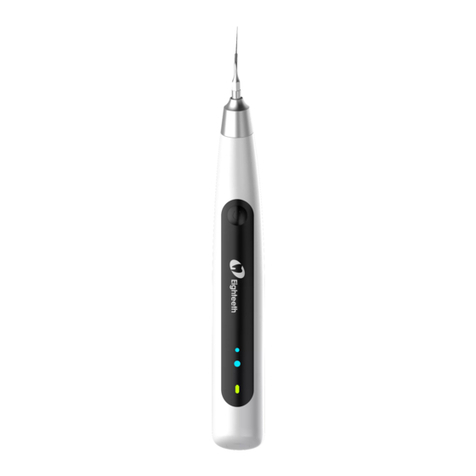
Eighteeth UltraMint Pro User manual

0197
Model:UltraMint Pro
ULTRASONIC SCALER
USER MANUAL

Version: 03
IFU-6635002
Issued: 2021.06.11
Size:197mmX140mm

Page 3 / 36
Catalog
1. Overview.............................................................................................................4
1.1 Content...................................................................................................................................... 4
1.2 Packing list and coding .............................................................................................................. 5
2. Symbol instruction.............................................................................................6
3. Foreword.............................................................................................................8
3.1 Scope of application.................................................................................................................. 8
3.2 Contraindications ...................................................................................................................... 8
4. Installation..........................................................................................................9
4.1 Front view.................................................................................................................................. 9
4.2 Back view................................................................................................................................... 9
4.3 Main Unit Installation.............................................................................................................. 10
4.4 Handpiece installation and removal ....................................................................................... 12
4.5 Tip installation and removal.................................................................................................... 13
5. Product function and use................................................................................14
5.1 Operation panel instructions .................................................................................................. 14
5.2 Function mode and use........................................................................................................... 16
5.3 Operating the device............................................................................................................... 18
5.4 Advanced settings ................................................................................................................... 20
6. Cleaning, Disinfection and Sterilization.........................................................21
6.1 Foreword................................................................................................................................. 21
6.2 General recommendations...................................................................................................... 21
6.3 Autoclavable Components ...................................................................................................... 21
6.4 Disinfection components ........................................................................................................ 26
7. Maintenance .....................................................................................................27
8. Troubleshooting...............................................................................................28
9. Technical Data..................................................................................................30
10. EMC Tables.....................................................................................................31
11. Statement........................................................................................................35

1 Overview
Page 4 / 36
1. Overview
1.1 Content
2
3
4
5
6
7
8
10
9
1. Main Unit
2. Bottle
3. Cover
4. Handpiece Support
5. Handpiece
6. Tip
7. Foot Pedal
8. External Water Supply Hose
9. Power Cable
10. Wrench

1 Overview
Page 5 / 36
1.2 Packing list and coding
Main unit (1pcs)
6651001
Bottle (1pcs)
6651012
Cover (1pcs)
6603023
Foot pedal (1pcs)
6651027
Handpiece support (1pcs)
6604008
External water supply hose
(1pcs)
6641006
Wrench (1pcs)
Store in the instrument box
6651010
Handpiece (1pcs)
Store in the instrument box
6651005
Power cable (1pcs)
6615006
Tips (6pcs)
Store in the following box
G1(6626001), G2(6626002),
G4(6626004), P1(6626006),
P3(6626007), E4(6626016)

2 Symbol instruction
Page 6 / 36
2. Symbol instruction
WARNING
If the instructions are not followed properly, operation may
lead to hazards for the product or the user/patient.
NOTE
Additional information, explanation of operation and
performance.
Serial number
Class II equipment
Type B applied part
Alternating current
Dispose of in accordance with the WEEE directive
Keep dry
134 C
Can be autoclaved up to a maximum temperature of 134°
Celsius
55C
20C
Temperature limitation
80%
20%
Humidity limitation
106kPa
70 kPa
Atmospheric pressure limitation
Foot pedal
Water inlet pressure: 0.01-0.5MPa
IPX0
Ordinary equipment
IPX1
Anti-drip equipment
Used indoor only
Bottle water supply mode
Bottle water control

2 Symbol instruction
Page 7 / 36
External water supply mode
Catalogue number
Manufacturer
Date of manufacture
LOT
Lot of manufacture
Authorized Representative in the European Community
Manufacturer’s LOGO
Follow instructions for use
Washer-disinfector for thermal disinfection
Earth(ground)
Handpiece water control

3 Foreword
Page 8 / 36
3. Foreword
3.1 Scope of application
UltraMint Pro is an ultrasonic scaler intended for use during scaling, endodonti
c treatment and periodontal therapy to remove calculus deposits and stains fr
om teeth by application of an ultrasonic vibrating scaler tip to the teeth.
This device must only be used in hospital environments, clinics or dental
offices by trained and qualified dental personnel and not used in the
oxygen-rich environment.
3.2 Contraindications
3.2.1 The patient who has hemophilia is not allowed to use in this equipment.
3.2.2 The patient or doctor who equips with cardiac implantable electronic
devices is forbidden to use this equipment.
3.2.3 The heart disease patient, pregnant woman and children should be
cautious to use the equipment.
WARNING
Read the following warnings before use:
1. The device must not be placed in humid surroundings or anywhere where it
can come into contact with any type of liquids.
2. Do not expose the device to direct or indirect heat sources. The device must
be operated and stored in a safe environment.
3. The device requires special precautions with regard to electromagnetic
compatibility (EMC) and must be installed and operated in strict compliance
with the EMC information. In particular, do not use the device in the vicinity of
fluorescent lamps, radio transmitters, remote controls and do not use this
system near the active HF Surgical Equipment in the hospital. Portable RF
communications equipment (including peripherals such as antenna cables and
external antennas) should be used no closer than 30 cm (12 inches) to any
part of the ultrasonic scaler, including cables specified by the manufacturer.
Otherwise, degradation of the performance of this equipment could result. Do
not charge, operate or store at high temperatures. Comply with the specified
operating and storage conditions.
4. Gloves are compulsory during treatment.
5. If irregularities occur in the device during treatment, switch it off. Contact the
agency.
6. Never open or repair the device yourself, otherwise, void the warranty.
7.The third conductor in the power cable is only a functional earth.

4 Installation
Page 9 / 36
4. Installation
4.1 Front view
Decrease power key
Increase power key
Quickly decrease/increase power key
&Power indicator
Water control knob
Periodontal mode
External water supply mode
Scaling mode Endodontic mode
Water control knob
Handpiece cord
Bottle water supply mode
Handpiece
Tip
Power display window
4.2 Back view
Power switchFuse Power socket
Foot pedal socket External water hose connector

4 Installation
Page 10 / 36
4.3 Main Unit Installation
4.3.1 Install the handpiece
support
Install the handpiece support to
the main unit first.
Clamp the handpiece cord to the
handpiece support.
4.3.2 Install the bottle and
cover
Install the bottle on the main unit
as shown below (note the
direction of the notch framed by
the dotted line in the figure), and
then install the cover on the
bottle. If you need to use the
bottle water supply mode, please
add water or other allowed
liquids to the bottle according to
actual needs.
2
11
4.3.3 Install the power cable and
foot pedal
Plug the power cable and foot pedal into
the corresponding sockets. Turn the
power switch to the off state (i.e. press
the side marked with "O"), and plug the
power cord into the power supply to
supply power to the main unit.
Power switch Power socket Foot pedal socket
WARNING
The power cable must be plugged
into the main unit before being
plugged into the power supply.
4.3.4 Install external water
supply hose
If select the external water supply mode,
it is required to install the external water
supply hose to the external water hose
connector on the main unit.

4 Installation
Page 11 / 36
External water hose connector
①Unscrew the lock nut on the
external water hose connector
counterclockwise.
②Put the lock nut on the external
water supply hose as shown above.
③Connect one end of the external
water supply hose to the external
water hose connector on the main unit,
then clockwise tighten the lock nut.
Connect the other end to the clean
water source.
WARNING
When the external water mode is
selected, the water inlet pressure
should be in the range of
0.01-0.5MPa. If the bottle water
supply mode is selected, this step can
be omitted.
Lock nut
External water supply hose
1Unscrew the lock nut
counterclockwise
2Put the lock nut on the
external water supply hose
3Connect one end of the external
water supply hose to the external
water hose connector
4Clockwise tighten the lock nut

4 Installation
Page 12 / 36
4.4 Handpiece installation and removal
4.4.1 Handpiece installation
and removal
Install and remove the handpiece as
shown below.
Note that before installation, align the
direction mark on the handpiece with
the direction mark on the connector of
handpiece cord, and then insert the
handpiece into the connector of the
handpiece cord.
Handpiece
Handpiece cord
Align
Removal
Installation
4.4.2 Lamp bead protective
shield and light guide and
lamp bead removal and
installation
WARNING
Disassemble the light guide and lamp
bead from the handpiece, before
Cleaning, disinfection and sterilization
handpiece.
Light guide
Lamp bead
Take out lamp bead
protective shield by
r ing it counterclockwiseotat
Lamp bead
protective shield
1
Take out light guide and
lamp bead in order
2
Removal
Light guide
Lamp bead
Install light guide and
lamp bead in order
1
Installation
Install lamp bead protective
shield by r ing it clockwiseotat
Lamp bead protective shield
2

4 Installation
Page 13 / 36
4.5 Tip installation and removal
4.5.1 Tip installation
1) Screw the tip to the handpiece.
2) Align the gap of the wrench with
the tip.
3) Rotate the wrench clockwise until
it turns 90 degrees.
Handpiece
Tip
Wrench
Rotate the wrench until
it turns 90 degrees
4.5.2 Tip removal
1) Align the gap of the wrench with
the tip.
2) Rotate the wrench
counterclockwise until the tip
becomes loose.
3) Unscrew the tip from the
handpiece
Handpiece
Tip
Wrench
Rotate the wrench until
the tip becomes loose

5 Product function and use
Page 14 / 36
5. Product function and use
5.1 Operation panel instructions
5.1.1 Water supply mode
External water
supply mode Bottle water
supply mode
This equipment can provide external
water supply mode and bottle water
supply mode, and users can choose
water supply mode to supply water
according to their needs.
Press the " " button to select the
external water supply mode, the
indicator on the corresponding button
is lit.
Press the " " button to select the
bottle water supply mode, the
indicator on the corresponding button
is lit. The water supply mode selection
button can only be triggered in the
standby state of the device.
5.1.2 Working mode
Periodontal mode
Scaling
mode Endodonic
mode
This equipment can provide three
working modes: Scaling mode,
Periodontal mode and Endodontic
mode.
The user can choose the working
mode according to the tip used and
the required treatment.
Press the " " key to select the
scaling mode, the indicator on the
corresponding button is lit, select the
tip marked with "G" at the tip when
using it.
Press the " " key to select the
periodontal mode, the indicator on the
corresponding button is lit, select the
tip marked with "P" at the tip when
using it.
Press the " " button to select the

5 Product function and use
Page 15 / 36
endodontic mode, the indicator on the
corresponding button is lit, select the
tip marked with "E" at the tip when
using it.
5.1.3 Power adjustment
Decrease
power key Increase
power key
Quickly decrease/increase power key
&Power indicator
Power
display window
10
The device can provide 10 (1-10)
graduations of power configurations in
each mode, and the user can adjust it
according to the needs of use.
Press "-" key to decrease the power,
press "+" key to increase the power.
"
10
Power display window" and
" power indicator"
correspond to the power level.
Users can also adjust the power by
tapping with their fingers or sliding
“ ” left and right.
Operating Power of the equipped ti
ps
Tip model
Power
G1
1-10(G)
G2
1-10(G)
G4
1-10(G)
P1
1-10(P)
P3
1-6(P)
E4
1-6(E)

5 Product function and use
Page 16 / 36
5.2 Function mode and use
This equipment can provide external water supply mode and bottle water
supply mode, and users can choose water supply mode to supply water
according to their needs.
5.2.1 Bottle water supply
mode
Steps:
1) Pull up the bottle installed on the
equipment vertically.
2) Remove the cover of the water
bottle, add proper amount of
purified water, remember not to fill
the water higher than the marked
maximum water level (900ml),
and then put on the cover.
3) Clean the bottle port and the
bottle connector on the main unit.
4) Put the bottle port straight down to
the bottle connector on the main
unit.
5) Press “ ” to choose the bottle
water supply mode.
Water flow adjustment in bottle
water supply mode
In the bottle water supply mode, the
water flow of the handpiece can be
adjusted by the water control knob
(rotate clockwise to increase the water
flow) on the main unit, or the knob
(rotate clockwise to increase the water
flow) on the handpiece cord. This
adjustment depends on the tip used
and the treatment.
NOTE
When selecting the knob on the main
unit to adjust the water flow, it is
necessary to ensure that the knob on
the handpiece cord is in the state of
maximum water output. Conversely,
when selecting the knob on the
handpiece cord to adjust the water
flow, it is necessary to ensure that the
knob on the main unit is in the state of
maximum water output.
When users are accustomed to
using the main unit knob to adjust
water flow:
1
2
Like to adjust
by this knobwater
Clockwise
to max
Water
control knob
When users are accustomed to
using the handpiece knob to adjust
water:
Clockwise to max
(Default max
after booting)
Like to adjust
by this knobwater
2
1Water
control knob
5.2.2 External water supply
mode
Steps:
1) Remove the fixing nut on the
water inlet of the device
counterclockwise.
2) Put the fixing nut on the external
water supply hose.

5 Product function and use
Page 17 / 36
3) Insert the external water supply
hose into the water inlet, and then
tighten the fixing nut clockwise.
4) Connect the other end of the
external water supply hose to the
clean water source.
5) Press " " button to select the
external water supply mode.
Water flow adjustment in external
water mode
In the external water supply mode, the
water flow can only be adjusted by the
knob on the handpiece cord.
Water
control knob
External water
supply mode

5 Product function and use
Page 18 / 36
5.3 Operating the device
5.3.1 Install the device correctly
according to the installation steps.
The operator is facing the device,
and the water control knob on the
handpiece cord is adjusted to the
maximum.
5.3.2 Press the power switch on the
main unit. At this time, the scaling
mode indicator is lit. The power
display window shows 05. The power
indicator lights half, and the bottle
water supply mode indicator is lit.
5.3.3 Select the bottle water supply
mode or external water supply mode
(the mode indicator corresponding to
the selected water supply mode is
lit).
5.3.4 Select the appropriate working
tip as required, and tighten it to the
handpiece by using the provided
wrench.
5.3.5 Hold the handpiece according
to the using habits, generally
adopting the pen holding position.
5.3.6 When the device is working
normally, the frequency is extremely
fast. When scaling, ensure that the
tip vibrates normally and the water is
atomized normally, then gently touch
the tooth surface and reciprocate at a
certain speed to remove the dental
calculus. Keep the water flow
smoothly to avoid tip overheat. Never
use excessive force or stay for too
long when cleaning the teeth.
5.3.7 Power adjustment: Adjust the
power depending on the application.
Generally, the medium power is
enough, and the output power can
be adjusted at any time in clinical
practice according to the sensitivity
of the patient's teeth and the
hardness of the calculus.
5.3.8 Water flow adjustment: Step on
the foot pedal to activate the tip
vibration. Turn the water control knob
on the main unit or the water control
knob on the handpiece cord to form
water spray to cool the tip and the
cleaned tooth surface.
5.3.9 During clinical use, the cusp of
the tip should not be in vertical
contact with the tooth surface, and
heavy pressure should not be
applied in order to avoid any damage
to the tooth and the tip.
5.3.10 After the operation is
completed, adjust the water control
knob on the handpiece cord to the
maximum, let the device work for
about 30 seconds to rinse the
handpiece and the tip, and then
remove the handpiece and the tip for
cleaning, disinfection and
sterilization.

5 Product function and use
Page 19 / 36
NOTE
1. Keep the device clean before and
after use.
2. Before each use, always check
that the device is placed on a secure
and flat surface. And adjust the water
flow to the maximum, and then start
the device to work for about 10
seconds in order to eliminate the
residual liquid in the liquid circuit.
3. The operator should take sufficient
protection (such as wearing goggles,
face mask, etc.) to prevent cross
infection. Use of an antiseptic mouth
rinse prior to procedure and use of a
high volume evacuator during the
scaling procedure are
recommended.
4. The use of the product must meet
the requirements of the relevant
operating specifications and relevant
regulations of the treatment
department, and is limited to the use
of trained professionals (such as
dentists) in the hospital or clinic.
5. Do not screw the tip, or pull out the
handpiece while the device is
running.
6. The tip must be tightened and
there must be fine spray coming out
from the tip when operating. Refer to
the user manual of tips for detailed
operating instructions.
7. Change a new one when the tip or
handpiece is damaged or there are
visible signs of wear.
8. Do not twist or rub the tip.
9. Do not use impure water sources,
and never use saline instead of pure
water.
10. If use the water source without
hydraulic pressure, the water surface
should be 1 meter higher than the
head of the patient.
11. Do not pull the handpiece cord
with force to avoid damage to the tail
wire.
12. Do not knock or rub the
handpiece.
13. After operating, turn off the
power switch and pull out the power
plug.
14. Always use original parts. Using
non original instruments may
damage the device, and operator or
patient may be injured.
15. No modification shall be made on
this product.
16. The ultrasound power must be
adjusted in accordance with the tip
used and the required treatment.
17. Always check that the cords or
cables will not rub against the front
face during the operation since this
could eventually modify the selected
settings.

5 Product function and use
Page 20 / 36
5.4 Advanced settings
5.4.1 "Cleaning" mode
It is recommended to flush the liquid
circuit of the device after scaling at
least once a day. The "Cleaning"
mode allows for cleaning the liquid
circuit in order to reduce the
accumulation of crystals and bacteria
in the liquid circuit.
Press it once
2“+”“-”Set
cleaning time
Depress the
foot pedal to
start cleaning
3
Alternately displays “CL”
and the cleaning time
Steps:
1) Fill distilled water or
demineralized water into the
bottle.
2) Press the water control knob on
the main unit, the buzzer beeps
once and enters the "Cleaning"
mode. At this time, the LED digital
tube on the panel alternately
displays "CL" and the cleaning
time. The default cleaning time is
30 seconds, press "+" or "-" key to
adjust. The adjustment range is
10 ~ 60 seconds.
3) Step on the foot pedal to start
cleaning the liquid circuit. At this
time, the foot pedal can be
released.
4) After the cleaning countdown, the
device will automatically stop and
exit the "Cleaning" mode.
During the cleaning process, step on
the foot pedal again or press the
water control knob once on the main
unit to stop cleaning and exit the
"Cleaning" mode.
5.4.2 Handpiece LED light
delay adjustment
The handpiece LED light will be lit
during the operation. The device will
stop running after the foot pedal is
released. The handpiece LED light
will be delayed for a certain time
before extinguishing. The default
delay time is 10 seconds, and the
delay time can be adjusted as
needed.
“+”“-”
Set the
delay time
Press
it twice
3
Display the delay time
Press it once or after about 5 seconds
of no operation, exit the delay setting
2
Operation method: In standby mode,
continuously press the water control
knob on the main unit twice to enter
the handpiece LED light adjustment
state. At this time, the LED digital tube
displays the delay time. The default is
10 seconds, you can press the "+" or
"-" key to proceed adjustment. The
adjustment range is 10 ~ 20 seconds.
Press the water control knob on the
main unit again or after about 5
seconds of no operation, exit the
setting of the handpiece LED light
delay.
Table of contents
Other Eighteeth Dental Equipment manuals
Eighteeth
Eighteeth HyperLight User manual
Eighteeth
Eighteeth Ultra X User manual
Eighteeth
Eighteeth Fast-Pack pro User manual
Eighteeth
Eighteeth E-connect S User manual
Eighteeth
Eighteeth AirPex User manual
Eighteeth
Eighteeth UltraMint User manual
Eighteeth
Eighteeth Fast-Pack User manual

Eighteeth
Eighteeth Helios 600 User manual
Eighteeth
Eighteeth E-xtreme User manual
Eighteeth
Eighteeth CuringPen-E User manual
