EisSound 426A2 Operating manual

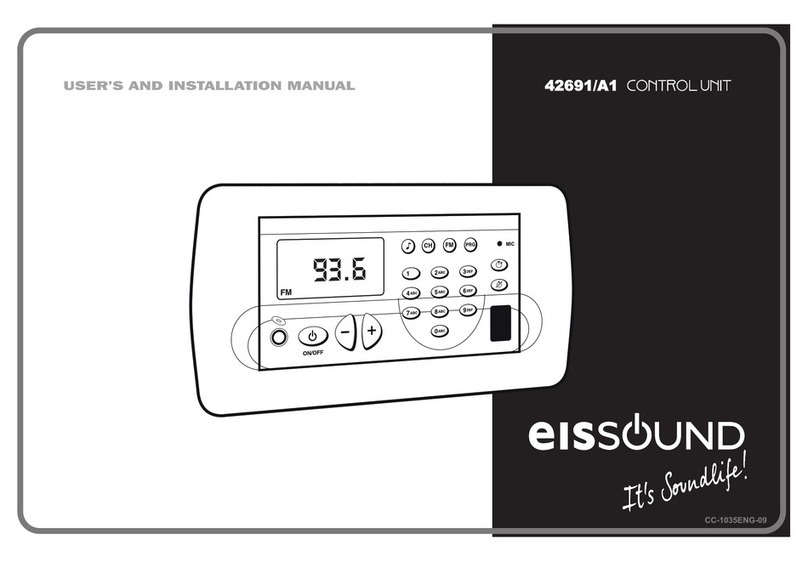
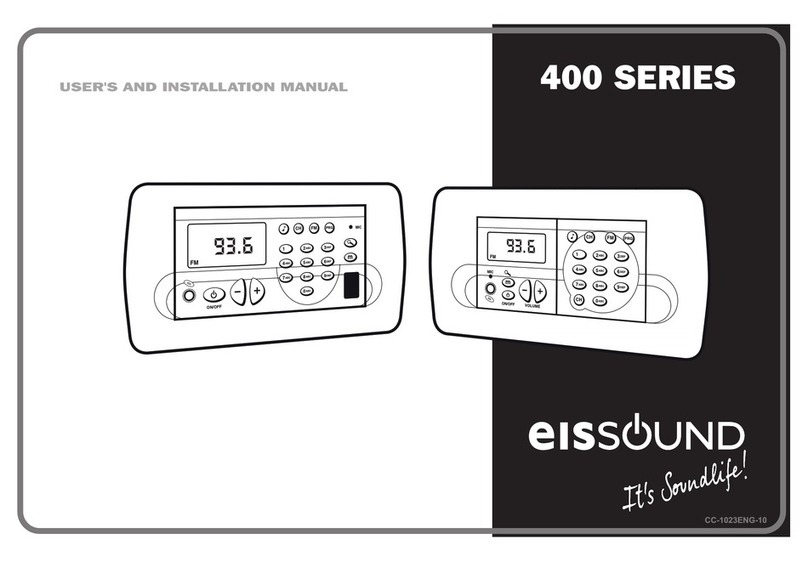
USER’S AND INSTALLATION MANUAL
426A2 CONTROL UNIT
DAB
CC-1122ENG-05

1
2. Fe a tu re s & Tech n ica l Cha ra cte ristics
3. In sta lla tion
7. O p era ting
5. Settin gs Me nu
4. In sta lla tion Menu
6. Pro g ra m m ing Men u
1. Q u ick Refe re nce Gu id e
4
6
14
7
8
9
2
Important Safety Instructions
Before installing the unit, plea se rea d and follow the instructions provide d in the
Ins tallation Manua linclude d .
Before ope rating the unit, plea se read and follow the ins tuctions provided in the User´s
Manual thoroughly a nd sa ve it for future experie nce.
WARNING - To reduce the risk offire or e lectric shock:
installin accordance with the ma nufacture r’s instructions
do not e xpose this apparatus to ra in or moisture
do not us e this product near wate r
do not a ttempt to diss amble this unit
do not block any ve ntilation openings
do not install ne ar any he at source s such as radiators, stoves or other
equipments that produce heat.
You a re cautione d that any changes or modifica tions not express ly mentioned in this
manualcould void your a uthority to opera te this e quipment.
This product ha s been des igned and teste d to provide rea sonable protection a gains t
harmful interference in res ide ntial insta llation. Howeve r there is no gua rantee that
interference will not affect in a particular ins tallation. In thes e cases, reorie nt the receiving
ante nna , try to incre as e the sepa ration between the equipme nt and the source of
interference and/or connect the equipme nt into an outlet on a circuit different from that to
which the source ofinterfere nce is connected.
The entire risk ofthe ins tallation, use, results and pe rformance a re borne by you.
When use d as a mechanism to disconnect from the current network, a socket plug, or a
device connector; the disconne cting mechanism mus t be ea sily a ccessible at a ll times.
Protect the powe r cord from being walked on or pinche d particularly at plugs ,
conve nience receptacles , and the point where the y exitfrom the appara tus.
Only us e a ttachme nts /acce ss ories spe cified by the ma nufa cturer.
as power-supply cord or plug is dama ge d,
liquid has bee n spilled or objects ha ve fallen into the appara tus, the a ppa ratus has been
exposed to rain or moisture, doe s not operate norma lly, or ha s bee n dropped.
Attention s hould be drawn to the environme ntal as pects ofba tte ry dispos al.
Use a certified technician for insta llation, repa ir and/or ma inte na nce of this e quipment a nd
comply with all the re gulations in force in each country. S ervicing is required when the
appara tus ha s been damage d in any way, such
CAUTIO N
DO NOT O P EN
RIS K O F E LE CTR IC S H O CK
!
Table of contents
CC-1122ENG-05

music ena bled
station tuned in stereo
sleep enabled auto-standby ena bled
alarm 1-2 enabled alarm 1-2 enabled a nd snoozed
day of the week
pre-set memory selected
FM/ DAB tuner memory
pre-sets
FM/ DAB station tuned
FM tuner
audio a djustment mode (volume-ba ss-treble - loudness - ba la nce)
audio cha nnel selection (FM - DAB - discman/ MP3/ iPod input)
FM/DAB tuner
access to progra m / settings / insta llation menus
start a coustic timer
acoustic timer ena bled (flashing)
stop a coustic timer
numeric keypad
FM station frequency
FM&DAB memory pre-set
programming options
delete
adjust keys
IR receiver
discma n/ MP3/ iPod input
off/ on
Audio levels (volume -bass-treble-loudness-ba lance)
Automatic station seek
Digit-by-digit frequency ba nd forward/ reverse
store
discma n/ MP3/ iPod
1 2
FM
1 432 765
NO RMAL
STATIC FLASHING
PROGRAMMING
exit progra mming menu
numeric keypad
numeric selection of setting to be selected
scroll through the progra mming options
delete
adjust keys
selection of progra m setting to be selected
scroll through options in the same
programming level
21 . Qu ic k Re fe re n c e Gu id e
CC-1122ENG-05

16
EIS 3
CLO CKS
Alarm 1 (ON/ O FF status - Hour, minutes - Days of week - Type - Volume)
Alarm 2 (ON/ O FF status - Hour, minutes - Days of week - Type - Volume)
Auto Sta ndby (O N/ O FF status - Hour, minutes - Da ys of week)
Sleep
Time (Auto time set - Hour, minutes - Da y, month, yea r)
FM TUNER
FM Sea rch sensitivity (4= ma x ... 1= min)
Autosca n FM
Delete FM tuning pre-sets
DAB TUNER
Initialize DAB
Autosca n DAB
Delete DAB tuning pre-sets
Upda te DAB sta tions
ADJUSTMENTS
Store “IDEAL” settings
Dimmer off
Dimmer on
1
1
1
1
1
1
2
abc
2
abc
2
abc
2
a bc
5
jkl
4
ghi
4
ghi
4
ghi
4
ghi
3
de f
PRG
PRG
PRG
PRG
PRG
1
2
a bc
3
de f
3
def
3
def
3
def
PRG
PRG
PRG
1
1
2
a bc
2
a bc
3
de f
3
de f
PRG
PRG
PRG
PRG
PRG
PRG
PRO GRAM MENU
Alarm 1 sta tus O N/ O FF
Alarm 2 sta tus O N/ O FF
Autostandby status O N/ O FF
Store “Ideal”
Activate Ideal mode
(2") Ena ble sleep
1
2
abc
4
ghi
3
def
PRG
PRG
PRG
PRG
8
tuv
QUICK ACCESS FUNCTION S
(2") Language
(2") Control Unit greeting
(2") Permission to store/ delete pre -sets
(2") IR remote Control Unit
(2") Delete settings
1
2
abc
5
jkl
4
ghi
3
def
PRG
PRG
PRG
PRG
PRG
SETTINGS MENU
INSTALLATION MENU
(2") Mono/Stereo
(2") Audio output
(2") Delete installation
(2") Software version
1
2
abc
4
ghi
3
def
PRG
PRG
PRG
PRG
(2") in dica te
to hold a
ke y down
for 2
se cond s
21
54
87
0C
3
6
9
abc
jkl
ghi
p q rs
tu v
de f
m n o
wxyz
Scroll back to the previous option within the
sa me level. enter the level
exit the level Scroll forward to the next option
within the same level.
3
def
PRG
4
ghi
CC-1122ENG-05

- FM ra dio with RDS services (50 memories)
- DAB (Band III) digital ra dio (50 memories)
- Externa l source sound input (discman/ MP3/ iPod, ...)
- Clock & calenda r
- 2 alarms
- Autostandby
- Sleep timer
42 . Fe a t u re s & Te c h n ic a l Ch a ra c t e ris t ic s
- Acoustic timer
- Easy view LCD display white light
- Different colours a vailable (accessory)
- IR remote control a vailable (accessory)
426A2 MIN NORMAL MAX COMMENTS
Mea sureme nts 135,5x70,5x44 mm exterior (width x height x de pth) CHANNEL MHz CHANNEL MHz CHANNEL MHz
116x54x36 mm cavity (width x height x de pth) 1-5A 174,928 18-9B 204,640 35-13C 234,208
99x51 mm frontal (width x he ight) 2-5B 176,640 19-9C 206,352 36-13D 235,776
Voltage 15 16 Vdc terminal 2 3-5C 178,352 20-9D 208,064 37-13E 237,488
Cons umption de mand 26 215 600 mA termina l 2 4-5D 180,064 21-10A 209,936 38-13F 239,200
Input signa l 100 mVeff jack 3,5mm 5-6A 181,936 22-10B 211,648
Input impedance 70 100 130 Kohms jack 3,5mm 6-6B 183,648 23-10C 213,360
Output signa l (16 ohms ) 1,5 W terminals 05,06 7-6C 185,360 24-10D 215,072
Pas sband 20 15.000 Hz 8-6D 187,072 25-11A 216,928
Distortion 0,3 0,4 % 9-7A 188,928 26-11B 218,640
Freque ncy range 87,5 108 MHz FM 10-7B 190,640 27-11C 220,352
174 240 MHz DAB (Band III) 11-7C 192,352 28-11D 222,064
Antenna impedance 75 ohms terminals A,M 12-7D 194,064 29-12A 223,936
Antenna se nsitivity 1 uV FM (SNR=26dB) 13-8A 195,936 30-12B 225,648
-93 -96 dBm DAB (EN50248) 14-8B 197,648 31-12C 227,360
AD converter pre cision 8 bits 15-8C 199,360 32-12D 229,072
Number of station pre-sets 50 FM 16-8D 201,072 33-13A 230,784
50 DAB 17-9A 202,928 34-13B 232,496
DAB (Band-III) frequency table
11298 MIN NORMAL MAX COMMENTS
Meas urements 181x50x52 mm exte rior (width x height x de pth)
Volta ge 185 230 265 Vac 50Hz, terminals F,N
Powe r 8 W termina ls 2(+),4(-)
Output voltage 15 16 Vdc te rmina ls 2(+),4(-)
Output current 530 mA termina ls 2(+),4(-)
Cons umption demand 12 W
CC-1122ENG-05

16
EIS 5
The 426A2 Control Unit has three program menus of settings at different a ccess levels.
Discusses the settings related to the proper opera tion of the system. These settings should be programmed by a
professional.
Discusses ea ch user’s custom operation mode. None of these settings will affect the system’s opera tion a nd, once defined, the
settings will usua lly not ha ve to be changed.
Discusses features tha t a re progra mmable by the user a nd which a re ea sily changed.
Insta lla tion Menu:
Settings Menu:
Progra m Me nu:
«
«
«
The program menus a re structured in level and sub-level menus.. The
following opera tions a nd keys in the menu will scroll the user between
settings of the list of options.
When a setting to be programmed appea rs on the
display, it will be flashing, indicating it is rea dy to
be programmed.
If more tha n one setting is a vailable (for example,
da ys of the week or digits of a date) use the + / -
keys to scroll forward/ back.
The numeric keys can be used to cha nge
a setting. In some cases, in a ddition
to the numeric keys, the + / - keys can also be used
to cha nge settings
Ho w to u se this m a nua l
Q uick Acce ss To A Menu O ption
As an a lterna tive to scrolling through the menus to find a n option, directly key in the option code followed by the menu access key (see code list in
chapter 1. Q uick Reference Guide
O nce you select the desired setting, press the PRG key to store.
The entry will begin to flash quickly, indicating that the new setting ha s been
stored.
To delete a n entry at any time, press the ZERO key for 1”
To exit a programming option without storing a setting, press the O N/ O FF key.
PRG
0C1’’
Scroll ba ck to the previous
option within the same level.
enter the level
exit the level Scroll forward to the next
option within the same level.
21
54
87
0C
3
6
9
abc
jkl
ghi
pqrs
tu v
de f
mn o
wxyz
CC-1122ENG-05

CONNECTING TERMINALS
15Vdc Sound regulator power supply
Mass
2
4
05
06
04
N
L
Left loudspea ker output (red termina l/+ )
Right loudspea ker output (red term ina l/+ )
Common loudspea ker ouput (black terminals/ -)
230V Power supply
FM&DAB tuner antenna signal
FM&DAB tuner antenna mass/ screen
A
M
·
·
·
·
·
·
·
·
·
Installation involves four elements: a power supply, a Control Unit, an antenna a nd loudspea kers.
If the room is to run in MO NO connect any of the spea kers and set the Control Unit to MO NO. (See 4.1. Mono/ Stereo Installa tion)
Default speaker output is set to 16 ohms. Also, 8 ohms speakers ca n be connected, in this ca se, the Control Unit must be set to 8 ohms. (See 4.2.
Audio Output Installation).
If it is necessa ry to connect a n amplifier or power supply to a Control Unit's sound output, the Control Unit must be set to AMPLIFIER. (See 4.2. Audio
O utput Installation). Connect the a mplifier to terminals 2, 4, 05 and 06 on the Control Unit.
All wire sections a re 0.25 mm except supply wires (termina ls 2 and 4), which are 1 mm . The network tapping wires a re standard.
To connect the FM/DAB a ntenna, connect a 76 cm wire to termina l A or connect a 75 ohms antenna input to termina ls A (signal) and M (ma ss).
Improving the FM&DAB reception: extend the aerial antenna wire and adjust the angle for best reception. Be sure to loca te it as far as possible from
any sources of electrical noise such us ha logen lamps, HVAC, fluorescent bulbs, etc.
It is advisable that the direct current that provides power
to the power supply (ref.11298) be connected to a
specific Automatic Switch in order to isolate a nd a llow
you to disconnect the Audio System independently from
the rest of the electrical a ppliances in the home.
2 2
WE STRO NGLY RECO MMEND TO CO NNECT A DAB AERIAL (75 ohm s a n te nna a mplifie d) to re ceive m ore progra m me s with im proved
so und qua lity
63 . In s t a lla t io n
426 A2
power supply
Control Unit
loudspeakers
+
-
0506 4M 04 2
+
-
A
76 cm
+-
75 +-
Red Black 4 2 N L
LN
BlackRed
112 98
230V
M A
CC-1122ENG-05

4.1 Mono/ Ste re o
Defines whether the Control Unit's a udio output (terminals 04, 05, 06) is connected in
mono or stereo mode. In a Control Unit in stereo, outputs 05 a nd 06 respond to the left
and right cha nnels. In a Control Unit in mono, both outputs are identical a nd can
therefore be used interchangea bly.
To cha nge the output setting to mono
Store
Key Seque nce Displa y Visua l
st er eo/ mono
st er eo
mono
2
abc
PRG
2’’
PRG
1
16
8
16
EIS 7
4.2 Audio Outpu t
Defines the impeda nce connected to the Control Unit's audio output (terminals 04, 05, 06)
between the following options: 16 ohms pa ssive loudspeaker
8 ohms pa ssive loudspeaker
amplifier
line To change the setting to 8 ohms
Store
audio output
2
abc
PRG
PRG
2’’
2
abc
4 . In s t a lla t io n Me n u
on
loading data
2
abc
PRG
delete installat ion
off
ver sion soft
softwar e, 112702, 141211
Shows Control Unit’s software version.
4.3 De le tin g Con trol Unit Insta lla tion . Ma nufa cturer Rese t.
4.4 Knowing the Softwa re Version
Deletes all settings a nd programming da ta from the Control Unit, restoring manufacturer
default settings.
To a ctivate delete process
To initiate the process press PRG
O nce the Control Unit starts up, the manufacturer default settings are enabled
2’’
PRG
2’’
PRG
3
def
4
ghi
CC-1122ENG-05

5.1 La ngua g e
To select the langua ge of the display text.
To select a different langua ge (for example, English).
Store
idioma españl
englsh
2
a bc
PRG
1
PRG
2’’
gr eet ing
hello
hello
2’’
8
PRG
hello mar ia
2
a bc
PRG
Allows you to personalize the message that a ppea rs on the display when the Control Unit is
powered on (a maximum of 18 characters).
Scroll through the name until you rea ch the
cha ra cter you want to change.
Key in the new greeting using the alphanumeric keypad and store
5.2 Gre e tin g
5 . S e t t in g s Me n u
Ke y Seque nce Displa y Visua l
per mission to stor e
pr esets
ON
PRG
2’’
5.3 Permission to Store/ De le te FM&DAB Tuning Pre -sets
Allows/ disallows access to save a nd delete tuning pre-sets.
Disa llow permission.
Store off
2
abc
PRG
3
def
5.4 Se le ction of IR Rem ote Control
Allows remote control selection
5.5 Deleting Se ttings from th e Control Unit
Deletes all setting a nd programming da ta from the Control Unit,
restoring the initial default settings. This option does not affect
installation data (4. Installation Menu)
ir r emote
ir 14
ir 15
PRG
2’’
To activate the remote control opera tion, use the
keys to scroll to number 14.+ / - To block remote
control operation, select a value other than 14
Store
PRG
off
delete set tings
on
2
abc
PRG
Activate delete process
loading data
4
ghi
PRG
2’’
5
jkl
Initiate delete process
CC-1122ENG-05

6.1.1 Ala rm 1 a n d 2
0C
5
jkl
0C6
mno
5
jkl
5
jkl
5
jkl
PRG
PRG
8
tuv
8
tuv
2
abc
PRG
11
PRG
1 2
abc
alar m 1
on/ off
alr m1
off
on
on/ off
hh-mm
00-00
06-50
hh-mm
dias
The Control Unit is equipped
with two progra mma ble
alarms with two opera tion
modes, as described in section
7.10.
Change the enable setting, a lso
available as a quick a ccess
function, see 1. Q uick Reference
Guide
Store
Store
Scroll to next program setting in
alarm mode
Enter to program time
Set the time
Scroll to next program setting in
alarm mode
Key Se quence
Displa y Visua l
or
… CO N TIN UED
5
jkl
5
jkl
8
tuv
TYPE
TYPE
beep
MO on
TU on
Enter to program the days of the
week a larm will be set
Scroll through da ys
Scroll through days
Change
Change
Change
Store
Store
Scroll to next progra m setting in
alarm mode
Enter program to select alarm
sound
Ke y Sequence
Displa y Visua l
16
EIS 9
SA OFF
SU ON
SU OFF
music
PRG
PRG
2
abc
2
abc
2
abc
6 . P ro g ra m m in g Me n u
6 .1 Clo c k
5
jkl
PRG
8
tu v
volume
vol 75
vol 86
Store
Enter to progra m the a larm
volume
Change
Scroll to next progra m setting in
alarm mode
CC-1122ENG-05

5
jkl
10
5
jkl
PRG
8
tuv
PRG
13
def
autostandby
on/ off
off
on
on/ off
hh-mm
O ption to program a time for the
Control Unit to a utoma tically go
into stand-by mode (music shuts
off). For example, to program auto
stand-by for 11:45 p.m. every day
except Saturday a nd Sunda y
Store
Store
Key Se quence
Displa y Visu a l
6.1.2 Auto sta ndby
2
a bc
5
jkl
2
abc
5
jkl
4
ghi
3
de f
5
jkl
PRG
8
tuv
00-00
23:45
hh-mm
days
mo on
…
PRG
su On
days
2
abc
5
jkl
3
de f
PRG
1 4
ghi
PRG
min 20
min 35
sleep minutes
6.1.3 Sle ep
Sleep time can be adjusted to the
user's needs by using the
following programming option
(See 7.9. Sleep Operation)
Ke y Seque nce
Displa y Visua l
1 0 C5
jkl
4
ghi
5
jkl
5
jkl
PRG
1time-dat e
hh-mm
13-43
10-54
6.1.4 Time a nd Da te
Enter time progra m
Enter
For example, to set 10:54
Store
PRG
5
jkl
SET CLOCK
AUTO
oFF
To ena ble/ disable the built-in clock to
automatically synchronize with any
DAB data being received
2
abc
To progra m the time ma nually
O NLY if there a re a ny DAB se rvice s received
5
jkl
dat e
28-aug-07
10-dec-08
Scroll to next step
Enter, key in the da y, month
and yea r
Store
PRG
8
tu v
5
jkl
5
jkl
on
PRG
PRG
1time-dat e
5
jkl
8
tu v
CC-1122ENG-05

16
EIS 11
6.2.3. Deleting FM Tunin g Pre -Sets
6.2.2. Storing FM Sta tions Auto ma tica lly
The Control Unit will store into memory the stations that are received with best reception
sequencially from the lowest frequency (87.5 MHz) to the highest frequency (108.0 MHz). The
System has a maximun of 50 memories.
6 . P r o g r a m m in g Me n u
6 .2 FM t u n e r
6.2.1. FM Se ek Sensitivity
The option to a djust the a utoma tic station seek sensitivity for the Control Unit's internal FM tuner
To adjust the new sensitivity;
Store
Key Seque nce Displa y Visua l
PRG
2
abc
PRG
1fmsensitivity
ALL
STRONG
2
abc
To confirm the comma nd
To start the process
Enter code
The option to delete a ll the FM tuner pre-sets
To confirm the comma nd to delete the data
To start the process
6.2.2 a nd 6 .2.3 option s a re o n ly a va ila b le if
perm issio n for th is op tion is e n a ble d in the
settings m e nu.
Se e 5.3 . Pe rm ission to Sa ve / De lete FM Tune r Pre -
Se ts
off
AUTOSCAN FM
on
PRG
3
def
2
abc
2
abc
PRG
PRG
2
a bc
2
abc
PRG
delete fm
pr esets
off
on
2
abc
CC-1122ENG-05

6.3.3. De leting DAB Tuning Pre -Sets
12
6.3.2. Storing DAB se rvice s Automa tica lly
The Control Unit will store into memory the DAB services that are received
with the best reception, ordered by cha nnel number (see Technical
Specificacions). The system will store in the memory a maximum of 50
stations.
6.3.1. Ge ttin g sta rte d with DAB
The first time DAB is selected a s a sound source or a fter resetting, or if you cha nge the unit's
loca tion, or want to a dd a new service after the initial setting, the unit must re-scan a nd crea te a
list of receivable broadca sts. This opera tion will a ctivate automa tically the first time you
requiere a ny DAB service, but it ca n activate through this option in the
menu as ma ny times a s needed
Ke y Seque nce Displa y Visua l
To confirm the command
To start the process
Enter code
off
AUTOSCAN DAB
on
PRG
3
def
2
abc
2
a bc
PRG
PRG
delete DAB
pr esets
off
on
The option to delete all the DAB tuner pre-sets
To confirm the command
To start the process
2
a bc
6 . P r o g r a m m in g Me n u
6 .3 DAB t u n e r
off
INIT DAB
on
PRG
1
def
2
abc
2
a bc
PRG
3
de f
To confirm the command
To initiate the process
PRG
3
def
3
def
Steps 6 .3.2, 6.3 .3 a nd 6 .3.4 options a re only
a va ila ble if p erm ission for th e se options is e na ble d in
th e se ttin g s me n u .
Se e 5.3. Perm issio n to Sa ve / De le te DAB Tune r Pre -Sets
off
AUTOSCAN DAB
on
PRG
3
def
2
abc
2
a bc
PRG
off
UPDATE STATIONS
on
PRG
3
def
2
abc
2
a bc
PRG
Enter code
6.3.4. Upda te DAB sta tions
The option to search and update new DAB stations
To confirm the command
To start the process
Enter code
CC-1122ENG-05

16
EIS 13
6 . P ro g ra m m in g Me n u
6 .4 Ad ju s t m e n t s
PRG
PRG
or or
off
ideal
light on
light off
on
light 5
light 8
6.4.1. Sa ving “Idea l”Se ttin gs
6.4.2. Off/ On Dimmer
To store the current audio
settings (volume, balance, ba ss,
treble, loudness and selected
cha nnel) a s the “idea l settings”
Display brightness for O N/ O FF
functions can be programmed
from this option
Adjust level
Store
2
abc
Ke y Se quence
Displa y Visua l
Ke y Sequence
Displa y Visua l
Select O N/ OFF
Store
PRG
1
4
ghi
PRG
2
a bc
4
ghi
PRG
3
de f
4
ghi
CC-1122ENG-05

CC-1122ENG-05
14
Ke y Seque nce Displa y Visua l
7.1. Ma nua l O ff/ O n O f Control Un it
The Control Unit activates a udio output with the previous settings with the press of a key.
The display will be illuminated a nd the icon will be activa ted.
10:56
After a power loss, whether by disconnecting the power supply or because of a power failure,
the status of the system once power is restored the Control Unit will start up its “ideal” mode.
The 426A2 Control Unit
ic channels FM tuner, DAB
tuner and a sound input through
the jack on the face of the
Control Unit
ha s 3
mus :
7.2. Se le ction of Music Ch a nne ls
See 7.7. “Ide a l”mode
7 . Op e ra t in g
The default function for the + - keys when the Control Unit is on is to adjust the volume. A few
seconds after the last key entry the Control Unit will return to its default function of volume
adjustment.
Pressing the key sequentially switches between the ba ss, treble,
loudness and balance mode a djustments. The + / - keys ca n be used to
adjust the level of each parameter tha t is a ctivated at tha t time.
vol 55
BAS +24
TRE +17
loud 0
BAS +12
TRE +11
loud 1
CH
7.3. Audio Level Adjustme nt
To flip through the different cha nnels, enter
cha nnel selection mode by pressing the CH key.
In this mode the function of the + ,- keys is channel selection.
CH fm
ch dab
disc

CC-1122ENG-05
Key Seque nce Displa y
FM1 0 C
8
tuv
9
wxyz
FM
6
mn o
CO N TIN UED
By directly keying in the station frequency, for
example, to select the station 89.10 MHz.
By directly keying in the station’s memory pre-
set value, for example, if pre-set # 6 is set to
station (89.10 MHz).
To enter the memory pre-set selection mode,
press FM. The displa y will show the frequency
of the current station.
FM
A m inim um of th re e digits must
be ente re d whe n ke ying in a
frequ en cy.
FM
FM station tuned
mem ory pre-set number
stereo
16
EIS 15
Scroll through the different pre-set stations in
memory with the + - keys.
426A2 Control Unit is equipped with an interna l FM tuner. When the FM tuner is
selected as a sound source, stations can be tuned in severa l different ways:
7.4. O p era tion of the FM tun e r
FM station tuned
frequency selec tion
mode
FM
stereo
89.10 r adio MUS
FM
FM station tuned
memory pre-set num ber
stereo
89.10 r adio MUS
FM
FM station tuned
memory pre-set num ber
stereo
89.10 r adio MUS
89.10 r adio MUS

CC-1122ENG-05
Ke y Seque nce Displa y
To enter the frequency selection mode, press FM again.
FM
FM
16
FM
FM station tuned
automatic station
search sensitivity
level (1...4)
frequency selection mode
frequenc y
automatic station
search sensitivity
level (1...4)
frequency selection mode
frequenc y
FM station tuned
automatic station
search sensitivity
level (1...4)
modo selec ción de frequenc ys
frequenc y
stereo
stereo
FM
FM station tuned
FM station tuned
stereo
forced
mono
forced mono
FM
FM
FM
quickly pressed
held down
When pressed with a short key press, the
+ / - keys tune the frequency in intervals of
0.05 MHZ.
In the sa me mode, by keeping the + / - keys pressed
down, the tuner will automatica lly sea rch the next
station (the sensitivity level is as progra mmed in
6.2.1).
If the stereo signal qua lity is not satisfactory you can
overrule a nd select mono mode ma nually, which is
less dema nding, by pressing FM aga in.
To switch between stereo a nd forced mono
modes, use the + /- keys.
89.90 RADIO Z

CC-1122ENG-05
Key Seque nce Displa y
FM
6
mn o
DAB service tuned
memory pre-set num ber
stereo
DAB service tuned
memory pre-set num ber
stereo
By directly keying in the DAB service's
memory pre-set value, for example, pre-
set # 6
To enter the memory pre-set selection
mode, press FM/ DAB. The display will
show the DAB information of the current
receiving service
DAB service tuned
mem ory pre-set number
stereo
We ca n scroll through the different pre-set
services in memory with the + - keys.
426A2 Control Unit is equipped with
an interna l DAB tuner. When the
DAB tuner is selected a s a sound
source, services ca n be tuned in
severa l different ways:
7.5. O p era tion of the DAB tune r
DAB
FM
DAB
r ee europe
r ee europe
r ee europe
To enter the service selection mode, press
FM/DAB a ga in.
DAB service tuned
DAB service selec tion m ode
stereo
held down
keeping the + / - keys pressed down, the
tuner will a utoma tically sea rch the next
service
FM
DAB
Before ope ra tio n of the DAB tu ner rea d ca refully cha pter 6.3.1.Initia lize DAB
r ee europe
16
EIS 17

CC-1122ENG-05
The pre-set memory number will appear flashing. By
default, the Control Unit offers the first a vailable memory
position, which ma y be cha nged using the + / - keys.
The a ssocia ted pe rmission must be
a ctiva ted to execu te th is fe a ture . See
5.3. Permission to Store / Delete FM&DAB
Tuning Pre -sets.
To confirm it has been stored, press FM/ DAB aga in.
7.6. Store Sta tion Pre - se ts Into The FM/ DAB Tu ner
Key
Sequence s Displa y
FM
FM/DAB station tuned
memory pre-set num ber (flashing)
FM 1’’
FM
frequenc y
stereo
stereo
forced
mono
FM/DAB station tuned
memory pre-set number (flashing)
FM
freq uency
stereo
stereo
forced
mono
The Progra m Menu ha s the optio n to
se a rch a nd a u tom a tica lly store sta tion s
a t the optim a l rece ption leve l, see
6.2.2 for FM a nd 6.3.2 for DAB
Select the FM station frequency or DAB service to be stored using a ny of the methods described
in the previous point.
To enter the store
to memory
mode, press the
FM/DAB key.
DAB
FM
DAB
8
tu v
PRG
ideal
Vol 72
7.7. “Idea l”Settings Mode
The 426A2 Control Unit has the feature to store “ideal” a udio settings, which a re pre-progra mmed
settings tha t ca n be activa ted quickly and immediately. These settings consist of an a udio cha nnel
and pre-set levels of volume, balance, bass, treble a nd loudness.
Using the quick function indicated, the ideal settings mode will be automatically stored.
Pressing the + /- keys down simultaneously
activates the a udio ideal settings mode.
ideal
To progra m th e "ide a l settin gs m ode"
se e 6.4.1
18

CC-1122ENG-05
The 426A2 Control Unit will go into standby mode ( music off) a t the time a nd days of the
week progra mmed.
See 6.1.2. Progra m Me nu:
Auto sta ndby
1 3
def
PRG
1 1
3
def
PRG
3
def
PRG
16
EIS 19
standby
7.8. Auto sta n dby
The function can be activa ted or clea red
from this option in the progra m menu.
The function is a ctivated when the icon is flashing.
The quick function can also be used.
Access the program menu. Select the O N/ OFF sta tus,
time and days of the week to execute the function. auto-standby
on/ off
standby x
Key Seque nce Displa y Visua l
11 4
ghi
PRG
7.9. Sle ep
Access the progra m menu and
select the time in minutes. sleep min 20
sleep
2’’
It is activated by pressing the
O N/OFF key down for 2”
The icon will be static if the
sleep function is a ctivated
The sleep function shuts the Control Unit off a fter a predefined time entered a t power on. The
user ca n program the time. O nce the pre-set time has ela psed, the Control Unit will
automatically power off. If the Control Unit is switched off manually before the end of the pre-
set time, the sleep function will be clea red.
See 6.1.3. Progra m Me nu:
Slee p
Other manuals for 426A2
2
Table of contents
Other EisSound Control Unit manuals
Popular Control Unit manuals by other brands

Lenze
Lenze E84AYCIB Mounting instructions

Schmidt
Schmidt RTM-400 instruction manual

Fisher-Rosemount
Fisher-Rosemount Design CV500 instruction manual

UNICORECOMM
UNICORECOMM UM220-IV M0 Additional Instructions for Installation and Operation

Eaton
Eaton CMA user manual

ICT
ICT CRX-POSTX-DIN installation manual