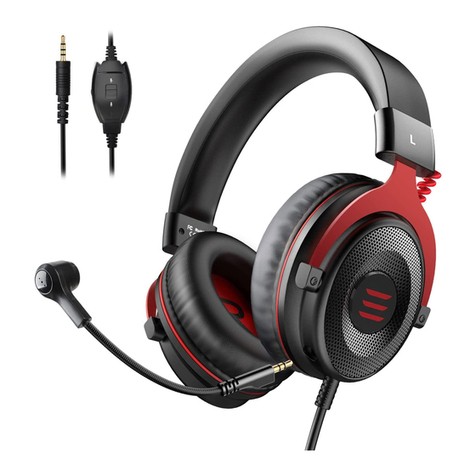
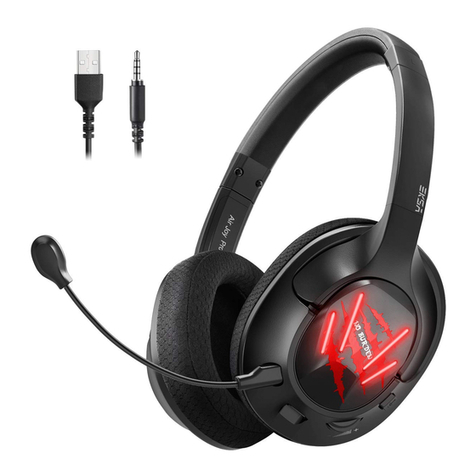
EKSA E3000 User manual

3
User Guide

Device Layout
1. 50mm audio speaker
2. Protein leather earmu
3. Adjustable stretchy band
4. Illuminating LED light
5. Adjustable microphone
6. Mic mute control button
7. Audio volume control
8. 3.5mm audio & mic plug
9. USB connector for LED lights
1 2
EN
(3.5mm jack)
Operating instruction
Speaker size 50mm Microphone
impedance 2.2K
Impedance 16Ω+15% Directionality omnidirectional
Sensitivity 117dB+3dB Cable length 2.2M
Frequency
range 20-20KHz LED working
voltage USB 5V
Microphone Microphone
6.0x2.7mm
Working
current
<200mA
Microphone
sensitivity 42dB±3dB Headset jack 3.5mm+USB
Specications

3 4
This headset can be used directly
on the latop via 3.5mm jack.
On Latop
1).Use the 3.5mm jack to work
on desktop.
Desktop
[Click]
20
3). Make sure none of the Microphone are disabled or muted.
[Recording]
[right click and select
"Show Disabled Devices"]
[click on Mic and select"Enbale"]
[Right click]
[Sound settings]
[ Sound Control Panel]
[click on Mic and select"Enbale"]
[Recording]
[right click and select
"Show Disabled Devices"]
[Right click]
2). Make sure to insert the
right jack (the yellow for the
microphone).
speaker(Realtek High Denition Audio)
User interface for Window 7:
User interface for Window 10:

5 6
On PS4
1). Plug the 3.5mm jack into the Gamepad.
2). Long press the PS4 button to enter the System Settings.
4). Try disabling "Front mic" on recording
devices. Update the Sound Card Drivers.
Line input
Realtek High Denition Audio
Speaker
Recording
Yes
Microphone
Line input
Stereo mix
5). Adjust or rotate the 3.5mm interface until both sides of the
headphones have smooth sound.
[Devices]
3).
[Peripheral Machines]
[Adjust Sound And Devices]
[Output To The Headphone]
[All Audio]
System Settings
[Audio Devices]
4). Discard the USB interface (Only for LED light) if this cable
is not long enough for your device.
(LED light)
5). Adjust or rotate the 3.5mm interface until both sides of the
headphones have smooth sound.

7 8
1). Please connect the separate splitter (Included) with the
3.5mm jack for this headset to work on desktop.
Usage (Xbox One S/X)
To work on the old version of Xbox One controller, you need a
Microsoft adapter(sold separately). To work on the new version of
Xbox One S/X controller, you can directly connect the E3000
headset to controller via 3.5mm jack.
Note: this headset isn’t compatible with Xbox 360.
Information for Xbox User
Controller has a 3.5mm jack:
headset adapter not required
Controller has no 3.5mm jack:
Microsoft Stereo headset
adapter required
For Xbox One S/X controller For Xbox One controller
(old version)
Matters needing attention
4). Adjust or rotate the 3.5mm interface until both sides of the
headphones have smooth sound.
2). The 3.5mm cable inline controller can be used to adjust
the volume level and mute the microphone.
(Cable series controller)
3). Check and make sure your PS4 setting are
congured correctly before using this headset
on PS4 and then check if the audio devices
work properly and sound switch on the
microphone has been turned on.

5). Make sure the sound switch on the
microphone has been turned on when
using this headset on PC.
6). Enjoy music at a moderate volume to prevent adverse eects on
the hearing.
7). Be careful to wear when driving or cycling so as not to aect
safety.
8). Product specications are subject to change without notice.
9). If disassemble the headset without authorization, we can’t
guarantee the quality.
1). Make sure the sound switch on the
Microphone has been turned on.
Microphone isn’t working On PS4
2). Make sure your PS4 Setting are congured correctly. If your
Microphone was detected on the Adjust Microphones Level
screen, then the headset and mic are working with the PS4
properly. If other players still cannot hear you in chat, check
your network connection or in-game chat setting.
Audio Devices
Input Device Connected to Controller
Connected to Controller
Output Device
Adjust Microphone Volume
Volume Control (Headphones)
Output to Headphones
Peripheral Machines
All Audio
3). Review your PS4 Setting to make sure they are congured
as follows:
① Go to"Setting">"Devices">"Audio Devices"
② Set "Input & Output Device to Headset" to "Connected to Controller"
③ Set "Output to Headphones" to "All Audio"
④ Set "Volume Control" (Headphones) level to maximum
⑤ Select "Adjust Microphone" Level and follow the on-screen instructions
to calibrate your microphone
Audio Devices
Input Device Connected to Controller
Connected to Controller
Output Device
Adjust Microphone Volume
Volume Control (Headphones)
Output to Headphones
Peripheral Machines
All Audio
9 10

Lida
4). Plug the headset into a mobile phone and try making a call.
If someone is able to hear you in the call, then the headset and
microphone are working properly.
1). You must use the 1-to-2 3.5mm jack splitter cable to ensure
that each jack is connected properly and securely plugged in.
On Desktop
(LED light)
2). Disconnect the separate splitter cable and then connect the
headphones directly. If the issue is resolved, with the extension
cable disconnected, the splitter cable is the cause.
The EKSA gaming headset requires minimum maintenance to keep
it in optimum condition. Once a month we recommend you clean
Safe and Maintenance
Safety Guidelines
In order to achieve maximum safety while using your EKSA gaming
headset, we suggest that you adopt the following guide-lines:
1. Should you have trouble operating the device properly and trouble
shooting does not work, unplug the device and contact the EKSA
x the device yourself at any time.
2. Keep your device away from liquid, humidity or moisture. Operate
your device only within the specied temperature range of 0°C
(32°F) to 40°C (104°F). You should operate it in a temperature
that is beyond this range, unplug and switch o the device in order
to let the temperature stabilize within the optimal temperature
range.
3. Listening to excessively loud volumes over extended periods of
time can damage your hearing. Furthermore, legislation of certain
countries permits a maximum sound level of 86db to aect your
hearing for 8 hours a day. We therefore recommend that you
reduce the volume to a comfortable level when listening for
prolonged periods of time. Please, take good care of your hearing.
Maintenance
11 12

Q1: Microphone cannot be used?
the device using a soft cloth or cotton swab with a bit of warm
water to prevent dirt buildup. Do not use soap or harsh cleaning
agents.
Please close the computer’s
onboard mic by enter your sound
devices in the hardware section
of the control panel, and choose
the Microphones of the headset.
?
Speaker
Recording
Yes
Microphone
Line input
Stereo mix
Microphone
2- Realtek High Denition Audio
5-USB PnP Audio Device
Q2: Small sound or no sound?
?
1). Make sure that your audio
devices work well and sound
switch has been turned on.
2). Turn up the sound volume level, makes sure connecting the
plug of headset to.
Q3: Is there a static noise?
?
50
Realtek High Definition Audio
13 14

1). Please check out and make sure the plug is well inserted
into the device.
2). Please make sure there are NO electric devices (like cell-
phone, electric fan) with strong magnetic eld nearby.
Otherwise, please take away these devices.
3). Please check if the microphone boost in Windows or other
systems) is turned o or turned down. If not, you will need to
turn down the microphone boost level by the following steps.
(For Windows 7/10 Home System)
[Control Panel]
[Sound]
[Recording]
[right-click "Headset Microphone"]
[Level]
[turn down the boost level]
Q4: What’s the warranty for this product?
Even though Amazon only provide 30 days no hassle return/replace-
ment service for its product, you could always reach out to us by
while using our.
15 16
EKSA offers a one-year limited warranty for this product.
We will repair or replace any defective products free of
charge. Feel free to contact us:
Limited Warranty
+852 6940 4955(Mon to Fri 9:00 am-6:30 pm, UTC +8 HKT)
www.eksa.net/warranty
Global:
India:
+91 8929369620(Mon to Fri 9:30 am-5:30 pm, IST)
Other manuals for E3000
1
Table of contents
Other EKSA Headset manuals


