10
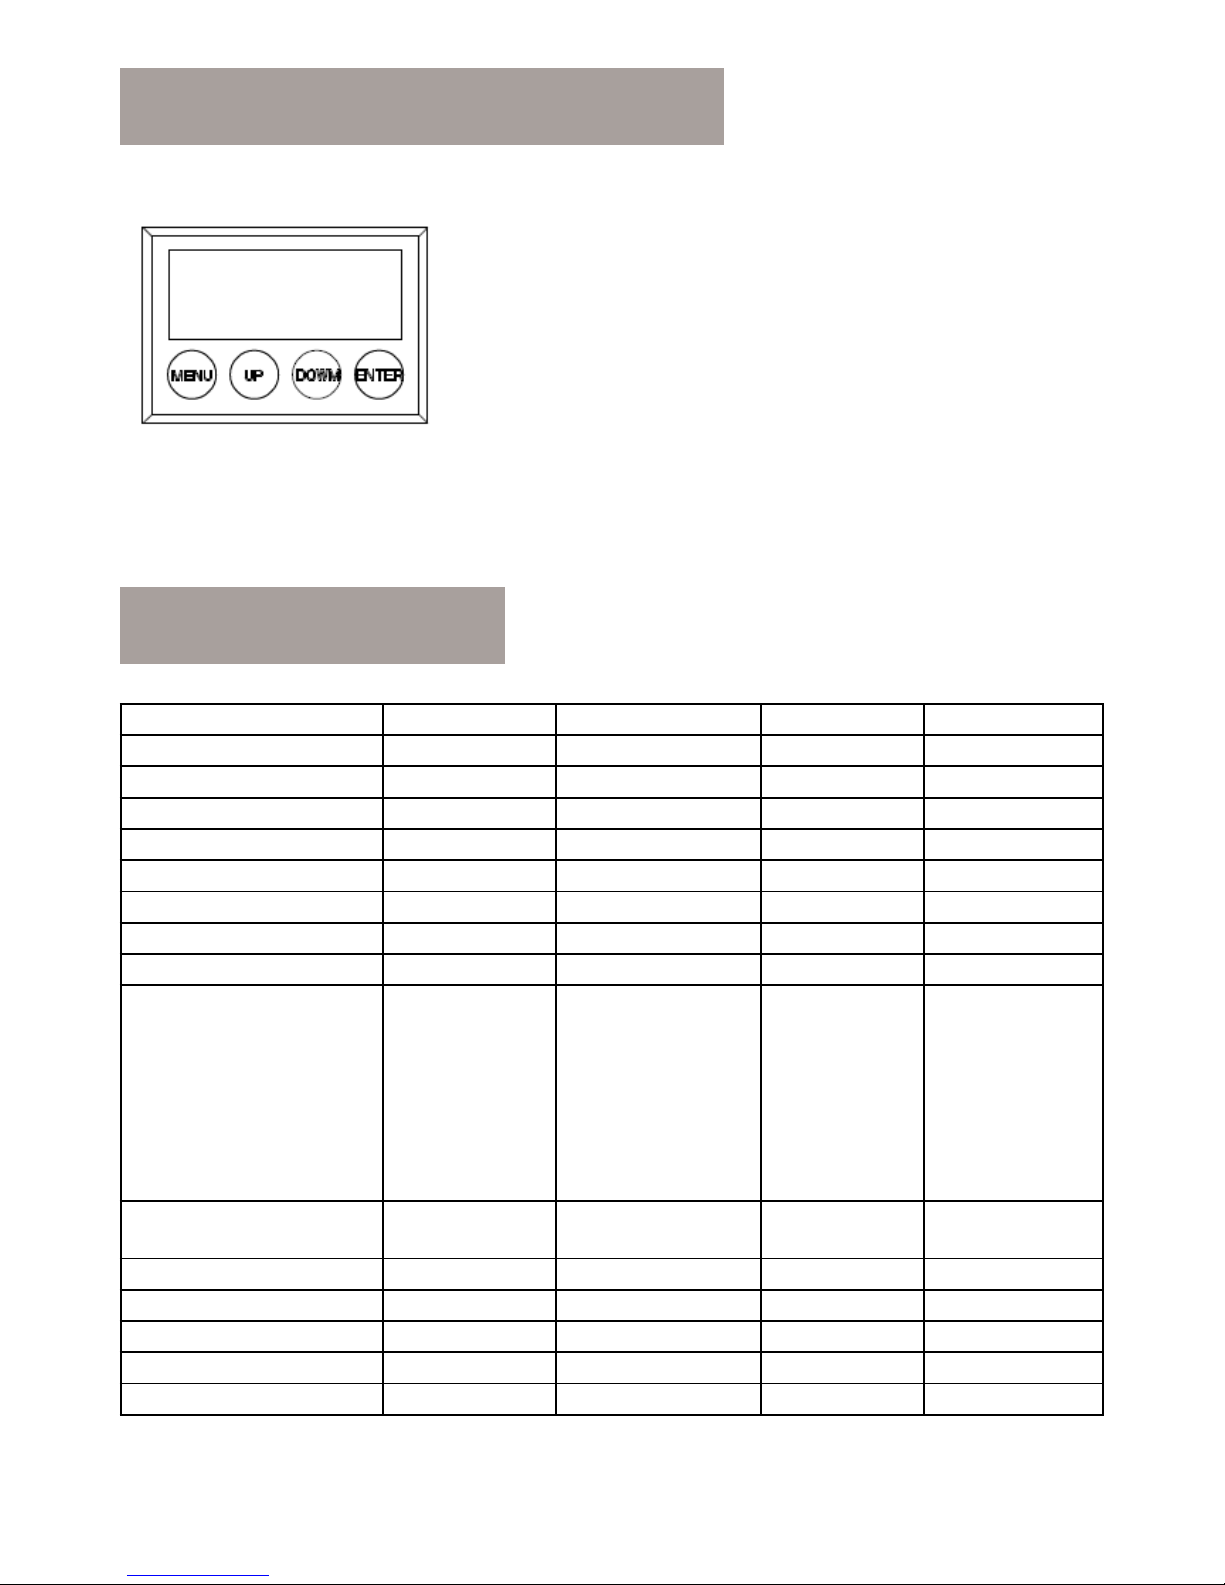
Instructions:
When enter to the “*” position displayed on the LED, the light will automatically set as master and
send data to external. Other fixtures can receive this data and will synchronously running without
manually set as slave. When power cycle it will jump to the “*” position and running again. And in
these position it will not return back to the default display after two minutes.
6.1 DMX ADDRESS SETTING
1) Press the ENTER button in ADDR menu, then enter to the DMX address setting.
2) Press theUP/DOWN button to select 1-512 numerical value.
3) Press the ENTER button to escape and save.
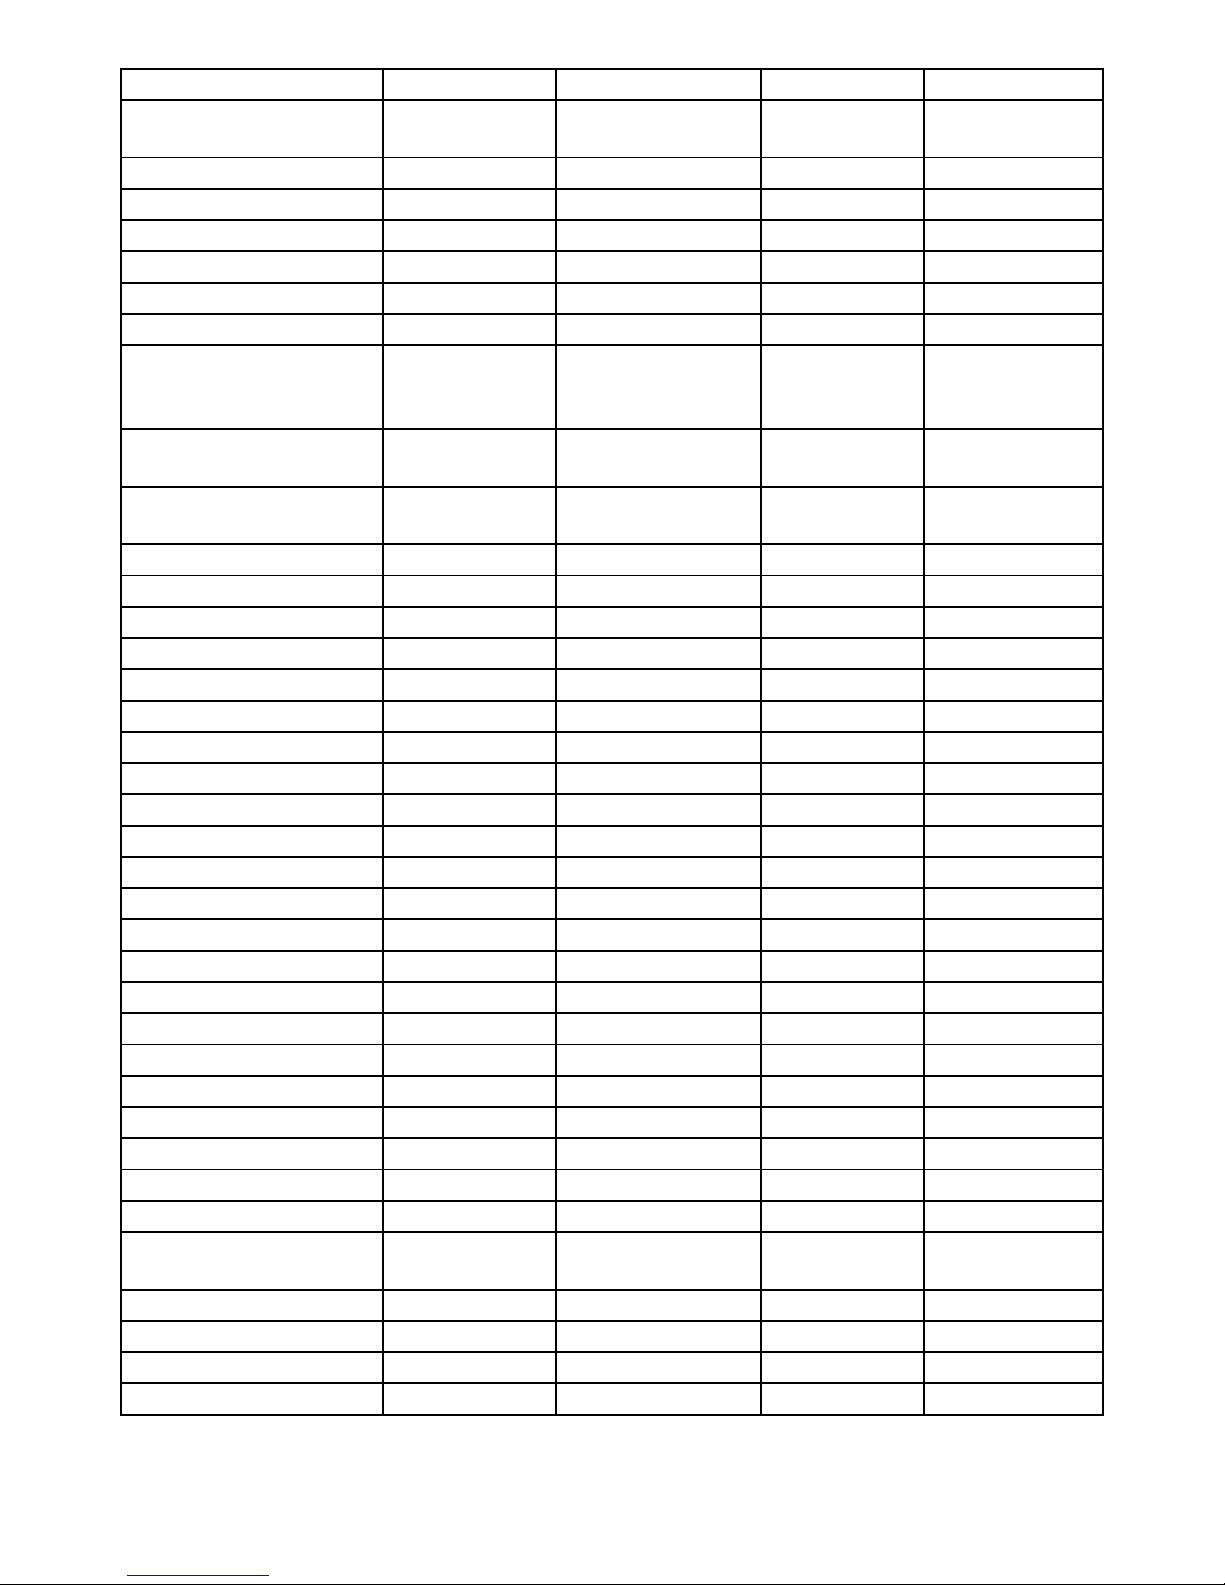
6.2 STATIC SETTING
1) Press the ENTER button in STAT menu, then enter to the static setting.
2) Press the UP/DOWN button to select RED GREEN BLUE AMBER,WHITE, UV and SHUT.
3) Press the UP/DOWN button to set up the 0-255 numerical value.
4) Press the ENTER button to escape and save.
6.3 COLOR CAST CALIBRATION SETTING
1) Press the ENTER button in CAL menu, then enter to the color cast calibration setting.
2) Press the UP/DOWN button to select RED GREEN BLUE AMBER, WHITE,UV
3) Press theUP/DOWN button to set up the 0-255 numerical value.
4) On the USE interface, pressing YES button means valid, NO means invalid.
5) Press the ENTER button to escape and save.
Illustrations: When pressing the YES button which means valid on the USE interface, the actual ou-
tput value of RED GREEN BLUE AMBER,WHITE, UV is output in accordance with the percentage
which the color cast calibration value divides 255.
6.4 CHANNEL MODE SETTING
1) Press the ENTER button in CHMD menu, then enter to the channel mode setting.
2) Press theUP/DOWN button to select 12CH 9CH 7CH 6CH 5CH 4CH
3) Press the ENTER button to escape and save.
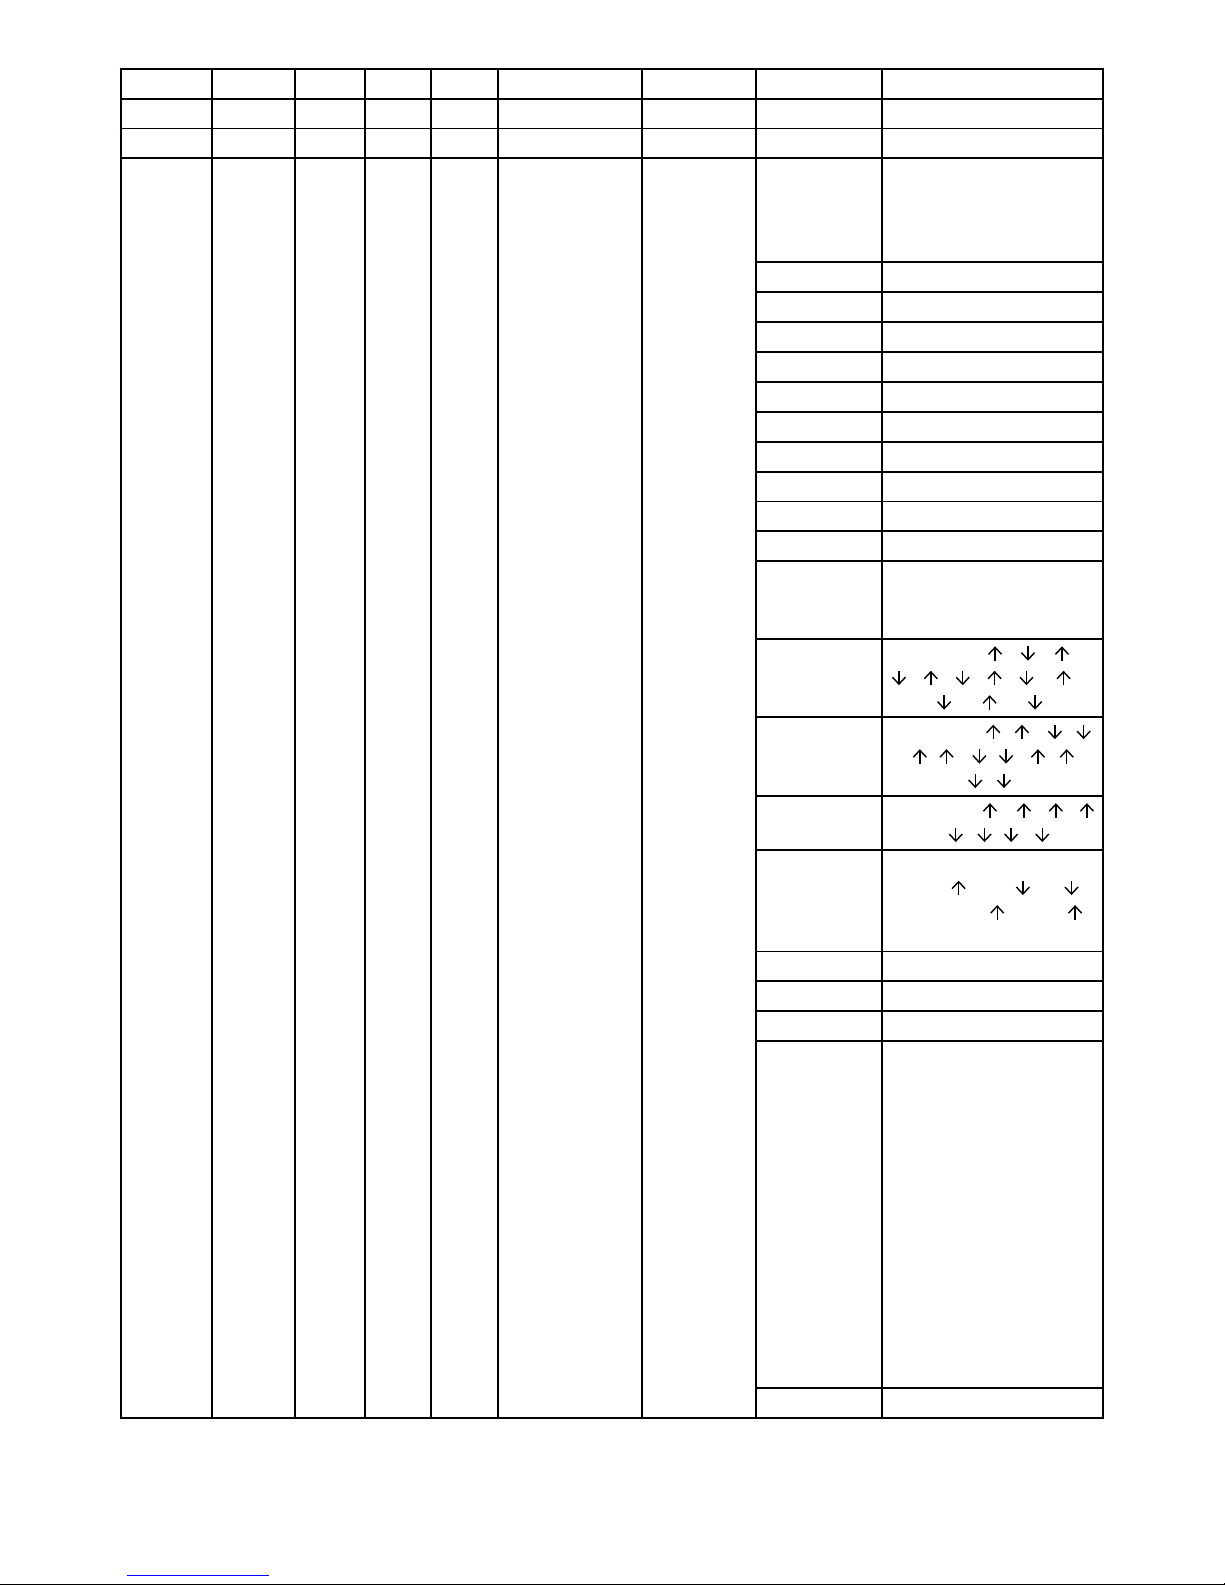
6.5 DIMMING MODE SETTING
1) Press the ENTER button in DIM menu, then enter to the dimming mode setting.
2) Press the UP/DOWN button to select LIN SQR ISQR SCUR LIN. SQR. ISQR. and SCUR.
3) Press the ENTER button to escape and save.
Illustrations: When settingLIN SQR. ISQR. and SCUR. in DIM menu, there will be added a little
delay dimming effect for smooth.
Dimming curve:
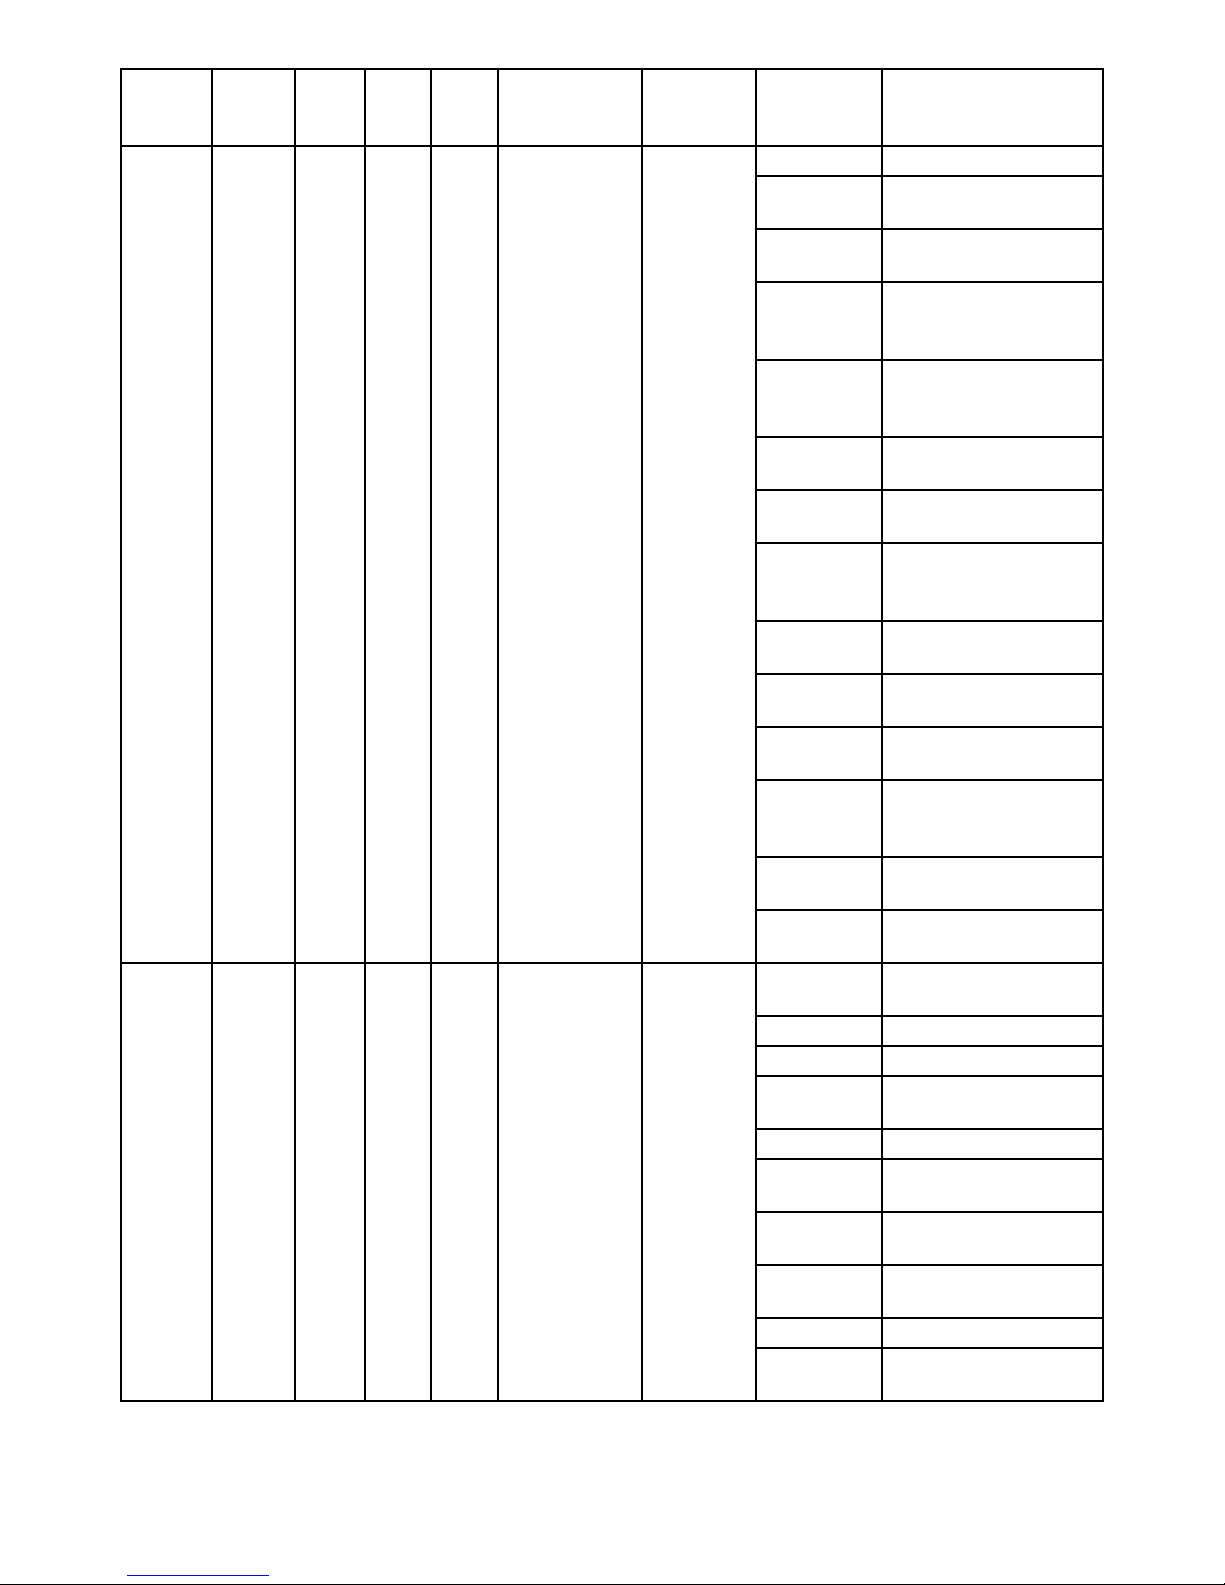
. SC20 Scene 20
CHS3 Chase 3
INFO Information SOFT(Software
version)
Vx.x
POW(Power
reduction)
100%/80%/50%
LOAD(Load) ST L Setting
load)
YES/NO
PR L Program
load)
YES/NO
SEND(Send) YES/NO