manuals.online logo
Brands
  1. Home
  2. •
  3. Brands
  4. •
  5. Eldat
  6. •
  7. Receiver
  8. •
  9. Eldat Easywave RCL07 User manual

Eldat Easywave RCL07 User manual

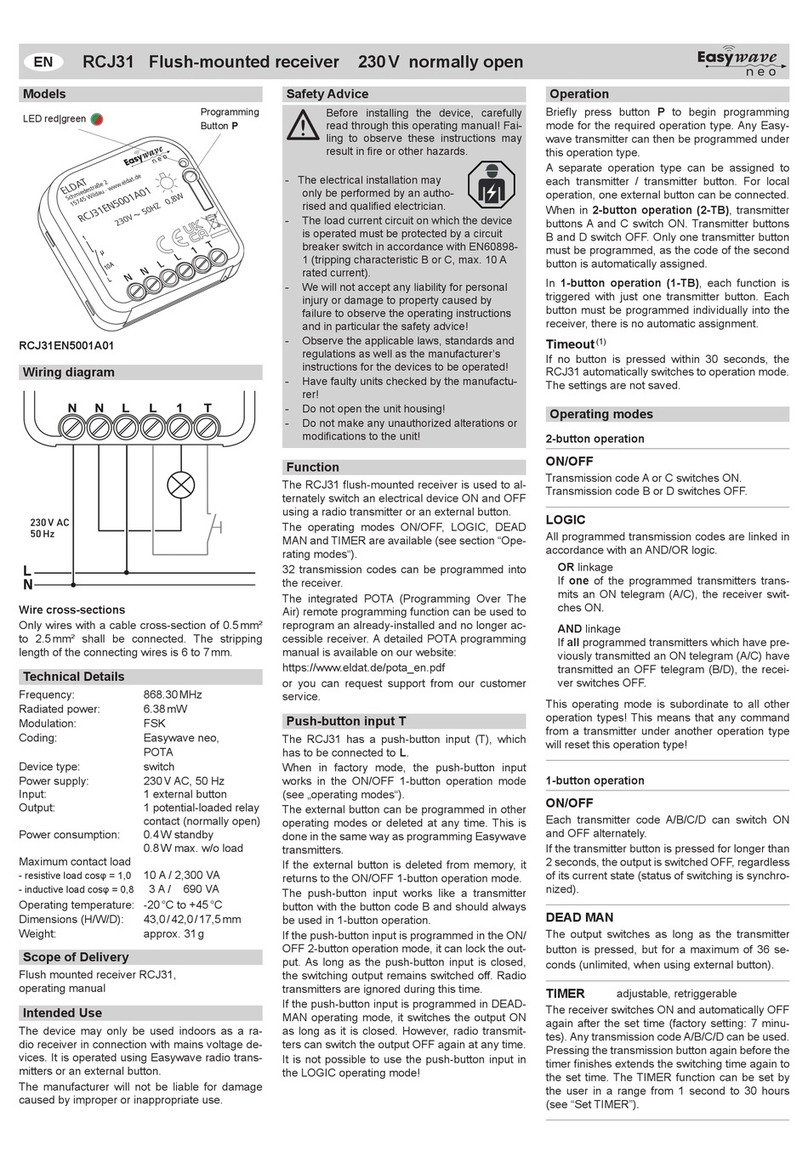
A maximum of eight switching codes can be pro-
grammed. Teaching is carried out using the in-
ternal programming button Q/S (refer to page 2
„Programming switching transmitter“).
SWITCH-OFF Function
When the switch-o󰀨 function is enabled, the
RCL07 can be switched o󰀨 using the switch but-
ton.
When switched o󰀨, separately programmed
transmitters must be used to trigger a call, the so-
called „Priority transmitters“.
These transmitters trigger calls even if the RCL07
is switched o󰀨.
Priority transmitters must be programmed sepa-
rately in the RCL07 and can be deleted in the
same way as call transmitters (refer to page 3
„Programming priority transmitter“).
RCL07 switch OFF: Press the button
(>10 seconds) until the green LED goes o󰀨.
RCL07 switch ON: Press the button (approx.
5 seconds) until the green LED lights up.
After a voltage interruption, the RCL07 is always
switched on.
Jumper J1 can be used to disable or enable the
switch-o󰀨 function. This function is disabled in the
factory settings (J1 in pos. 1), to change refer to
page 2 „Changing the switch-o󰀨 function“.
Please note that it is not possible to con-
trol the power supply when the switch-o󰀨
function is activated.
BATTERY UNDERVOLTAGE
If the capacity of the battery of a call tranmitter or
a priority transmitter is low, the transmitter sends
an undervoltage telegram. The relay channel 2
(CH2) is switched for approx. one second and the
LED signals the undervoltage by ashing.
If the RCL07 receives an undervoltage telegram
when the acknowledgment function is activated,
the undervoltage is only displayed on the device
after acknowledgment of the call.
Now replace the battery of the call transmitter.
When the RCL07 receives two consecutive tele-
grams from this transmitter without an undervolt-
age message, the receiver automatically resets
the undervoltage indication.
Operating Modes (OM)
The operating mode is selected by repeatedly
pressing the programming button Rin the pro-
gram step „Programming the call transmitter“ (re-
fer to page 2).
PULSE
1-button operation
If a transmitter button A/B/C/D is pressed, the cor-
responding relay is triggered for one second.
ON/OFF
2-button operation
The relay can selectively be switched ON or OFF.
The transmitter button A or C switch ON, the
transmitter button B or D switch OFF.
Caution! In order to change the operating mode,
rst delete the transmitter transmission code and
then subsequently programming an other trans-
Model
1234
J2 J1
Q/S R
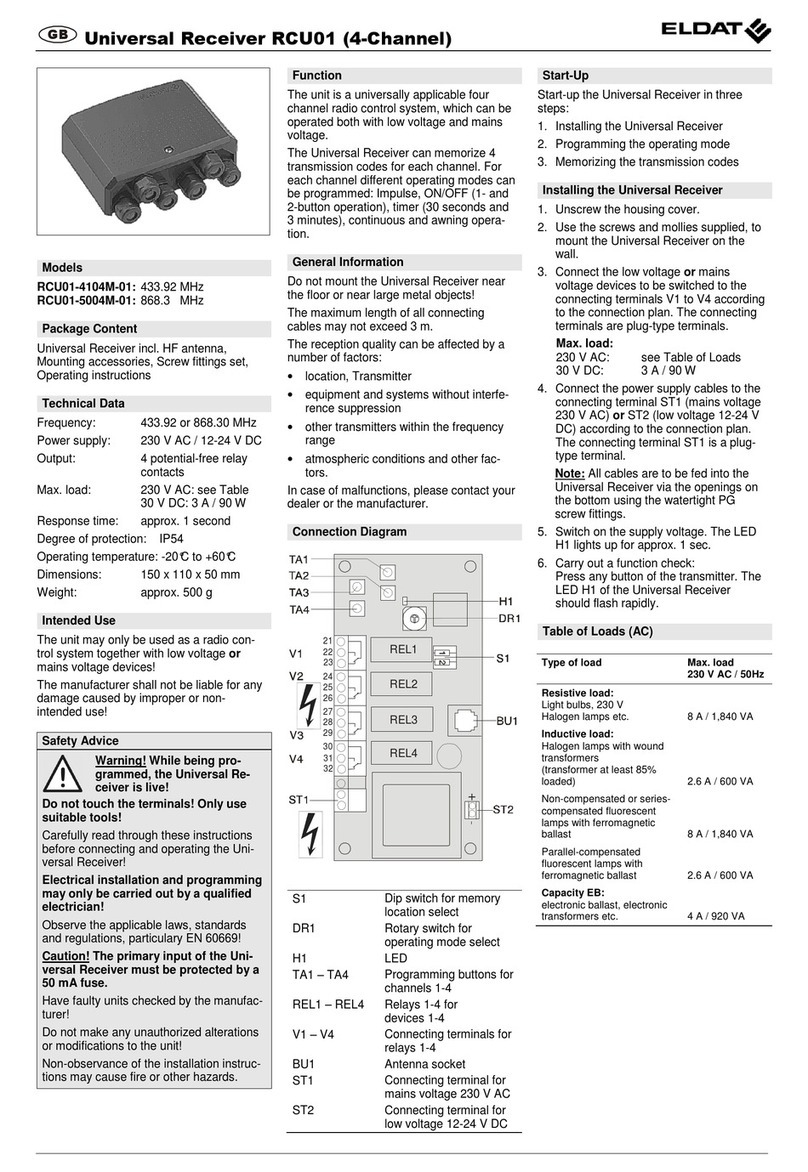
Technical Details
Frequency: 868.30 MHz/916.50 MHz
Modulation: FSK
Coding: Easywave
EasywavePlus
Power supply: 12-24 V DC
Current consumption:
12 V DC: 19 mA stand by
65 mA load *)
24 V DC: 11 mA stand by
31 mA load *)
Max. contact rating: 30 V / 1 A / 30 W
Output: 2 potential-free
relay contacts
(1 CO and 1 NO)
Operating temperature: -20 °C to +60 °C
Degree of protection: IP54
Dimensions (w/l/h): 35/80/20 mm
Weight: 38.0 g
Connecting cable: Ø 5 mm
*) Both relays are switched.
Scope of Delivery
Call receiver RCL07, operating instruction
Intended Use
The unit may only be operated with safety extra
low voltage (SELV) and may only be used as a ra-
dio control for switching devices with safety extra
low voltage (SELV).
The manufacturer shall not be liable for any dam-
age caused by improper or non-intended use.
RCL07 Call Receiver with internal programming
GB
Cable entry
with cord
grip
Switch button
Care function activate/deactivate
green LED
illuminates: RCL07 ready for
operation
ashes: Care function active
not light: RCL07 is o󰀨 (Priority
channels are still
being received)
or
RCL07 without power supply
Acknowledge button Quit
Call acknowledge
red LED
illuminates: Call received
ashes: Battery low voltage
Safety Advice
Before using the device, carefully read
through the operating instructions!
Caution! Observe the permissible supply volt-
age and the max. contact rating!
Have faulty radio controls checked by the
manufacturer!
Do not make any unauthorized alterations or
modications to the receiver!
Function
The call receiver RCL07 has two channels. Chan-
nel 1 (CH1) is used for signal incoming calls. If
the RCL07 receives an undervoltage telegram,
the channel 2 (CH2) switches for one second.
The following applications can be realized with
this:
CALL Function
When the RCL07 receives the telegram from a
call transmitter, channel 1 (CH1) switches accord-
ing to the operating mode selected.
A maximum of 32 transmission codes for call and
priority senders can be programmed.
Teaching is carried out using the programming
button R(refer to page 2 „Programming call trans-
mitter“).
When the care function is activated and a call has
been received, the red LED R continuously illu-
minates.
This call can be acknowledged using the taught
acknowledge transmitter or the button Quit (refer
to „Acknowledge function“).
ACKNOWLEDGE Function
A maximum of eight transmission codes can be
programmed.
Teaching is carried out using the internal pro-
gramming button Q/S (refer to page 2 „Program-
ming acknowledge transmitter“).
The acknowledge function can be activated or
deactivated by setting jumper J2 accordingly. The
acknowledgment function is activated at the fac-
tory.
Activated (jumper J2 in position 4)
When the acknowledge function is activated, LED
Rwill light up red once a call is incoming.
This call can be acknowledged using an acknowl-
edgement transmitter, or on the RCL07 using the
Quit button. LED Rwill stop illuminating and out-
put channel 1 (CH1) will be reset.
Deactivated (jumper J2 in position 3 and 4)
If the acknowledge function is deactivated, an in-
coming call can not be acknowledged and LED
Quit will not light up. The device will switch to
output channel 1 (CH1) in accordance with the
operating mode selected.
CARE Function
Using the care function, the call function is
disabled for 15 minutes.
Disabling the call function is carried out by a sep-
arate switching transmitter using the transmitter
button Bor D.
Alternatively, the call function can also be disa-
bled by pressing the button (> 1.6 s but
<10 s) on the RCL07.
The call function is automatically reactivated after
15 minutes or can be reactivated using the trans-
mitter button Aor C, or on the receiver using the
button .
RCL07E5002B02 868.30 MHz
RCL07E6002B02 916.50 MHz
Programming button Q/S
Teach and delete the acknowledge
and switch transmitter
Programming
button R
Teaching and
delete the
call transmitter
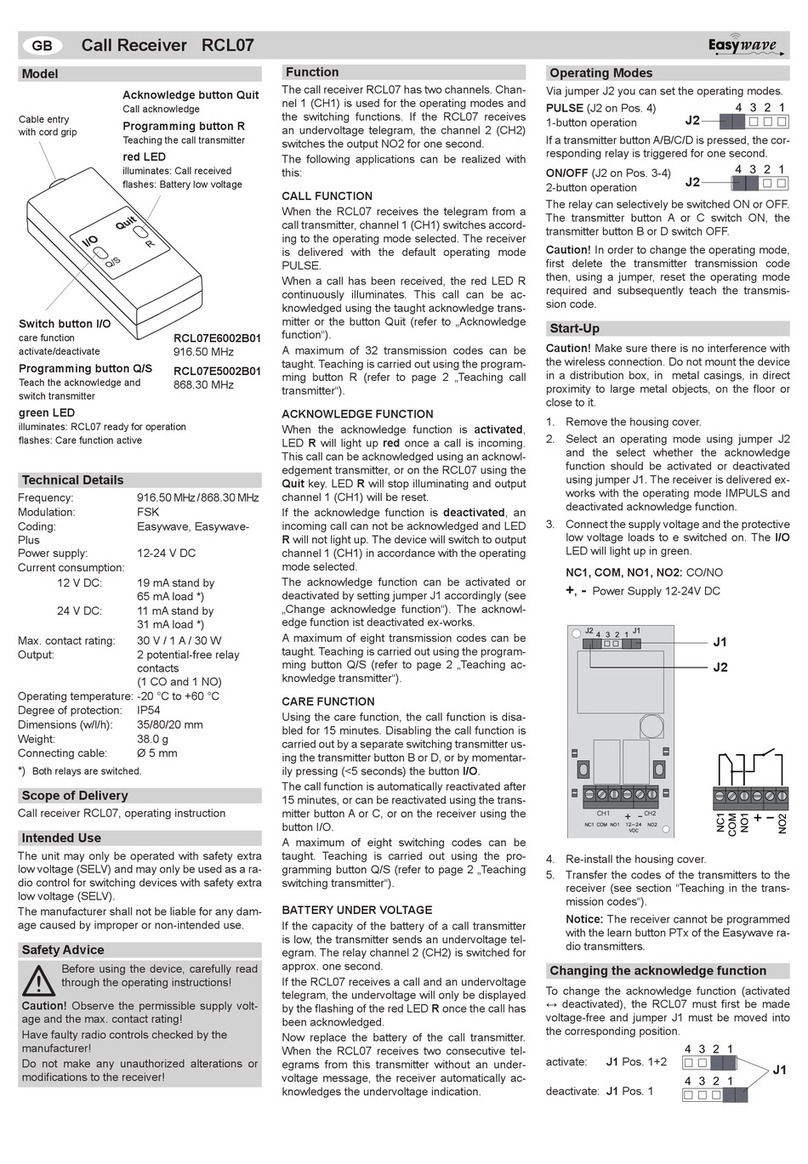
Changing switch-o󰀨 function
To change the switch-o󰀨 function (activated ↔
deactivated), the jumper J1 must be moved into
the corresponding position.
disable: J1 Pos. 1
1432
aneble: J1 Pos. 1-2
1432
If the switch-o󰀨 function is disabled, the
RCL07 can not be switched o󰀨 via the
button .
Changes to the switch-o󰀨 or acknow-
ledgment function can only be made
when the power is o󰀨.
Changing the acknowledge function
To change the acknowledge function (activated ↔
deactivated), the jumper J2 must be moved into
the corresponding position.
activate: J2 Pos. 4
deactivate: J2 Pos. 3+4
2
Operation
[Press button]
Display LED RCL07 Description
Programming a call transmitter The call transmitter is used to send out a care call.
Tx
<1,6 s
R
1234
J2 J1
Q/S R
1x RBA EIN/AUS
2x RBA IMPULS
3x RBetriebs-
bereitschaft
R

<1,6 s
R <1.6 s LED R ashes slowly
(1x|break|1x| ...)
OM ON/OFF selected
R <1.6 s LED R ashes in cycles of two
(2x|break|2x| ...)
OM PULSE selected
The receiver is in
programming mode
for approx.
30 seconds. Programming the transmission code
during this period, after the period has expired, the
receiver changes to operation mode.
Tx <1.6 s LED R illuminates for
approx. 4 s
The transmission code is transmitted. The operat-
ing mode set at the receiver is accepted with the
save procedure and is applicable for the trans-
mission code saved. Subsequently, the receiver
changes to operation mode.
Flashes the LED R quickly for approx. 4 seconds,
all 32 memory spaces are allocated.
J2
J1
1432
1432
mission code again.
Installation
Caution! Make sure there is no interference with
the wireless connection. Do not mount the device
in a distribution box, in metal casings, in direct
proximity to large metal objects, on the oor or
close to it.
1. Remove the housing cover.
2. Use jumper J1 to select whether the switch-
o󰀨 function should be disabled or enabled and
jumper J2 if the acknowledge function should
be activated or deactivated.
The receiver is supplied with deactivated
Switch-O󰀨 Function and activated Acknow-
ledgment Function.
3. Connect the supply voltage and the protec-
tive low voltage loads (see Fig. 1). The LED
will light up in green.
4. Transfer the codes of the transmitters to the
receiver (see section “Programming the trans-
mitter“).
5. Re-install the housing cover.
Notice: The receiver cannot be programmed
with the learn button PTx of the Easywave ra-
dio transmitters.
PROGRAMMING TRANSMITTERS
Each type of transmitter can only be programmed
into the RCL07 once!
If e.g. for transmitters with 2-button operation, the
transmission code A or B is programmed in the
receiver, the buttons C and D can not be used in
this RCL07.
A transmitter can only ever be used for ONE func-
tion.
START-UP
Q/S programming button Q/S
Rprogramming button R
Tx transmitter button
OM Operating mode
ON/OFF
PULSE
Operating mode
<1.6 s
<1.6 s
1234
J2 J1
NC1
COM
NO1
NO2
NC1, COM,
NO1, NO2:
CO/NO
+,-Power Supply
12-24V DC
Jumper J1
Jumper J2
Fig. 1
PROGRAMMING
PROGRAMMING
3
Q/S programming button Q/S
Rprogramming button R
Tx transmitter button
OM Operating mode
Operation
[Press button]
Display LED RCL07 Description
Programming priority transmitter With priority transmitters, a care call can be initiated even if the RCL07 is deactivated.

Q/S
<1,6 s

Tx
<1,6 s
Q/S R
1234
J2 J1
Q/S R
1x RBA EIN/AUS
2x RBA IMPULS
3x RBetriebs-
bereitschaft
R

<1,6 s
R <1.6 s LED R ashes slowly
(1x|break|1x| ...)
Programming mode
OM ON/OFF selected
R <1.6 s LED R ash in cycles of two
(2x|break|2x| ...)
Programming mode
OM PULSE selected
Q/S <1.6 s LED Rand Q/S ash in
cycles of the selected OM
Programming mode priority transmitter
The receiver is in
programming mode
for approx.
30 seconds. Programming the transmission code
during this period, after the period has expired, the
receiver changes to operation mode.
Tx <1.6 s LED Rilluminates
for approx. 4 s
Press the transmitter button and the transmission
code is transmitted.
The operating mode set at the receiver is accepted
with the save procedure and is applicable for
the transmission code saved. Subsequently, the
receiver changes to operation mode.
Flashes the LED R quickly for approx. 4 seconds,
all 32 memory spaces are allocated.
Programming acknowledgment transmitter You can use a acknowledge transmitter to acknowledge a care call received.


Q/S <1,6 s


Tx <1,6 s
Q/S
1234
J2 J1
Q/S R
A
BC
D
Q/S <1.6 s LED R ashes slowly
(1x|break|1x| ...)
Programming mode
acknowledgment transmitter
The receiver is in
programming mode
for approx.
30 seconds. Programming the transmission code
during this period.
After the period has expired, the receiver changes
to operation mode. To cancel the programming
press 2x briey (<1.6 s) button Q/S.
Tx
A/B/
C/D
<1.6 s LED Q/S illuminates
for approx. 4 s
Press the transmitter button with which you wish to
acknowledge. The transmission code (A/B/C/D) is
transmitted and the receiver changes to operation
mode.
Flashes the LED Q/S quickly for approx. 4 sec-
onds, all 8 memory spaces are allocated.
Programming a switching transmitter Switching transmitter: Activation or deactivation of the care function.
A
BC
D


Tx <1,6 s

Q/S <1,6 s


Q/S <1,6 s
Q/S
1234
Q/S R
Q/S <1.6 s LED Q/S ashes slowly
(1x|break|1x| ...)
Programming mode
acknowledgment transmitter
Q/S <1.6 s LED Q/S ash in cycles of two
(2x|break|2x| ...)
Programming mode
switching transmitter
The receiver is in
programming mode
for the switch-
ing transmitter for approx. 30 seconds. Program-
ming the transmission code during this period.
After the period has expired, the receiver changes
to operation mode.
To cancel the programming press 1x briey (<1.6 s)
button Q/S.
Tx
A/C
<1.6 s ED Q/S illuminates
for approx. 4 s
Press the transmitter button Aor C, the transmis-
sion codes are transmitted (Code B and D are
automatically allocated). The receiver changes to
ready for operation.
Flashes the LED Q/S quickly for approx. 4 seconds,
all 8 memory spaces are allocated.
ON/OFF
PULSE
Operating
mode
<1.6 s
<1.6 s
<1.6 s
<1.6 s
<1.6 s
<1.6 s
<1.6 s
<1.6 s
Activate care function: Press transmitter button Bor D. LED I/O ashes green.
Calls are ignored for 15 minutes.
Deactivate care function: Press transmitter button Aor C. LED I/O
illuminates green
.
Calls are signaled again.
UM164362A 0319 GB
GENERAL INFORMATION
Disposal
Waste electrical products not be disposed of
with household waste!
Dispose of the waste product via a col-
lection point for electronic scrap or via
your specialist dealer.
Put the packaging material into the
recycling bins for cardboard, paper and
plastics.
Warranty
Within the statutory warranty period we undertake
to rectify free of charge by repair or replacement
any product defects arising from material or pro-
duction faults.
Any unauthorized tampering with, or modications
to, the product shall render this warranty null and
void.
Conformity
Hereby, ELDAT GmbH declares that the radio
equipment type RCL07 is in compliance with Di-
rective 2014/53/EU. The full text of the EU dec-
laration of conformity is available at the following
internet address: www.eldat.de
Customer Service
If the device does not work properly despite prop-
er handling or in case of damage, please contact
the manufacturer or your retailer.
ELDAT GmbH
Im Gewerbepark 14
15711 Königs Wusterhausen
Germany
Phone: + 49 (0) 33 75 / 90 37-310
Fax: + 49 (0) 33 75 / 90 37-90
Internet: www.eldat.de
E-Mail: [email protected]
DELETE TRANSMITTERS
Operation
[Press button] Display Description
Deleting individual call- /priority transmitter
R
1234
J2 J1
Q/S R
Tx <1,6 s
R
>1,6 s
R >1.6 s LED R ashes rapidly The receiver is in delete mode for 30 seconds.
Delete the required transmission code during
this period. After the period has expired, the
receiver changes to operation mode.
To cancel the programming press 1x briey
(<1.6 s) button R.
Tx
A/B/
C/D
<1.6 s LED Rilluminates
for approx. 2 s
Press the transmitter button to delete.
The transmission code is deleted and the
receiver changes to operation mode.
If an attempt is made to delete an acknowledgment or switching transmitter,
there is at reaction on the RCL07.
Deleting call- /priority transmitter complitly
R
1234
J2 J1
Q/S R
R >1.6 s LED R ashes rapidly The receiver is in delete mode for approx.
30 seconds. Again press the button Rduring
this period. After the period has expired, the
receiver changes to operation mode.
To cancel the programming press 1x briey
(<1.6 s) button R.
R >1.6 s LED Rilluminates
for approx. 2 s
All transmission codes of the call- or priority
transmitters have been deleted and the
receiver changes to ready for operation.
Deleting individual acknowledgement- /switch transmitter
Q/S
>1,6 s
Tx
<1,6 s
Q/S
1234
J2 J1
Q/S R
A
B
C
D
Q/S >1.6 s LED Q/S ashes rapidly The receiver is in delete mode for 30 seconds.
Delete the required transmission code during
this period. After the period has expired, the
receiver changes to operation mode.
To cancel the programming press 1x briey
(<1.6 s) button Q/S.
Tx
A/B/
C/D
<1.6 s LED Rilluminates for
approx. 2 s
Press the transmitter button to delete.
The transmission code is deleted and
the receiver changes to operation mode.
If an attempt is made to delete an acknowledgment or switching transmitter,
there is at reaction on the RCL07.
Deleting acknowledgment- /switch transmitter complitly


Q/S >1,6 s


Q/S >1,6 s
Q/S
1234
J2 J1
Q/S R
Q/S >1.6 s LED Q/S ashes rapidly The receiver is in delete mode for approx.
30 seconds. Again press the button Q/S
during this period. After the period has expired,
the receiver changes to operation mode.
To cancel the programming press 1x briey
(<1.6 s) button Q/S.
Q/S >1.6 s LED Q/S illuminates for
approx. 2 s
All transmission codes of the
acknowled-
gement- /switch transmitters
have been
deleted and the receiver changes to ready
for operation.
<1.6 s
<1.6 s
>1.6 s
>1.6 s
>1.6 s
>1.6 s
>1.6 s
>1.6 s
PROGRAMMING

Other Eldat Receiver manuals

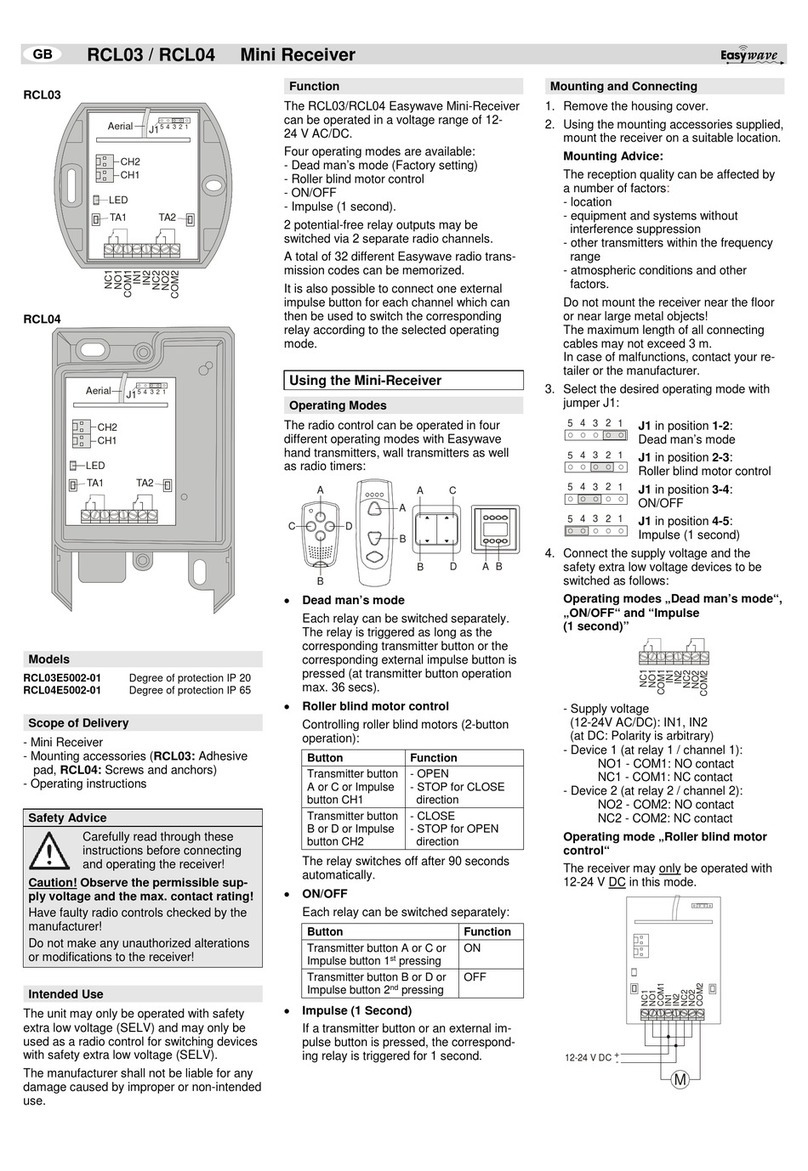
Eldat RCL03 Series User manual

Eldat

Eldat RCL03 Series User manual

Eldat RCJ31 User manual

Eldat

Eldat RCJ31 User manual

Eldat Easywave neo User manual

Eldat

Eldat Easywave neo User manual

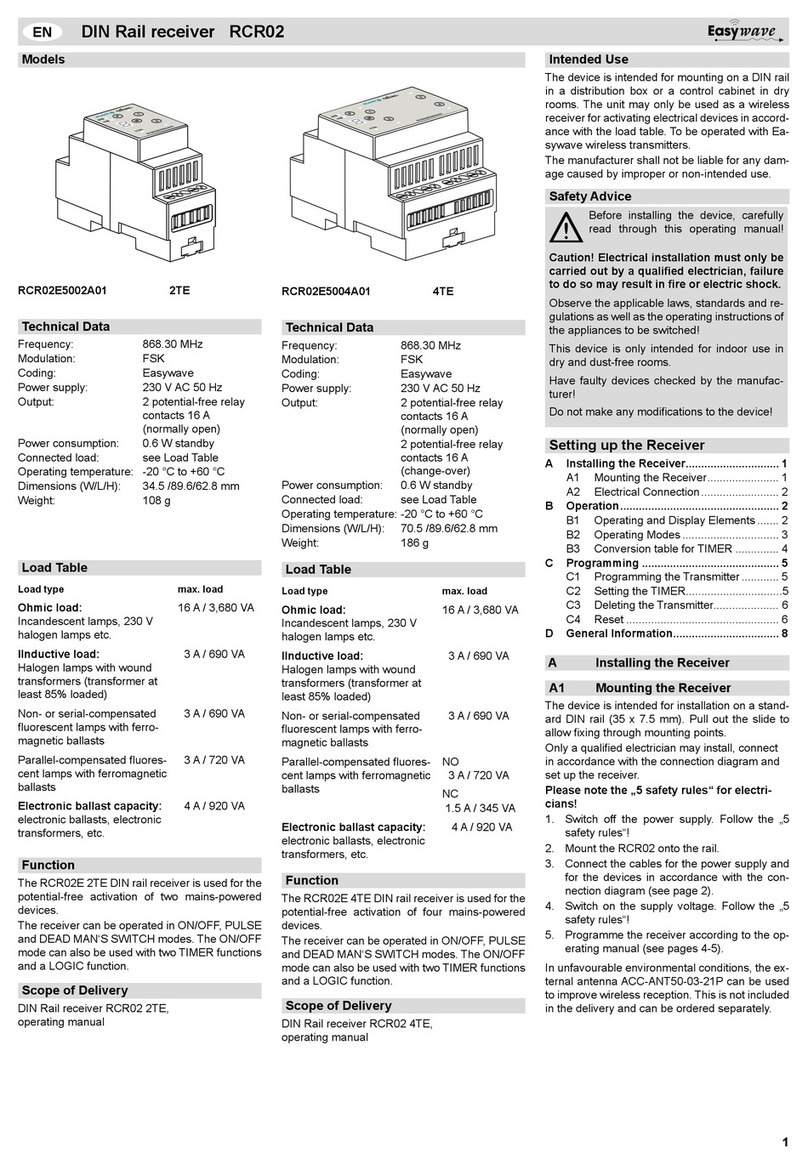
Eldat Easywave RCR02E5002A01 User manual

Eldat

Eldat Easywave RCR02E5002A01 User manual

Eldat RCL07 User manual

Eldat

Eldat RCL07 User manual

Eldat Easywave neo RCJ32 User manual

Eldat

Eldat Easywave neo RCJ32 User manual

Eldat RCU08 User manual

Eldat

Eldat RCU08 User manual

Eldat RCU01 Series User manual

Eldat

Eldat RCU01 Series User manual

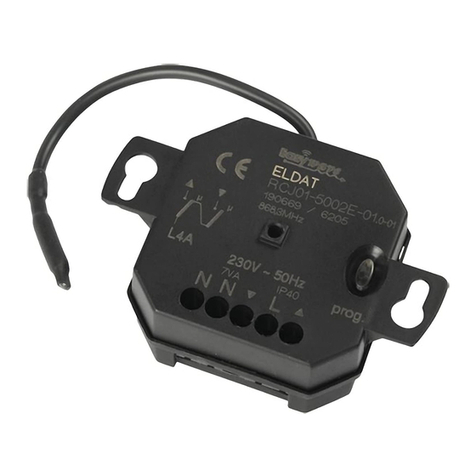
Eldat RCJ01 Series User manual

Eldat

Eldat RCJ01 Series User manual

Eldat EASY WAVE RCL03 User manual

Eldat

Eldat EASY WAVE RCL03 User manual

Eldat Easywave RCL07 User manual

Eldat

Eldat Easywave RCL07 User manual

Eldat EasyWave RCL07 User manual

Eldat

Eldat EasyWave RCL07 User manual

Eldat RCU01-4104M-01 User manual

Eldat

Eldat RCU01-4104M-01 User manual

Eldat Easywave neo RCJ35 User manual

Eldat

Eldat Easywave neo RCJ35 User manual

Eldat RCL03 Series User manual

Eldat

Eldat RCL03 Series User manual

Popular Receiver manuals by other brands

Pioneer VSX-918V-K Service manual

Pioneer

Pioneer VSX-918V-K Service manual

Permobil 1825342 manual

Permobil

Permobil 1825342 manual

Pioneer AVH-285BT owner's manual

Pioneer

Pioneer AVH-285BT owner's manual

Teac DR-H300DAB Service manual

Teac

Teac DR-H300DAB Service manual

Lincoln 3614 manual

Lincoln

Lincoln 3614 manual

Onkyo SC886 - PR Preamplifier / Processor Service manual

Onkyo

Onkyo SC886 - PR Preamplifier / Processor Service manual

Banner DF-G1-NR-2M quick start guide

Banner

Banner DF-G1-NR-2M quick start guide

Sony STR-DA6400ES - Multi Channel Av Receiver Service manual

Sony

Sony STR-DA6400ES - Multi Channel Av Receiver Service manual

Teleco TVRCL868A02F6 instructions

Teleco

Teleco TVRCL868A02F6 instructions

Strong SRT 5120 user manual

Strong

Strong SRT 5120 user manual

TechniSat DigiCorder Short instructions

TechniSat

TechniSat DigiCorder Short instructions

Pioneer VSX-822-K operating instructions

Pioneer

Pioneer VSX-822-K operating instructions

Pioneer VSX-821-K operating instructions

Pioneer

Pioneer VSX-821-K operating instructions

LG HT902TBW owner's manual

LG

LG HT902TBW owner's manual

BridgeWave BW64E installation guide

BridgeWave

BridgeWave BW64E installation guide

Elk Products ELK-M1XRF2G installation manual

Elk Products

Elk Products ELK-M1XRF2G installation manual

Pioneer SC-1223-K operating instructions

Pioneer

Pioneer SC-1223-K operating instructions

Philco 50 Service manual

Philco

Philco 50 Service manual

manuals.online logo
manuals.online logoBrands
  • About & Mission
  • Contact us
  • Privacy Policy
  • Terms and Conditions

Copyright 2025 Manuals.Online. All Rights Reserved.