CONTENTS-1
CONTENTS
WELCOME & INTRODUCTION ............. 1-1
End Of Life Vehicle Directive .................. 1-1
Elddis Technical Approvals ...................... 1-2
GENERAL SAFETY ............................... 2-1
Please read before using your new
motorhome. ............................................. 2-1
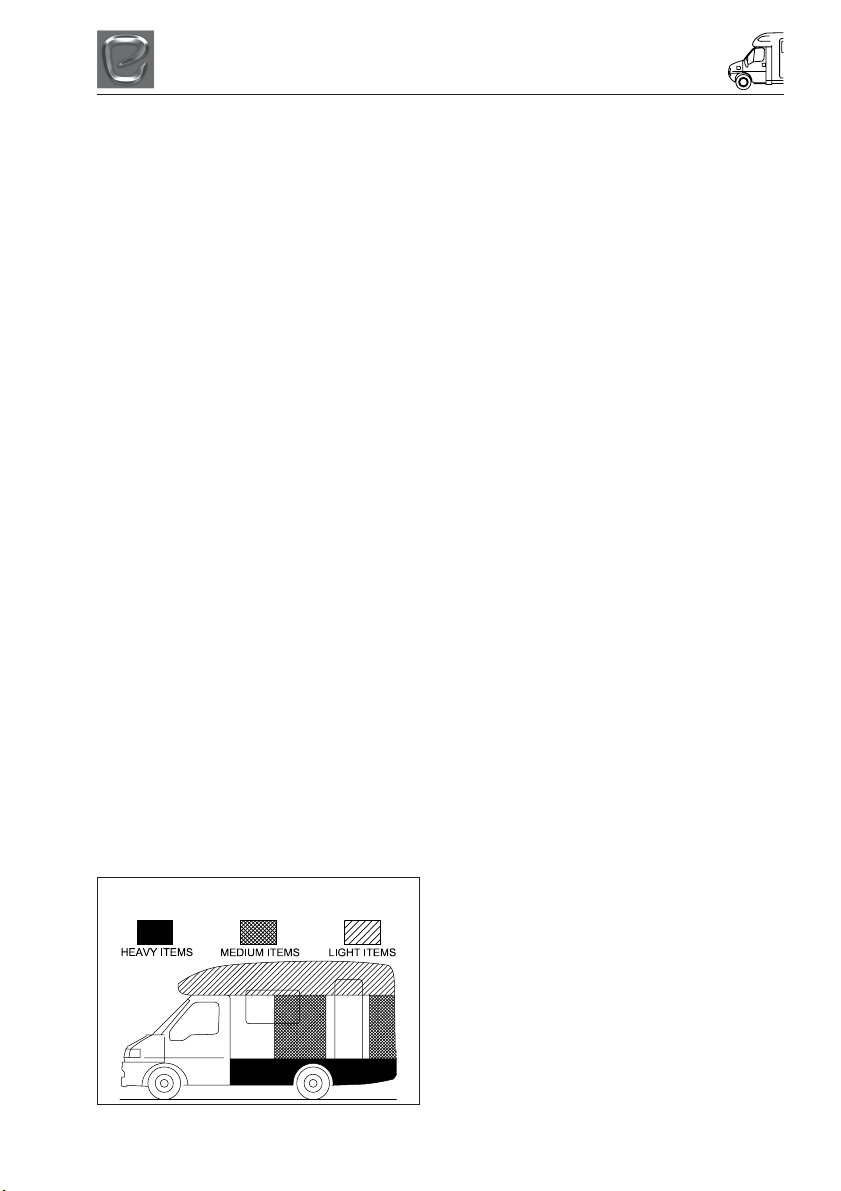
Proper And Safe Use Of Storage
Areas In Motorhomes .............................. 2-1
Ventilation ............................................... 2-2
High-Level Ventilation ............................. 2-2
Low-Level Ventilation .............................. 2-2
Ventilation in Separate Bedrooms ........... 2-2
Gas Dispersal Holes ............................... 2-2
Fire Safety ............................................... 2-2
Fire Extinguishers ................................... 2-2
In Case Of Fire ........................................ 2-2
Fire Retardant Foams ............................. 2-2
Habitation Door ....................................... 2-2
PREPARING FOR THE ROAD ............... 3-1
Motorhome Weights Explained ............... 3-1
Mass in Running Order ........................... 3-1
Maximum Technically Permissible
Laden Mass ............................................ 3-1
User Payload .......................................... 3-1
Loading ................................................... 3-1
Before Moving Off ................................... 3-1
Pulling Off ................................................ 3-2
Bicycle Racks .......................................... 3-2
Tow Bars ................................................. 3-2
MOTORWAY HANDLING ....................... 4-1
Best Practice ........................................... 4-1
Speed Limits ........................................... 4-1
Towing Your Motorhome ......................... 4-1
ARRIVING ON SITE ............................... 5-1
Check Site Regulations ........................... 5-1
Selecting A Pitch ..................................... 5-1
Lateral Levelling (Side To Side) .............. 5-1
Leveller Jack ........................................... 5-1
Ramp ...................................................... 5-1
GETTING STARTED .............................. 6-1
Electricity ................................................. 6-1
Power Supply Charger ............................ 6-1
12v Systems: .......................................... 6-1
Generator/Charger .................................. 6-1
Electricity Mains Supply .......................... 6-1
Connecting To Mains Supply On
Arrival at Site ........................................... 6-1
Disconnecting Mains Supply When
Leaving Site ............................................ 6-2
Overseas Electrical Connection .............. 6-2
Gas Supply ............................................. 6-3
Connection .............................................. 6-3
Gas Regulator ......................................... 6-3
Road Safe Gas Regulator ....................... 6-4
High Pressure Gas Hoses ...................... 6-5
Water System .......................................... 6-5
Filling your Fresh Water Tank ................. 6-5
Waste Water Tank ................................... 6-5
Draining Down Your Water System ......... 6-5
GAS SAFETY ADVICE ........................... 7-1
Facts about LPG ..................................... 7-1
Awning Spaces, LPG and Appliance
Exhaust ................................................... 7-1
LPG Gas System .................................... 7-1
ELECTRICAL SYSTEM .......................... 8-1
12v Power Supply ................................... 8-1
Battery Installation .................................. 8-1
Battery Maintenance ............................... 8-1
Generators / Charger .............................. 8-1
230v Power Supply ................................. 8-1
Mains Unit ............................................... 8-1
Resetting the RCD .................................. 8-2
Automatic Charging System ................... 8-2
Internal Lights ......................................... 8-2
Maximum Bulb Ratings for Internal Lights8-2
HOW TO USE YOUR MOTORHOMES
EQUIPMENT ........................................... 9-1
How To Operate Your Motorhome
Entrance Door ......................................... 9-1
Control Panel .......................................... 9-2
Circular Function Buttons ........................ 9-2
Oven, Hob and Grill ................................ 9-5
Safety ...................................................... 9-5
Use of the Burners .................................. 9-7
Use of the Electric Hotplate (if applicable)9-7
Use of the grill ......................................... 9-8
Use of the Oven ...................................... 9-8
Safe Cooking .......................................... 9-9
Temperature Control ............................... 9-9
Maintenance and Cleaning ................... 9-10
Refrigerator ............................................ 9-11
Operation ............................................... 9-11
Refrigerator ........................................... 9-14
Operation .............................................. 9-14
Alde Heating
Alde 3020 Control Panel ....................... 9-17
Microwave (When installed) .................. 9-20
Battery Charger ..................................... 9-21
Smoke Alarm ......................................... 9-21
Nuisance Alarms ................................... 9-22
Maintenance ......................................... 9-22
Cleaning your Alarm .............................. 9-22
Carbon Monoxide Alarm ....................... 9-23
Recognising Alarm Signals and
Warnings ............................................... 9-23
Using your Alarm ................................... 9-23
MY2019/Elddis Encore Motorhome