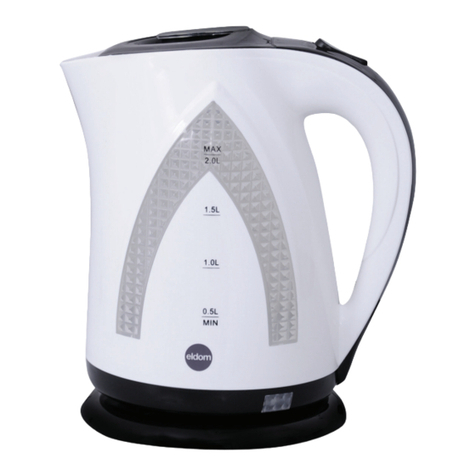
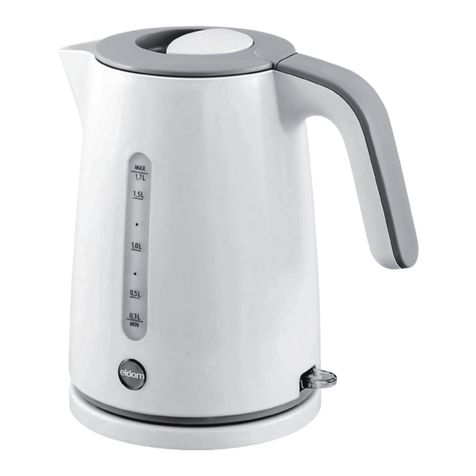
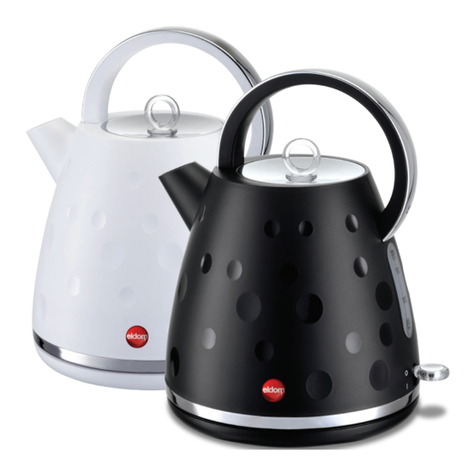
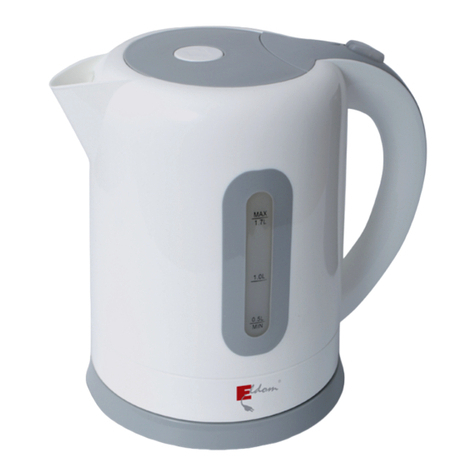
Eldom Lux C520 User manual

Eldom Sp. zo.o. •ul. Pawła Chromika 5a • 40-238 Katowice, POLAND
tel: +48 32 2553340 • fax: +48 32 2530412 • www.eldom.eu
C520lux
/ PL / CZAJNIK BEZPRZEWODOWY / EN / CORDLESS KETTLE
/ DE / KABELLOSER WASSERKOCHER / RU /
/ ES / HERVIDOR INALÁMBRICO


3
/PL/ Usuwanie wyeksploatowanych urządzeń elektrycznych i elektronicznych (dotyczy krajów Unii
Europejskiej iinnych krajów europejskich zwydzielonymi systemami zbierania odpadów).
Ten symbol na produkcie lub jego opakowaniu oznacza, że produkt nie powinien być zaliczany do odpadów
domowych. ektrycznych i elektronicznych. Prawidłowe usunięcie produktu zapobiegnie potencjalnym negatywnym
konsekwencjom dla środowiska naturalnego izdrowia ludzkiego, których przyczyną mogłoby być niewłaściwe usuwanie
produktu. Recykling materiałów pomaga w zachowaniu surowców naturalnych. Aby uzyskać szczegółowe informacje
o recyklingu tego produktu, należy się skontaktować z władzami lokalnymi, firmą świadczącą usługi oczyszczania lub
sklepem, wktórym produkt został kupiony.
/EN/ Disposal of used electrical and electronic equipment (applies to the European Union countries and other
European countries with separate waste collection systems).
The symbol on the product or its packaging indicates that the product should not be classied as household waste. It
should be handed over to acollection point that deals with the collection and recycling of electrical and electronic devices. Correct
disposal of the product prevents potential negative consequences for the environment and human health that could be caused
by improper disposal of the product. Material recycling helps to preserve natural resources. For detailed information on recycling
of this product, please contact your local authority, acleaning service provider or ashop where the product has been bought.
/DE/ Entsorgung von gebrauchten Elektro- und Elektronikgeräten (gilt für Länder der Europäischen Union und
andere europäische Länder mit getrennten Sammelsystemen).
Dieses Symbol auf dem Produkt oder seiner Verpackung weist darauf hin, dass das Produkt nicht als Hausmüll entsorgt
werden darf. Es muss zur Entsorgung bei der entsprechenden Sammel- und Recyclingstelle für Elektro- und Elektronikgeräte
abgegeben werden. Eine ordnungsgemäße Entsorgung des Produktes verhindert mögliche negative Auswirkungen auf die
Umwelt und die menschliche Gesundheit, die durch unsachgemäße Entsorgung des Produktes verursacht werden könnten. Das
Entsorgen von Materialien trägt zur Schonung der natürlichen Ressourcen bei. Weitere Informationen zur Entsorgung dieses
Produktes erhalten Sie bei Ihren örtlichen Behörden, dem kommunalen Entsorgungsbetrieb oder dem Geschäft, in dem Sie dieses
Produkt gekauft haben.
/RU/ Утилизация отработанного электрического и электронного оборудования (касается стран Европейского
Союза и других европейских стран с раздельными системами сбора отходов).
, .
.
, .
.
, , , , ,
, .
/ES/ Eliminación de aparatos eléctricos y electrónicos usados (aplicable alos países de la Unión Europea y aotros
países europeos con sistemas de recogida selectiva).
Este símbolo en el producto oen su embalaje indica que el producto no debe clasicarse como residuo doméstico. Se
debe entregar en un punto autorizado de recogida y reciclaje de aparatos eléctricos y electrónicos. La adecuada eliminación del
producto evitará las posibles consecuencias negativas para el medio ambiente y la salud humana que podrían ser causadas por
una eliminación inadecuada del producto. El reciclaje de materiales ayuda apreservar los recursos naturales. Para más información
sobre el reciclaje de este producto, póngase en contacto con su autoridad local, con un proveedor de servicios de reciclaje ocon
la tienda en que compró el producto.
4
WSKAZÓWKI BEZPIECZEŃSTWA
Przed pierwszym użyciem należy uważnie zapoznać się
zcałością treści niniejszej instrukcji.
1. Przewód przyłączeniowy podstawki zasilającej należy
podłączyć do gniazdka wyposażonego w kołek
ochronny o parametrach zgodnych z podanymi
w instrukcji.
2. Urządzenie należy odłączać od sieci zawsze poprzez
pociągnięcie za wtyczkę a nie za przewód zasilający.
3. Urządzenie ustawić na płaskiej, suchej i stabilnej
powierzchni.
4. Wyłączyć urządzenie z sieci, jeśli nie jest już ono
używane oraz przed jego czyszczeniem.
5. Przed włączeniem trzeba upewnić się czy w dzbanku
jest woda. Nie należy uruchamiać dzbanka bez wody.
6. Nie wolno nalewać wody powyżej poziomu max na
wskaźniku w dzbanku. Przepełnienie dzbanka grozi
niekontrolowanym wypływem gorącej wody na
zewnątrz (grozi to zalaniem połączeń elektrycznych i
zwarciem).
7. Nie pozostawiać urządzenia bez nadzoru.
8. Nie używać na wolnym powietrzu.
9. Niniejszy sprzęt może być użytkowany przez dzieci w
wieku co najmniej 8 lat i przez osoby o obniżonych
możliwościach zycznych, umysłowych i osoby
o braku doświadczenia i znajomości sprzętu, jeżeli
zapewniony zostanie nadzór lub instruktaż odnośnie
do użytkowania sprzętu w bezpieczny sposób, tak aby
związane z tym zagrożenia były zrozumiałe. Dzieci
nie powinny bawić się sprzętem. Dzieci bez nadzoru
nie powinny wykonywać czyszczenia i konserwacji
sprzętu.
10. Dzbanek włączony do sieci lub zawierający gorącą
wodę pozostawiony bez nadzoru może być
niebezpieczny dla dzieci.
11. Podczas mycia nie wolno zanurzać dzbanka w wodzie.

5
12. Nie chwytać urządzenia mokrymi rękami.
13. Nieprzenosićaninieprzesuwaćwtrakcieużytkowania.
14. Nie należy stawiać urządzenia w pobliżu źródeł ciepła.
15. Dzbanek może być używany tylko z dołączoną,
oryginalną podstawą.
16. Należy uważać na wydobywającą się z dzbanka
podczas gotowania gorącą parę.
17. Sprzęt tylko do użytku domowego, przy eksploatacji
przemysłowej, niezgodnej z przeznaczeniem lub
wbrew niniejszej instrukcji sprzedawca nie ponosi
żadnej odpowiedzialności, a uprawnienia z tytułu
gwarancji wygasają.
18. Nie wolno używać dzbanka z uszkodzonym
przewodem przyłączeniowym.
19. Jeżeli przewód zasilający ulegnie uszkodzeniu,
aby zapobiec niebezpieczeństwu musi on zostać
wymieniony w Serwisie Producenta.
20. Napraw sprzętu może dokonać jedynie autoryzowany
punkt serwisowy (lista serwisów w załączniku oraz na
stronie www.eldom.eu). Wszelkie modernizacje lub
stosowanie innych niż oryginalne części zamiennych
lub elementów urządzenia jest zabronione i zagraża
bezpieczeństwu użytkowania.
21. FirmaEldomSp.zo.o.nieponosiodpowiedzialnościza
ewentualneszkodypowstałewwynikuniewłaściwego
używania urządzenia.
UWAGA: Woreczek foliowy może stanowić niebezpieczeństwo – aby uniknąć
uduszenia workiem należy przechowywać go z daleka od niemowląt i małych dzieci.
OCHRONA ŚRODOWISKA
- urządzenie jest zbudowane z materiałów, które mogą być poddane ponownemu przetwarzaniu lub
recyklingowi
- należy je przekazać do odpowiedniego punktu, który zajmuje się zbieraniem i recyklingiem urządzeń
elektrycznych ielektronicznych
GWARANCJA
- urządzenie przeznaczone jest do użytku prywatnego wgospodarstwie domowym,
- nie może być używane do celów zawodowych,
- gwarancja traci ważność wprzypadku nieprawidłowej obsługi.
Warunki gwarancji podane są wzałączniku

6
OPIS OGÓLNY
1. Wylewka + ltr siatkowy
2. Pokrywa + przycisk otwierania pokrywy
3. Panel
4. Uchwyt
5. Wskaźnik poziomu wody
6. Podstawa
7. Zbiornik z podświetleniem
DANE TECHNICZNE
moc: 1850 - 2200 W
napięcie zasilania:
220-240V ~ 50Hz
pojemność: 1,8 l
PRZEZNACZENIE
Dzbanek bezprzewodowy C520 przeznaczony jest do gotowania wody. Wyposażony jest w funkcję
regulacji oraz podtrzymania temperatury (między 85-100°C).
Jednorazowo można zagotować 0,5 - 1,8 l wody. Maksymalny i minimalny poziom wody zaznaczony
jest na wskaźniku (5).
OBSŁUGA
Wszystkie zmiany ustawień potwierdzane są sygnałem dźwiękowym.
Podstawę urządzenia (6) należy ustawić na płaskiej, stabilnej i suchej powierzchni.
W podstawie jest miejsce na nadmiar przewodu. Ważne by przewód był wyprowadzony z podstawy
(6) przez specjalny rowek by urządzenie stało stabilnie.
Przed pierwszym użyciem dzbanka należy 2-3 krotnie zagotować wodę i wylać.
Urządzenie należy napełniać po otwarciu pokrywy (2). Pokrywę otwiera się przyciskiem (2).
Pokrywę należy zamknąć dociskając lekko aż do słyszalnego zatrzaśnięcia.
Nie należy napełniać dzbanka kiedy stoi na podstawie.
Dzbanek rozpoczyna pracę po włączeniu przycisku (A).
Praca urządzenia sygnalizowana jest podświetleniem zbiornika (7).
Dzbanek wyłącza się automatycznie po zagotowaniu wody. Pracę urządzenia można przerwać
w dowolnym momencie wyłączając urządzenie przyciskiem (A).
REGULACJA TEMPERATURY
Czajnik umożliwia zagrzanie wody do zadanej temperatury.
Aby wybrać żądaną temperaturę wody (40°C, 70°C, 80°C lub 90°C) należy naciskać przycisk (B), aż
zaświeci się odpowiedni wskaźnik na panelu (3).
Praca urządzenia sygnalizowana jest podświetleniem zbiornika (7). Kolor podświetlenia zależy od
wybranej temperatury. Po osiągnięciu zadanej temperatury, czajnik wyłączy się.
INSTRUKCJA OBSŁUGI
CZAJNIK BEZPRZEWODOWY C520
PL
1
2 3
4
56
7
A B

7
Uwaga: Zdjęcie czajnika z podstawy powoduje skasowanie ustawień.
Pracę urządzenia można przerwać w dowolnym momencie wyłączając urządzenie przyciskiem A.
PODŚWIETLENIE
40°C: zielone światło.
70°C: niebieskie światło.
80°C: żółte światło
90°C: purpurowe światło.
PODTRZYMANIE TEMPERATURY
Podtrzymanie temperatury jest możliwe tylko po podgrzaniu wody do temperatury 100°C.
Aby włączyć funkcję podtrzymania temperatury należy nacisnąć i przytrzymać przycisk A, aż do
usłyszenia 2 dźwięku.
Włączenie funkcji będzie sygnalizowane migającym wskaźnikiem oraz podświetleniem zbiornika (7).
Czajnik przez 2 godziny będzie kontrolował temperaturę.
Po spadku temperatury wody do 85°C podgrzeje ją do 100°C.
Zdjęcie czajnika z podstawy powoduje skasowanie ustawień.
CZYSZCZENIE I KONSERWACJA
- przed czyszczeniem odłączyć urządzenie od sieci,
- czyścić wolno tylko zimne urządzenie,
- podczas mycia nie wolno zanurzać dzbanka w wodzie,
- zewnętrzne powierzchnie można czyścić przy pomocy wilgotnej ściereczki z dodatkiem płynu do
mycia naczyń,
- osad z wody na wewnętrznych powierzchniach należy usuwać ściereczką zwilżoną w occie, po
czym imbryk wypłukać czystą wodą
- w przypadku osadzania się kamienia wapiennego na płycie grzejnej należy go regularnie usuwać
w podany niżej sposób:
- zagotować w dzbanku - 0,75 l wody
- wyłączyć dzbanek oraz wyjąć wtyczkę z kontaktu
- wlać do dzbanka - 0,1l octu
- pozostawić roztwór na kilka godzin w imbryku
- wylać roztwór, wypłukać czajnik czystą wodą
- zagotować w dzbanku wodę w ilości 1l
- wylać wrzątek i wypłukać wnętrze dzbanka czystą wodą
- zaniechanie usuwania kamienia z grzałki powoduje przyśpieszone zużycie elementu grzejnego
dzbanka,
- szkody wynikłe w przypadku stosowania zbyt agresywnych środków do usuwania kamienia
dostępnych w handlu nie są objęte gwarancją producenta dzbanka,

8
SAFETY INSTRUCTIONS
Carefully read all instructions before using the appliance.
1. Connect the kettle only to a suitably earthed socket
compatible with the parameters indicated in the
instructions.
2. The appliance should be placed on a stable and dry
surface.
3. Before operating, make sure that there is water inside
the kettle. You should not switch the kettle on when
empty.
4. You must not exceed the maximum water level mark.
Filling over the maximum mark on the exterior of the
kettle may result in the boiling water splashing out
from the kettle (which may result in a short-circuit).
5. The device can be used by children aged 8 and
older and by persons with limited physical, sensory
or mental capabilities, or persons without sucient
experience and knowledge only under supervision
or if previously instructed on the safe use of the
appliance and the possible risks. Children shall not
play with the appliance. Cleaning and maintenance
that are the responsibility of the user shall not be
carried out by children without supervision. Protect
the appliance and the power cord against children
under 8 years old.
6. Do not leave the kettle unattended when in use,
when plugged-in or containing hot water, the kettle
may expose children to hazard, if left unattended.
7. Never immerse the kettle in water while washing-up.
8. You should be cautious about the steam coming from
the kettle during the heating process.

9
9. This appliance is designed for domestic use only;
when used for industrial purposes outside the
product’s specications, or used not in accordance
with the instructions,no liability is assumed and the
warranty is nullied.
10. Donotusetheappliance,ifthepowercordisdamaged
or if the appliance fell down or was otherwise
damaged. The appliance should be repaired by an
authorized Service Centre; a list of Service Centres
can be found in the attachment and on the website
www.eldom.eu
11. The appliance can be repaired only in an authorised
Service Centre. Any modernisation or application of
spare parts or elements other than the original ones
is forbidden and dangerous for the user.
12. The company Eldom Sp. z o.o. shall not be liable
for any damage caused by inappropriate use of the
appliance.
13. Thiskettlemustbeusedwiththepowerbasesupplied.
WARNING: Plastic bag can be dangerous, to avoid danger of suocation keep this bag
away from babies and children.
ENVIRONMENTAL PROTECTION
- The appliance is made of materials which can be recycled.
- It should be handed over to the applicable collection point for the recycling of electrical and electronic
equipment.
WARRANTY
- This appliance is designed for domestic use only.
- It cannot be used for professional purposes or for other than the intended use.
- Improper use will nullify the guarantee.

10
INSTRUCTION MANUAL
CORDLESS KETTLE C520
EN
GENERAL DESCRIPTION
1. Spout + net lter
2. Opening lid + lid release button
3. Control panel
4. Handle
5. Water level indicator
6. Base
7. Illuminated jug
TECHNICAL DATA
power: 1850 - 2200W
mains voltage:
220-240V, ~50Hz
capacity: 1.8 litre
INTENDED USE
The C520 wireless kettle is intended for boiling water. It is tted with the function of temperature
control and hold (85 – 100°C). The capacity of the kettle allows to boil 0.5–1.8 l of water. The maximum
and minimum level of water is marked with the indicator (5).
OPERATION
All changes of settings are conrmed with audible signal.
Place the base of the appliance (6) on at, stable and dry surface.
Excess cord may be kept inside the base. Make sure that the cord protrudes from the base (6) through
the special groove to have the appliance stable.
Boil water 2-3 times and discard before the rst use of the kettle.
Fill in the appliance after opening the cover (2).
Do not ll in the kettle while on the base.
The kettle will be activated after pressing the button (A).
Operation of the appliance is signaled with illumination of the jug (7).
The kettle will be automatically turned o when the water is boiled.
The appliance may be turned o at any time with the button (A).
TEMPERATURE CONTROL
The kettle allows to warm up water to the pre-set temperature.
To select the required temperature of water (40°C, 70°C, 80°C or 90°C), press the button (B) to cause
illumination of the relevant indicator on the panel (3).
Operation of the appliance is signaled with illumination of the jug (7). Illumination color depends on
the selected temperature.
1
2 3
4
56
7
A B

11
When the preset temperature is reached, the kettle will turn o.
Note. Taking the kettle o the base cancels the settings.
The appliance may be turned o at any time with the button (A).
ILLUMINATION
40°C: green light.
70°C: blue light.
80°C: yellow light.
90°C: purple light.
TEMPERATURE HOLD – 85-100°C
Press the button (A) and hold it for 3 seconds.
Activation of the function will be signalled with ashing indicator and illumination of the jug (7).
The kettle will hold the temperature (85-100°C) for 2 hours, and then it will automatically turn o.
Taking the kettle o the base cancels the settings.
CLEANING AND MAINTENANCE
- allow the unit to cool down completely before cleaning,
- do not immerse the kettle in water while washing up,
- the outside of the kettle may be wiped over with a damp cloth and washing-up liquid,
- water stains inside the kettle can be removed by rubbing with a cloth moisten with white vinegar;
rinse the inside with water afterwards,
- limescale should be removed in the following way:
- ll the kettle with 0.75 litre of water and bring it to boil,
- switch the kettle o and disconnect the kettle from the power supply,
- pour 0.1 litre of white vinegar into the kettle,
- allow to stand overnight,
- discard the solution and rinse the inside with water,
- ll the kettle with 1 litre of water and bring to boil,
- discard the water and rinse the inside with water,
- no timely removal of the scale from the heating element results in the heating element’s quicker
wear,
- any damage resulting from applying harsh descalling products available in the market are not
covered by the producer’s warranty,
- if the power cord is damaged, it can be replaced only by an especially constructed one (with
appropriate plugs and endings).

12
SICHERHEITSHINWEISE
Vor dem ersten Gebrauch machen Sie sich bitte mit der
ganzen Bedienungsanleitung bekannt.
1. Das Anschlusskabel des Verspeisungssockels soll an
eine Steckdose mit Schutzbolzen nach den in der
Anleitung angegebenen Parametern angeschlossen
werden.
2. Das Gerät soll auf einer stabilen und trockenen
Oberäche aufgestellt werden.
3. Vor dem Einschalten soll man sich vergewissern,
dass es im Wasserkocher Wasser gibt. Man soll
den Wasserkocher ohne Wasser nicht in Betrieb
setzen. Das Wasser darf nicht über den markierten
maximalen Stand eingefüllt werden. Eine Überfüllung
des Wasserkochers kann ein unkontrolliertes
Ausdringen von heiβem Wasser zur Folge haben
(Gefahr einer Befeuchtung der Stromanschlüsse und
Kurzschlussgefahr).
4. Lassen Sie nicht das Gerät ohne Aufsicht.
5. Das Gerät kann von den Kindern über Lebensjahr
benutzt werden. Personen, die körperliche,
sensorische und geistliche Beeinträchtigungen
aufweisen oder keine ausreichenden Erfahrung oder
kein ausreichendes Wissen haben, können das Gerät
nur dann benutzen, wenn sie sich unter Aufsicht einer
anderen Person benden oder über einen sicheren
GebrauchdesGerätsunddamitverbundeneGefahren
unterrichtet werden. Kinder dürfen mit dem Gerät
nicht spielen. Die Reinigung und Wartungsarbeiten,
die dem Benutzer obliegen, dürfen von den Kindern
ohne Aufsicht nicht durchgeführt werden. Das Gerät
und das Netzkabel sind vor Kindern unter Lebensjahr
zu schützen.

13
6. Ein unbeaufsichtigter am Netz angeschlossener oder
heiβ es Wasser enthaltender Wasserkocher kann für
Kinder gefährlich sein.
7. BeimWaschen darf der Wasserkocher nicht ins Wasser
getaucht werden.
8. Man soll auf den beim Kochen herauskommenden
heiβ en Dampf aufpassen.
9. Das Gerät ist nur für den Haushaltsgebrauch
bestimmt. Bei in dustrieller, bestimmungs- oder
anleitungswidriger Verwendung übernimmt der
Hersteller keine Haftung und die Garantierechte
erlöschen.
10. Ein Wasserkocher mit beschädigtem Anschlusskabel
darf nicht benutzt werden. Im Fall einer Beschädigung
sollmansichmitdemHersteller-ServiceinVerbindung
setzen. Serviceverzeichnis nden Sie in der Anlage
oder auf www.eldom.eu.
11. Reparaturen durfen nur durch eine autorisierte
Servicestelle durchgeführt werden. Alle
Modernisierungen oder Verwendung anderer
Ersatzteile bzw. Elemente als die Originalen ist
verboten und gefährdet den sicheren Gebrauch.
12. Der Wasserkocher darf nur mit dem beigelegten
originalen Sockel benutzt werden.
VORSICHT! Plastiktüten können gefährlich sein! Erstickungsgefahr! Bewahren Sie die
Tüte sicher vor Kindern auf!
Přii nasazeni na hlavu nebezpečí udušeni!! Tento sáček není hračka!!!
UMWELTSCHUTZ
- Das Gerät ist aus wieder verwendbaren oder recyclebaren Stoen gebaut.
- Es soll an einer entsprechenden für Recycling elektrischer und elektronischer Geräte zuständigen.
- Sammelstelle abgegeben werden.
GARANTIE
- Das Gerät ist für den Privatgebrauch im Haushalt bestimmt.
- Es darf nicht für beruiche Zwecke benutzt werden.
- Bei unrichtiger Bedienung erlischt die Garantie.

14
BEDIENUNGSANWEISUNG
KABELLOSER WASSERKOCHER C520
DE
ALLGEMEINE BESCHREIBUNG
1. Ausguss + Gitterlter
2. Deckel + Knopf zum Deckelönen
3. Display
4. Gri
5. Wasserstandsanzeige
6. Sockel
7. Behälter mit Beleuchtung
TECHNISCHE DATEN
Leistung: 1850 - 2200W
Versorgungsspannung:
220-240V, ~50Hz
Füllmenge: 1,8 l
VERWENDUNG
Der kabellose Wasserkocher C520 ist für das Kochen von Wasser konzipiert. Sie hat
Temperaturwahlfunktion und Warmhaltefunktion (85-100°C). Auf einmal kann man 0,5 – 1,8 l Wasser
bis zum Siedepunkt erhitzen. Der maximale und minimale Wasserstand ist mit der Anzeige (5)
gekennzeichnet.
BEDIENUNG
Alle Änderungen der Einstellungen werden durch ein Tonsignal bestätigt.
Der Gerätsockel (6) soll auf einer achen, stabilen und trockenen Oberäche aufgestellt werden.
Im Sockel gibt es Platz für überüssiges Kabel. Es ist wichtig, dass das Kabel aus dem Sockel (6) über
eine spezielle.
Rille ausgeführt wird, damit das Gerät stabil steht.
Vor dem ersten Gebrauch soll man 2-3 Mal Wasser kochen und ausgießen.
Der Wasserkocher soll nach dem Deckelönen (2) gefüllt werden.
Das Wasser soll nicht eingefüllt werden, wenn der Wasserkocher auf dem Sockel steht.
Der Wasserkocher wird durch Einstellung der Taste (A) in Betrieb gesetzt.
Der Betrieb wird durch die Beleuchtung des Behälters (7) signalisiert.
Nachdem das Wasser bis zum Siedepunkt erhitzt wird, wird der Wasserkocher automatisch
ausgeschaltet.
Der Betrieb kann jederzeit durch Einstellung der Taste (A) unterbrochen werden.
TEMPERATUREINSTELLUNG
Mit dem Wasserkocher können Sie Wasser bis zur gewählten Temperatur erhitzen.
Um die gewünschte Temperatur (40°C, 70°C, 80°C oder 90°C) zu wählen, drücken Sie die Taste (B), bis
eine entsprechende Anzeige auf dem Display (3) leuchtet.
Der Betrieb wird durch die Beleuchtung des Behälters (7) signalisiert. Die Farbe der Beleuchtung
1
2 3
4
56
7
A B

15
hängt von der gewählten Temperatur ab.
Nachdem die vorgegebene Temperatur erreicht wird, schaltet sich der Wasserkocher aus.
Hinweis: Nach der Abnahme des Wasserkochers vom Sockel werden die Einstellungen
zurückgesetzt.
Der Betrieb kann jederzeit durch Einstellung der Taste (A) unterbrochen werden.
BELEUCHTUNG
40°C: grün.
70°C: blau.
80°C: gelb.
90°C: purpurfarbig.
WARMHALTEN - 85-100°C
Halten Sie die Taste (A) 3 Sekunden lang gedrückt.
Die Aktivierung der Funktion wird durch die blinkende Anzeige und die Beleuchtung des
Wasserbehälters (7) signalisiert.
Der Wasserkocher wird die Temperatur (85-100°C) 2 Stunden lang aufrechterhalten, dann schaltet er
sich automatisch aus.
Nach der Abnahme des Wasserkochers vom Sockel werden die Einstellungen zurückgesetzt.
REINIGUNG UND WARTUNG
- nur kaltes Gerät darf gereinigt werden,
- beim Waschen darf der Wasserkocher nicht ins Wasser getaucht werden,
- äußere Oberächen können mit einem feuchten Tuch und Spülmittel gereinigt werden
- wasserrückstände an inneren Oberächen können mit einem mit Essig angefeuchteten Tuch
entfernt werden, dann den Wasserkocher mit klarem Wasser spülen
- wenn sich an der beheizten Platte Kalkstein ablagert, soll er regelmäβig wie folgt entfernt werden:
- im Wasserkocher 0,75 l Wasser zum Kochen bringen
- den Wasserkocher ausschalten und den Stecker aus der Steckdose herausnehmen
- in den Wasserkocher 1l Essig eingieβen
- die Lösung für einige Stunden im Wasserkocher lassen
- die Lösung ausgieβen, den Wasserkocher mit klarem Wasser spülen
- im Wasserkocher 1l Wasser zum Kochen bringen
- siedendes Wasser ausgieβen und den Wasserkocher mit klarem Wasser spülen

16
МЕРЫ БЕЗОПАСНОСТИ
1.
,
.
2. .
3. 3. ,
. .
4. 4.
.
(
).
5. .
6. 8 ,
,
,
. .
.
8 .
7. , o
, -
8. .

17
9.
.
10.
,
,
,
.
11. K
.
.
www.eldom.eu.
12. K
.
, .
13. K
.
Внимание! Полиэтиленовый пакет может быть опасным – чтобы избежать
удушения мешком, необходимо хранить его в недосягаемом для младенцев и
маленьких детей месте.
ЗАЩИТА ОКРУЖАЮЩЕЙ СРЕДЫ
- , .
- .
ГАРАНТИЯ
- .
- .

18
ИНСТРУКЦИЯ ПО ЭКСПЛУАТАЦИИ
C520
RU
ОБЩАЯ ИНФОРМАЦИЯ
1. ,
2. K + o
3.
4.
5.
6.
7.
ТЕХНИЧЕСКАЯ
ХАРАКТЕРИСТИКА
мощность: 1850 - 2200W
напряжение в сети:
220-240 ~ 50
объем: 1.8
НАЗНАЧЕНИЕ
C520 .
(85-100°C).
0,5 - 1,8 .
(5).
ОБСЛУЖИВАНИЕ
.
(6) , .
.
(6) ,
.
2-3 ,
.
, (2)
, .
(7),
.
, .
, (A).
РЕГУЛИРОВКА ТЕМПЕРАТУРЫ
.
(40°C, 70°C, 80°C 90°C),
(B) (3).
(7).
1
2 3
4
56
7
A B

19
.
, .
Внимание! Снятие чайника с подставки приводит к сбросу настроек.
,
(A).
ПОДСВЕТКА
40°C: .
70°C: .
80°C: .
90°C: .
ПОДДЕРЖАНИЕ ТЕМПЕРАТУРЫ - 85-100°C
(A) 3 .
(7).
(85-100°C) 2 ,
.
.
ЧИСТКА И УХОД
-
-
-
- ,
,
- ,
:
- 0.75
-
- 0.1
-
- ,
- 1
- ,

20
SEGURIDAD
Antes del primer uso, lea atentamente todo el contenido
de este manual
1. El cable de conexión de la base de alimentación debe
estar conectada a la toma con conexión a tierra con
los parámetros conformes a las de instrucción.
2. Desconecte el aparato de la red siempre tirando del
enchufe, no del cable.
3. Hay que poner el dispositivo sobre una supercie
plana, seca y estable.
4. Desconecte el dispositivo si no está ya en uso y antes
de limpiarlo
5. Antes de encender el hervidor hay que asegurarse de
que el agua está en la jarra. no se puede encender el
hervidor sin agua.
6. No vierta agua por encima del nivel máximo en una
jarra. La cantidad demasiada del agua amenaza con
no controlada salida de agua caliente lo que puede
causar la inundación de las conexiones eléctricas y el
cortocircuito.
7. No deje el dispositivo sin vigilancia.
8. No utilice al aire libre.
9. El aparato puede ser utilizado por niños mayores
de 8 años y personascon capacidades físicas,
sensoriales o mentales reducidas o sin suciente
experiencia y conocimientos sólo cuando están bajo
la supervisión o hayan recibido instrucciones sobre
el uso seguro del aparato y los riesgos potenciales.
Los niños no deben jugar con el aparato. La limpieza
y el mantenimiento que corren a cargo del usuario
no pueden ser realizados por niños sin supervisión.
Proteger el aparato y el cable de alimentación de los
niños menores de 8 años.
Table of contents
Languages:
Other Eldom Kettle manuals

Eldom
Eldom humie CS10 User manual

Eldom
Eldom Lumi C510B User manual

Eldom
Eldom wave C465 User manual

Eldom
Eldom CS7K User manual

Eldom
Eldom Neev User manual

Eldom
Eldom hemi CS20 User manual

Eldom
Eldom 5908277384999 User manual

Eldom
Eldom litea C410 User manual

Eldom
Eldom frano C341 User manual

Eldom
Eldom C400C User manual

Eldom
Eldom Jewel Vegas CV900W User manual

Eldom
Eldom C250 User manual

Eldom
Eldom minii C110 User manual

Eldom
Eldom C12N User manual

Eldom
Eldom Nelo User manual

Eldom
Eldom eclipse C450s User manual

Eldom
Eldom ater C470 User manual

Eldom
Eldom C160 User manual

Eldom
Eldom C175 User manual

Eldom
Eldom C170 User manual