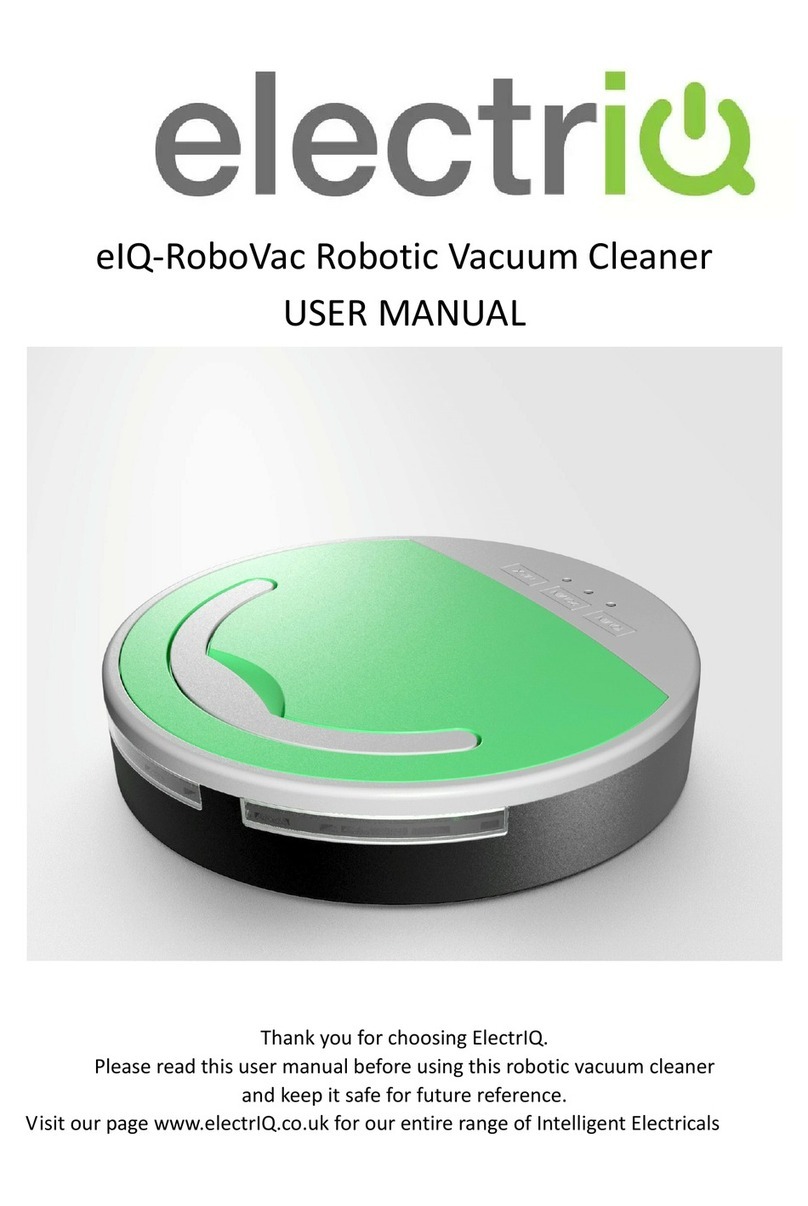
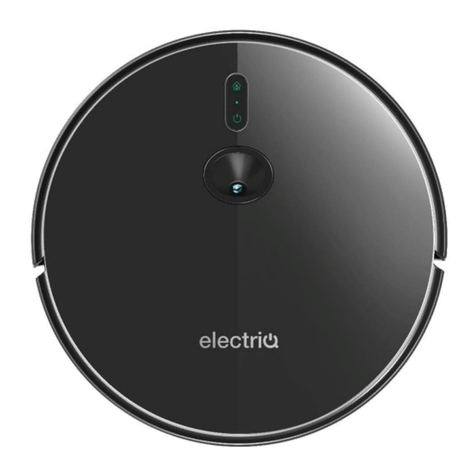
ElectrIQ iQlean-LR02C30 User manual

USER MANUAL
Robot Vacuum Cleaner
With Auto Empty Dock and Smart App
iQlean-LR02C30
Thank you for choosing this electriQ robot vacuum cleaner. The instruction manual
is designed to provide you with all the required instructions related to the use and
maintenance of this appliance. In order to operate the unit correctly and safely,
please read this instruction manual carefully before use.


3
CONTENTS
SAFETY PRECAUTIONS
4
PRODUCT OVERVIEW
6
PARTS LIST
6
PRODUCT DIAGRAMS
7
SETTING UP THE CHARGING BASE
9
SETTING UP THE ROBOT
10
BEFORE OPERATION
11
QUICK START GUIDE
12
REMOTE CONTROL
13
USING THE WATER TANK AND MOP
15
CLEANING AND MAINTENANCE
16
SIDE BRUSH CLEANING AND REPLACEMENT
16
CLEANING OF SENSORS AND CHARGING CONTACTS
16
DUST BOX AND FILTER CLEANING
17
CLEANING THE WATER TANK
19
REPLACING THE DUST BAG
19
CLEANING THE MAIN BRUSH
20
BATTERY REPLACEMENT / REMOVAL
21
APP CONTROL
22
DOWNLOADING THE APP
22
CONNECTING THE ROBOT TO THE APP
24
CONTROLLING THE ROBOT THROUGH THE APP
26
SMART SCENES AND AUTOMATION
28
APP TROUBLESHOOTING
30
TROUBLESHOOTING
31
EXPLODED VIEW
32
SPARE PARTS
32
TECHNICAL SPECIFICATION
33
SUPPORT
33

4
SAFETY PRECAUTIONS
Important
•Carefully read the instructions before operating the unit. Please retain
the manual for future reference.
•This appliance is for indoor use only.
•Rating: This unit must be only connected to a 220-240 V, 50/60 Hz
outlet. Always check the rating label against your electrical supply.
•If you are in any doubt about the suitability of your electrical supply
have it checked and, if necessary, tested by a qualified electrician.
•This robotic vacuum cleaner has been tested and is safe to use.
However, as with any electrical appliance - use it with care.
•Disconnect the power plug from the unit before dismantling,
assembling or cleaning.
•Do not clean the unit by spraying it or immersing it in water.
•Never operate this appliance if the cord or power supply is damaged.
Ensure the power cord is not stretched or exposed to sharp objects /
edges.
•Do not use the appliance if any part or accessory is damaged or
defective.
•Avoid touching any moving parts of the appliance.
•Never insert fingers, or any other objects into the robot while robot is in
operation.
•This appliance is not intended for use by persons (including children)
with reduced physical, sensory or mental capabilities. It is also not
intended for use by those with a lack of experience and knowledge,
unless they have been given supervision or instruction concerning the
use of the appliance by a person responsible for their safety.
•Do not leave children or animals unsupervised with this appliance.
•Only use the original battery and charging base from the manufacturer,
any third-party components may damage the unit.
•Any service other than regular cleaning should be performed by an
authorised service representative. Failure to comply could result in a
voided warranty.
•Do not use the appliance for any purpose other than its intended use.
•Do not use the appliance in places with high humidity (>80%RH).
•Do not immerse the robot in water or other liquids. If the robot is
immersed by mistake, do not touch it with your hands. The unit must
not be used and should be disposed of responsibly.
•Do not use if liquids are on the floor.
•Do not use in an environment where there is a risk of fire or explosion.
•Do not use to clean printer toner spilt on the floor as this could cause a
fire.

5
•Before using the robot cleaner, remove any fragile objects from the
floor e.g. glasses, bottles, candles, lamps. Also remove any sharp
metals, nails, sharp glass pieces or any other objects that could block
or damage the robot.
•Do not place any object on the top of the robotic cleaner.
•Do not leave any fragile objects on the side of the tables, cabinets etc
where the robot could bump into and cause them to fall.
UNIT SAFETY PROTECTION AND PERFORMANCE TIPS
•Make sure unit is assembled correctly before use.
•Charge for 24 hours before operating first time. If not using the robot
for a long time please fully charge and remove the battery.
•Always use the charging base provided.
•Clean the robot and brushes regularly. Empty and vacuum the dust
container.
•If the robot become entangled, remove brushes, clean the debris and
reassemble.
BATTERY CARE
•Ensure that the battery is kept charged. If the battery is exhausted it
should be charged ASAP.
•Only use the charging base or the specified charger for charging the
battery, other chargers may damage the battery and pose a risk of fire.
•Only use genuine replacement batteries.
•If the unit is not going to be used for a while, it should be fully charged,
switched off, and the battery disconnected, to help prevent
deterioration of the battery.

6
PRODUCT OVERVIEW
Your robot vacuum cleaner is designed for cleaning homes, hotel rooms and small
offices. It provides excellent cleaning for a variety of floor types including:
•Wooden floors
•Tiled floors
•Stone floors
•Short-pile carpets (less than 2cm deep)
FEATURES OF YOUR ROBOT VACUUM CLEANER
•Smart cleaning modes designed to suit your different cleaning needs.
•Great cleaning efficiency and power saving.
•Charging base both recharges the vacuum’s battery and unloads the robot’s dust
into its own dust box for ease of emptying.
•User-friendly design –press the power button to start cleaning, follow the Voice
Prompt to get the robot working for you.
•Dust box and pre-filter can be easily rinsed under the tap.
PARTS LIST
Robot
Charging Base
Remote Control
Water Tank
2 x Mop
2 x Side Brushes
(Pairs)
2x AAA batteries
(Not Included)
HEPA and Sponge
Filter

7
PRODUCT DIAGRAMS
Bumper
Control Panel
Wi-Fi Indicator
Laser Module
MAIN BODY (TOP)
MAIN BODY (UNDERSIDE)
MAIN BODY
Front Wheel
DC Power Jack
Power Switch
Dust Box /
Water Tank
Release Button
Dust Collection
Port
Dust Box
Suction Port /
Main Brush
Side Wheel
Battery Cover
Side Brush
Charging
Contacts

8
DUST BOX
WATER TANK & MOP
CHARGING BASE
Pre-Filter
HEPA Filter
Sponge Filter
Dust Box
Cleaning Tool
Dust Box Contacts
Tank Sealing Cap
LED Status Indicator
Body
Dust Bag
Lid
Mop
Water Tank
Charging Port
Power Cord
Dust Bag Guide Plate
Dust Bag Handle
Dust Box Suction Port
Note: HEPA and Sponge filters are
inserted using the flap on the top of the
Dust Box.
Dust Box Cover

9
SETTING UP THE CHARGING BASE / DUST BOX
Place the charging base within 5 cm of the
back wall with no objects 1 m to either side
and 2 m in front.
Keep away from strongly reflective surfaces
such as mirrors.
Once the base is positioned, it can be
plugged in to a suitable socket.
Fit the dust bag into the charging base, by opening the lid,
and slide the cardboard handle on the bag into the slot on
the left-hand side within the dust box. The status indicator
on the front of the vacuum will go from flashing red, to a
constant white light to show the bag is inserted properly.
Note: Ensure that the dust bag is connected the correct
way around with the handle facing up.
DUST BOX STATUS INDICATOR
LED
Reason
Fast Flashing Red
Dust bag not installed properly.
Slow Flashing Red
Suction pipe blocked. Check dust bag is
inserted correctly and for any blockage.
Constant White
Dust box is operational
Rapid Flash White
Dust collection complete.
Slow Flash White
Charging base available / robot on charge.
Guide plate
Handle
Status indicator

10
SETTING UP THE ROBOT
Remove the dust box from the rear of the
robot by pressing the release button on the
rear of the dust box, and sliding the dust box
out of the robot.
Open the hatch on the top of the dust box. Insert the
Sponge filter first, followed by the HEPA filter,
ensuring that the tags on the HEPA filter are on the
top to aid removal.
Once the filters are fitted, close the hatch, before
replacing the dust box in the robot.
Before using the robot for the first time it should be
charged for 12 hours. With the robot turned on using
the switch on the side, Place the contacts on the front
of the robot onto the contacts on the charging base.
The power light on the robot will start to flash to
indicate the robot is charging. If you are struggling to
locate the robot on the base, press the power button
on the top to start the robot, and then press the home
button to return the robot to the base for emptying
and charging.
Insert 2 x AAA batteries (Not Supplied) into the rear
of the remote control, ensuring the correct polarity is followed.
Once charging is complete, the Robot is ready for use.

11
BEFORE OPERATION
Before using your robot vacuum cleaner:
oArrange your furniture so that your robot can move around freely.
oBlock off hazards such as stairways and bannisters to prevent the risk of falling.
oAvoid blocking corridors and narrow walkways, the robot will avoid those areas.
Also ensure any objects that are under 2cm tall are removed to prevent the risk of
the robot climbing and jamming.
oTake care to remove small objects from the floor, for example power leads, toys
etc as these may get tangled in the robot’s mechanism.
Do not use the mopping function on carpet and if you have any loose rugs, roll
them up to keep them away from the vacuum.

12
QUICK START GUIDE
•Ensure the charging base and robot have been set up following the instructions on
the previous page.
Press the POWER button to start cleaning. The robot will map out the room and start off
at the edges of the room.
Press the HOME button to return the robot to the charging base to empty and charge.
The robot will also return to the base when it has finished cleaning or when the battery is
low. Note: Power must be connected to the base for the home function to work correctly.
Press and hold the POWER button for 5 seconds to change the WI-FI setup mode. See
the APP Control section for more details.
Alternatively, much more functionality can be gained by using the supplied remote
control or the smart app.
STATUS LIGHTS ON THE ROBOT
LED
Reason
Power Button Flashing Red
Robot is stuck and needs assistance.
It will stop cleaning until fixed.
Power Button Flashing White
The Robot is recharging.
Power Button Constant White
The Robot is cleaning.
WI-FI Indicator Rapid Flashing White
The Robot is in WI-FI connection mode.
WI-FI Indicator Constant White
The Robot is connected to the WI-FI.
Home Button Flashing White
Returning to charging base.
HOME BUTTON
POWER BUTTON
WI-FI INDICATOR

13
REMOTE CONTROL
POWER
Press the power button to change the unit between Sleep mode
(Ready to work) and Standby (Power saving). The robot will also
automatically enter standby if left inactive for 10 minutes.
PLAN
CLEANING
With the unit in Sleep mode, press the
PLAN CLEANING button to enter plan
cleaning mode. The robot will travel
around the edge of the room, avoiding
any obstacles before cleaning the room
in an S shaped pattern.
SPOT
CLEANING
With the unit in Sleep mode, press the
SPOT CLEANING button to enter spot
cleaning mode. The robot will intensively
clean a specific area in a spiral pattern
except when too close to the charging
base or other obstacles. This mode is
especially useful if there is a
concentrated area of dust or debris. The
unit will stop cleaning after two minutes.
Power On/Off
Display
Return for Auto Charging
Direction
Clock Setting
Schedule Setting
Plan Cleaning
(Smart Cleaning)
Suction Cleaning
Spot Cleaning
Confirm

14
MANUAL
CLEANING
The arrow buttons can be used to take control of the robot vacuum,
Press the UP and DOWN buttons to move forwards and
backwards, and the LEFT and RIGHT buttons to rotate. Press the
PLAY/PAUSE button on the centre to turn the suction on and off. If
no input is received for 10 seconds the robot will enter standby.
RETURN TO
HOME
Press the RETURN TO HOME button to stop the current operation
and the robot cleaner will return to the base unit. It will first enter
the base in reverse to empty the dust box, before leaving the base,
turning around, and then re-entering to charge.
Note: During the return to home function, the robot may pause in
position a number of times, while it accurately works out the
movement needed to ensure a reliable connection with the base.
The vacuum will also return to home when the planned cleaning is
finished, or when the battery level is low.
SUCTION
BUTTON
VACUUM MODE: When the dust box is attached, press the
suction button to change the suction level between 1 and 2. The
indicator on the remote will show the current setting.
MOP MODE: When the water tank is attached, press the suction
button to change the water output level between 1 and 2. The
indicator on the remote will show the current setting.
CLOCK
BUTTON
Press the CLOCK button to set the clock. Use the UP and DOWN
arrows to change the time and the LEFT and RIGHT buttons to
change between hours and minutes. Press the PLAY/PAUSE
button to confirm the time set.
SCHEDULE
BUTTON
The Schedule can be used to set a daily start time for the robot.
Press the SCHEDULE button to activate the Schedule, and use the
UP and DOWN arrows to change the time and the LEFT and
RIGHT buttons to change between hours and minutes. Press the
PLAY/PAUSE button to save the scheduled start.
A much more comprehensive timer can be set using the App.

15
USING THE WATER TANK AND MOP
Instead of using the dust box, the robot can also be set up to mop hard surfaces using
the supplied water tank.
WARNING: Remove the water tank when
charging to remove risk of electric shock.
To fill tank, open tank sealing cap and slowly
pour in water.
After replacing the tank sealing cap, fix the
microfibre mop to the Velcro on the base of the
water tank.
To install the water tank, press the release button on
the dust box to remove it, then install the water tank in
its place.

16
CLEANING AND MAINTENANCE
SIDE BRUSH CLEANING AND REPLACEMENT
Regularly check the condition of the side brushes for damage or entanglement with
foreign objects.
Clean the brushes with a cloth.
If the brushes become damaged over time, please replace them. Note that the left and
right brushes are different, and should be changed accordingly.
CLEANING OF SENSORS AND CHARGING CONTACTS
Use the cleaning tool or a
soft, dry cloth to periodically
clean the charging contacts
and sensor window on the
robot base.
Use the cleaning tool or a
soft, dry cloth to periodically
clean the charging terminals
on the base.
Charging
contact
Charging
Terminals
Sensor

17
DUST BOX AND FILTER CLEANING
Press the dust box release
button to remove the dust box.
Open the dust box cover and
empty any contents into a bin.
Remove the primary filter.
Open the top filter cover and
remove the HEPA filter and
sponge filter.
Remove any debris from the
HEPA filter, and clean with a
vacuum.

18
Rinse the dust box, pre-filter
and sponge filter with water.
Dry the dust box and filter
components.
The pre-filter should be
washed after the first 15-30
days.
The maximum service life of
the high efficiency filter is three
months.
Do not expose the filters to
direct sunlight.
Ensure that the pre-filter and
sponge filter are completely
dry. Reinstall the filters in the
dust box following the reverse
of removal.
Replace the cover on the dust
box and fit it back into the main
body.

19
CLEANING THE WATER TANK
Press the release button to
remove the water tank.
Remove the mop. Wash and
dry the mop.
Pour out any remaining water
from the tank.
Clean and dry the tank.
REPLACING THE DUST BAG IN THE BASE
Open the lid.
While gripping the cardboard handle,
slide the full dust bag up and out of the
charging base, before placing in a bin.
Insert a new bag by sliding the
cardboard handle down the guide plate
until it is in position. The status light will
change to white to show it is correctly
inserted.
(Note: If dust bag is upside down but in
the right position the light will be white
but when sunction occurs it will be be
unable to enter the dust bag.)
Close the lid.
Guide plate
Handle

20
CLEANING THE MAIN BRUSH
1. Open the roller brush cover assembly.
2. Take out the roller brush
3. Use the cleaning tool provided to cut
off any hair tangled on the roller brush.
BATTERY REPLACEMENT / REMOVAL
Using a small
screwdriver,
Remove the two
screws from the
battery cover on
the underside of
the robot.
Remove the
battery cover.
Take out the
battery and
disconnect the
connector.
Replacement is the opposite of the removal process, but ensure the battery
connector is located in the notch to prevent it hindering the battery from sitting flat.
Table of contents
Other ElectrIQ Vacuum Cleaner manuals

ElectrIQ
ElectrIQ eiQ-C22EW User manual

ElectrIQ
ElectrIQ iQLEAN-CR01 User manual

ElectrIQ
ElectrIQ iQLEAN-LR01 User manual

ElectrIQ
ElectrIQ eiQ-C11E User manual

ElectrIQ
ElectrIQ eIQ-RoboVac User manual

ElectrIQ
ElectrIQ iQLEAN-CR01 User manual

ElectrIQ
ElectrIQ eiQ-R900M User manual

ElectrIQ
ElectrIQ iQLEAN-GR01 User manual

ElectrIQ
ElectrIQ CLARA User manual

ElectrIQ
ElectrIQ eiQ-RBV10 User manual