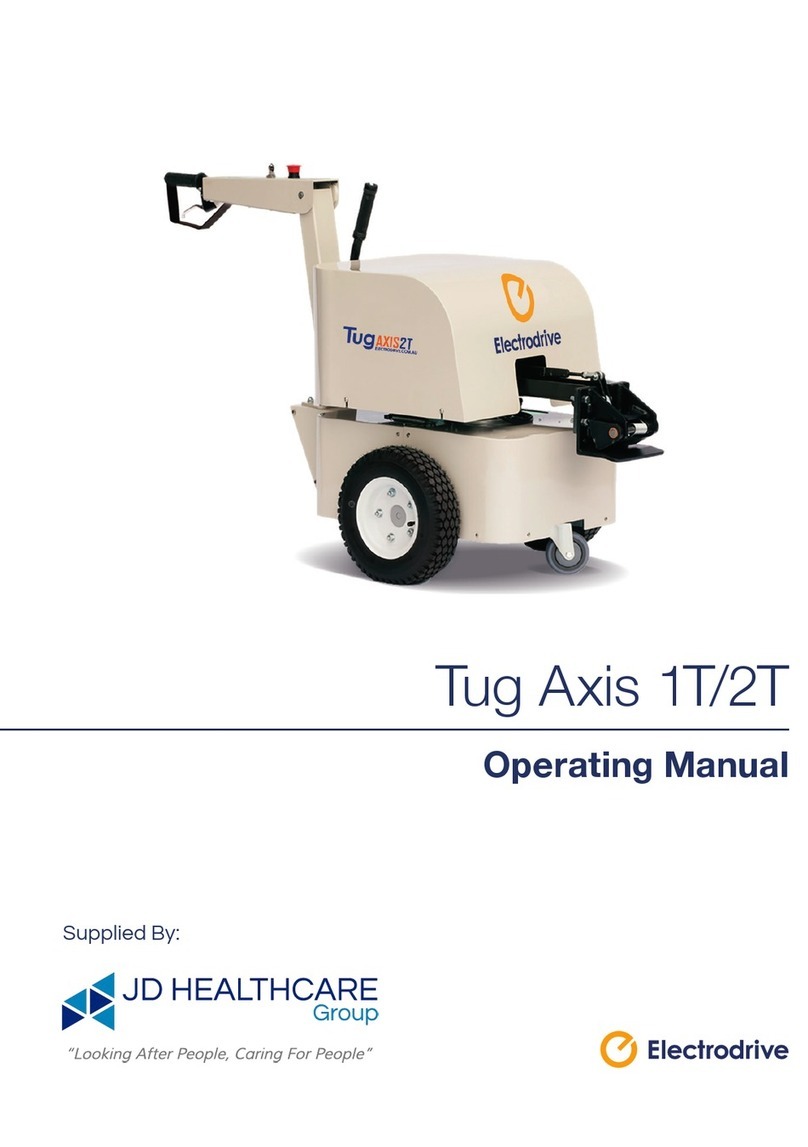
ELECTRODRIVE Tug Axis 4T User manual

Tug Axis 4T
Operating Manual

Tug Axis 4T Operating Manual—OM0026E
This manual contains important safety, installation and operating instructions for this
unit. Read this manual thoroughly and completely, and retain for future reference.
This unit can cause serious injury to personnel or damage to property if used incorrectly,
therefore do not use this machine for any other purpose apart from its intended use.
Using this unit incorrectly may void warranty.
Any damage audible or visible to this unit should be addressed at the time of discovery.
Electrodrive Pty Ltd can provide parts and service support on request through its
service partner company:
Serviced Equipment Pty Ltd
p: 1300 934 471
e: service@fallshaw.com.au
Made in Australia by:
Electrodrive Pty Ltd
2A Ayton Street, Sunshine North VIC Australia 3020
p: 1300 934 471 (within Australia)
p: +61 (03) 9300 8521 (International)
w: www.electrodrive.com.au
© Electrodrive

Tug Axis 4T—Operating Manual
3
Contents
Introduction..................................................................................................................... 5
Features ....................................................................................................................... 5
Controls ........................................................................................................................ 6
Operating instructions ................................................................................................... 6
Controls ........................................................................................................................ 7
Driving instructions ........................................................................................................ 9
Safety check ................................................................................................................. 9
Hitching to a trolley....................................................................................................... 9
Unhitching................................................................................................................... 10
Steering....................................................................................................................... 11
Charging ..................................................................................................................... 11
Maintenance ................................................................................................................. 12
Batteries...................................................................................................................... 12
Tyres............................................................................................................................ 12
Motor and transmission.............................................................................................. 12
Brakes......................................................................................................................... 12
Motor controller .......................................................................................................... 12
Throttle lever ............................................................................................................... 12
Fuses .......................................................................................................................... 13
Self-resetting circuit breaker....................................................................................... 13
Warranty ........................................................................................................................ 14
Modications and misuse will void your warranty...................................................... 14
General wear items not covered under warranty........................................................ 14

4
Appendix 1: Machine rating conditions...................................................................... 15
Appendix 2: Wiring diagram ........................................................................................ 16
Appendix 3: Fault codes .............................................................................................. 18
Appendix 4: Charging procedures for SLA batteries ................................................ 19
Charging setup ........................................................................................................... 19
During charging .......................................................................................................... 19
Charger manual .......................................................................................................... 19
Appendix 5: Spare parts list......................................................................................... 20
Service log .................................................................................................................... 22

Tug Axis 4T—Operating Manual
5
Introduction
Eortlessly move trolleys or wheeled equipment using the battery powered
Tug Axis 4T.
The Tug Axis 4T enables a single user to easily move up to four tonne load capacities.
It simply hooks on to your existing trolley or wheeled equipment with a simple hitch.
Productivity is greatly increased, and back or shoulder strain is eliminated.
Suitable for use:
§Through long corridors, factory aisles, round tight corners.
§Up and down ramps.
§On and o lifts.
Features
§Rated to tow up to 4000 kg.
§24 Volt DC power.
§Variable speed drive unit.
§Electro-magnetic park brake.
§Travel speed—up to 3 kph.
§Robust steel chassis.
§Tiller handle steering that folds up to reduce space when not in use.
§Programmable motor controller.
§Automatic charger.

6
Operating instructions
Controls
Controls
Auto-latching
hitch
Emergency stop Battery level indicator
Tiller arm
Speed selector
Key switch
Throttle lever
Emergency back-o
button
Direction selector
Tiller post
Hitch release

Tug Axis 4T—Operating Manual
7
Controls
Key switch
The key switch must be turned clockwise to switch the unit on. When ON, the LED
status indicator will be illuminated. If a fault occurs with the electronics, this LED light
will ash an error code (refer to Appendix 2). It is important to note that the unit should
be switched o and the key removed, whenever it is not in use. This eliminates the risk
of unauthorised movement and also prevents an unnecessary use of battery power.
Emergency stop and back-o button
The controls have two emergency buttons.
1. Emergency stop button—in an emergency, push this button to stop the unit.
To release, slightly twist the button and it will pop back up.
2. Emergency back-o button—when pressed, the unit will travel backwards until
released, to avoid pinning the operator against an obstacle.
Only use the emergency buttons in an emergency.
Direction selector
This determines the direction of travel. Push
the button corresponding to the desired travel
direction (forward/reverse).
Throttle lever
This lever provides variable speed control
from zero up to 100% of the governed speed.
Releasing the lever stops the unit.
Speed selector
The speed selector will always start in the SLOW position. Select a speed that you are
comfortable using. The speed can be changed whilst driving. It is advisable that you
operate this unit at a slow speed when entering a conned area.
Battery level indicator
The battery level indicator indicates the amount of charge left in the batteries. When it
appears to be running low, return the unit to the closest charging station to charge the
batteries. Being aware of the level of charge of the batteries will eliminate the possibility
of running low on power whilst away from the charging station. Red light only indicates
no usable battery power remaining.

8
Horn (where tted)
Push to sound the horn, release to turn o.
Charger socket
The charger socket is located on the body panel of the unit, next to the tiller post.
Brakes
When the speed control lever is released, the unit is slowed electrically by dynamic
braking until the machine and load comes to a complete stop.
Capacity
Refer to the serial plate for the unit’s safe working load, located on the body adjacent to
the tiller post.

Tug Axis 4T—Operating Manual
9
Driving instructions
Safety check
Before using the powered tug, the operator should complete the following check:
1. The battery charger is not connected.
2. The direction selector works.
3. The emergency stop button is released.
4. The brakes operate correctly when the throttle lever is released.
5. The battery indicator shows adequate charge.
6. There is no visible damage to the unit.
7. Back-o button works correctly.
Hitching to a trolley
This tug is tted with an auto-latching hitch. Other hitches are also available.
1. Facing the tug, unhook the hitch release handle and move it backward.
This unlocks the auto-latching hitch.
1. Pull the hitch release
lever to unhook.
Trolley hitch bar.

10
In all cases, ensure that the trolley being attached to has its brakes engaged (or chocked)
and is free from obstruction. Inspect the trolley and ensure that the trolley castors are in
good condition.
Unhitching
Always make sure the trolley is on a at level surface and apply the castor brakes
(if tted) or chock the trolley wheels.
1. Unhook the hitch release handle by pulling towards operator to unlock the hitch.
2. Carefully drive the tug forward away from the trolley.
Towing a trolley with castors in poor condition can overload the tug,
and cause damage not covered under warranty.
This tug is not designed for use on inclined surfaces and doing so may
pose a risk of accident or injury. Use this tug on level ground only.
2. Carefully reverse the tug back onto
the trolley’s tow bar until the tug
hitch sits over the tow bar.
3. Once aligned, move the tug forward.
This will automatically lock the tug
hitch over the trolley’s tow bar.

Tug Axis 4T—Operating Manual
11
Steering
The tiller arm provides easy steering. The tug with an attached trolley can be
manoeuvred through tight areas.
It is STRONGLY RECOMMENDED that the operator lead the tug and
trolley, rather than using the tug to “push” the trolley. This will ensure
that the operator has a safe unobstructed view ahead. This will also make
the tug and trolley easy to manoeuvre.
This unit’s power transmission system is a transaxle arrangement.
Obstruction or resistance to one wheel will cause driving power to be
transmitted through to the wheel that is free. This may cause the tug to spin
out of control. Please ensure a clear and clean path ahead when operating
the tug.
Charging
Ensure regular recharging of batteries (charging overnight after a day’s usage is
recommended). Irregular charging may cause the batteries to prematurely fail.
Leaving a machine in storage without charge for periods greater than a month can also
lead to premature battery failure. This is not covered under warranty.
For detailed charging procedures refer to Appendix 4: Charging procedures for SLA
batteries. Misuse of the battery will void warranty.
Only use the battery charger supplied with this tug.
The automatic features of the supplied charger ensures that the sealed gel
batteries are not overcharged, and only a minimum amount of gas, if any at
all, are expelled during charging.

12
Maintenance
Batteries
If this unit is not being used for an extended period of time, it should be connected to
the battery charger to check the battery level on a regular basis, and placed on charge
overnight if required. This will ensure the batteries are kept in good condition.
The batteries are sealed and maintenance free. DO NOT attempt to open these
batteries. If the unit is not charged as above, the batteries may be exhausted and have
dropped below the charging threshold of the battery charger. The supplied charger
cannot begin to charge the batteries unless they have a small amount of charge. If this
occurs, contact Electrodrive or your local service agent.
A sign that the batteries need replacing is when they no longer hold charge.
Tyres
The tyres are solid rubber and do not require maintenance. For replacement tyres,
please contact an authorised Electrodrive technician.
Motor and transmission
The motor and transmission should only be serviced by an authorised Electrodrive
technician.
Brakes
The dynamic braking system does not require regular maintenance.
Motor controller
This unit is not serviceable. Any diculties experienced with speed control should be
referred to Electrodrive.
Throttle lever
The throttle lever and cable do not require maintenance. Should the lever or cable suer
damage they should be replaced. If the handle loosens with wear, the hinge nut can
be gently tightened. However, rst conrm that the lever is in the correct position as it
may need to be reset. (Test by squeezing the lever slightly. The tug should slowly move,
release and the tug should completely stop).

Tug Axis 4T—Operating Manual
13
Fuses
The control circuit is protected against inadvertent current over-loads. This fuse is
located adjacent to the controller under the top cover.
Self-resetting circuit breaker
This tug is tted with a self resetting circuit breaker in case of momentary over-
load. This circuit breaker can be found beneath the top cover on the main electrical
control panel. If the unit repeatedly over-loads, test the machine, as the motor may be
damaged, and continued use could damage the unit further.

14
Warranty
Electrodrive Pty Ltd warrants that this product is free from defects in materials and
workmanship for a period of twelve months from the date of dispatch from the
Electrodrive plant.
If a defect is reported, Electrodrive will repair or replace the defective part, at its own
discretion. This warranty does not apply if this unit has been misused, damaged, or
modied in any way.
Modications and misuse will void your warranty
The following activities (including, but not limited to) are examples:
Modications
§The machine is re-wired by an unauthorised service agent.
§The motor controller is re-programmed by an unauthorised service agent.
§There are modications to the body or frame of the machine.
§Use of non-specied parts.
§The machine is serviced by an unauthorised service agent.
Misuse
§Shunting loads at speeds in excess of 2 km/h.
§Overloading the unit either during towing or lifting.
§Carrying people or other foreign objects.
§Exposed to rain or other precipitation, unless weatherproof option is installed.
§Using the emergency back-o system to change direction regularly.
§Exposed to a corrosive environment.
§Driven o road—potholes, gravel, etc.
§Driven on slopes with a steeper gradient than 1:12.
§Not being charged adequately.
§Using the emergency stop button as an ON/OFF button.
General wear items not covered under warranty
§Tyres, tubes and castors.
§Drive wheels and motor brushes.
§Hand grips.

Tug Axis 4T—Operating Manual
15
Appendix 1: Machine rating conditions
Model Safe Working Load Max Load
TUGAXIS4TNH 4000 kg 4000 kg
The Tug Axis 4T has been designed to move the rated weight capacity on a level rm
surface. Variations in the working environment may impede the performance of this unit.
Such parameters include (but are not limited to) the following:
• Ramps and sloped surfaces.
• Soft surfaces (for example carpet).
• Slippery surfaces (gravel, water, oil on the ground, etc).
It is important that the Tug Axis 4T IS NOT to be operated outside of
the recommended conditions.
790 mm1465 mm
875 mm 650 mm

16
Appendix 2: Wiring diagram

Tug Axis 4T—Operating Manual
17

18
Appendix 3: Fault codes
Fault Code Explanation Causes
☼ ☼ Over-temperature cutback Machine overloaded
Park brake not releasing properly
Short in motor or wiring
High ambient temperature
☼ ☼☼ Throttle pot fault Throttle pot wires open or shorted
Faulty throttle pot
☼ ☼☼☼ Speed governor fault Speed governor wires open or
shorted
Faulty speed governor pot
☼ ☼☼☼☼ Battery voltage too low Battery voltage < 17V
☼ ☼☼☼☼☼ Battery voltage too high Battery voltage > 36V
☼☼ ☼ Main contactor controller failure
☼☼ ☼☼ Contactor driver fault
☼☼☼ ☼ HPD present > 10 seconds Throttle out of adjustment
☼☼☼ ☼☼ Park brake fault Park brake coil open circuited
Controller failure
☼☼☼ ☼☼☼ Pre-charge fault Low battery voltage
Controller failure
☼☼☼ ☼☼☼☼ Park brake fault Park brake coil shorted
Controller failure
☼☼☼ ☼☼☼☼☼ High pedal disable (HPD) Throttle not in neutral when key
switch turned on
☼☼☼☼ ☼ Current sense fault Short in motor or wiring
Controller failure
☼☼☼☼ ☼☼ Motor voltage fault Short in motor or wiring
Controller failure
☼☼☼☼ ☼☼☼ EEPROM fault Controller failure
☼☼☼☼ ☼☼☼☼ Output section fault Short in motor or wiring
Controller failure

Tug Axis 4T—Operating Manual
19
Appendix 4: Charging procedures for
SLA batteries
§Always charge batteries when work is complete and the equipment is not required
for use.
§Opportunity charging is NOT recommended. This can also shorten battery life.
§Never leave batteries in a discharged state as this will shorten the batteries life.
§For maximum battery life, a battery must be recharged to 100% capacity. Recharging
less than 100% may result in premature battery failure. Batteries are not covered
under warranty if they are not recharged properly.
§If batteries are disconnected from the machine and not used for lengthy periods of
time, it is recommended to give them a maintenance charge once every two months.
Charging setup
§Ensure you have the correct charger for the batteries. The correct voltage and current
is important to ensure the full life of the batteries.
§Check all connections are tight and in good condition.
§The green charger LED will illuminate to conrm charging is in progress.
§If charger lights do not come on, call your service technician.
§When charger is plugged in, drive function of machine is automatically inhibited.
During charging
§Ensure there is enough airow to help keep the batteries as cool as possible.
§If the batteries are swollen turn o immediately and call your service technician.
§Always leave batteries on charge until the charge is COMPLETE. This is indicated
when charger LED turns o.
Charger manual
Please read BA1105—Battery Charger Operating Manual for more information.

20
Appendix 5: Spare parts list
Part Description
EDBA1030 Battery—12V 70 Ah
EDBA1105 Charger—24V 7 Amp
EDCL1052 Tiller handle membrane loom
EDCL1130 Loom—charger with socket
EDCL1141 Loom—controller suit tiller
EDCS1030 Grey PU castor—100 mm
EDCS1202 Single Rotacaster wheel
EDEL1041 Battery leads blue/white
EDEL1100 Blanking plug—13mm
EDEL1910 Circuit breaker—40 Amp
EDEL2110 Motor controller—Curtis 1228
EDEL2338 Emergency reverse button
EDEL2380 Emergency stop button
EDEL2450 Fuse 1 Amp (charger) (3AG)
EDEL2470 Fuse 10 Amp (control) (3AG)
EDEL2500 Fuse holder panel mount
EDEL2620 Horn button (optional)
EDEL2720 Key switch with key
EDEL2775 Membrane key pad
EDEL2805 Hour meter 12–48V
EDEL3010 Potentiometer—5k (internal)
EDGM1810 Handgrip 7/8" x 5"—tiller
EDGM2040 Spring—tiller handle position
EDGM2051 Tiller pot spring
EDGM2107 Spring—compression C315-01
EDGM2150 Throttle cable
EDGM2170 Throttle lever for tiller handle
EDGM2210 Tiller pin—zinc plated
This manual suits for next models
3
Table of contents
Other ELECTRODRIVE Lifting System manuals
Popular Lifting System manuals by other brands
SystemRoMedic
SystemRoMedic RiseAtlas625M user manual

Columbus McKinnon
Columbus McKinnon Yale HTP Series operating instructions

Lift Tech Marine
Lift Tech Marine AC AUTO STOP GEN 2 owner's manual
WIFO
WIFO HM Series Manual and safety instructions

Eurotruss
Eurotruss FL-080 user manual

Blue Giant
Blue Giant BG E-Step owner's manual
