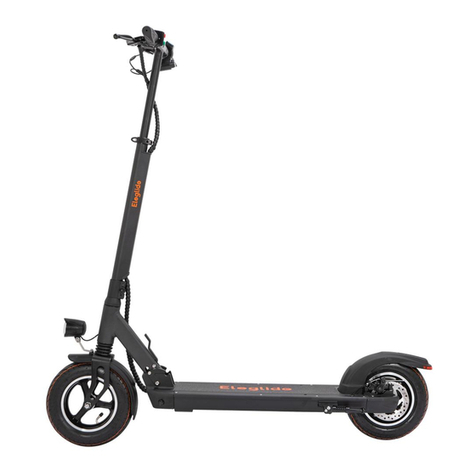
Eleglide D1 User manual

User Manual

CATALOGUE
01~12
13~24
25~36
37~48
49~60
ENGLISH
FRANÇAIS
DEUTSCHE
ITALIANO
ESPAÑOL

*Before the first operation,
please read the user manual carefully!
1. Note
2. Packing List
3. Diagram
4. Assembling Your E-scooter
5. First Ride
6. Folding and Carrying
7. Trouble Shooting
8. Maintenance
9. Specification
10. Warranty
Contents
This manual was written to help you get the most performance, comfort, enjoyment and safety when
riding your new Eleglide electric scooter(hereinafter referred to as e-scooter). It is important for you to
understand your new e-scooter. By reading this manual before you go out on your first ride, you’ll
know how to get the most from your new e-scooter. It is also important that your first ride on your new
e-scooter is taken in a controlled environment, away from cars, obstacles, and other riders.
The e-scooter a recreational product. Before mastering riding skills, you need to practice. Neither
Eleglide Team nor its Resellers are responsible for any injuries or damage caused by a rider's inex
perience or failure to follow the instructions in this document.
E-scooter are vehicles with certain risks, please make sure to follow the traffic rules. Also, when
emergency braking, apply brakes to the rear wheel first, and only then the front wheel, especially if
the cycling speed is too high. If the front brake is used suddenly, you may fall over. Please ride care
fully.
The e-scooter is supplied without basic mandatory equipment, which may vary from place to place.
Therefore, if you intend using the e-scooter on public roads, it's necessary to equip the bike with the
basic mandatory equipment, in accordance with the relevant laws and regulations.
This product is designed for home use. Do not use it for commercial or other purposes.
Keep this manual in a safe place to be able to find information in the future or for other users.
1. Note
EN
01

Assembled Electric Scooter
D1
Hexagon Wrench x4 Screw x2
Key x2 Saddle x1
Accessories
ELEGLIDE
ELECTRIC COOTER
User Manual
User Manual x1
Charging Adaptor
Assembled Electric Scooter
D1 Master
Hexagon Wrench x4 Screw x2
Key x2
Accessories
ELEGLIDE
ELECTRIC COOTER
User Manual
User Manual x1
Charging Adaptor
EN
02
Please retain the box and packaging materials in case you need to ship your e-scooter in the future.
Remember to power off your e-scooter and unplug the power cord before assembling, mounting
accessories, or cleaning the mainframe.

Display
Accelerator
ON/OFF Key
Lock sleeve
Quick- release grip
Head light
Folding lever
Saddle
Rear mud block
Motor
Tail light
Rear wheel
Rear shock
absorber
Side light
Side light
Frame
D1
Kickstand
Folding base
Front shock absorber
Front wheel
Front disc brake
Front mud block
Light switch
Horn switch
Brake Lever
Rear mud block
Display
Brake Lever Light switch
Horn switch
Quick- release grip
Head light
Front mud block
Front shock absorber
Front disc brake
Front wheel
Folding lever
Folding base
Tail light
Rear handle
Rear shock
absorber
Motor
Side light
Side light
Kickstand
Frame
ON/OFF Key
D1 Master
Accelerator
3. Diagram
EN
03

Function Instruction:
On/off : Press on/off button for 3 second, the e-scooter will be of / on.
Mode button: press it could help you to change the speed mode(supportsupto3-levelspeed)
Accelerator: Use it to speed up.
Cruise function: Twist and hold the accelerator for up to 5 second toactivatethecruisecontrol
function.
LED Light On/Off:Press the button.
1. On/off
2. Mode switch
3. Accelerator
4. Display
5. Speed info display
6. Mileage display
7. Battery info
8. USB Charging port
9. LED Light switch
10. Horn switch
11. Key
12. Power Indicator
EN
04

2) Check the handlebar: Lift up the handlebar
and check if it’s fasten. If handlebar is loose, Fold
the handlebar and fasted the screw with the
included hexwrenches.
4) Saddle Assembling (For D1 which with the
saddle only)
a.Lift up the seatpost and fasten it with the nut.(twist
the nut, make sure the seat post is steady).
b.Loose the quick release clip. Put the saddle in the
seat post and fasten the clip with a suitable height for
you.
1) Get it out and unfold it: Unfold the handlebar
stem and fasten. Then unfold the kickstand to
support the e-scooter.
4. Assembling Your E-scooter
3) Display Assembling: Put it on the right
handlebar and fasten it in the right position with
the tool in the package.
EN
05

5) Battery supply: Use the key to get the battery supply. (Please take care of the key)
6) Finished: The bike is ready for your first ride. Turn on the battery and the bike, go out with it.
06
EN
Warning: Wear an approved helmet and other protective gear to minimize any possible injury. And if
you intend using the e-scooter on public roads, it's necessary to equip the bike with the basic
mandatory equipment, in accordance with the relevant laws and regulations.
A. Power on (Press On/off button for 3 seconds) the E-scooter and check the power level indicator.
Charge the E-scooter if the battery level is low.
B. Stand on the footrest with one foot and push off with another foot to start gliding.

6. Folding and Carrying
2) Handlebar Folding: Horizontal slide outward
the lock sleeve and put down the handlebar.
1) Handlebar Folding:
Loose the seatpost clip
and put the saddle on the pedal. (Only for the
model D1 which with the saddle)
EN
07

3) Put down the telescopicrod: Loose the
quick release clip and put the telescopic rod
down to a right position.
5) Carrying: Hold the rod and take it to where you want.
4) Scooter Folding: Hold the scooter upright rod
and pull down the folding handle. Make the
kickstand be folded as well.
EN
08
EN

7. Trouble Shooting
Code
ERRO 1
ERRO 2
ERRO 3
ERRO 4
ERRO 5
ERRO 6
ERRO 7
LED Display Error Code
Solutions
a.Check and Plug the wire in properly.
b.Revise/Replace the Motor
a.Revise/Replace LED Dispaly
a.Revise/Replace controller
a.Replace the Brake Lever wire.
b.Replace the brake lever
c.Contact re-seller.
a.Charge it.
b.Contact re-seller.
a.Check and Plug the wire in properly.
b.Replace the motor
c.Replace the LED display
d.Contact re-seller.
a.Check and Plug the wire in properly.
b.Replace the motor
c.Replace the LED display
d.Contact re-seller.
Possible Causes
Motor Problem
Accelerator
Controller Problem
Brake Lever Problem
Low-voltage protection
Communication failure, Led
display can not receive the
instruction from controller
Communication failure, controller
can not receive the instruction
from Led display
Problem
Display and power
indicator does not
work
Battery does not
charge
Insufficient Range
Motor does not
work
Other Problem
Solutions
a.Charge the battery
b.Reconnect the electric wire
properly
C & d. Contact the re-seller for
helping to solve it.
a.Plug the wire in properly.
b.Contact re-seller.
a.Plug in properly and charge.
b.Make sure it is the resume
Charging temperature.
c.Contact re-seller.
a.Charge the battery fully.
b.Check the pressure before
every use.
c.Develop good drive habits.
d.It’s normal.
e.Contact re-seller.
Possible Causes
a.No power supply for vehicles.
b.The electric wire is not plugged in
properly
c.Display is damaged
d.Controller burnout or water damage
a.Charger is not plugged in properly
b.Battery if out/below of temperature
site.
c.Battery is under rated voltage
a.Battery is not in full charge.
b.Tyre pressure is low
c.Frequent braking
d.Battery aging or attenuation
e.Low ambient temperature, battery
a.The electric wire is not plugged in
properly
b.Sensor / controller is inefficient
Attention: If any other failures occurred and you can not find any solution above, please contact the
re-seller to solve it. And if you need to which need professional tools, in order to avoid danger, the
machine must be repaired or replaced by manufacturer, other maintenance offices or professionals
from similar offices.
EN
09

Cleaning and Storage
Use a soft, wet cloth to wipe the mainframe clean. Dirt hard to remove can be scrubbed with a
toothbrush and toothpaste, then cleaned with a soft, wet cloth.
NOTE
Do not wash your e-scooter with alcohol, gasoline, acetone, or other corrosive/volatile solvents.
These substances
may damage the appearance and internal structure of your e-scooter. Do not wash your e-scooter
with a power washer or hose.
WARNING
Make sure the e-scooter is powered OFF, the power cord is unplugged, and the rubber cap on the
charge port is tightly sealed before cleaning; otherwise you may damage the electronic components.
Store your e-scooter in a cool, dry place. Do not store it outdoors for extended periods of time.
Exposure to sunlight and temperature extremes (both hot and cold) will accelerate the aging process
of the plastic components and may reduce battery life.
Tire Pressure
Inflate tires to 50 psi. Inflate both tires equally.
Battery Pack Maintenance
Do not store or charge the battery at temperatures outside the stated limits (see Specifications). Do
not puncture the battery. Refer to your local laws and regulations regarding battery recycling and/or
disposal.
A well maintained battery can perform well even after many miles of riding. Charge the battery after
each ride and avoid draining the battery completely. When used at room temperature 25℃the
battery range and performance is at its best; whereas using it at temperatures below 0°C can
decrease range and performance. Typically, at -5℃range can be half that of the same battery at
25°C. Battery range will recover when temperature rises.
NOTE
Typically, a fully charged battery should retain power for 60-120days. A low-power battery should
retain power for 30–60 days. Remember to charge the battery after each use. Completely draining
the battery may cause permanent damage to the battery. Electronics inside the battery record the
charge-discharge condition of the battery; damage caused by over-charging or under-charging will
not be covered by the Limited Warranty.
WARNING
Do not attempt to disassemble the battery. Do not touch battery contacts. Do not dismantle or
puncture the casing. Keep the battery contacts away from metal objects to prevent short circuit. Risk
of fire and electric shock. No user serviceable parts. Do not charge or use your battery if it is
damaged or see trace of water.
WARNING
Do not ride when the ambient temperature is outside the machine operation temperature (see
Specifications) because low/high temperature will limit the maximum power/torque. Doing so could
cause personal injury or property damage due to slips or falls.
8. Maintenance
EN
10
EN

This product enjoys one year warranty for the machine and 6 months warranty for the battery service
starting from the date of purchase.
Excluded from the guarantee is normal wear, commercial use, alterations to the appliance as
purchased, cleaning activities, consequences of improper use or damage by the purchaser or a third
person, damage, that can be attributed to external circumstances or caused by the batteries.
A. Inappropriate product selection and the fact that the product does not meet your requirement can
not be a reason for complaint. Buyers is familiar with the properties of the product.
B. Buyer has the right to ask the sellers to check the functionality of the product and become familiar
with its operation.
C. prerequisite for receiving warranty claims is that the guidelines for operating, servicing, cleaning,
storage and maintenance were followed.
10. Warranty
Model
Spec.
D1 Master
1200*570*1190mm
1150*210*380mm
28.5KG
580mm
13cm
21cm
120KG
Aluminum Alloy
20KM/H
35KM/H
45KM/H (Single-Motor 500W)
55KM/H (Dual Motor 500W*2)
Up to 15°
Up to 80KM
8M
55KM/H
48V
22AH
10-12H
48V
500W*2
D1
1200*570*1190mm
1150*210*380mm
27.5KG
580mm
13cm
21cm
120KG
Aluminum Alloy
15KM/H
25KM/H
45KM/H
Disk brake and E-brake
Up to 15°
Up to 70KM
8M
45KM/H
48V
18AH
9-11H
48V
500W
Unfolded Size
Folded Size
N.W
Width of Handlebar
Chassis Height
Width of Pedal
Max Load
Material
Speed
Brake
Slope
Max Mileage
Brake Distance
Max Speed
Battery
Motor
Speed 1
Speed 2
Speed 3
Voltage
Capacity
Charging time
Rated Voltage
Rated Power
NOTE
Above max speed and mileage data are provided by the Eleglide lab. The e-scooter was fully
charged under regular environment temperature around 25℃, no wind and with a 70kg load on the
e-scooter. Driven on a flat road with an average speed of 20km/h.
The actual data may vary based on different road conditions, temperature, humidity, wind speed, and
rider’s habit (whether often use the brakes, frequently shift speeds, etc.) and rider’s weight.
9. Specification
EN
11

D. Damage caused by natural wear and tear, overloading, improper use or intervention outside the
authorized service during the warranty period, are excluded from the guarantee.
E. Warranty does not cover wear and tear of components known as common consumables
(e.g., Bearings, carbon brushes, commutators, chains, tires, wheel tubes.
F. From the warranty are excluded wear and tear of the product or parts caused by normal use of the
product or parts of the product (e.g., low battery or reduce battery capacity after a period of usual
life of 6 months) and other parts subject to natural wear and tear.
G. Damage resulting from defects in material or manufacturer error will be eliminated free of charge
by replacement delivery or repair.
H. Maintenance, inspection and alignment tools are not the warranty act.
EN
12
EN

*Veuillez lireattentivementetassimiler le mode d'emploi
avant la première mise en service de votre nouveau scooter.
1. Introduction
2. Contenu du paquet
3. Présentation du produit
4. Assemblage et configuration
5. Comment la conduire
6. Pliage et transport
7. Depannage
8. Entretien quotidiens
9. Caractéristiques
10. Garantie
Table des matières
Ce manuel a été rédigé pour vous aider à obtenir le maximum de performances, de confort, de plaisir
et de sécurité lorsque vous conduisez votre nouveau trottinette électrique Eleglide (Ci-après dénom-
mé trottinette électrique). Il est important que vous compreniez votre nouveau scooter électrique. En
lisant ce manuel avant de partir pour votre première sortie, vous saurez comment tirer le meilleur parti
de votre nouveau trottinette électrique. Il est également important que votre premier trajet sur votre
nouveau trottinette électrique se fasse dans un environnement contrôlé, loin des voitures, des
obstacles et des autres conducteurs.
Le trottinette électrique un produit récréatif. Avant de maîtriser les compétences d'équitation, vous
devez vous entraîner. Ni l'équipe Eleglide ni ses revendeurs ne sont responsables des blessures ou
dommages causés par l'inexpérience d'un coureur ou le non-respect des instructions de ce
document.
Les trottinettes électriques sont des véhicules présentant certains risques, veuillez vous assurer de
suivre les règles de circulation. De plus, lors d'un freinage d'urgence, appliquez d'abord les freins sur
la roue arrière, puis seulement sur la roue avant, surtout si la vitesse de pédalage est trop élevée. Si
le frein avant est utilisé brusquement, vous risquez de tomber. Veuillez rouler prudemment.
Le trottinette électrique est livré sans équipement de base obligatoire, qui peut varier d'un endroit à
l'autre. Par conséquent, si vous avez l'intention de l'utiliser sur la voie publique, vous devez disposer
de l'équipement de base obligatoire, conformément aux lois et règlements en vigueur.
Ce produit est conçu pour un usage personnel. Ne l'utilisez pas à des fins commerciales ou autres.
Veuillez conserver ce manuel dans un endroit sûr pour référence future.
1. Introduction
FR
13

Trottinette électrique assemblée
D1
Clé hexagonale x 4 Visx 2
Clé de Trottinette électrique x 2 Selle x 1
Accessories
ELEGLIDE
ELEGLIDE Trottinette
User Manual
Mode d’emploi x 1
Chargeur de batterie
Trottinette électrique assemblée
D1 Master
Clé hexagonale x 4 Visx 2
Clé de Trottinette électrique x 2
Accessories
ELEGLIDE
ELEGLIDE Trottinette
User Manual
Mode d’emploi x 1
Chargeur de batterie
FR
14
Veuillez conserver la boîte et les matériaux d'emballage au cas où vous auriez besoin d'expédier
votre scooter électrique à l'avenir.
N'oubliez pas d'éteindre votre trottinette électrique et de débrancher le cordon d'alimentation avant
d'assembler, de monter des accessoires ou de nettoyer le châssis principal.

Tableau de bord
Accélérateur
Interrupteurs à clé – marche/arrêt
Manchon de verrouillage
Levier de libération rapide
Phare avant
Levier de pliage
Saddle
Bloc boue arrière
Moteur
Phare arrière
Roue arrière
Amortisseur
arrière
Feu latéral
Feu latéral
Cadre
D1
Béquille
Base de pliage
Amortisseur avant
Roue avant
Avant frein à disque
Garde-boue avant
Bouton Phare
Cloche
Frein à main
Bloc boue arrière
Tableau de bord
Frein à main Bouton Phare
Cloche
Levier de libération rapide
Phare avant
Garde-boue avant
Amortisseur avant
Avant frein à disque
Roue avant
Levier de pliage
Base de pliage
Phare arrière
Poignée arrière
Amortisseur
arrière
Moteur
Feu latéral
Feu latéral
Béquille
Cadre
Interrupteurs à clé – marche/arrêt
D1 Master
Accélérateur
3. Présentation du
FR
15

Instruction de fonction:
Bouton d’alimentation: Appuyez sur le bouton marche/arrêt pendant 3 secondes, l'e-scooter sera
éteint/allumé.
Bouton Modes: appuyez dessus pour vous aider à changer le mode de vitesse (prend en charge
jusqu'à 3niveaux de vitesse)
Accélérateur: Use it to speed up.
Cruise function: Twist and hold the accelerator for up to 5 second toactivatethecruisecontrol
function.
Lumière LED Marche/Arrêt:Appuie sur le bouton.
1. Bouton d’alimentation
2. Bouton de Modes
3. Accélérateur
4. Affichage
5. Compteur de vitesse
6. Affichage du kilométrage
7. Niveau de batterie
8. Port de chargement USB
9. Bouton d'éclairage LED
10. Aerte
11. clé
12. Indicateur d'alimentation
FR
16

2) Vérifiez le guidon: Soulevez le guidon et
vérifiez s'il est fixé. Si le guidon est lâche, pliez le
guidon et fixez la vis avec les clés hexagonales
incluses.
4) Assemblage de la selle (Pour D1 qui avec la
selle uniquement)
a.Soulevez la tige de selle et fixez-la avec l'écrou
(tournez l'écrou, assurez-vous que la tige de selle est
stable).
b.Desserrez le clip à dégagement rapide. Placez la
selle dans la tige de selle et fixez le clip à une hauteur
qui vous convient.
1) Sortez-le et dépliez-le: 1)Dépliez la potence
du guidon et fixez-la. Dépliez ensuite la béquille
pour soutenir le scooter électrique.
4. Assemblage et configuration
3) Affichage Assemblage: Placez-le sur le
guidon droit et fixez-le dans la bonne position
avec l'outil dans l'emballage.
FR
17

5) Battery supply: 5)Utilisez la clé pour obtenir la puissance de la batterie. (Veuillez prendre soin de
la clé)
6) Fini: La trottinette est prêt pour votre premier trajet. Allumez la batterie et la trottinette, sortez avec.
FR
18
FR
Avertissement : Portez un casque approuvé et d'autres équipements de protection pour minimiser
toute blessure possible. Et si vous avez l'intention d'utiliser la trottinette électrique sur la voie
publique, il est nécessaire d'équiper la trottinette de l'équipement de base obligatoire, conformément
aux lois et réglementations en vigueur.
A. Allumez (appuyez sur le bouton marche/arrêt pendant 3 secondes) le scooter électrique et vérifiez
l'indicateur de niveau de puissance. Chargez le scooter électrique si le niveau de la batterie est faible.
This manual suits for next models
1
Table of contents
Languages:
Other Eleglide Scooter manuals
