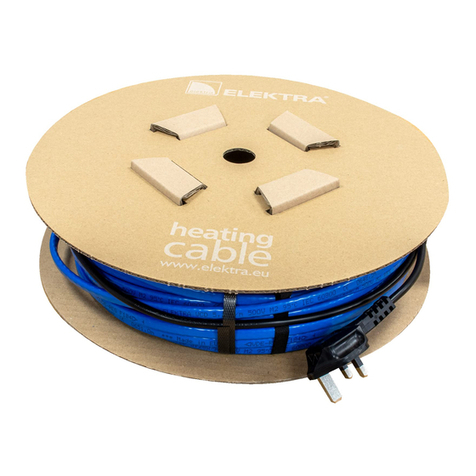
ELEKTRA SelfTec16 ready2heat User manual

elektra.eu
ELEKTRA
• Self-regulating
heating cables
SelfTec®
16
ready2heat
Instrukcja montażu
Installation manual
Инструкция по монтажу


Application
ELEKTRA SelfTec®16 ready2heat heating cables
are intended for the antifrost protection of:
• pipeline systems up to 50 mm in diameter,
• sprinkler systems,
• drain pipes for condensate outlets in air condi-
tioning and ventilation systems,
• actuators,
as well as for the protection against snow and ice of:
• gutters,
• downpipes,
• roof drains.
Characteristics
ELEKTRA SelfTec®16 ready2heat self-regulating
heating cables increase their heating power when
the temperature of the heated system drops and
adequately decrease it when the temperature
increases. Change of power only occurs in these
places where ambient temperature changes.
Self-regulating heating cables are never in danger
of overheating and that is why they may touch
and cross.
3

ELEKTRA
SelfTec®16 ready2heat
Construction of the ELEKTRA SelfTec®16 ready2heat heating
cable
Technical properties
ELEKTRA SelfTec®16 ready2heat self-regulating
heating cables are terminated at one end with
a 3 metre-long power supply conductor with a
hermetic plug, and a connecting joint at the other.
Technical parameters:
• specic heat output (at +10°C) 16 W/m
• power supply voltage 230V/~50/60 Hz
• external dimensions of the cable ~6x9 mm
• min. installation temperature -25°C
• max. exposure temperature +65°C
• min. cable bending radius 3.5D
• IP rating IPX7
• max. protection type C 16 A
1 2 3 4 5 6
• tinned multi-wire copper conductor
• self-regulating conductive polymer
• modied polyolen insulation
• PET covered aluminum foil shield
• tinned copper braiding
• UV resistant halogene-free outer sheath
1
2
3
4
5
6
4

• ELEKTRA SelfTec®16 heating cable
• “cold tail” power supply conductor
• connecting joint between the power supply
conductor and the heating cable
• label
• end joint
• hermetic plug
1
2
3
4
5
6
• tinned multi-wire copper conductor
• self-regulating conductive polymer
• modied polyolen insulation
• PET covered aluminum foil shield
• tinned copper braiding
• UV resistant halogene-free outer sheath
Note:
Never bend the joint and end seal.
!
5

ELEKTRA
SelfTec®16 ready2heat
Selection
Pipeline systems, sprinkler systems, etc.
Length of the heating cables depends from:
• pipe’s diameter,
• min. ambient temperature on the installation site.
Value 1 signies parallel positioning of the cable
along the pipe. Values higher than 1 signify the
length of the heating cable per 1 m of heated
pipe. In this case, the cable should be spiralled
along the pipe.
Table 1. Length of the heating cable per 1 m of the heated pipe
½ ¾ 1 1¼ 1½ 2
-10
length
[m] 111111
spiraling
ratio [cm] 000000
-15
length
[m] 111111
spiraling
ratio [cm] 000000
-20
length
[m] 1111.1 1.2 1.5
spiraling
ratio [cm] 00029 23 17
-25
length
[m] 1111.3 1.4 1.7
spiraling
ratio [cm] 00016 15 14
-30
length
[m] 11.1 1.3 1.6 1.8 2.2
spiraling
ratio [cm] 0
18.5
12.5 10.5
10 9.5
Pipe’s diameter [inches]
Ambient temperature [ °C]
6

Note:
Heated pipeline systems, sprinkler systems,
etc., must be insulated.
!
Gutters, downpipes
Selection of the adequate length of the heating
cables depends from:
• min. ambient temperature in the area of the
installation site.
* if the building is located in the regions of intense
snowfall
The values are given for gutters of diameters
Ø100-125 mm.
Min. ambient
temperature
Number of segments
of the heating cable
[°C] Above -5°C Below -5°C
gutters 12
downpipes 1 1 or 2*
7

ELEKTRA
SelfTec®16 ready2heat
Examples of installation in gutters
and downpipes
Double-led installation
in a gutter and downpipe
Double-led installation
in a gutter with single-led installation
in a downpipe
Single-led installation
in a gutter or downpipe
8

Materials
– required for the installation of heating cables
on pipes and pipelines:
• ELEKTRA SelfTec®16 ready2heat self-regula-
ting heating cable (in the box),
• self-adhesive installation tape (in the box),
• self-adhesive aluminium foil min. 0.06 mm
thick, approx. 50 mm wide (available in the
offer),
• thermal insulation for pipes.
– required for the installation of heating cables
in gutters and downpipes:
• ELEKTRA SelfTec®16 ready2heat self-regula-
ting heating cable (in the box),
• gutter and downpipe holders (available in the
offer),
• support bar (available in the offer).
9

ELEKTRA
SelfTec®16 ready2heat
Installation on pipes
• ELEKTRA SelfTec®16 ready2heat self-regula-
ting heating cable should be selected matching
the pipe’s length according to table 1,
• The heating cable should be mounted along the
pipeline in its bottom part with self-adhesive
installation tape xed every 30 cm. If, basing
on the table, the selected cable is longer than
the heated pipe, the cable should be installed
spirally,
• For plastic pipelines, install self-adhesive alumi-
nium foil on the pipe before xing the heating
cable. This will improve the temperature distri-
bution on the surface of the pipeline,
10

• After the cable has been installed, the entire
length of the cable should be covered by self-
adhesive aluminum foil (min. thickness: 0.6 mm,
min. width: 50 mm), which facilitates heat
transfer from the cable, as well as to the
pipeline. Additionally, aluminium foil will
prevent the cable from being pushed into
thermal insulation,
• After the installation of the heating cable has
been completed, thermal insulation should be
placed on the pipeline.
11

ELEKTRA
SelfTec®16 ready2heat
Installation in gutters
and downpipes
Preliminary proceedings:
• measure the length of gutters and downpipes,
• assess the required heat output resulting from
the climate conditions in which the installation is
to be made,
• select the proper length of the heating cable
taking into account the number of the cable’s
segments in the gutter and downpipe.
* if the building is located in the regions of intense
snowfall
The values are given for gutters of diameters Ø100-
125 mm.
Note:
If the water from downpipes is discharged directly
to the rain channel, the segment of the downpipe
from the surface level to the soil freezing depth
also should be heated.
If the calculated heating cable length has no direct
equivalent in the available ready-made units, select
the longer cable and leave excess cable in the pipe.
!
Min. ambient
temperature
Number of segments
of the heating cable
[°C] Above -5°C Below -5°C
gutters 12
downpipes 1 1 or 2*
12

Gutter holder GH-2
Cable xing in the gutter
with a wire with clips
Heating cable xing in gutters and downpipes
Heating cables should be xed in order to maintain
steady spacing between neighbouring cable’s seg-
ments.
Gutters
Heating pipes can be xed with holders (holder spa-
cing should not exceed 30 cm) or a wire with clips.
Gutter spacing wire with clips
GSW-2
13

ELEKTRA
SelfTec®16 ready2heat
Downpipes
Single-led heating cables – do not require xing if
the length of the heated downpipe does not exceed
6 m.
Double-led heating cables – to be xed with holders
(holder spacing should not exceed 40 cm) or a wire
with clips. Wire with clips are applied when the
length of the heated downpipe exceeds 6 m.
Downpipe
spacing clip
DSC-2
Downpipe spacing wire with clips
DSW-2
Leading the cables
in gutters
and downpipes
14

Protect the joining spot of the gutter and downpi-
pe with a exible cable support to prevent
possible damage to the cable.
When using the wire with clips in the downpipe,
suspend it on the support bar.
• support bar DSW-SB-1
• exible cable support
FCS-1-SS
1
2
1
2
Operation
The system runs after the hermetic plug has been
connected to the mains. Self-regulating heating
cables are characterised by changeable heating
power depending on ambient temperature. The
lower the temperature, the higher the heating cable’s
power, and thus the amount of heat generated. Even
though the cables are self-regulating, they operate
also in ambient temperatures above 0°C and charge
certain amount of electric energy.
To eliminate electric energy consumption in ambient
temperatures above 0°C, disconnect the power
supply of a self-regulating heating cable.
15

ELEKTRA
SelfTec®16 ready2heat
Warranty
ELEKTRA company grants a 3 year-long
warranty (from the date of purchase) for the
ELEKTRA SelfTec®16 ready2heat
self-regulating heating cables.
Warranty conditions
1. Warranty claims require:
• that the heating system has been executed in
full accordance with the Installation Instruc-
tions herein,
• presentation of the proof of purchase of the
heating cable under complaint.
2. The Warranty loses validity if any attempt at
repair has been undertaken by an installer
unauthorised by the ELEKTRA company.
3. The Warranty does not cover the damages
inicted as a result of:
• mechanical fault,
• incompatible power supply,
• lack of adequate overload and differential pro-
tection measures of the electric energy system
supplying the heating cable in question,
• no power supply disconnection for the heat-
ing cable in ambient temperatures above 0°C.
4. Within the Warranty herein, ELEKTRA com-
pany undertakes to bear exclusively the costs
required to cover the necessary repairs to the
heating cable itself, or to exchange the cable.
Note:
The Warranty claims must be registered with the
proof of purchase, in the place of purchase or the
ofces of ELEKTRA company.
!
16

17


elektra.pl
• Samoregulujące
przewody grzejne
Instrukcja montażu
Installation manual
Инструкция по монтажу
ELEKTRA
SelfTec®
16
ready2heat

Table of contents
Languages:
Other ELEKTRA Cables And Connectors manuals
ELEKTRA
ELEKTRA TuffTec 30 User manual
ELEKTRA
ELEKTRA TuffTec 30 User manual

ELEKTRA
ELEKTRA VCD7 User manual

ELEKTRA
ELEKTRA VCD10 User manual

ELEKTRA
ELEKTRA FreezeTec Series User manual
ELEKTRA
ELEKTRA SelfTec PRO Series User manual

ELEKTRA
ELEKTRA VCDR User manual

ELEKTRA
ELEKTRA VCD25 User manual
ELEKTRA
ELEKTRA SelfTec DW User manual

ELEKTRA
ELEKTRA VCDR User manual
Popular Cables And Connectors manuals by other brands

TE Connectivity
TE Connectivity GS-IPC-500U installation instructions

Uplift Desk
Uplift Desk PDC003 quick start guide

Philips
Philips SWV2214 Specifications

Staubli
Staubli SLS425-BFT/N Assembly instructions

NTI
NTI VOPEX-C5VA-xC1000 Installation and operation manual

ADTRAN
ADTRAN SOOTAK8J Series quick start guide