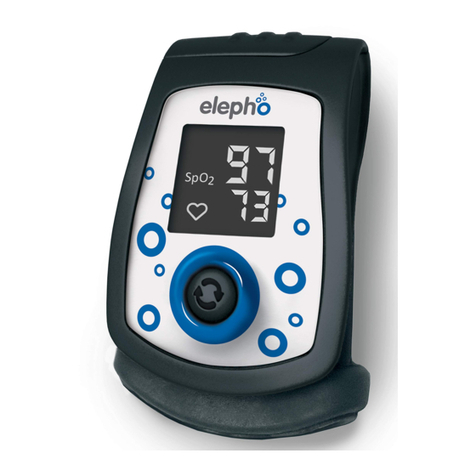
elepho eClip User manual

eClip Full User Guide
Baby reminder in your car
eClip

Contents
First Things First 3
In the Box 3
Set it Up 3
Downloading the eClip App 4
Preparing the eClip Battery 5
Pairing the eClip and the App 6
Installing the eClip in Your Car 7
Time to Start Monitoring 8
When an Alert Sounds 10
Shutting Down until Next Time 11
Settings 12
Taking Care of Your eClip 13
Changing the eClip Battery 14
Troubleshooting 15
Pairing Does Not Work 15
No Temperature Alerts 15
Limited End User Warranty 16
FCC Warning 17

eClip Full User Guide 3
First Things First
In the Box
Set it Up
First—and above all else—is the health, safety, and well-being of your baby.
We believe that you will benefit from the eClip—but nothing can replace
responsible parenting.
Open the eClip package and make sure that you have all of the following:
It only takes a few minutes to set up your new eClip and to learn how to use it.
A. eClip (battery included)
B. eClip Accessory Strap
C. eClip Quick Setup Guide.
D. End User Warranty
After every journey, always check that you have removed your child
from the car.
You might want to set up your new eClip, and familiarize yourself with its
operation, during a dry run, before taking your first drive, so you don’t have to do it
in the hot sun, next to your car, when you’re in a hurry.
A
B
C
D
Note:
Reminder!
End User Warranty
Quick Setup Guide

eClip Full User Guide 4
Downloading the eClip App
First, download and install the eClip app
that is suitable for your device: elepho.com/apps
To use the eClip app successfully you will need to give permissions to
access the following services on your smartphone
· Bluetooth and GPS/location services - for BLE Bluetooth Low Energy pairing
between eClip and app
· Audio permission - to sound eClip audio alerts and adjust volume for alerts
· Camera to take a picture to add in baby profile picture
· Storage to save and retrieve images for baby profile picture
· Wake lock - to allow the screen to wake up from sleep mode for eClip alerts
Note:
Please check your smartphone operating system and bluetooth version
is compatible with the eClip. iOS: Version 9.3 and above & Android: 4 (ice cream
sandwich) and above. Bluetooth 4.1 or later.
Note:

eClip Full User Guide 5
We recommend that you launch the eClip app only after you’ve completed the next step.
So, first, let’s pull the plastic tab out.
Preparing the eClip Battery
The eClip includes a battery that should give you 500 hours of continuous use. It is shipped
at full strength, and is protected against discharge during shipping by a plastic tab.
1. Remove the eClip from the box and turn it over.
2. Take a coin and rotate the battery cover counter-clockwise until it comes off.
3. Lift up the battery, take the plastic tab out, and dispose of it.
4. Put the battery back in place, with the flat side, marked with a plus sign (+) facing up.
5. Replace the battery cover, turning it clockwise with a coin, until the coin is in line with
the two H-clips.
Once you close the battery cover the eClip‘s red LED flashes quickly three times to indicate
that it is on. It will then continue to flash about once every second.
For now, turn the eClip off by pressing the On/Off switch continuously for three seconds.
The red LED flashes three times, and then the eClip turns off.
CR2032
3V
To prevent accidentally turning the eClip off, hold down the On/Off switch
continuously for three seconds until you see the red LED flash quickly 3 times.
This will help prevent accidentally turning the eClip on or off.
Note:
The battery cover is tight to prevent young children from opening it.
Note:

eClip Full User Guide 6
Pairing the eClip and the App
Now it’s time to get your smartphone to communicate with the eClip.
1. Launch the eClip app. Read and accept the terms and conditions on the Welcome screen.
2. On the Did You Know?screen tap GO TO SETTINGS to personalize your eClip with your
child’s name and picture, and to modify your sound alerts. See Settings on page 12 to
do this now, or click the settings gear icon, at any time, to do it later.
3. Turn on your eClip by pressing the On/Off switch continuously for three seconds.
The red LED flashes three times quickly, then once a second until pairing has been
completed. When it is paired it flashes blue about once a second. For ideal pairing
setup, ensure that the eClip and app are less than 6 ft (2 m) apart.
Note:
Note:
By default the temperature alerts are disabled.
To activate or deactivate the eClip, hold down the On/Off switch
continuously for three seconds until you see the red LED flash quickly 3 times.
This will help prevent accidentally turning the eClip on or off.
4. On the Did You Know screen tap CONNECT to eClip NOW.
5. The app displays the Connecting in progress screen. The eClip flashes
red until Bluetooth Connection has been established.
If you see the Cannot connect with eClip screen first check
that the eClip is on and that your Bluetooth and GPS are activated on
your smartphone. Then tap Try to connect again.
6. After a successful pairing the app displays the App is now connected with eClip
screen and the eClip red LED changes to a blue LED that flashes about once a second.
Note:
Recommendation: The eClip will pair quicker and more easily if the app is
running before the eClip is switched on.

eClip Full User Guide 7
After your first successful set up and pairing of the app, when you next
launch and pair with the eClip, the app should go directly to the connecting screen.
Note:
If you own two eClips make sure that you have disconnected from the first
eClip before beginning to pair with the second one.
More than one person can install the eClip app and be within range of the eClip, but the
eClip can only be paired with one smartphone at a time.
Note:
Installing the eClip in Your Car
As you can see from the eClip packaging, you have your choice of four convenient options
to secure the eClip.
Once you’ve chosen a location for the eClip set it in place, as follows:
Baby car
seat strap
Standard adult
seat belt
Diaper bag
strap
Included strap
accessory
Always check manufacturers’ recommendations before attaching
the eClip to the strap of your baby’s car seat or your vehicle’s adult seat belt.
Always make sure that the eClip stays out of your baby’s mouth and
that no liquids are spilled on or into it. See Taking Care of Your eClip on page 13 for
more information.
WARNING!
WARNING!
Before attaching the eClip’s H-grip to purse or diaper bag, make sure that
it is a compatible size, to prevent the eClip from accidently falling off the strap.
Please regularly check that the app and the clip are still paired.
Note:
Note:
1 2
1. Slide one edge of the strap
under one side of the H-clip
on the back of the eClip.
2. Push the other edge of the
strap under the second side
of the clip. It should fit snugly.

eClip Full User Guide 8
Time to Start Monitoring
Once your baby is in the car seat and the
eClip is securely in place, it’s time to start
monitoring.
ON/OFF Button
1. Launch the eClip app and then tap CONNECT to eClip NOW.
2. Turn on your eClip by pressing the On/Off switch continuously for three seconds. The
red LED flashes quickly for a short while, then flashes about once per second.
3. After a successful connection the Connecting in progress screen is replaced by the
App is now connected with eClip screen. The flashing LED on the eClip turns blue,
indicating that your eClip and the app on your smartphone are paired.
4. Tap START MONITORING NOW.
Monitoring begins a few seconds after the eClip has paired with the app
even if you do not tap START MONITORING NOW.
Note:
Your eClip continues to flash blue about once a second while it is paired.
Take a moment to review the eClip Monitoring screen.

eClip Full User Guide 9
The eClip alert should sound at full volume even if you
have muted your phone. Once you have dismissed the alert the
volume returns to its previous sound setting.
The alert will also sound on full volume even with
ear/headphones
Note:
Note:
A. Your Baby.
A1. If you take your baby out of the car and walk away, you
should receive a visible and audible alert after about 25 feet
(8 meters) if you didn’t turn off the eClip. Just tap SHUTDOWN
APP and confirm by tapping YES. The eClip automatically turns
off three minutes later.
A2. Just in case you forget your baby you should receive a
visual and audible alert when you go beyond about 25 feet
(8 meters) from the car. Go back to your car and get your baby.
B. Settings. Of course, our baby icon has much less personality than
your baby. See Baby Profile Tab on page 12 for more information
about how to upload a picture and type in your baby’s name to
add another reminder that your baby is onboard with you.
C. Battery Level. Five green bars in the Battery Level icon indicates a
good strong power supply for your eClip. The battery should be
good for about 500 hours of continuous use. Good battery health
is very important, so we recommend that you replace it at least
twice a year: at the start of summer and the start of winter. Always
replace the battery when the Battery Level icon drops to two red
bars, since this low level indicates that power can drain completely
at any time. See Changing the eClip Battery on page 14 for more
information about how to change the battery.
D. Bluetooth Signal. This shows the strength of your communication
signal by the number of green waves. If the signal is lost the radio
waves disappear, the icon turns red and the color of your eClip
LED changes from blue to red. Correct the Bluetooth settings on
your smartphone and tap CONTINUE MONITORING to renew the
connection.
E. Temperature. The eClip app checks the temperature every
few seconds. By default temperature alerts are disabled. See
Temperature Alert Tab on page 12 for information about how to
enable alerts, change the measurement unit, modify the checking
frequency, or define your temperature threshholds.
A
C
E
B
D
A1
A2
A1

eClip Full User Guide 10
To understand why you
received this alert click on
the link at the bottom of the
A2 screen Is Your Child OK
screen to see the reasons
and how to resolve them.
Finished with eClip for today
Bluetooth connection lost
You forgot your baby
When an Alert Sounds
The main function of the eClip is giving you a visible and audible alert if you move too far
away from your child when you have parked your car.
This is done by measuring the distance between the eClip and your smartphone. When it
goes beyond about 25 feet (8 meters) you will receive both an audio and visual alert.
You arrived at your destination,
took your baby out of the car—
but didn’t turn off the eClip.
Just tap SHUTDOWN APP and
continue on your way. The
eClip automatically turns off
three minutes later.
You are still in the car. The eClip LED flashes red, meaning that the Bluetooth connection
has been lost. Check your smartphone, correct the problem, and then tap CONTINUE
MONITORING to renew the connection. See Pairing Does Not Work on page 15 for
more information.
And that’s why eClip is here. You may have become distracted by any number of things,
and walked away from the car. The alert sounds when you go beyond about 25 feet
(8 meters) from your baby.
Some iOS and Android devices attempt to override visual alerts. However, you
shoud still hear the audible alert.
If your smartphone goes into sleep mode, or if the screen turns off, the
eClip app may also go into sleep mode and you may not receive any alerts.
Note:
Caution:
The eClip alert sounds at full volume even if you have muted your phone.
Once you have dismissed the alert the volume returns to its previous setting.
Note:
See Temperature Alert Tab on page 12 for information about how to modify the
temperature alert settings.

eClip Full User Guide 11
When you begin your next car trip it will take a few minutes for the eClip to
stabilize and report on the ambient temperature around your baby instead of the
eClip’s temperature from having been in a closed car.
Note:
There are several ways to shut down the eClip.
When you and your baby go beyond about 25 feet (8 meters) from the eClip in your
car, your smartphone sounds the DID YOU FORGET YOUR BABY alert. Tap SHUTDOWN
APP, confirm that you really want to shut down, and continue on your way. The eClip
automatically turns off three minutes later.
Press the eClip On/Off switch for three seconds to turn it off. Tap SHUTDOWN on the eClip
HAS BEEN SWITCHED OFF screen and then YES on the ARE YOU SURE THAT YOU WANT
TO SHUT DOWN THE APP?screen.
Shut down the eClip app and tap YES on the ARE YOU SURE THAT YOU WANT TO SHUT
DOWN THE APP?screen. The eClip automatically turns off three minutes later.
You do not have to remove the eClip from your car between trips. However, if you plan to
use a single eClip for two cars, or if you want to use your eClip to stay close to your child
when you are out of the car, always make sure that the eClip is located near your baby
when you want to use it.
Shutting Down until Next Time
Take your baby, lock the car, and walk away
Shut down the eClip app
Turn off the eClip

eClip Full User Guide 12
Settings
Baby Profile Tab
Distance Alert Tab
Temperature Alert Tab
User Guide:
Feedback:
You can make a number of changes to customize your eClip experience.
Use the Baby Profile
tab to add your
baby’s picture and
name to the eClip
app. It will appear
in every monitoring
screen and alert
screen.
In the Distance Alert tab you can change the default values.
By default, the eClip temperature alerts are disabled. You will,
however, see the temperature on the eClip monitoring screen.
The following temperature alert settings can be changed:
· Baby Profile Tab · Distance Alert Tab · Temperature Alert Tab
· The default eClip alert sound is a voice saying “Did you
forget your baby?” You can change this to any other ring tone
already available on your device.
· Change the refresh time, between alerts, from thirty seconds
to one, two, or three minutes.
· Change the default temperature units from ºF to ºC
· Toggle Temperature Alerts to On to enable audible and visual
temperature alerts
· Change the low and high temperature alert threshholds
· Change the alert sound from your smartphone’s default
· Change the temperature alert refresh time from the default
three minutes to 30 seconds, one minute, or two minutes.
Click the Settings gear icon from any eClip Monitoring screen to see the following tabs:
If the temperature of the
eClip drops below 31ºF / 0ºC then
the app will display <30ºF or <0ºC.
If the temperature of the eClip
increases above 176ºF or 80ºC then
the app will display >176ºF or >80ºC.
Note:
Tap eClip User Guide in any setting screen to view the user guide.
We welcome your comments; please tap the Feedback button at the bottom
of any Settings screen to communicate with us.

eClip Full User Guide 13
Taking Care of Your eClip
There is very little you have to do to take care of your eClip. It does not require calibration
or maintenance, aside from periodically changing the battery. See Changing the eClip
Battery on the next page for more information about how to change the battery.
If you notice that the eClip has become dirty clean it off with a damp cloth. Accumulated
dust can interfere with the temperature sensors.
Storage Environment Temperature:
Operation Environment Temperature:
Do not drop the eClip to the ground. Physical shocks can damage its electronics.
If you store the eClip in near freezing conditions, allow it to acclimate to room temperature
before use.
The optimal operating conditions for the eClip are as follows:
· Temperature: -4 ºF to 158 ºF (-20 ºC to 70 ºC)
· Humidity: Less than 95% non-condensing
· Temperature 39 ºF to 122 ºF (4 ºC to 50 ºC)
· Humidity: Less than 95% non-condensing
The eClip is not water resistant. Do not use cleansing sprays.
Do not immerse the eClip in water.
Caution:

eClip Full User Guide 14
Changing the eClip Battery
The battery should be good for 500 hours of continuous use. Good battery health is
very important, so we recommend that you replace it at least twice a year: at the start of
summer and the start of winter. Always replace the battery when the eClip Monitoring
screen drops to two red bars.
Once you close the battery cover the eClip‘s red LED flashes quickly three times to indicate
that it is on. It will then continue to flash about once every second.
To change the battery:
Always use a high quality CR2032 battery (Panasonic or equivalent) for
the most reliable results.
The battery cover is tight to prevent young children from opening it.
Caution:
Note:
1. Take the eClip off of the strap where it is installed and turn it over.
2. Take a coin and rotate the battery cover counter-clockwise until it comes off.
3. Take out the spent battery and dispose of it responsibly, as required by your local codes.
These batteries cannot be recharged.
4. Put the new battery in place, with the flat side, marked with a plus sign (+) facing up.
5. Replace the battery cover, turning it clockwise with a coin, until the coin is in line with
the two H-clips.
CR2032
3V

eClip Full User Guide 15
Troubleshooting
Pairing Does Not Work
No Temperature Alerts
The eClip was designed to deliver trouble-free use.
Please note the following:
If your eClip cannot communicate with the app, check the following possible problems.
By default the temperature alerts are disabled. See Temperature Alert Tab on page 12 for
information about how to enable them.
· Please check your smartphone operating system and bluetooth version is compatible
with the eClip. iOS: Version 9.3 and above & Android: 4 (ice cream sandwich) and
above. Bluetooth 4.1 or later.
· If you are not going to use the eClip for an extended period of time remove the battery
to prevent leakage and damage to the unit.
· Do not disassemble this device or attempt to make repairs; this will void the warranty.
Refer to the End User Warranty (page 16) for more information.
· Your device’s Bluetooth is not turned on. Open your smartphone settings and turn it on.
· There may be a problem with your smartphone’s Bluetooth settings. Refer to your
device’s help page.
· Your eClip is paired to the wrong smartphone. Make sure to pair the eClip with only
one device at a time.
· Your eClip is not turned on.
· The eClip battery is fully discharged (empty).

eClip Full User Guide 16
Limited End User Warranty
Elepho Inc (the “Company”) warrants that their products (the “Product”) are free of defects
in material and workmanship for a period of one year (the “Warranty Period”) from the
date of purchase by end user. In the event that the Product qualifies for coverage under
this warranty, the Company at its option and at no charge may either repair or replace the
Product (not including, shipping, handling, delivery or installation) with an identical product
or product having similar features and functionality as determined by the Company.
The Company does not warranty the installation, maintenance, or service of its Product.
The Company is not responsible for ancillary equipment not supplied by the Company,
which is attached to or used in connection with the Company’s Product, or for the
operation of the Product with any ancillary equipment, and all such equipment and
operation of such equipment with the Product, is expressly excluded from this limited
warranty. Furthermore, the Company shall not be responsible for any damage to the
Product resulting from the use or operation of the ancillary equipment not furnished by the
Company for use with the Product.
The Company extends this limited warranty only to the original end-user. This limited
warranty and the remedies hereunder are limited to Products properly used, maintained,
stored, installed and used for their intended purpose and use only, in accordance with
the Company instructions. This warranty shall not apply to Product installed, operated
or maintained in or under abnormal conditions. This warranty is not applicable to any
Product, which is not operated and/or installed in accordance with the Company’s
specifications and or industry practices and standards. This warranty does not extend to
any battery power supply included in/with the Product.
This warranty also does not extend to the purchase of opened, used, repaired,
repackaged and/or resealed products, including but not limited to sale of such products
on Internet auctions sites and/or sales of such products by surplus or bulk resellers.
Any and all warranties or guarantees shall immediately cease and terminate as to any
products or parts thereof which are repaired, replaced, altered, or modified, without the
prior express and written permission of the Company.
This warranty sets forth all of the Company’s responsibilities for the Product.
THIS WARRANTY IS GIVEN IN LIEU OF ALL OTHER EXPRESS WARRANTIES. IMPLIED
WARRANTIES, STATUTORY OR OTHERWISE, INCLUDING BUT NOT LIMITED TO ANY IMPLIED
WARRANTIES OF MERCHANTABILITY OR FITNESS FOR A PARTICULAR PURPOSE, ARE LIMITED
TO THE DURATION OF THIS LIMITED WARRANTY. IN NO EVENT, INCLUDING WITHOUT
LIMITATION, IN CONTRACT, TORT, STRICT LIABILITY OR WARRANTY, SHALL THE COMPANY BE
LIABLE TO THE PURCHASER OR TO ANY THIRD PARTY, FOR ANY DAMAGES OR FOR ANY LOSS
OF USE, LOSS OF TIME, LOSS OF LIFE, INCONVENIENCE, COMMERCIAL LOSS, LOST PROFITS OR
SAVINGS OR INCIDENTAL, CONSEQUENTIAL OR SPECIAL DAMAGES ARISING OUT OF THE USE
OR INABILITY TO USE SUCH PRODUCT. TO THE FULL EXTENT THAT SUCH MAY BE DISCLAIMED
BY LAW, COMPANY’S SOLE LIABILITY SHALL BE TO REPLACE OR REPAIR THE PRODUCT.

FCC Warning
Distributed by Elepho Inc. (Ver. 050619)
www.elepho.com
On-line product support at: www.elepho.com/help-support/
Telephone support via Elepho Consumer Relations at: 1-833-435-3746 (1-833-4-ELEPHO)
General information regarding Elepho full product line via: www.elepho.com
This device complies with Part 15 of the FCC Rules. Operation is subject to the following
two conditions:
(1) This device may not cause harmful interference, and
(2) This device must accept any interference received, including interference that may
cause undesired operation.
Note 1: This equipment has been tested and found to comply with the limits for a
Class B digital device, pursuant to part 15 of the FCC Rules. These limits are designed to
provide reasonable protection against harmful interference in a residential installation.
This equipment generates, uses and can radiate radio frequency energy and, if not
installed and used in accordance with the instructions, may cause harmful interference
to radio communications. However, there is no guarantee that interference will not occur
in a particular installation. If this equipment does cause harmful interference to radio
or television reception, which can be determined by turning the equipment off and on,
the user is encouraged to try to correct the interference by one or more of the following
measures:
- Reorient or relocate the receiving antenna.
- Increase the separation between the equipment and receiver.
- Connect the equipment into an outlet on a circuit different from that to which the receiver
is connected.
- Consult the dealer or an experienced radio/TV technician for help.
Note 2: Any changes or modifications to this unit not expressly approved by the party
responsible for compliance could void the user’s authority to operate the equipment.
Other manuals for eClip
1
Table of contents
Other elepho Medical Equipment manuals