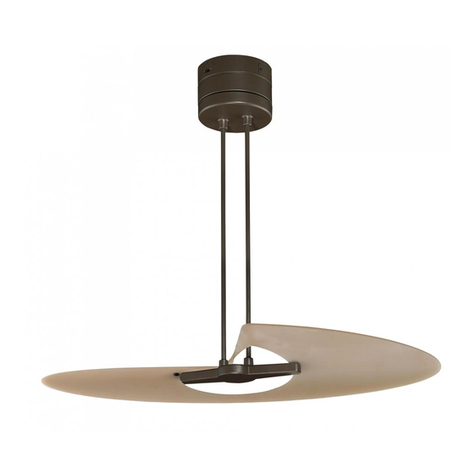
Elicent POLAR EVOLUTION 90/36 User manual

1
LIBRETTO ISTRUZIONI
INSTRUCTION BOOKLET
VENTILATORE DA SOFFITTO
CEILING FAN
3EL3005 POLAR EVOLUTION 90/36 (K36004)
3EL3055 POLAR EVOLUTION 120/48 (K48004)
3EL3105 POLAR EVOLUTION 140/56 (K56004)
3EL3155 POLAR EVOLUTION 150/60 (K60004)
Cod. 5FI2268

2
Il ventilatore da lei acquistato è un ventilatore da soffitto reversibile.
E’ possibile installare in aggiunta:
-Regolatore RVS/L (mod. 2RV4095) per regolare la ventilazione, per accendere e
spegnere il ventilatore e la luce.
-Kit Telecomando e ricevitore (mod. 2SL0034) per regolare la ventilazione, attivare il
temporizzatore, accendere e spegnere la luce.
-Kit luce (mod. 2ST1066) che prevede l’utilizzo di lampadina con attacco E27 e
potenza max 60W.
Inoltre per l’installazione sono disponibili aste in opzione a quella in dotazione:
-Asta (mod. 2AS0012) lunga 30cm.
-Asta (mod. 2AS0025) lunga 90cm.
Far eseguire l’installazione solo da personale professionalmente qualificato.
Questo simbolo vi invita a leggere attentamente queste istruzioni prima
dell’uso dell’apparecchio, ed eventualmente informare terzi, se
necessario. Conservare il libretto per ulteriori consultazioni e per
l’intera durata di vita dell’apparecchio. Se nella lettura di queste
istruzioni d’uso alcune parti risultassero difficili nella comprensione o
se sorgessero dubbi, prima di utilizzare il prodotto contattare l’azienda
all’indirizzo scritto in ultima pagina.
AVVERTENZE GENERALI
Questo apparecchio è destinato alla ventilazione di ambienti
interni domestici e similari, solo se fissato e installato al
soffitto, secondo le modalità indicate nelle presenti
istruzioni.
L'uso di qualsiasi apparecchio elettrico comporta
l'osservanza di alcune regole fondamentali, tra le quali:
a) non deve essere toccato con mani bagnate o umide
b) non deve essere toccato a piedi nudi
c) non lasciare l’apparecchio senza sorveglianza quando è
in funzione, specialmente laddove sono presenti
bambini e persone vulnerabili.
L’apparecchio può essere utilizzato da bambini di età non
inferiore a 8 anni e da persone con ridotte capacità fisiche,
sensoriali o mentali, o prive di esperienza o della necessaria
conoscenza, purchè sotto sorveglianza oppure dopo che le
stesse abbiano ricevuto istruzioni relative all’uso sicuro
dell’apparecchio e alla comprensione dei pericoli ad esso

3
inerenti. I bambini non devono giocare con l’apparecchio. La
pulizia e la manutenzione destinata ad essere effettuata
dall’utilizzatore non deve essere effettuata da bambini
senza sorveglianza.
Spegnere interruttore magnetotermico differenziale della
linea:
-prima di collegare l’apparecchio alla corrente, assemblare,
smontare e prima di pulire l’apparecchio
-prima di accedere ai morsetti, tutti i circuiti d’alimentazione
devono essere scollegati.
-quando si rileva un’anomalia di funzionamento
-se si decide di non utilizzare per brevi o lunghi periodi
l’apparecchio
-prima di procedere alla sostituzione della lampada
(qualora tale accessorio sia presente)
Non usare l’apparecchio se non funziona correttamente o
se sembra danneggiato; in caso di dubbio rivolgersi a
personale professionalmente qualificato.
Verificare periodicamente l'integrità dell'apparecchio. In
caso d'imperfezioni o nel dubbio rivolgersi a personale
professionalmente qualificato.
Non usare l’apparecchio in presenza di sostanze o vapori
infiammabili (alcool, insetticidi, benzine) o in ambienti
particolarmente polverosi.
Non utilizzare l’apparecchio in ambienti con temperatura
superiore a 40°.
Non lasciare l’apparecchio esposto agli agenti atmosferici
(sole, pioggia, ecc.).

4
Attenzione: il ventilatore deve
essere installato in modo che le pale
siano poste a più 2,3m sopra il livello
del pavimento (2,7m nel caso di
installazione in ambito residenziale),
come in figura.
Qualsiasi modifica venga apportata all'attacco predisposto
dal fabbricante o di altro genere, è pericolosa e farà decadere
la garanzia, e solleverà lo stesso da eventuali responsabilità.
In caso di guasto o cattivo funzionamento spegnere
l’apparecchio e farlo controllare da personale
professionalmente qualificato; le riparazioni effettuate da
personale non qualificato possono essere pericolose e fanno
decadere la garanzia.
INSTALLAZIONE
L'installazione dell'apparecchio deve essere eseguita da personale professionalmente
qualificato.
Dopo aver tolto l’imballaggio, assicurarsi dell’integrità dell’apparecchio; in caso di
dubbio non utilizzarlo e rivolgersi a personale professionalmente qualificato. Gli
elementi d’imballaggio (sacchetti di plastica, polistirolo espanso, chiodi, ecc.) non
devono essere lasciati alla portata di mano di bambini in quanto potenziali fonti di
pericolo, ma vanno smaltiti secondo le norme vigenti negli appositi contenitori per la
raccolta differenziata.
Prima di collegare l’apparecchio controllare che:
a) i valori di tensione riportati sulla targa dati (230V~ 50Hz) corrispondano a quelli della
rete elettrica
b) l'impianto elettrico a cui l'apparecchio verrà collegato:
-sia conforme alle norme vigenti
-abbia cavi la cui sezione sia idonea alla potenza assorbita
- abbia un'efficace messa a terra e sia in conformità alle vigenti norme di sicurezza
elettrica: in caso di dubbio, richiedere un controllo accurato da parte di personale
professionalmente qualificato.
c) sia stato previsto un interruttore onnipolare con distanza di apertura dei contatti
uguale e superiore a 3mm. In successione a questo, è bene prevedere un interruttore
unipolare per accendere e spegnere il ventilatore: predisporlo anche per l’istallazione
del kit telecomando, invece non necessita se impiega il Regolatore RVS/L.
d) il soffitto/soletta a cui si fissa l’apparecchio, dia garanzia di sostegno (di almeno 8
volte il peso dell’apparecchio), che la parte inferiore del ventilatore risulti ad altezza di

5
almeno 2,3m dal piano di calpestio (2,7m nel caso di installazione in ambito non
residenziale), l’ambiente in cui è installato non sia polveroso, non vi siano materiali
volatili o materiali infiammabili, che lo spazio libero a lato del ventilatore sia di almeno
1m.
Per il montaggio e fissaggio dell’apparecchio, procedere nel modo seguente e
prendere come riferimento le figure:
1. Assemblare le pale al motore facendo attenzione a non danneggiare o deformare le
pale o altre parti, per non compromettere il buon funzionamento. Fissare le pale al
motore con le viti in dotazione, prestando attenzione che siano tutte orientate nello
stesso verso (è bene che la flangia sia rivolta verso l’alto).
2. Fissare la staffa di sostegno al soffitto: prima di forare il soffitto accertarsi di non
danneggiare condotte interne, e che i dispositivi di ancoraggio non compromettano la
resistenza del soffitto. Utilizzare i dispositivi di ancoraggio idonei al peso del
ventilatore, alla tipologia del soffitto, adeguati a prevenire lo svitamento indotto dal
funzionamento del ventilatore. Verificare la solidità del fissaggio: applicare alla staffa
di sostegno un peso 4 volte superiore a quello del ventilatore, e verificare che la
piastra rimanga perfettamente fissata e in aderenza alla superficie.
3. Eseguire il collegamento elettrico della morsettiera (prima accertarsi di aver tolto
tensione), in modo corrispondente:
“L” marrone (brown) fase per motore
“N” blu (blue) neutro motore
giallo-verde (yellow-green), messa a terra.
Schema di collegamento
4. Agganciare il ventilatore alla staffa di sostegno: prima di operare, verificare che i fili
elettrici (sia del ventilatore e della staffa di sostegno) siano orientati in modo da non
ostacolare l’operazione. Inserire l’estremità semi-sferica dell’asta nella staffa
attraverso lo spazio predisposto: allineando il dentello presente sulla staffa alla
corrispettiva sede presente nell’estremità semisferica.
I cavi elettrici del motore terminano con connettore a 4 spinotti femmina, mentre
quelli della morsettiera con connettore maschio: collegare i connettori in modo che
combacino esattamente, e accettarsi che siano inseriti a fondo.
5. Coprire la staffa di fissaggio tramite la calotta superiore già calzata sull’asta, che va
fisata con le viti in dotazione.

6
Funzionamento
Il ventilatore è dotato reversibilità, cioè ruota in entrambi i sensi: questo consente
dirigere il flusso d’aria anche dal basso verso l’alto per riciclare il calore che nei periodi
invernali si stratifica in alto. Il selettore di reversibilità si trova sopra il motore, nella
calotta inferiore: va azionato solo se il ventilatore è completamente spento.
Per azionare e spegnere il ventilatore agire sull’interruttore unipolare previsto nello
schema di collegamento elettrico; per lunghi periodi di inattività, disattivare l’interruttore
onnipolare.
PULIZIA E MANUTENZIONE
Attenzione: prima di eseguire le normali operazioni di pulizia, spegnere completamente
il ventilatore, disattivare l'alimentazione elettrica con l'interruttore onnipolare.
Per la pulizia utilizzare un panno morbido, leggermente
inumidito; non utilizzare prodotti abrasivi o corrosivi. Fare
attenzione a non danneggiare l'apparecchio, le pale, i
collegamenti elettrici, o compromettere i fissaggi.
Non immergere o bagnare nessuna parte del ventilatore in
acqua o altro liquido: nel caso dovesse succedere per prima
cosa verificare d'aver tolta l'alimentazione alla rete elettrica, e
poi asciugare con cura l’apparecchio e verificare che tutte le parti
elettriche siano perfettamente asciutte: in caso di dubbio
rivolgersi a personale professionalmente qualificato.
E’ indispensabile mantenere il motore libero da polvere e
lanugine.
Non disperdere nell’ambiente prodotti non biodegradabili, ma smaltirli nel rispetto delle
norme vigenti. Alla fine della sua vita utile il prodotto non deve essere smaltito insieme
ai rifiuti urbani. Può essere consegnato presso gli appositi centri di raccolta

7
differenziata predisposti dalle amministrazioni comunali, oppure presso i rivenditoriche
forniranno questo servizio all’acquisto di un nuovo apparecchio. Smaltire
separatamente un elettrodomestico consente di evitare possibili conseguenze
negative per l’ambiente e per la salute derivanti da un suo smaltimento inadeguato e
permette di recuperare i materiali di cui è composto al fine di ottenere un importante
risparmio di energia e risorse. Per rimarcare l’obbligo di smaltire separatamente gli
elettrodomestici, sul prodotto è riportato il marchio del contenitore di spazzatura mobile
barrato.
PROBLEMA
CAUSA
POSSIBILE
RIMEDIO
Apparecchio non
funziona
Mancanza di
corrente
Controllare l’interruttore
generale dell’impianto o
il collegamento elettrico
sbagliato.
L’apparecchio non
funziona
regolarmente
Motore guasto
Rivolgersi ad un
installatore di fiducia.
Il ventilatore oscilla
eccessivamente
Pale montate non
correttamente
serrate.
Serrare adeguatamente
tutte le viti
Pale piegate
Sostituire le pale.
Viti di ancoraggio
pale non
correttamente
serrate.
Bloccare
adeguatamente tutte le
viti.

8
The fan you bought is a reversible ceiling fan.
You can also install:
-RVS/L regulator (mod. 2RV4095) to adjust the ventilation, and to switch the fan and
light on and off.
- Remote control and receiver kit (mod. 2SL0034) to adjust the ventilation, activate the
timer, switch the light on and off.
- Light kit (mod. 2ST1066) which requires the use of an E27 lamp with a maximum
power of 60W.
There are various rods available for installation instead of the one supplied:
- Rod (mod. 2AS0012) 30cm long.
- Rod (mod. 2AS0025) 90cm long.
Have the appliance installed by a qualified technician only.
This symbol invites you to read these instructions carefully before using
the appliance, and also to inform other users of the instructions if
necessary. Store this booklet for future reference and for the entire
lifetime of the device. If any parts of these instructions prove difficult to
understand or if in doubt, contact the company at the address written on
the last page before using the product.
GENERAL WARNINGS
This appliance is designed to ventilate domestic and similar
indoor environments only if it is fixed and installed on the
ceiling, according to the methods indicated in these
instructions.
The use of any electrical appliance involves complying with
a few basic rules, including:
d) Do not touch with wet or damp hands
e) Do not touch with bare feet
f) Do not leave the appliance unattended when operating,
especially where there are children and vulnerable
persons.
The appliance can be used by children over 8 and by people
whose physical, mental or emotional capacity is limited or
compromised, or who lack the appropriate experience or
knowledge, only if they are supervised after receiving
instructions about safe use of the appliance and they
understand the hazards. Children should not play with the

9
appliance. Cleaning and maintenance that must be carried
out by the user must not be performed by children unless
they are supervised.
Switch off the differential thermal magnetic circuit breaker of
the line:
-Always unplug the appliance from the mains before
assembly, disassembly or cleaning the appliance.
-before accessing the terminals, all power supply circuits
must be disconnected.
-when an operating fault is detected
-if you decide not to use the appliance for short or long
periods
-before replacing the lamp (if this accessory is present)
Do not use the appliance if it does not work properly or if it
appears damaged; when in doubt, contact a qualified
technician.
Periodically check the integrity of the appliance. In case of
imperfections or in doubt, contact a qualified professional.
Do not use the appliance in the presence of flammable
substances or vapours (alcohol, insecticides, petrol) or in
particularly dusty environments.
Do not use the appliance in room temperatures exceeding
40°C.
Do not allow the appliance to be exposed to the weather
(sun, rain, etc.).
Warning: the fan must be installed in such
a way that the blades are placed more
than 2.3m above the floor level (2.7m for
installation in a residential area), as
shown.

10
Any modification made to the attachment provided by the
manufacturer or otherwise is dangerous, voids the warranty,
and relieves the manufacturer of any liability.
If there is a fault or the appliance is not working correctly,
switch it off and have it checked by a qualified professional.
Repairs done by anunqualified person can be dangerous and
cause the guarantee to become void.
INSTALLATION
The appliance must be installed by a qualified technician.
After unpacking, check that all parts of the appliance are present; if in doubt, do not
use and contact a qualified technician. The packaging materials (plastic bags,
polystyrene, metal staples, etc.) must not be left within reach of children, as they
constitute possible sources of danger and must be disposed of according to applicable
regulations in recycling containers.
Before connecting the appliance, check that:
the voltage values on the plate (230V~ 50Hz) match with those of the electric system
b) the electrical system to which the appliance will be connected:
- complies with current regulations
- has cables whose section is suitable for the power absorbed
- has effective grounding and is in compliance with current electrical safety standards: if
in doubt, have this checked by a qualified technician.
c) an omnipolar switch with an opening distance of contacts equal to or greater than
3mm has been provided. After this, it is good to provide a unipolar switch to turn the
fan on and off: this is also required for the installation of the remote control kit, but not
for the RVS/L Regulator.
d) the ceiling to which the appliance is fixed provides guaranteed support (at least 8
times the weight of the appliance), that the lower part of the fan is at least 2.3m from
the floor (2.7m for non-residential installation), the environment in which it is installed is
not dusty, there are no volatile or flammable materials, that the free space at the side
of the fan is at least 1m.
To fit and attach the appliance, proceed as follows and refer to the figures:
6. Fit the blades to the motor, taking care not to damage or deform the blades or any
other parts, so as not to jeopardize the proper functioning. Attach the blades to the
motor with the supplied screws, making sure that they are all face the same direction
(the flange should be facing upwards).
7. Attach the ceiling support bracket: before drilling the ceiling, make sure there are no
internal pipes, and that the anchoring devices do not compromise the ceiling
resistance. Use anchoring devices suitable for the weight of the fan, the type of
ceiling, and suited to preventing unscrewing induced by the operation of the fan.
Check the fastness of the attachment: apply a weight 4 times higher than the fan to
the support bracket and check that the plate remains perfectly fixed and adhering to
the surface.

11
8. Connect the terminal board (first make sure you have unplugged the power),
correspondingly:
"L" brown, motor phase
"N" blue, motor neutral
yellow-green, grounding.
Wiring diagram
9. Hook the fan to the support bracket: before operating, check that the electric wires
(of the fan and the support bracket) are positioned so as not to hinder the
operation. Insert the semi-spherical end of the rod into the bracket through the
space provided: align the tooth on the bracket with the corresponding seat at the
hemispherical end.
The electric cables of the motor have a female 4-pin connector, while those of the
terminal block have a male connector: connect the connectors so that they fit tightly,
and make sure they are pushed right in.
10.Cover the fixing bracket using the upper cover already fitted on the rod, and then
attach with the supplied screws.

12
Using the appliance
The fan is equipped with reversibility, i.e. it rotates in both directions: this allows you to
direct the air flow from bottom to top to recycle the heat that is stratified upwards in
winter. The reversibility selector is above the motor in the lower cover: it must only be
activated when the fan is completely off.
To turn the fan on and off, use the unipolar switch shown in the wiring diagram; turn off
the omnipolar switch during long periods of inactivity.
CLEANING AND MAINTENANCE
Warning: before carrying out the normal cleaning operations, completely switch the fan
off and disconnect the power supply with the omnipolar switch.
To clean use a soft, damp cloth; do not use steel wool or abrasive
products. Be careful not to damage the appliance, the blades,
the electrical connections, or compromise the fixings.
Do not soak or wet any part of the fan in water or other liquid: if
this happens, first check that the power supply has been
disconnected, and then carefully dry the appliance and check
that all the electrical parts are perfectly dry: if in doubt, contact a
qualified technician.
It is important to keep the motor free from dust and lint.
Do not dump non-biodegradable products; be sure to dispose of them in compliance
with existing regulations. At the end of its life, the product must not be disposed of as
part of ordinary waste. It should be handed in to specific collection centres set up by
the municipality, or to retailers who provide such a service following the purchase of a
new device. Disposing of a household appliance separately avoids possible negative
consequences for the environment and human health resulting from inappropriate
disposal and allows the recovery of the materials from which it is made in order to
obtain significant savings in energy and resources. As a reminder of the obligation to
dispose of appliances separately, the product is marked with a crossed-out wheelie bin
symbol.
PROBLEM
POSSIBLE CAUSE
SOLUTION
The appliance does
not work.
No power
Check the general system
switch or incorrect electrical
connection.
The appliance does
not work properly.
Motor failure
Contact a trusted installer.
The fan oscillates
excessively
Blades not
tightened properly.
Tighten all screws properly
Bent blades
Replace the blades.
Blade anchoring
screws not
tightened properly.
Tighten all screws properly.

13
Prescrizioni relative alle informazioni/Information requirements
Codic
e/Cod
e
Descrizione/Descriptio
n
Portata
massim
a
d’aria/M
aximum
fan flow
rate
Potenza
assorbita
del
ventilatore
/Fan
power
input
Valori di
esercizio/S
ervice value
Livello di
potenza
sonora del
ventilatore
/Fan
sound
power
level
Velocità
massima
dell’aria/Max
imum air
velocity
F
P
SV
LWA
C
3EL3
005
POLAR EVOLUTION
90/36
85.25
58.74
1.45
61
2.737
3EL3
055
POLAR EVOLUTION
120/48
168.08
71.46
2.35
67.8
3.270
3EL3
105
POLAR EVOLUTION
140/56
187.25
77.2
2.43
65.9
3.168
3EL3
155
POLAR EVOLUTION
150/60
219.15
81.3
2.70
62.8
2.816
Prescrizioni relative alle informazioni/Information requirements
Descrizione/Descri
ption
Simbolo/
Symbol
Valore/Value
Unità/Unit
Portata massima
d’aria/Maximum fan
flow rate
F
85.25 (type 3EL3005)
168.08 (type 3EL3055)
187.25 (type 3EL3105)
219.15 (type 3EL3155)
m³/min
Potenza assorbita
del ventilatore/Fan
power input
P
58.74 (type 3EL3005)
71.46 (type 3EL3055)
77.2 (type 3EL3105)
81.3 (type 3EL3155)
W
Valori di
esercizio/Service
value
SV
1.45 (type 3EL3005)
2.35 (type 3EL3055)
2.43 (type 3EL3105)
2.70 (type 3EL3155)
(m³/min)/W
Consumo elettrico in
modo
“attesa”/Standby
power consumption
PSB
-
W
Livello di potenza
sonora del
ventilatore/Fan
sound power level
LWA
61 (type 3EL3005)
67.8 (type 3EL3055)
65.9 (type 3EL3105)
62.8 (type 3EL3155)
dB(A)
Velocità massima
dell’aria/Maximum
air velocity
c
2.737 (type 3EL3005)
3.270 (type 3EL3055)
3.168 (type 3EL3105)
2.816 (type 3EL3155)
m/sec

14
Cod. 00810.01
GARANZIA
Tutti i prodotti vengono accuratamente collaudati e
sono coperti da garanzia per un periodo di 24 mesi
dalla data dell’acquisto, in conformità alle disposizioni di cui al D.
lgs.24/2002. Tali diritti, come disposto dal Decreto sopra citato,
potranno essere fatti valere esclusivamente nei
confronti del proprio venditore. Entro tale periodo la
Maico Italia S.p.A. si fa carico della riparazione e/o sostituzione,
a propria cura e spese, dei componenti che, a suo
insindacabile giudizio, vengono riconosciuti non
correttamente funzionanti. Sono esclusi dalla garanzia e ne
fanno decadere la validità i seguenti casi:
•
Installazione dell’apparecchio da personale non
professionalmente qualificato (valido solo per apparecchi
non provvisti di spina dal costruttore);
•
Mancata osservanza dei suggerimenti d’uso, di installazione e
di manutenzione indicati nel relativo manuale di istruzioni;
•
Rotture per uso non corretto o incuria;
•
Rotture causate dal trasporto;
•
Collegamento errato alla rete di alimentazione;
•
Alimentazione con una tensione diversa da quella indicata
sull’apparecchio;
•
Riparazioni o manomissioni effettuate da personale non
autorizzato;
•
Interventi per vizi o verifiche di comodo;
•
Mancanza del certificato di garanzia e/o mancata compilazione
dello stesso;
•
Asportazione o manomissione dell’etichetta o timbro
comprovante la data di produzione.
In qualunque caso, il prodotto reso per riparazione o
sostituzione dovrà essere reso al punto vendita dove è stato
acquistato, unitamente al presente certificato debitamente
compilatoe con il relativo documento fiscale comprovante la data
di installazione.
La presente garanzia non si estende mai all’obbligo di
risarcimento danni di qualsiasi natura eventualmente subiti da
persone o cose.
Con riferimento alla Legge 196/03 “Codice di protezione dei dati
personali”, Vi informiamo che la firma sul presente contratto
verrà considerata come consenso al trattamento dei dati
aziendali secondo il dettato della legge indicata. Vi informiamo
altresì che il conferimento dei dati è necessario per
l’espletamento delle obbligazioni di cui alla presente garanzia.

15
WARRANTY CONDITIONS
All products are carefully tested and covered by a 24-month
warrantyfrom purchasedate, in conformity
with the provisions of Law Decree 24/2002. In accordance with the
aforementioned Decree, any claims made under warranty must be
sent to your local dealer.
Withinsuchperiod,MaicoItaliaS.p.A.shallberesponsibleforrepairing
and/or replacing, under its own responsibility and at its own expense,
those parts which, according to its own undisputable judgement, are
acknowledged to be not working properly.
The following cases are not covered by and invalidate the warranty:
•
Installation of the appliance by not-professionally-qualified
personnel (only valid for appliances not featuring manufacturer’s
plug);
•
Failure to observe the operating, installation and maintenance
suggestions shown in the relevant instruction manual;
•
Breakages due to incorrect or careless use;
•
Breakages caused by transport;
•
Incorrect power mains connection;
•
Power supply with voltage different to that indicated on the appliance;
•
Repairs done or tampering by unauthorised personnel;
•
Jobs done following faults or convenience inspections;
•
Lack of warranty certificate and/or failure to complete the certificate;
•
Removal or tampering with the label or stamp indicating the production
date.
In any case, the product returned for repair or replacement must be
delivered to the sales outlet where it was purchased, together with
this certificate duly completed and with relevant tax documentation
showing the date of installation.
This warranty never covers the obligation to repay any damages of
whatever nature suffered by people or things.
With reference to Law 196/03 “Code of protection of personal details”,
we hereby inform you that the signature on this agreement will be
deemedas authorisationtoprocess corporatedetailsaccording tothe
provisions of the above law. We further inform you that such details
must be provided in order to fulfil the obligations indicated in this
warranty.
This manual suits for next models
11
Table of contents
Languages:
Other Elicent Fan manuals

Elicent
Elicent REC SanAir User manual
Elicent
Elicent MRF BA EC User manual
Elicent
Elicent EXT Series User manual
Elicent
Elicent AXC User manual
Elicent
Elicent REC duo 100 User manual
Elicent
Elicent ELPREX User manual
Elicent
Elicent TIRAFUMO User manual

Elicent
Elicent e-style User manual
Elicent
Elicent REC SanAir User manual
Elicent
Elicent MICROBOX AC User manual
Popular Fan manuals by other brands

Oster
Oster 1693 instruction manual
Hunter
Hunter Alexander 51939 installation manual

Siemens
Siemens 3RW4928-8VB00 operating instructions

Ferroli
Ferroli 15 Installation and operation manual
Vectaire
Vectaire ELP2204 Installation and operating instructions
Fanimation
Fanimation The Marea FP8026 owner's manual


