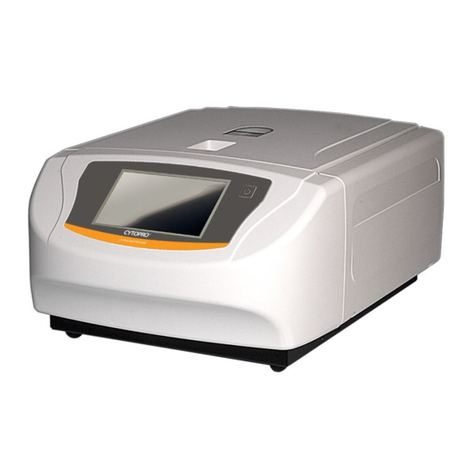
ELITechGroup AEROSPRAY TB Instructions for use

AEROSPRAY®
TB
MODEL 7722
Applications
Manual
SLIDE STAINER/CYTOCENTRIFUGE

ELITechGroup Inc.
370 West 1700 South
Logan, Utah 84321-8212
USA
800 453 2725
+1 435 752 6011
WWW.ELITECHGROUP.COM

AEROSPRAY®TB
SLIDE
STAINER/CYTOCENTRIFUGE
Model 7722
Applications Manual
57-2004-01E

2
©2015 ELITechGroup Inc. All rights reserved. No part of this publication may be
reproduced, transmitted, transcribed, stored in a retrieval system, or translated into any
language (human or computer) in any form, or by any means whatsoever, without the
prior express written permission of ELITechGroup Inc.
Wescor, Aerospray and Cytopro are trademarks of ELITechGroup Inc.
Other trade names used in this manual are trademarks of their respective owners, used
here for information only.
ELITechGroup Inc. makes no express or implied warranty regarding this manual, its
quality, performance, or appropriate use regarding any type of specific procedure.
ELITechGroup Inc. may modify this manual without notice and without implying any
obligation or liability on the part of the company.
Printed in the United States of America by:
ELITechGroup Inc.
370 West 1700 South
Logan, Utah 84321-8212 USA

3
Table of Contents
Section 1
Introduction
1.1 Aerospray TB Stainer Overview...................................................... 7
Using this Manual................................................................. 7
Functional Description ......................................................... 8
Key Features......................................................................... 9
Intended Use ........................................................................ 9
Table 1: General Specifications............................................. 10
Table 2: Performance Specifications..................................... 11
Table 3: Carousel and Rotor Information ............................. 12
Table 4: Explanation of Symbols........................................... 13
1.2 Instrument Description .................................................................. 15
Figure 1: Front and Right Side Panels................................... 15
Figure 2: Front Panel and Touchscreen ................................ 16
Figure 3: Rear Panel ............................................................. 16
Figure 4: Stainer Bowl Components...................................... 17
Figure 5: Nozzle Diagram ..................................................... 17
Table 5: Preventive Maintenance Kit.................................... 18
Barcode Reader .................................................................... 19
Figure 6: Barcode Reader ..................................................... 19
Other Needed Items............................................................. 19
1.3 Touchscreen and User Interface .................................................... 20
Table 6: Front Panel/Main Screen Function Keys ................. 20
Table 7: System Setup Keys .................................................. 21
Table 8: Maintenance Function Keys.................................... 23
Section 2
Setup and Preparation for Operation
2.1 Instrument Setup ........................................................................... 24
Unpacking and Installing the Stainer.................................... 24
Connecting the Drain Tube and Waste Container................ 25
Connecting Power ................................................................ 25
Installing Standard 500 mL Reagent Bottles......................... 26
Installing the 5 Liter Reagent Bottle ..................................... 28
Installing the Barcode Reader .............................................. 28
2.2 Preparing the Stainer for Operation............................................... 29
Priming Procedures .............................................................. 29
The Clean Cycle .................................................................... 31
Performing Tests .................................................................. 31
Reagent Level Monitoring .................................................... 32
Enabling/Disabling Reagent Level Detect....................... 32
Zeroing the Reagent Level Sensors ................................. 33
Section 3
Controlling and Customizing Stainer Functions
3.1 System Setup Menu ....................................................................... 35
Accessing the System Setup Menu....................................... 35
Creating a Stain Program...................................................... 35
Editing a Stain Program or Adjusting Stain Settings ............. 36
Adjusting Stain Settings........................................................ 36
Changing the Program Name ......................................... 36
Administrator and User Accounts ........................................ 37
Creating an Administrator Account................................ 37
Creating User Accounts .................................................. 37
Managing User Access ................................................... 37
User Login/Logout .......................................................... 38

4
Section 3
Controlling and Customizing Stainer Functions (continued)
Using Reagent Information Tracking .................................... 38
Modifying Level Detect Functions ........................................ 39
Changing User Language ...................................................... 39
Setting the Date and Time.................................................... 39
System Log ........................................................................... 40
Accessing Logs................................................................ 40
Exporting Logs ................................................................ 40
Controlling Beeper Alerts ..................................................... 40
QC/Maintenance Tracking.................................................... 41
Enable Stain Slide Tracking............................................. 41
Enable Cyto Slide Tracking.............................................. 42
Enable Manual Entry ...................................................... 42
Enable Preventive Maintenance Tracking ...................... 42
Enable Reagent Tracking................................................ 42
Restoring Software Defaults................................................. 43
3.2 Recording Specimen and Reagent Information.............................. 44
Scanning Slides with the Barcode Reader ............................ 44
Scanning Reagent Bottles with the Barcode Reader ............ 45
Manually Entering Specimen information............................ 46
Manually Entering Reagent Information .............................. 46
3.3 The Help Menu............................................................................... 47
Using Help ............................................................................ 47
Section 4
Operating the Stainer
4.1 Operating Instructions ................................................................... 48
Suggested Staining Protocol................................................. 48
Performing a Hub Pattern Test............................................. 48
Figure 7: Correct Hub Pattern Test Result ............................ 48
Figure 8: Incorrect Hub Pattern Test Result.......................... 48
Loading the Carousel............................................................ 49
Figure 9: Loading a 12-Slide Carousel................................... 50
Figure 10: Loading a 30-Slide Carousel................................. 50
Figure 11: Reattaching the Carousel Lid............................... 50
Using Blocking Slides ............................................................ 51
Figure 12: Using Blocking Slides ........................................... 51
Performing a Stain Cycle ...................................................... 51
Unloading the Carousel ........................................................ 52
Monitoring Reagent and Waste Levels................................. 53
Table 9: Reagent Level Detect Display Symbols.................... 53
Replacing a Reagent Bottle .................................................. 54
Emptying the Waste Container ............................................ 54
Section 5
Preventive Maintenance and Safety
5.1 Preventive Maintenance ................................................................ 55
Daily Maintenance/Quality Control (QC) ............................. 55
Weekly Maintenance ........................................................... 55
Monthly Maintenance.......................................................... 56
Using the Preventive Maintenance Log................................ 56
5.2 Storing the Instrument................................................................... 57
Preparing for Long-Term Storage ......................................... 57
5.3 Replacing Fuses .............................................................................. 58
5.4 Cleaning the Stainer and Carousels................................................ 59
Cleaning Liquid Spills ............................................................ 59
Cleaning Broken Slides ......................................................... 59

5
Section 5
Preventive Maintenance and Safety (continued)
5.5 Decontaminating the Stainer and Carousels .................................. 60
Solutions for Decontaminating the Instrument.................... 60
Figure 13: Lid Latch and Locking Pin Hole Locations ............ 61
Decontaminating the Instrument......................................... 61
Decontaminating the Reagent D Bottle................................ 62
5.6 Shipping or Disposing of the Stainer or Carousels.......................... 63
Shipping the Instrument....................................................... 63
Disinfection Declaration ............................................... 63
Disposing of the Instrument................................................. 63
Section 6
Nozzle Maintenance and Performance
6.1 Nozzle Disassembly and Cleaning................................................... 64
Nozzle Disassembly .............................................................. 64
Nozzle Cleaning .................................................................... 64
6.2 Nozzle Reassembly......................................................................... 65
6.3 Manual Priming.............................................................................. 66
6.4 Performing the Volume Test .......................................................... 67
Table 10: Volume Test Tolerances (Carbol Fuchsin Stains)... 67
Table 11: Volume Test Tolerances (Fluorescent Stains)........ 67
6.5 Using the Line Flush ....................................................................... 69
6.6 Performing the Slide Pattern Test.................................................. 71
Figure 14: Correct Slide Pattern Test Result ......................... 71
Figure 15: Incorrect Slide Pattern Test Result....................... 71
Section 7
Solving Problems
7.1 Troubleshooting ............................................................................. 72
Table 12: General Troubleshooting and Diagnosis ............... 72
7.2 Abnormal Staining Results ............................................................. 77
Smear Separation or Cell Loss .............................................. 77
Over-Decolorization ............................................................. 77
Under-Decolorization ........................................................... 77
Artifacts and Microbial Contaminates.................................. 77
7.3 Instrument Malfunction ................................................................. 79
Air or Reagent Leaks............................................................. 79
Reagent Level Detect System Errors .................................... 80
Calibrating the Reagent Level Detect System....................... 81
7.4 Calibrating the Touchscreen........................................................... 83
7.5 Customer Service ........................................................................... 84
Section 8
Cytopro® Cytocentrifuge
8.1 Cytopro Centrifuge Information..................................................... 85
Functional Description ......................................................... 85
Key Features......................................................................... 85
Intended Use ........................................................................ 85
Appendix A: Critical Reagent Components ................................................. 86
Appendix B: Risk and Safety Phrases ........................................................... 88
Appendix C: Accessories and Supplies ......................................................... 93
Appendix D Programming Options............................................................... 95
General Programming Information ...................................... 95
Reagent Options for Staining ............................................... 95
Stain Program Options ......................................................... 97
Primary Stain Setting.................................................... 97

6
Appendix D Programming Options (Continued)
Primary Wash Setting................................................... 97
Decolorizer Setting ....................................................... 97
Decolorizer Wash Setting ............................................. 98
Counterstain Setting..................................................... 98
Counterstain Wash Setting........................................... 98
Dry Time Options .......................................................... 98
Table A: 12-Slide Carousel Timing ................................ 98
Table B: 30-Slide Carousel Timing................................. 99
Appendix E Sample/Slide Preparation......................................................... 101
Sample Preparation.............................................................. 101
Sample Fixation .................................................................... 103
Using Mycohold Cell Adhesive ............................................. 103
Staining Slides....................................................................... 104

7
SECTION 1
INTRODUCTION
1.1 Aerospray TB Stainer Overview
Using this Manual
This manual provides instructions to install, operate, and maintain the Aerospray TB
Stainer/Cytocentrifuge.
The manual is an important part of the product. Read it carefully and completely before
setup and first use of the instrument.
If additional accident prevention and environmental protection requirements exist in
the country of operation, this manual must be supplemented by appropriate
instructions to ensure compliance.
Safety Regulations
This instrument has been built and tested in accordance with safety regulations for
electrical control, regulating, and laboratory devices. In order to maintain this condition
and ensure safe operation, the operator must observe all the instructions and warnings
contained in this manual. For current information about applicable standards, please
refer to the CE Declaration of Conformity included with the documents shipped with this
device.
Understanding Warnings
This manual uses three warning levels to alert you to important information as shown in
the following examples.
WARNING!
A Warning alerts to the possibility of personal injury, death, or other serious adverse
reactions stemming from the use or misuse of this device or its components.
CAUTION:
A Caution alerts to possible problems with the device associated with its use or misuse.
Such problems include device malfunction, failure, damage, damage to the sample, or
damage to other property. Where applicable, a Caution may include precautions to be
taken to avoid the hazard.
NOTE: A Note reinforces or supplies additional information about a topic.
Specific Warnings
Pay particular attention to the following safety precautions. If these safety precautions
are ignored, injury or damage to the instrument may occur. Each individual precaution is
important.
WARNING!
Install the stainer in a well-ventilated area. If ventilation is inadequate, operate the
instrument under a safety hood.

8
SECTION 1
INTRODUCTION
1.1 Aerospray TB Stainer Overview
WARNING!
Reagents used in the Aerospray stainer contain moderately hazardous chemicals that
require care in handling. Refer to the provided Safety Data Sheets (SDS). Always use
appropriate safety measures including gloves and eye protection when handling
reagents.
WARNING!
Always wear protective clothing and eye protection when using cleaning solutions
(diluted SS-029C or SS-266). Dispose of used solution properly.
WARNING!
If power is lost while the stainer is running, the lid will remain locked until power is
restored. Do not attempt to open the lid while power is off.
WARNING!
Electrical shock hazard: Do not open this instrument or attempt internal repairs. Refer
servicing to qualified service personnel. Contact Elitech Group Biomedical Systems
service.
CAUTION:
This equipment has been designed and tested to CISPR 11 Class A and FCC Part 15 Class
A. In a domestic environment it may cause radio interference, in which case, you may
need to take measures to mitigate the interference. This equipment complies with the
emission and immunity requirements described in the IEC 61326 series.
CAUTION:
To avoid serious instrument damage, never use reagents other than those supplied for
this model stainer by Elitech Group. Except for deionized or distilled water and
approved alcohol, using reagents not supplied by Elitech Group may void the warranty.
CAUTION:
Only spare parts supplied or specified by Elitech Group should be used. Using non-
approved parts may affect the performance and safety features of the instrument. If the
equipment is used in a manner not specified by Elitech Group the protection provided
by the equipment may be impaired. If in doubt, contact your Elitech Group
representative.
Functional Description
The Aerospray TB stainer stains specimen smears on microscope slides to determine the
presence of acid-fast bacilli (AFB) including Mycobacterium tuberculosis and other
species which are part of the Mycobacterium genus. The TB stainer simulates traditional
manual staining techniques and the stained slides are representative of traditional
manual stains.
The TB stainer is capable of either fluorescence or carbol fuchsin staining, depending on
the reagents loaded on the instrument. For best results when using the Aerospray TB
stainer, body fluid specimens should be digested and spread as thin as possible on the
microscope slide prior to staining.

9
SECTION 1
INTRODUCTION
1.1 Aerospray TB Stainer Overview
Key Features
The key features of the Aerospray TB stainer are:
•Minimized reagent consumption
•Rapid staining
•Barcode scanner for tracking specimens and reagents
•Reagent and specimen traceability
•User traceability
•Administrator password
•Interactive touchscreen display
•Multiple languages
•High volume staining productivity (12 or 30 slides per stain cycle)
•Automatic clean cycle to purge each reagent spray nozzle (except D)
•Separate reservoir, delivery tube, pump, and spray nozzle for each reagent
•Stain sequence programmability
•Reagent and waste level monitoring
•Log files
The correct accessory must be used for each function. The Cytopro® Cytocentrifuge Rotor is
available as an option offering additional features. See Section 8 for more information.
Intended Use
The Aerospray TB Slide Stainer/Cytocentrifuge (Model 7722) is a dual-purpose stainer
intended for in vitro diagnostic use by medical professionals to stain microbiological
specimens suspected of containing acid-fast organisms, a step in the standard
laboratory practice of diagnosing disease. The use of Aerospray TB reagents is required
for successful use of this instrument. Adding the optional Cytopro rotor allows
preparation of slides by cytocentrifugation before staining.

10
SECTION 1
INTRODUCTION
1.1 Aerospray TB Stainer Overview
Table 1: General Specifications
Category
Characteristics
Slide Carousel Capacity
1 to 12 or 1 to 30, depending on carousel
Carousel Rotation Speed
Reagent application 10 to 20 rpm (5%) max.
Slide drying 200 to 950 rpm (5%) max.
Cytocentrifuge Rotor Speed
100 to 2000 rpm (5%), User programmable
Reagent Consumption
Refer to Approximate Reagent Consumption in Table A or
B in Appendix D
Operating Time
Refer to Table A or B in Appendix D
Display
7 in. WVGA (800 x 480 pixels) TFT
Touch Screen Controls
Menu driven icons
Drain Connection
Connector on rear panel accepts male connector
attached to vinyl drain tube. 1.8 meters (6 ft.) length
supplied
Ventilation
Air is exhausted from the stainer via a female ½ inch SAE
pipe thread fitting
Dimensions
Width
Height (lid closed)
Depth
Height (lid open)
57 cm (22 in.)
25 cm (10 in.)
54 cm (21 in.)
58 cm (23 in.)
Weight
15.8 kg (34.83 lb)
Electrical Requirements
100 to 240 VAC @ 50 to 60 Hz
Power Consumption
200 Watts maximum
Fuses
2.0 Amp time-lag (Type T) (5 x 20 mm) (2 required).
Manufactured by Littlefuse (Part No. 218002) or
Bussman (Part No. GDC-2A)
Ambient Temperature
Operating
Storage
15 to 30 C (59 to 86 °F)
-10 to 50 C (14 to 122 °F)
Relative Humidity
≤ 80% non-condensing
Altitude
≤ 2000 m (≤6562 ft.)

11
SECTION 1
INTRODUCTION
1.1 Aerospray TB Stainer Overview
Table 1: General Specifications (continued)
Table 2: Performance Specifications
Category
Characteristics
Reagent Spray Nozzles
Each reagent has a separate spray nozzle* to
dispense the correct amount of reagent.
*The D reagent sprays through two nozzles.
Reagents
NOTE: Use only Elitech Group reagents, with diluents
as specified for Elitech Group concentrated reagents.
REF numbers for this stainer begin with one of the
following: SS-061 or SS-161. See Appendix D for
detailed information about reagents.
A - Decolorizer
B - Counterstain
C - Primary Stain (fluorescence or carbol fuchsin)
D - Deionized or distilled water
NOTE:Deionized or distilled water is not provided by
Elitech Group and must be obtained locally. Water
should be filtered (0.2 micron inline filter) to remove
bacteria and particulates.
E –“Approved” ethanol, methanol, or reagent alcohol
NOTE: Approved ethanol or methanol must be 99.5%
pure.
NOTE: Approved reagent alcohol must meet the
following specifications:
• Greater than 90% ethanol
• Approximately 10% isopropyl alcohol or methanol
• Less than 0.5% water
• No ketones
Stain Settings
Up to 12 programs (stored)
Category
Characteristics
Pollution Degree
2
Heat Dissipation
Maximum
Average During Staining
Average While Idle
512 Btu/hour
102 Btu/hour
41 Btu/hour
Maximum Sound Emission
72 dB

12
SECTION 1
INTRODUCTION
1.1 Aerospray TB Stainer Overview
Table 3: Carousel and Rotor Information
Only the following slide staining carousels or cytocentrifuge rotor can be used in this instrument.
Each should be used following the instructions in this manual or the Cytopro Applications Manual
(RP-517).
Rotor/Carousel
Maximum rpm
Maximum Capacity
Maximum
Sample Volume
Elitech Group 12-Slide Carousel (AC-188)
950 rpm (± 5%)
12 each, 26 mm x 76 mm (1
x 3 inch) microscope slides
N/A
Elitech Group 30-slide Carousel (AC-189)
950 rpm (± 5%)
30 each, 26 mm x 76 mm (1
x 3 inch) microscope slides
N/A
Cytopro Cytocentrifuge Rotor (AC-160)
2000 rpm
8 each, standard chambers,
plus slides
8 each, Cytopro Magnum
chambers, plus slides
Up to 600 µL*
Up to 6 mL*
*Do not overfill cytocentrifuge chambers. See Cytopro Applications Manual or Methods Manual
for detailed instructions and warnings.

13
SECTION 1
INTRODUCTION
1.1 Aerospray TB Stainer Overview
Table 4: Explanation of Symbols
Alternating Current (AC)
Authorized Representative in the European Community
Batch Code
Biological Hazards (Biological Risks)
Catalog Number (Model Number)
Caution, Consult accompanying documents (Attention, see Instructions For Use)
CE Mark, product meets the essential requirements designated in Annex I of the
In Vitro Device Directive (IVDD) 98/79/EC.
Consult Instructions For Use
Do Not Reuse
Do not use if package is damaged
Fragile, Handle with Care
Fuse
General Symbol for Recovery, Recyclable
In vitro Diagnostic Device (In vitro Diagnostic Medical Device)
Keep away from sunlight (Keep away from heat)
Manufacturer
Waste Electrical and Electronic Equipment
Reagent stable after opening for number of months specified

14
SECTION 1
INTRODUCTION
1.1 Aerospray TB Stainer Overview
Table 4: Explanation of Symbols (continued)
I
“On” (Power)
O
“Off” (Power)
Environment Friendly Use Period
Serial Number
Temperature Limitation –indicates high and low limits (Normal room
temperatures are specified for all Elitech Group Reagents.)
Use By
Volume Control
General Warning, Caution, Risk of Danger
Warning, Biological Hazard
Corrosive
Environment Hazard
Flammable
Harmful/Irritant
Oxidant
Toxic
Product to be used for manual cleaning only. Do not pump product through
instrument.

15
SECTION 1
INTRODUCTION
1.2 Instrument Description
Figure 1: Front and Right Side Panels
1–Optional 30-slide Carousel
2–Front Panel with Touch Screen Display
3–Bowl
4–12-slide Carousel
5–Lid with Safety Lock
6–Right Side Panel with Label Indicating Reagent Positions:
•A –Decolorizer
•B –Counterstain
•C –Primary Stain
•D –Deionized or Distilled Water
•E –Approved Alcohol
7–Reagent Tray
1
4
5
2
3
7
6
E
D
C
B
A

16
SECTION 1
INTRODUCTION
1.2 Instrument Description
Figure 2: Front Panel and Touchscreen
1–Standby/Ready Button
2–Touchscreen
The front panel features an interactive touchscreen display. Refer to Touchscreen and
User Interface (Section 1.3) for more information.
Figure 3: Rear Panel
1 –Level Detect Connection for Reagent D (deionized or distilled water)
2 –USB Ports
3 –Network Ethernet Connection
4 –Exhaust Vent
5 –Rear Panel Label
6 –Biohazard Warning Label
7–Drain Tube Connection
8 –Level Detection Connection for Waste Container
9 –Power Switch
10 –Fuse Door
11 –Power Cord Connection
12 –Model/Serial Number Label
1
2
1
5
6
12
2 2
34
8
7
11 10 9

17
SECTION 1
INTRODUCTION
1.2 Instrument Description
Figure 4: Stainer Bowl Components
1 –Nozzle DF(Deionized or Distilled Water, front)
2 –Nozzle A (Decolorizer)
3 –Nozzle B (Counterstain)
4 –Nozzle C (Primary Stain)
5 –Nozzle E (Approved Alcohol)
6 –Nozzle DR(Deionized or Distilled Water, rear)
7 –Drive Hub
Figure 5: Nozzle Diagram
1 –Nozzle Insert
2 –Compression Screw
3 –Swirl Cone
4 –Nozzle Housing
7
65 4 3 2 1
1
2
3
4

18
SECTION 1
INTRODUCTION
1.2 Instrument Description
Table 5: Preventive Maintenance Kit
Component
Name
Description
Manual Priming Tool
Primes air-locked pumps
Silicon Grease
Lubricates the nozzle threads for
easy assembly
Nozzle Wire
Cleans nozzle housing orifices
Nozzle Cleaning Strainer
Holds nozzle parts to prevent loss
during cleaning
Nozzle Tool
Unscrews nozzles from the stainer
bowl
Nozzle Wrench
Disassembles the nozzle
Nozzle Brush
Cleans nozzles without removing
them from the stainer
This manual suits for next models
1
Table of contents
Other ELITechGroup Laboratory Equipment manuals