ELNA 8200 User manual


1
IMPORTANT SAFETY INSTRUCTIONS
Your Elna 8200 embroidery sewing machine is designed and constructed for HOUSEHOLD use
only. Read all instructions before using this machine.
DANGER – To reduce the risk of electric shock:
1. Your sewing machine should never be left unattended when plugged in. Always unplug the machine
from the electrical outlet immediately after using and before cleaning.
2. Always unplug before replacing light bulb. Replace bulb with same type rated 12 Volts, 5 watts.
3. Do not reach for the machine if it has fallen into water. Unplug immediately.
4. Do not place or store machine where it can fall or be pulled into a tub or sink. Do not place it in or
drop it into water or other liquid.
WARNING – To reduce the risk of burns, fire, electrical shock or injury:
1. Do not allow machine to be used as a toy. Supervision is necessary when this machine is used by or
near children.
2. Use this sewing machine only for its intended use as described in this manual. Only use
attachments recommended by the manufacturer as described in this manual.
3. Never operate this machine if it has a damaged cord or plug, is not working properly, has been
dropped or damaged or dropped into water. Return the machine to the nearest authorized dealer or
service center for examination, repair, electrical or mechanical adjustment.
4. This machine is equipped with a special connection cord which, if damaged, must be replaced by an
identical cord. This can be obtained from your dealer.
5. Never operate the sewing machine with any air opening blocked. Keep ventilation openings of the
sewing machine and foot control free from the accumulation of lint, dust and fibers.
6. Never drop or insert any object into any opening.
7. Do not use outdoors.
8. Do not operate where aerosol (spray) products are being used or where oxygen is being
administered.
9. To disconnect, turn machine off and remove plug from outlet.
10. Do not unplug by pulling on cord. To unplug, grasp the plug, not the cord.
11. Keep fingers away from all moving parts, especially the needle.
12. Always use the proper needle plate. The wrong plate can cause the needle to break.
13. Do not use bent needles.
14. Do not pull or push fabric while stitching. This may deflect the needle causing it to break.
15. Switch the sewing machine off when making any adjustment in the needle area, such as threading
needle, changing needle, threading bobbin, etc.
16. Always unplug the sewing machine from the electrical outlet when removing covers, lubricating or
making any other servicing adjustments mentioned in the instruction manual.
SAVE THESE INSTRUCTIONS
IMPORTANT
Be sure to keep machine away from static electricity, heat sources, humidity and direct sunlight.
USA only
Your machine comes equipped with a polarized plug (one prong wider than the other). A polarized plug
reduces the risk of electrical shock. This plug is intended to fit into a polarized outlet. If the plug does not
fit fully into the outlet, reverse the plug. If it still does not fit, contact a qualified electrician to install the
proper outlet. Do not modify the plug in any way.

2
TABLE OF CONTENTS
Machine Parts and Functions
Part Names ........................................................................................................................................................... 3
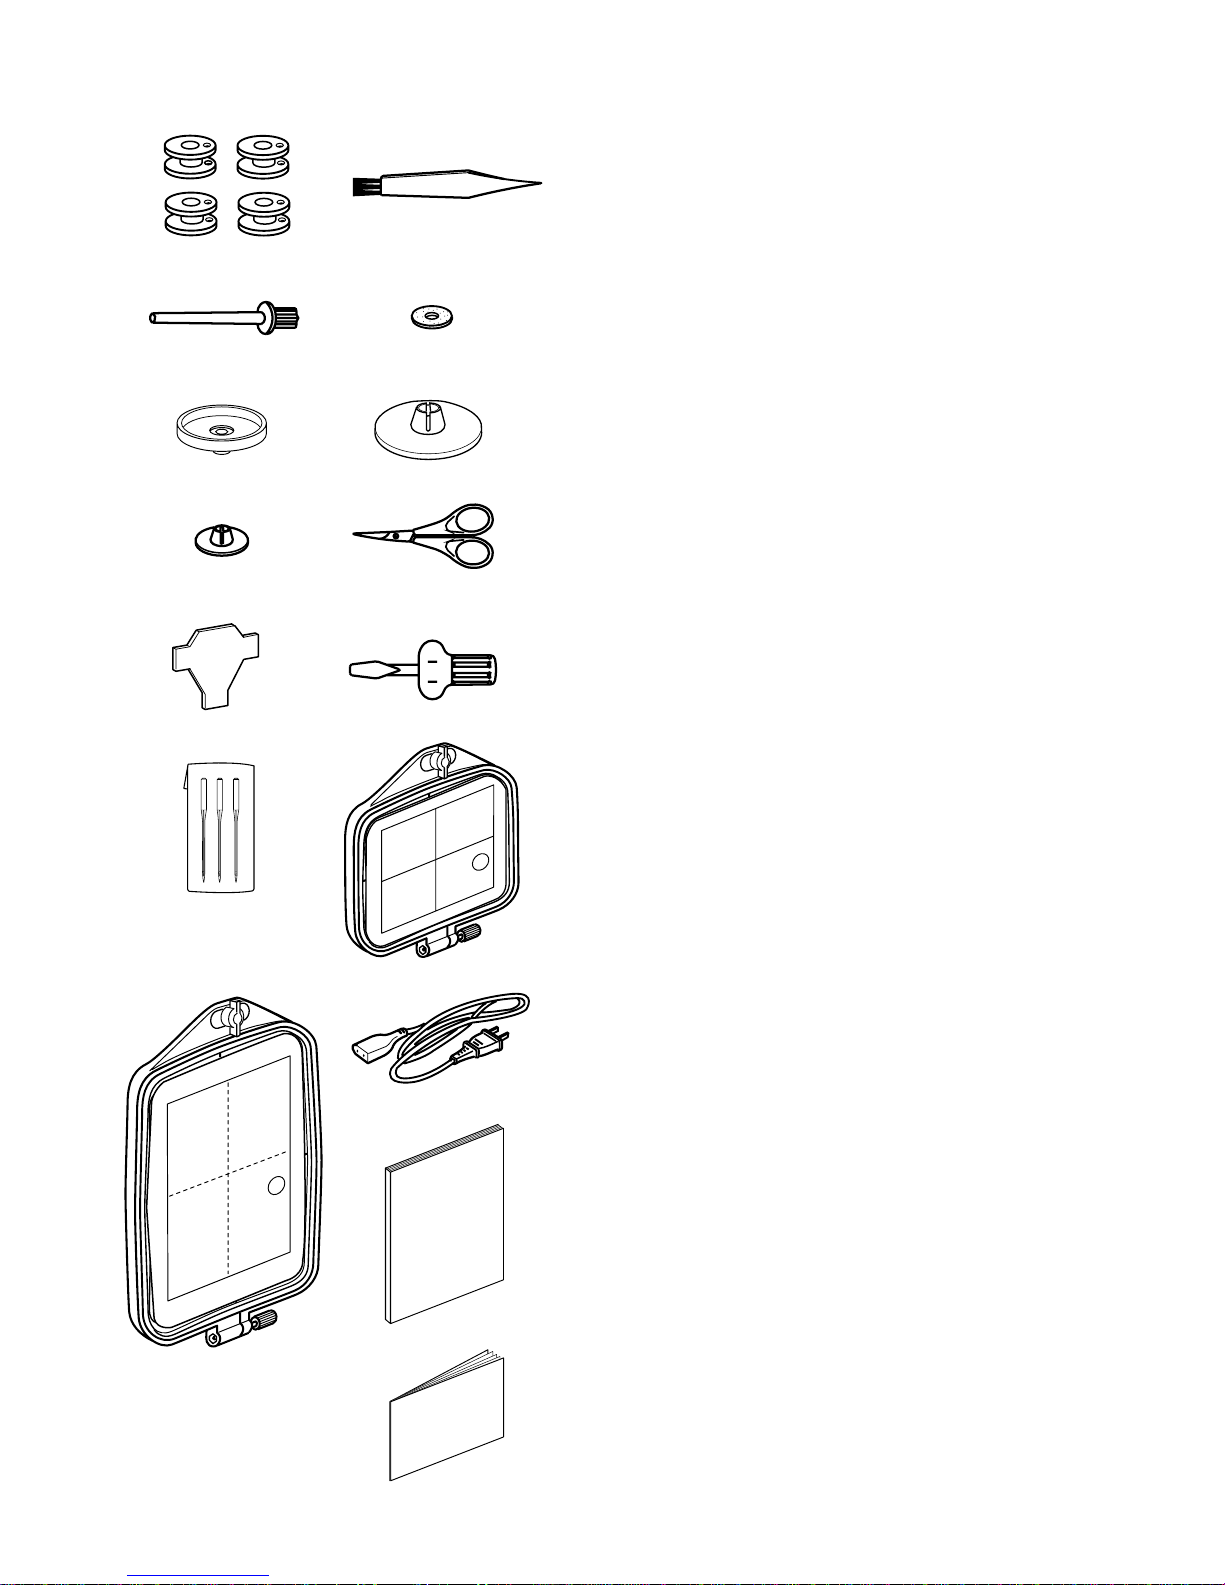
Standard Accessories ........................................................................................................................................... 4
Extension Table (Storage Box) ............................................................................................................................. 5
Free Arm ............................................................................................................................................................... 5
Presser Foot Lever and Additional Presser Foot Clearance ............................................................................... 5
Adjusting the Needle Thread Tension .................................................................................................................. 6
Getting Ready to Embroider
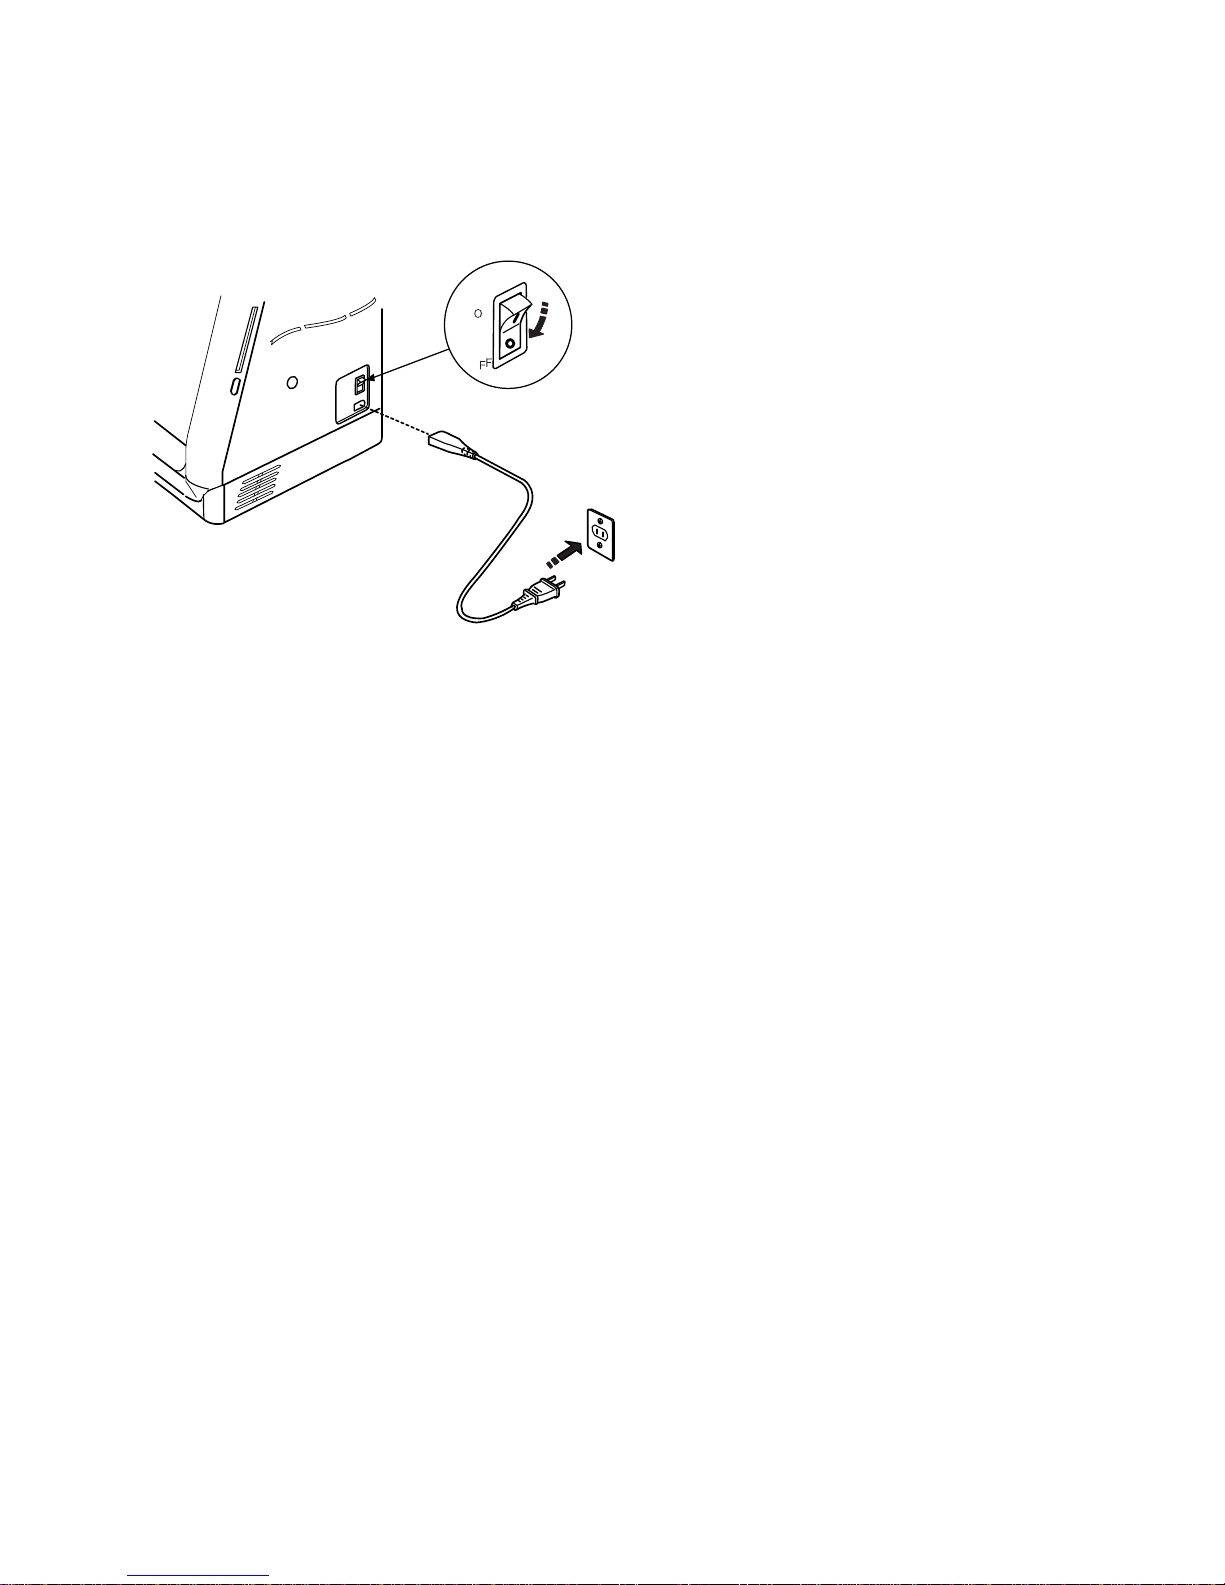
Connecting Machine to Power Supply ................................................................................................................ 7
Start/Stop Key....................................................................................................................................................... 8
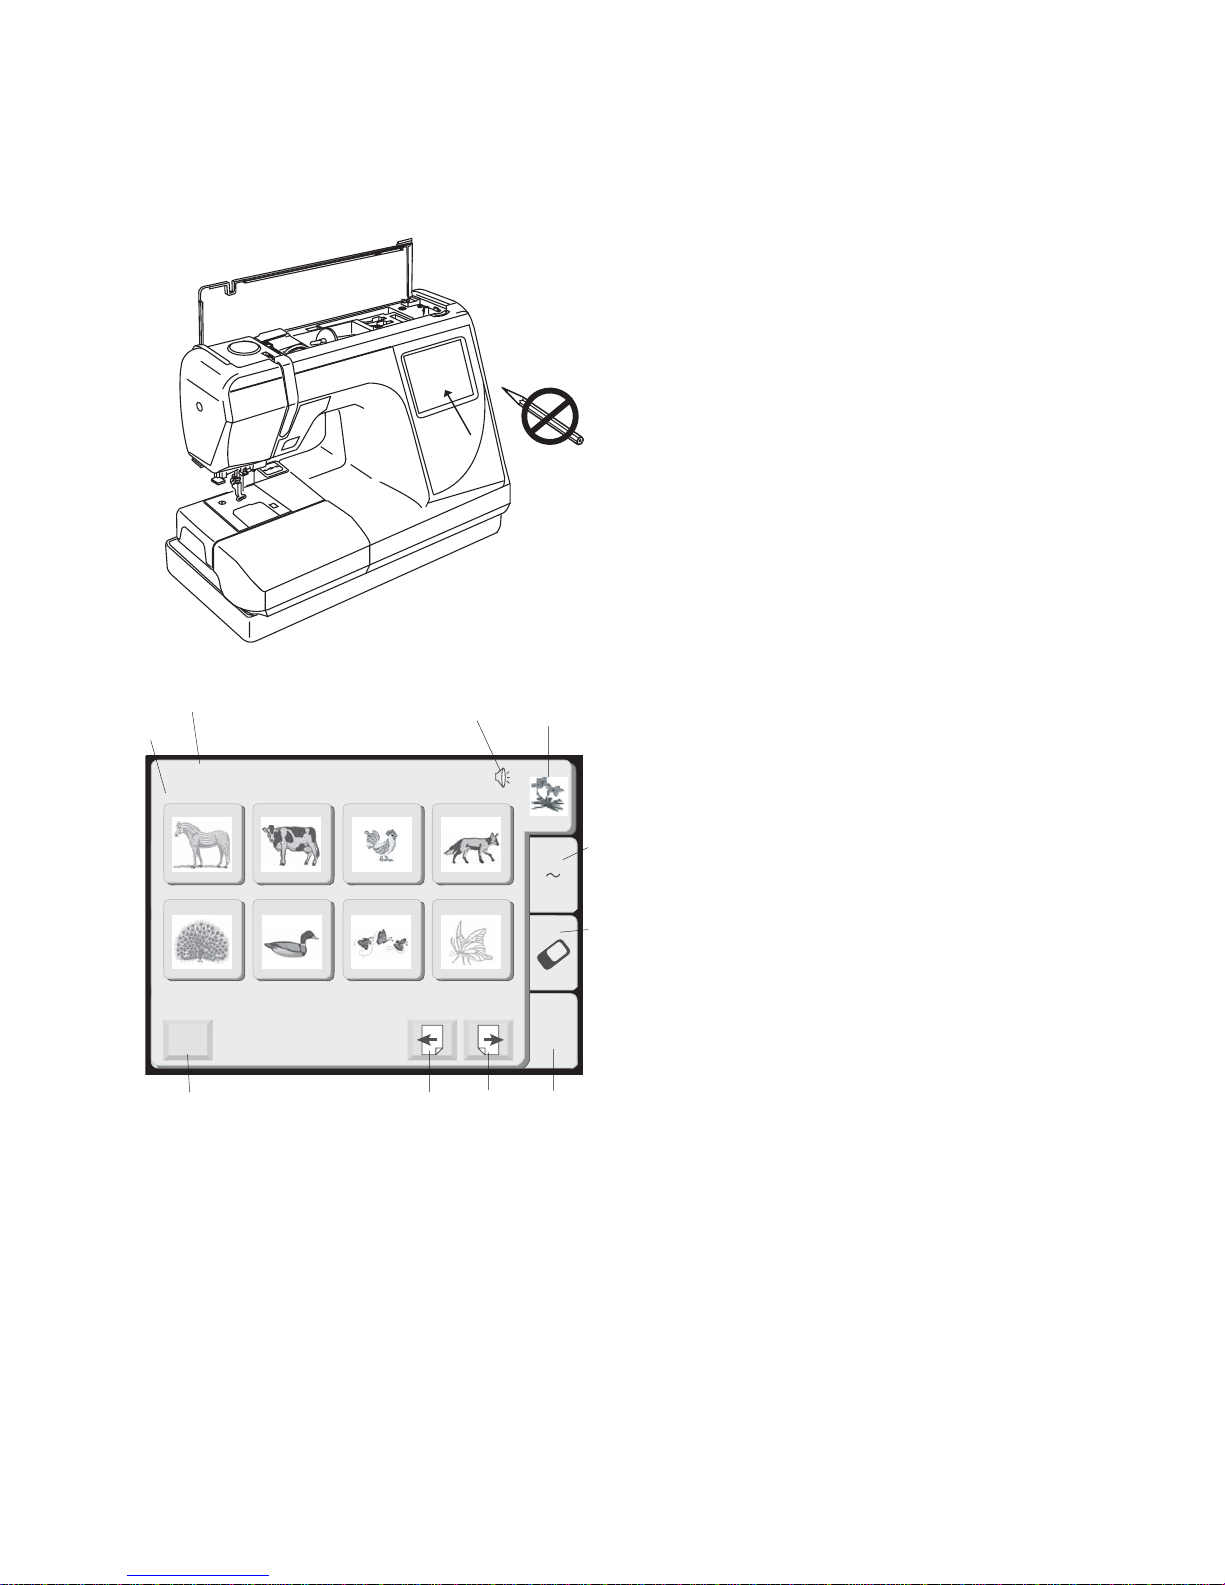
LCD Touch Screen ................................................................................................................................................ 9
Design Selection Window Keys............................................................................................................................ 9
Mode Selection Window Keys ............................................................................................................................ 10
SET Preference Keys .................................................................................................................................... 11-13
How to Access On Screen Information .............................................................................................................. 14
Winding a Bobbin .......................................................................................................................................... 15-16
Inserting the Bobbin............................................................................................................................................ 17
Threading the Machine ....................................................................................................................................... 18
Built-in Needle Threader .................................................................................................................................... 19
Drawing Up the Bobbin Thread .......................................................................................................................... 20
Changing Needles .............................................................................................................................................. 21
Embroidery Hoops .............................................................................................................................................. 22
Stabilizers ........................................................................................................................................................... 22
Templates ........................................................................................................................................................... 23
Securing Fabric in Hoop ................................................................................................................................ 23-24
Attaching Hoop to Carriage ................................................................................................................................ 25
Embroidering Small Areas .................................................................................................................................. 26
Sewing Designs
How to Select a Built-In Design ..................................................................................................................... 26-27
Sewing a Single Built-in Design ......................................................................................................................... 28
Ready to Sew Window After Embroidery Begins ............................................................................................... 29
How to Select Alphabets ............................................................................................................................... 30-31
Sewing Alphabets .......................................................................................................................................... 32-33
Alphabet Corrections .......................................................................................................................................... 34
2 Letter or 3 Letter Monograms .......................................................................................................................... 35
Sewing with PC Design Cards ........................................................................................................................... 36
Edit Window ........................................................................................................................................................ 37
Selecting a Design After Opening the Edit Window ...................................................................................... 38-39
Combine a Built-in Design with Alphabet ...................................................................................................... 40-41
Saving a Design in a File ............................................................................................................................... 42-43
Opening a Saved File ......................................................................................................................................... 44
Embridery with Optional Free Arm Hoop C ........................................................................................................ 45
Taking Care of Your Machine
Cleaning the Hook Area ..................................................................................................................................... 46
Replacing the Bobbin Case ................................................................................................................................ 47
Changing the Light Bulb ..................................................................................................................................... 47
DESIGN CHART.......................................................................................................................... 48-49
TROUBLESHOOTING ...................................................................................................................... 50
INDEX .......................................................................................................................................... 51-52
NOTE: Information found in this instruction manual is current at the time of printing. Elna
reserves the right to change and update specifications and information as needed.

3
Machine Parts and Functions
Part Names
1. Top cover
2. Design chart
3. Spool pin
4. Spool holder, large
5. Bobbin winder cutter
6. Bobbin winder spindle
7. Bobbin winder stop
8. LCD touch screen
9. Start/Stop key
10. Bobbin cover plate release button
11. Extension table (accessory storage box)
12. Bobbin cover plate
13. Needle plate
14. Built-in needle threader
15. Thread cutter and holder
16. Face plate
17. Thread tension dial
18. Thread take-up lever
19. Thread guide slit
20. Needle clamp screw
21. Needle
22. Presser foot
23. Carrying handle
24. Presser foot lever
25. Carriage
26. Machine socket
27. Power switch
28. Card eject button
29. PC design card (optional)
30. PC design card slot
31. Flywheel (always turn towards you)
12346
5
7
8
12 11
10
9
15
14 13
17
16
18
22
21
20
19
27 26
25
24
30
29
28
31
23

4
Standard Accessories
1. Bobbins
2. Lint brush
3. Additional spool pin
4. Spool pin felt
5. Spool stand
6. Spool holder (large)
7. Spool holder (small)
8. Scissors
9. Screw key
10. Screwdriver
11. Set of needles
12. Standard hoop – A (with template)
13. Large hoop – B (with template)
14. Power supply cord
15. Instruction Manual
16. Template sheets
11
6
5
43
2
1
10
9
87
13
12
15
14
16

5
Extension Table (Storage Box)
Most accessories are stored inside the extension
table.
To Open:
Pull cover towards you. Lift out the packet of
accessories.
Ferr Arm
Remove the extension table to access the free
arm.
To Remove:
Lift out extension table away from the machine, as
shown.
NOTE: Always embroider with the extension table
attached unless using optional free arm hoop C.
See page 45.
To Attach:
Place tabs over slots and push down on table.
Presser Foot Lever and Additional Presser
Foot Clearance
Raise and lower the foot with this lever q.
Before sewing can occur, the presser foot must be
lowered to close the tension discs.
You can raise the presser foot about 6.5 mm (1/4")
higher than the normal up position for easier
removal of the hoop. Pull the presser foot lever q
up beyond the normal up position.
q

6
321
21
3
Adjusting the Needle Thread Tension
Align the number 2 on the tension dial with the
setting mark q.
Balanced thread tension:
A small portion of needle thread should appear on
the underside of the fabric.
When adjusting needle thread tension, the higher
numbers tighten, the lower numbers loosen.
•Tension is too tight
The bobbin thread shows through on the topside
of the fabric.
Turn the dial to a lower number to loosen the
needle thread tension.
•Tension is too loose
The needle thread forms loops and looks ragged.
Turn the dial to a higher number to tighten the
needle thread tension.
q
q

7
N
O
Getting Ready to Embroider
Connecting Machine to Power Supply
Machine has an auto voltage system and will
automatically adjust to any local power supply
voltage between 100 and 240V, 50/60 Hz.
Always use the power supply cord that came with
the machine.
To connect machine to power supply, turn off the
power switch q. Insert machine plug w into the
machine and the power supply plug e into the
wall socket.
Your machine may come equipped with a
polarized plug (one prong wider than the other). A
polarized plug reduces the risk of electrical shock.
This plug is intended to fit into a polarized outlet. If
the plug does not fit fully into the outlet, reverse
the plug. If it still does not fit, contact a qualified
electrician to install the proper outlet. Do not
modify the plug in any way.
For Your Safety
Do not use extension cords or plug adapters.
Do not touch plug with wet hands.
Always turn off the power/light switch first and then
unplug from the electrical outlet. Examples:
•when leaving the machine unattended
•when cleaning the machine
•when attaching or removing parts such as
needle or needle plate
Do not place heavy items on cords. Do not subject
cords to heat. Do not use damaged cords. Have
the cord repaired immediately.
While the machine is in operation, always keep
your eye on the sewing area and do not touch
any moving parts such as the thread take-up
lever, flywheel or needle.
q
w
e

8
Edit
Mode
1 2 3 4
5 6 7 8
Designs
HoopSize A(F):126
X
110mm
A Z
IMPORTANT:
Before turning on your machine, clear
your table surface of anything that might
obstruct the carriage movement. If your
machine is in a cabinet, check that the
machine is even or above the cabinet
surface. (The carriage could possibly hit
the cabinet and disturb the sewing result.)
TURN ON THE POWER SWITCH.
NOTE: After turning on the machine there is
approximately a six second delay before the LCD
Touch Screen becomes visible. (This is the
required boot up time and is not a malfunction.)
qStart/Stop Key (changes color to indicate
function)
Press this (green) key to start the machine.
When the machine is running, press this (red)
key to stop machine.
NOTE: The Elna 8200 is equipped with a
safety feature that will automatically shut down
the machine to prevent overheating if it is
running overloaded. Follow the instructions
that appear in the LCD touch screen should
this occur.
q

9
Edit
Mode
1 2 3 4
5 6 7 8
Designs
HoopSize A(F):126
X
110mm
A Z
LCD Touch Screen
When the machine is turned on, the design
selection window will appear in the LCD touch
screen.
NOTE: Only a light touch is required when
making a selection on the LCD touch screen. Do
not touch the surface of the screen with any hard
or sharp object, such as pencils, pens,
screwdrivers, etc.
Design Selection Window Keys
1. Built-in designs
There are 58 built-in designs. For an overview,
see page 48.
2. Alphabets
Three distinctive fonts – Gothic, Script and
Cheltenham. In addition, 2 letter and 3 letter
monogramming. See page 30.
3. PC design cards (optional)
Please verify that this machine will accept
compact flash card. See page 36.
4. Edit
This is the window where you can modify and
combine designs. See page 37.
5. Next key
Touch this key to go forward to next window in
sequence.
6. Previous key
Touch this key to go back to the previous
window in sequence.
7. Window category
Names the window function based on the
activated category.
8. Hoop recommendation
Identifies the appropriate hoop (and shows its
dimensions) depending on the designs
displayed on the screen. The example shows
standard rectangular A hoop and the optional
round F hoop.
9. Sound
This symbol indicates the beep sound is on.
See page 11.
10. Mode key
This key opens the mode selection window.
See page 10.
3
2
791
54
6
10
8

10
Edit
Mode
1 2 3 4
5 6 7 8
Designs
HoopSize A(F):126
X
110mm
A Z
Mode Selection Window Keys
The mode key is displayed in the selection
window no matter the category: built-in designs,
alphabets, PC design cards or edit.
Touch the “Mode” key.
The mode selection window will open.
1. Open file key
Any designs that have been saved can be
recalled. See page 44.
2. SET preference key
You can program the machine to change the
default settings to reflect your personal sewing
style. See page 11.
3. On screen information key
View basic operation information windows.
See page 14.
4. Return carriage key
Use this key to bring the carriage back to the
store position after completing embroidery.
IMPORTANT: Always have the carriage in the
stored position before turning OFF the
machine.
5. Return key
Use this key to close this window and return to
the previous window.
3
5
4
21

11
Edit
Mode
1 2 3 4
5 6 7 8
Designs
HoopSize A(F):126
X
110mm
A Z
Screen Contrast
+
inch/mm
5
+
Eco Mode
SET
inch mm
Register
10
min
SET Preference Keys
These functions can be set according to your
preferences: screen contrast, sound volume, eco
mode, inch/mm, adjust key position, set maximum
embroidery speed, sewing light, thread selection,
format and language.
Touch the “Mode” key.
Touch the “SET” preference key to access and
personalize the machine settings.
1. Screen contrast
The LCD touch screen has an adjustable
backlight so the contrast can be lightened or
darkened. Touch the “+” key to darken and the
“–” key to lighten.
2. Sound
The beep volume default setting is 5 but it can
be adjusted between 0 (off) and 10 (loud).
Touch the “+” key to increase and the “–” key
to decrease or turn off.
3. Eco Mode
After turning on the machine this energy
saving feature will darken the LCD touch
screen and turn off the sewing light if the
machine has not been used. Simply touch the
LCD screen for the screen and light to turn
back on. The eco mode default setting is 10
minutes but it can be adjusted between 1 and
30 minutes. Touch the “+” key to increase and
the “–” key to decrease. If you want to turn off
the eco mode, touch the “+” key until “OFF”
appears in the display.
4. Inch/millimeter
Choose to have the measuring unit for designs
readout in either inch or millimeters. The
default unit setting is millimeters. Touch either
the “inch” or “mm” key.
5. Touch the “Next” key.
NOTE: Any change in the set preference window
must be “registered” to be activated. Only touch
the “Register” key (6) after making all changes
desired.
1
2
3
4
5
6

12
Key Position Adjustment
END
Key Position Adjustment
Sewing Light
+
Maximum Speed Setting SET
Register
650spm
Yes
Key Position Adjustment
Sewing Light
+
SET
Register
650
spm
Yes
Maximum Speed Setting
Key Position Adjustment
PRESS MARK ( )
+.
7. Adjust key positions
If the touch keys in the LCD touch screen do
not react to your touch, the keys may need to
be adjusted or realigned.
Touch the “Yes” key to open the key position
adjustment window.
The first of five black plus (+) symbols will
appear. Touch the black symbols in the order
that they appear.
After the fifth black symbol is touched, the
END message appears. Wait a few moments
and the set preference window reappears.
8. Set maximum embroidery speed
The maximum embroidery speed default
setting is 650 spm (stitches per minute).
Designs featuring narrow zigzag stitches may
need to be sewn at a slower speed for best
results. Touch the “–” key to decrease and “+”
key to increase.
9. Sewing light
You can operate the machine with the sewing
light on or off. Touch this key to change
between the two settings.
Touch the “Next” key.
7
8
9

13
Thread selection
Reset all to defaults
Format
Built-in Memory
ATA PC Card
SET
Register
Madeira Mettler
Robison-
Anton
Yes
Yes
Yes
10. Select thread brand
Choose from three popular brands of
embroidery thread. The default thread brand is
Robinson-Anton®. Touch the key that
represents the brand of thread you use most
commonly. The color code and name for that
brand of thread will be displayed in the LCD
screen after selecting a design.
Format
If the built-in memory or PC design card does not
function because the memory bank is damaged,
you must re-enable by formatting the memory.
NOTE: Formatting will erase all stored data.
11. Built-in memory
Touch “Yes” key next to Built-in memory.
12. PC design card (or Compact Flash)
Touch “Yes” key next to ATA PC card.
13. Reset to factory defaults
Touch this key to return everything, except
language, to the default settings (same
settings as when you purchased the machine).
14. Language selection
Touch the language key to open the language
selection window.
Choose from eleven languages. Touch the key
that represents the language you desire.
a. English
b. French
c. Spanish
d. Italian
e. Dutch
f. German
g. Portuguese
h. Swedish
i. Russian
j. Finnish
k. Japanese
15. Register key
Touch this key to save your personal settings
and exit the set preferences window. If you
touch the “Return” key (16), you will exit the
set preference window but the new setting will
not be saved.
10
11
12
13
14
c
b
a
15
d
e
f
g
h
i
j
k
(16)

14
Edit
Mode
1 2 3 4
5 6 7 8
Designs
HoopSize A(F):126
X
110mm
A Z
Index
Changing needles
Inserting the bobbin
Winding the bobbin
Threading the machine ?
?
?
?
Changing needles
How to Access On Screen Information
The LCD touch screen can show you information
for these basic machine operations: changing
needles, inserting the bobbin, threading the
machine and winding the bobbin.
1. Touch the “Mode” key to open the mode
selection window.
2. Touch the “On Screen Information” key to
open the index window.
3. Touch one of the keys in the index window.
4. View the illustrations of the topic selected.
5. Touch the “Return” key to go back to the
index window. Touch “Return” key again to
exit mode selection window.
2
5
3
1

15
Winding a Bobbin
To remove bobbin, slide bobbin cover plate
release button qto the right and lift away the
bobbin cover plate w.
Lift out the bobbin e. (Always use bobbin type
supplied with machine.)
Lift up the spool pin. Place the spool of thread on
the spool pin with the thread coming off the spool
as shown. Attach the spool holder and press it
firmly against the spool of thread.
NOTE: Spool holder needs to be changed
according to the type of thread spool
(A) Large spool
(B) Small spool
Additional Spool Pin
The additional spool pin can be used to wind a
bobbin without unthreading the machine.
PROCEDURE: Insert the spool stand wand the
additional spool pin ein the hole q. Place the felt r
and spool ton the pin with the thread coming off
the spool as shown.
NOTE: Hole is located in front and to the right of
the standard spool pin.
q
w
e
(A)
(B)
w
e
q
r
t

16
21
3
Using both hand, pull thread towards left and
insert thread into slit.
Pull the thread (dotted line in illustration) around
the thread guides following the broken lines
indicated on the machine .
Pass the thread through the hole in the bobbin
from inside to the outside. Place the bobbin on the
bobbin winder spindle w.
Push bobbin winder spindle to the right. (The LCD
touch screen will show a bobbin winding
message.) Holding the free end of the thread,
press the Start/Stop key. Stop machine after the
bobbin has made a few turns. Cut the thread tail
close to the hole in the bobbin. Start machine
again to continue winding bobbin. When the
bobbin is fully wound, stop the machine.
Move the spindle to the left to return the bobbin
winder to its original position. Remove the bobbin
and cut the thread with the bobbin winder cutter e.
NOTE: Do not move the bobbin winder spindle
while the machine is running.
If the machine is running for more than two
minutes during bobbin winding, it will automatically
stop for safety purposes.
q
w
e
q
q
w

17
Inserting the Bobbin
Place the bobbin in the bobbin case with the
thread running counterclockwise.
Guide the thread into notch qon the front side of
the bobbin case. Hold the bobbin with your right
hand and pull the thread to the left, through the
tension spring blades.
Continue pulling the thread lightly until the thread
slips into notch w.
Pull out about 15 cm (6") of thread.
Replace the bobbin cover plate.
Refer to the chart shown on the bobbin cover plate
to check the threading.
q
w

18
Threading the Machine
Raise the presser foot with the presser foot lever.
Hand turn the flywheel (always turn towards you)
to bring the needle up to its highest position.
Using both hands, pull thread towards left and
insert thread into slit. firmly insert the thread under
the thread guide plate .
Pull thread foward around guide . (Thread
pathway is indicated on the machine with solid
line.)
Guide the thread down right channel and around
the thread holder .
Pull the thread up the left channel to the take-up
lever. Firmly pull the thread from right to left, over
the take-up lever and down into the take-up lever
eye r.
Proceed down left channel and through the lower
threadguidet.
Slide the thread to the left behind the needle bar
thread guide y.
Thread the needle from front to back manually or
use the built-in needle threader. See page 19.
4
21
3
q
w
e
e
t
y
r
q
w

19
Built-in Needle Threader
Hand turn the flywheel (always turn towards you)
to bring the needle up to its highest position. Turn
OFF the power switch. Lower the presser foot.
Pull down the needle threader lever qas far as it
will go. Hook w is automatically inserted into the
needle eye.
Bring the thread around guide eand under hook
w.
Slowly release the lever while holding the thread
end and let the needle threader return to its
original position. A loop of thread ris pulled
through the needle eye.
Pull the thread loop off the guide to the back and
manually bring the thread through the needle eye.
NOTE: The needle threader can be used with #11
to #16 size needles. Thread weight may vary from
30 to 90.
If the needle threader does not catch a thread
loop, check the needle and positioning.
qw
ew
r
Other manuals for 8200
2
This manual suits for next models
1
Table of contents
Other ELNA Sewing Machine manuals

ELNA
ELNA eXcellence 790PRO User manual

ELNA
ELNA 6600 User manual

ELNA
ELNA Creative Series User manual

ELNA
ELNA eXplore 220 User manual

ELNA
ELNA 434 - LEAFLET User manual

ELNA
ELNA 1000 Sew 75 User manual

ELNA
ELNA 654 - User manual

ELNA
ELNA eXcellence 782 User manual

ELNA
ELNA 500 CLUB User manual

ELNA
ELNA 2600 User manual