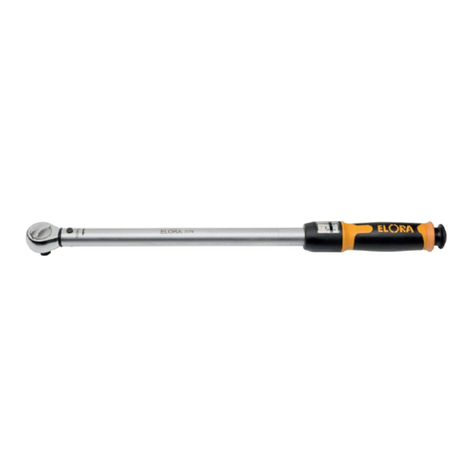
ELORA 2034 Technical manual

SICHERHEITSWARNUNG
Überbelastete oder defekte Befestigungen, Einsätze und auch der Drehmomentschlüssel können plötzlich brechen. Dadurch kann man das Gleichgewicht verlieren, fallen und andere Verletzungen
erleiden.
Darum achten sie auf sicheren Stand und andere Sicherheitsmaßnahmen.
INSTANDHALTUNG
1. Wenn Sie den Drehmomentschlüssel nicht gebrauchen, stellen Sie Ihn auf den kleinsten Wert und lagern Sie Ihn in der mitgelieferten Verpackung.
2. Außer dem Ratschenmechanismus darf der Schlüssel nicht geschmiert werden. Benutzen Sie dazu ein paar Tropfen Nähmaschinenöl.
3. Benutzen Sie nicht Aceton oder andere Lösungsmittel zum Reinigen des Schlüssels. Stattdessen benutzen Sie Fensterreiniger oder denaturierten Alkohol und einen sauberen Lappen.
4. Mit Ausnahme des Knarrenmechanismus, hat der Drehmomentschlüssel keine durch den Benutzer austauschbaren Teile. Zerlegen Sie nicht den Drehmomentschlüssel. Wenn bei dem
Drehmomentschlüssel eine Reparatur erforderlich ist, schicken sie den Schlüssel zu dem nächsten autorisierten Reparaturcenter.
ZERTIFIZIERUNG
Dieser Drehmomentschlüssel ist vor dem Versand mit einer Genauigkeit von +-3% im Uhrzeigerrichtung kalibriert worden.
Bei der Verwendung von Einsteckwerkzeugen ist das angegebene Stichmass besonders zu berücksichtigen!
Entspricht das Stichmaß des Verwendeten Einsteckwerkzeugs exakt dem des Werkskalibrierstichmaßes
(SS= 17,5 mm bei Rechteckaufnahme 9 x 12 mm und SS= 25 mm bei 14 x 18 mm) des Drehmomentschlüssels, dann ist das eingestellte Drehmoment der tatsächliche Wert.
Falls Einsteckwerkzeuge mit einem anderen Stichmass verwendet werden sollen, muss der Wert des Einstelldrehmomentes MIerrechnet werden, um den korrekten Solldrehmoment (MS) zu erzielen.
Dies ist anhand der folgenden Formel möglich:
Dabei gilt:
MSSolldrehmoment
lSHebellänge Drehmomentschlüssel + Werkskalibrierstichmaß
SVEinsteckwerkzeugstichmaß
SSWerkskalibrierstichmaß
(SS=17,5 mm bei Rechteckaufnahme 9 x 12 mm und SS=25 mm bei 14 x 18 mm)
MIEinstelldrehmoment
= MI
MSx lS
IS+ SV - SS
Drehmomentschlüssel
ELORA-Nr. 2034
Bedienungsanleitung
ELORA WERKZEUGFABRIK GMBH
Am Blaffertsberg 33, 42899 Remscheid
Tel.: +49 (0)2191.5627 - 0
Fax.: +49 (0)2191.5627 - 19
info@elora.de
www.elora.de
20220228
Bedienungsanleitung vor Anwendung bitte lesen!
1. Dieser Drehmomentschlüssel ist ein Präzisionsinstrument und nur
zum Anziehen von Schrauben und Muttern mit bestimmtem
Zieldrehmoment konstruiert.
2. Bitte nicht als Brecheisen, Hammer oder anstatt einer normalen
Knarre benutzen.
3. Den Drehmomentschlüssel bitte nicht über die maximal Kapazität
belasten. Die Belastung nur an dem Griff aufbringen.
Keine Griffverlängerung wie ein Stück Rohr verwenden!
4. Versichern Sie sich daß Sie das genaue Zieldrehmoment in der
richtigen Einheit laut Spezifikation einstellen. Anderenfalls könnte ein
zu hoher oder zu niedriger Drehmomentwert eine Beschädigung der
anzuziehenden Vorrichtung verursachen.
5. Demontieren Sie den Drehmomentschlüssel nicht!
Hoch vorgespannte interne Komponenten können durch
unsachgemäße Demontage schwere Verletzungen verursachen.
6. Der Drehmomentschlüssel sollte periodisch rekalibriert werden.
Die Kalibrierung sollte spätestens einmal im Jahr, nach übermässiger
Benutzung oder Überlastung oder nach 5000 Belastungszyklen
(„clicks“) erfolgen.
EINSTELLEN DES DREHMOMENTWERTES
1. Den Verriegelungsknopf herausziehen.
2. Den Griff im Uhrzeigersinn drehen um den Drehmomentwert zu erhöhen und im
Gegenuhrzeigersinn um Ihn zu verringern. Bitte das Ziehldrehmoment mit Hilfe der Skala
einstellen. Wenn Sie über das gewünschte Drehmoment hinweg sind, drehen Sie den Griff
eine Umdrehung zurück und stellen dann den gewünschten Wert ein.
3. Die Hauptskala zeigt den eingestellten Drehmomentwert in der primären- und die
Nebenskala in der sekundären Einheit.
4. Den Verrieglungsknopf drücken um den Griff zu verriegeln. Die Nebenskala könnte etwas
außerhalb der Mittelmakierung sein. Dies hat aber keinen Einfluß auf die Genauigkeit.
Hauptskala Nebenskala Verriegelungsknopf
rutschfester
QUATROLIT®-2K-Griff
Gehäuse aus gehärtetem,
legiertem Stahl

READ BEFORE YOU USE
1. This torque wrench is a precision instrument
intended to be used only to tighten screws, bolts and nuts to a desired
torque.
2. Do not use it as a „nut breaker“, pry bar, hammer, or in lieu of a regular
ratchet wrench.
3. Do not apply torque in excess of the maximum capacity of the wrench.
Apply load on the grip only, and do not use any handle extension bars (a
piece of pipe put over the grip).
4. Make sure that you adjust the wrench to the exact
torque units your specifications call for, or you will severely under-torque or
over-torque, causing severe damage to the equipment you are working on.
5. Do not disassemble the wrench for any reason. Highly stressed internal
components may cause severe injury when released in an unintended
manner.
6. The wrench should be re-calibrated periodically. The calibration of
the wrench should be checked at least once a year, after any abnormal
handling or overloading, or after 5,000 cycles („clicks“).
SETTING TORQUE
1. Pull the lock knob out.
2. Turn the grip in the clockwise direction to increase the torque, and in the counterclockwise to
decrease it. Please set torque going up the scale. If you exceed desired torque, please adjust
torque to one revolution below the desired torque, then back up.
3. The major scales show the amount of torque in both primary and secondary units. The minor
scale shows fine increments in primary units.
4. Push the lock knob in to lock the grip. The minor scale may be slightly off the centerline mark
without affecting the accuracy of your settings.
SAFETY WARNING
Overtorqued or defective fasteners, sockets, as well as the wrench itself, may suddenly break causing you to lose balance, fall, or to suffer other trauma. Be sure that you have firm footing,
are properly balanced, and if necessary are using appropriate harness, back support, or other safety device.
MAINTANANCE
1. When not in use, adjust the wrench to its lowest reading , and store it in the provided case.
2. Do not lubricate the wrench, exept the ratchet mechanism. Use only a few drops of light machine oil.
3. Do not use acetone or other solvents to clean the wrench, use window cleaner or denatured alcohol applied with a clean cloth instead.
4. With the exception of the ratchet mechanism, there are no user-serviceable parts. Do not disassemble the torque wrench for any reason. When service is needed, send the wrench to the nearest
factory-authorized service center.
CERTIFICATION
This torque wrench is certified to have been calibrated prior to shipment to the accuracy of +/- 3% in the clockwise direction .
When using insert tools, it is essential to take into account the stated extension.
If the extension for the insert tool to be used is exactly the same as the work calibration extension
(SS= 17.5 mm for 9 x 12 mm mounts and SS= 25 mm for 14 x 18 mm mounts) of the torque wrench, the torque level you have set will be correct.
Where insert tools having a different extension value are to be used, the set torque MIwill have to be calculated to ensure that the required target torque (MS) is, in fact, achieved.
This can be done using the following formula:
Where:
MStarget torque
lSlever length of the torque wrench + works calibration extension
SVextension of the insert tool
SSworks calibration extension (SS= 17.5 mm for 9 x 12 mm mounts
and SS=25 mm for 14 x 18 mm mounts)
MItorque setting on the wrench
= MI
MSx lS
IS+ SV - SS
TORQUE WRENCH
ELORA-No. 2034
Operation Instruction
ELORA WERKZEUGFABRIK GMBH
Am Blaffertsberg 33, 42899 Remscheid
Tel.: +49 (0)2191.5627 - 0
Fax.: +49 (0)2191.5627 - 19
info@elora.de
www.elora.de
20220228
Major torque units Minor torque units Lock knob
ergonomical
QUATROLIT®-2 Component handle
Hardened alloy steel housing
Table of contents
Languages:
Other ELORA Power Tools manuals
Popular Power Tools manuals by other brands

SPX
SPX Waukesha Cherry-Burrell CM instruction manual
Black & Decker
Black & Decker BDCMTR instruction manual

Canadian Tire
Canadian Tire 060-3798-0 Use and care guide

ProMeister
ProMeister Dr Twist PT5933 user guide
Raider
Raider RD-HP03 user manual
Parkside
Parkside PDSP 1000 B2 translation of original operation manual
