elsner elektronik SOL User manual
WLAN Interface SOL
for Solexa II control
Technical specifications and installation instructions
Item number 10154
EN
Technical support: +49 (0) 70 33 / 30 945-250
Elsner Elektronik GmbH Control and Automation Engineering
Sohlengrund 16
Germany Fax +49 (0) 70 33 / 30 945-20 www.elsner-elektronik.de
2 Description
SOL interface • Version: 24.11.2017 • Technical changes and errors excepted.
1. Description
The SOL interface WLAN connects the Solexa II building control system with the Sol-
exa II mobile app. With the app installed on the mobile device, meteorological data can
be called up and devices and drives operated manually. Readings from the indoor sen-
sor installed in the system can also be viewed over the WLAN.
The SOL interface receives the data from the app via the on-site Wi-Fi and the mobile
internet (VPN). These are then forwarded from the interface to the Solexa II by radio.
Data from the Solexa II weather station is transferred to the app in the same way.
The app can be installed on up to 6 mobile devices that can access the interface SOL
simultaneously. Commands that are typed in (e.g. blinds up/down) are executed in suc-
cession in the order of their arrival.
1.1. Deliverables
• Interface in the housing for CEE 7/4 socket.
1.2. Technical specifications
The product is compliant with the provisions of EC guidelines.
2. Instructions for first commissioning
2.1. Installation notes
Installation, testing, operational start-up and troubleshooting should
only be performed by an electrician.
The device is only to be used for its intended purpose. Any improper modification or
failure to follow the operating instructions voids any and all warranty and guarantee
claims.
After unpacking the device, check it immediately for possible mechanical damage. If it
has been damaged in transport, inform the supplier immediately.
Interface dimensions approx. 67 x 110 x 91 (W x H x D, mm)
Weight of interface approx. 260 g
Housing material Plastic, black
Protection category IP20
Ambient temperature Operation -20…+50 °C, storage -55…+70°C
Ambient humidity max. 95% RH, avoid condensation
Power supply 230 V AC (earthed CEE 7/4 plug)
Wireless frequency 868.2 MHz and 2.4 GHz

3 Setting up interfaces, WLAN, app
SOL interface • Version: 24.11.2017 • Technical changes and errors excepted.
The device may only be used as a fixed-site installation; that means only when assem-
bled and after conclusion of all installation and operational start-up tasks and only in
the surroundings designated for it.
Elsner Elektronik is not liable for any changes in norms and standards which may occur
after publication of these operating instructions.
2.2. Prerequisites
In order to be able to use the SOL interface following requirements must be fulfilled:
• A mobile device must be available (smart phone or tablet) with the Android
operating system 4.0.3 or higher or Apple iOS 8.0 or higher.
• A Solexa II system with weather station (from version 1.1) must be installed.
• A router and an active wireless network (WLAN) must be available. Take
appropriate actions to protect your WLAN against unauthorised access, e.g.
encryption etc.!
2.3. Notes on wireless equipment
When planning facilities with devices that communicate via radio, adequate radio re-
ception must be guaranteed. The range of wireless control will be limited by legal reg-
ulation and structural circumstances. Avoid sources of interference and obstacles be-
tween receiver and transmitter, that could disturb the wireless communication. Those
would be for example:
• Walls and ceilings (especially concrete and solar protection glazing).
• Metal surfaces next to the wireless participants (e. g. aluminium construction
of a conservatory).
• Other wireless devices and powerful local transmitters (e.g. wireless
headphones), which transmit on the same frequency (868,2 MHz). Please
maintain a minimum distance of 30 cm between wireless transmitters for that
reason.
2.4. Notes on mounting and commissioning
Device must not be exposed to water (rain). This could result in the electronic being
damaged. A relative air humidity of 95% must not be exceeded. Avoid bedewing.
3. Setting up interfaces, WLAN, app
The SOL interface is connected to the on-site WLAN and, in addition, establishes a
wireless connection to the Elsner Solexa II wireless system.
3.1. Installing the app
For Android devices:
Open the Google Play Store and install the Solexa II mobile app.

4 Setting up interfaces, WLAN, app
SOL interface • Version: 24.11.2017 • Technical changes and errors excepted.
For iPhone / iPad:
Open the App Store and install the Solexa II mobile app.
3.2. Putting the SOL interface into operation
The interface is plugged into a mains socket (CEE 7/4). The mains voltage must be
230 V AC / 50 Hz.
Fig. 1
1LED
2 Reset key (recessed)
2
1

5 Setting up interfaces, WLAN, app
SOL interface • Version: 24.11.2017 • Technical changes and errors excepted.
Read off the current equipment status from the LED status display type on the side:
LED off Initialising
Initialising can take up to 1 minute.
LED on WLAN configuration mode
In order to be able to use the SOL WLAN interface, you
must, first of all, configure the settings of the on-site
WLAN (-> section configuring WLAN)
Fig. 2 Screenshot of WLAN settings

6 Setting up interfaces, WLAN, app
SOL interface • Version: 24.11.2017 • Technical changes and errors excepted.
3.3. Configuring the WLAN
Prerequisite: The SOL interface status LED must be lit permanently.
Call up the available WLAN networks on your mobile device. Select the "SOL WLAN
interface" network. The mobile device is then connected with the SOL WLAN interface.
Start the app. Input fields will appear, into which you enter the on-site WLAN settings
"network name (SSID)", "encryption" and "code".
Now press "Save" top right in the menu screen. After about 10 seconds, the LED on the
SOL interface starts to blink regularly at short intervals. The interface is now connect-
ed with your WLAN router.
LED flashes regularly at
short intervals
Connected with the router
The SOL WLAN interface is connected with your
router. Log on with your mobile device into the same
WLAN network and start the app.
LED goes out briefly every 2
seconds
No WLAN connection to the router.
A connection to your router could not be established.
If necessary, position the WLAN interface closer to the
router. If the access data to your router has been
changed, reset the SOL to the default factory settings
(SOL section on resetting to factory settings) and con-
tinue with configuring the WLAN section.
Fig. 3 Screenshot showing No WLAN interface
7 Operating the app
SOL interface • Version: 24.11.2017 • Technical changes and errors excepted.
First of all, call up the available WLAN networks again and connect with the on-site
WLAN network. Restart the app.
3.4. Connecting to the Solexa II weather station
After successful WLAN configuration and restarting of the Solexa II mobile app, the no-
tice that a Solexa II must be taught is displayed. Briefly disconnect the Solexa II weath-
er station from the power supply (switch the fuse on the weather station off and back
on again).
A beep indicates that the weather station has been taught successfully.
The interface is now connected with the weather station and can transmit data to the
Solexa II mobile app. The app is now ready for use.
Alternatively, the weather station can be taught by pressing the PRG button on the in-
side of the housing. However, this may only be done by a qualified electrician since the
PRG button is on the inside of the weather station.
WARNING!
Electrical voltage!
The weather station programming button is on the inside of the
housing and thus in the proximity of unprotected, live components.
• The device may only be taught in this manner by a qualified
electrician (according to VDE 0100).
3.5. Resetting the SOL to the factory settings
The factory settings can be recreated using the reset button. For this, initialisation must
be completed, recognisable by the LED status (LED is on or blinks).
Press down the recessed reset button on the side of the device, next to the LED, with a
pointed object for 5 seconds.
4. Operating the app
The app has two screens: Overview and Operating Screen.
8 Operating the app
SOL interface • Version: 24.11.2017 • Technical changes and errors excepted.
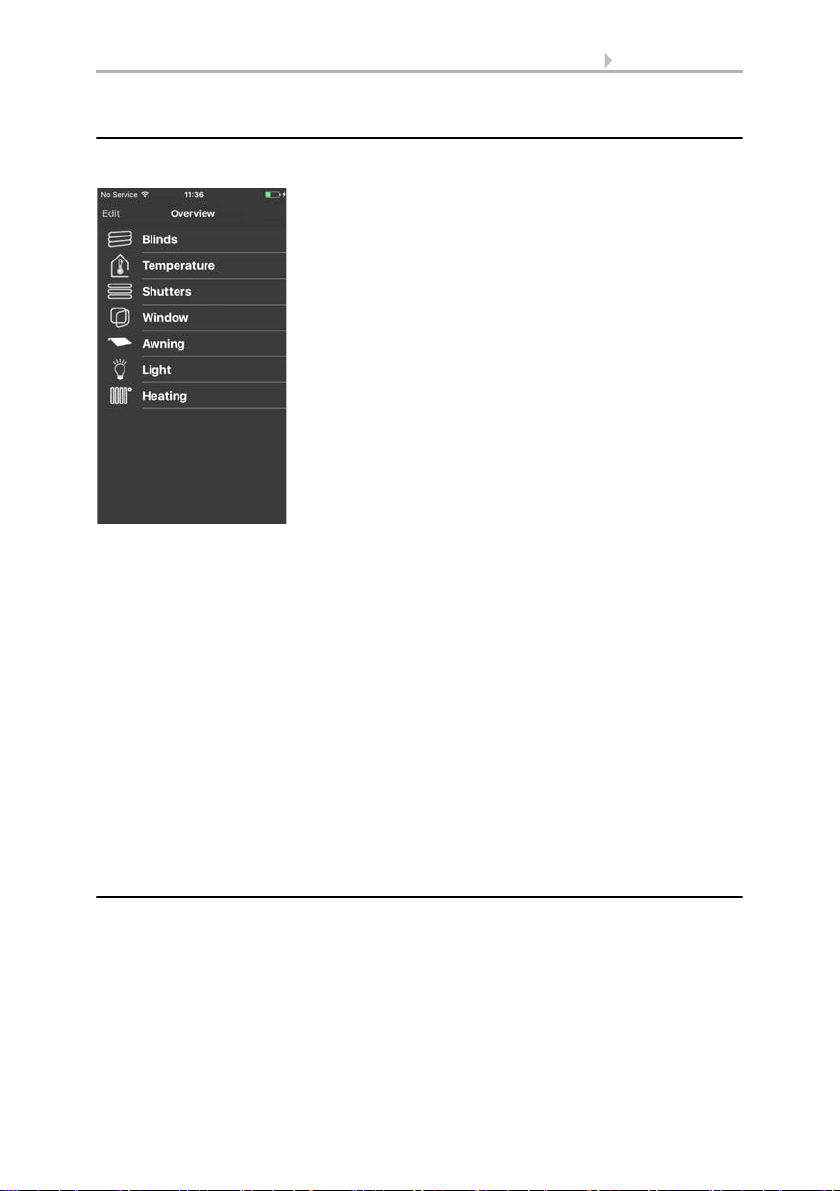
4.1. Overview
All the occupied memory locations of the Solexa II are shown in a list. Tap to select the
appropriate position and switch to the operating screen. In addition, you can change
the name for the display in the app.
Changing names in iOS
• Click on "Edit" top left.
• Tap on the left, next to the item on the red circle with the minus sign.
• Alternatively: Swipe the item to the left with your finger.
• The "Edit" menu opens on the right next to the item. Tap on "Edit" and assign
the new name. Either confirm with "OK" or close the input screen using
"Cancel".
Changing names in Android:
• Press on the desired item until a text-box with a keyboard appears.
• Confirm with "OK" or touch the display outside the keyboard to cancel.
4.2. App operating and display screen
Change to the next/previous item by swiping to the left or right with your finger in the
upper half of the screen.
Switch to the overview screen with "< Overview" in the upper left of the menu bar.
Fig. 4 Overview screen

9 Operating the app
SOL interface • Version: 24.11.2017 • Technical changes and errors excepted.
4.2.1. Drive and device operation, displaying indoor sensor
values
The functions of the selected drive or device or the indoor sensor data are displayed in
the top half of the display.
1 Manual/Automatic button:
• Tap the button to switch between manual/hand operation and automatic
operation
2 Rocker switch:
• Tap the rocker switch to trigger short movement commands or switching
commands
• If a drive is to move continuously upwards/downwards, hold the rocker switch
down for at least one second,
3 Text display:
•Name
• For shading and windows: current movement position
• For heating and lighting: current status (if applicable, level of dimming)
• For sensors: current values
4 Weather data:
• Rain (Yes/No)
•Brightness
•Windspeed
• Outside temperature
Fig. 5
Drive example
Fig. 6
Heating example
Fig. 7
Sensor example
1
2
3
4
1
2
3
3
This manual suits for next models
1
Table of contents
Other elsner elektronik Recording Equipment manuals

elsner elektronik
elsner elektronik KNX B4 Universal User manual

elsner elektronik
elsner elektronik KNX B4 Universal Maintenance and service guide

elsner elektronik
elsner elektronik KNX 70190 Guide

elsner elektronik
elsner elektronik KNX B4 Universal Guide

elsner elektronik
elsner elektronik 60133 User manual


