Elstat EMS-55 Owner's manual


2
INDEX
Contents Page
General description of the EMS 3
Installation instructions 4-5
Locating the appliance and condenser sensors 6-7
Self learning module 8-9
Relearning and resets 10
Soft start 11
Minimum compressor rest time 11-12
Automatic defrost management 12
Voltage management 12-13
Managing the internal fans 13
Door open alarm 13
Diagnostics 14
Uninterrupted pull down function 14
Button commands 15
Display 16-17
Control settings 18-20
Statistical scroll 21-22
Products in the EMS range 23
Technical information 24
Contact information 25
Supplement 26

3
EMS-55-(R) Instruction Manual
GENERAL DESCRIPTION
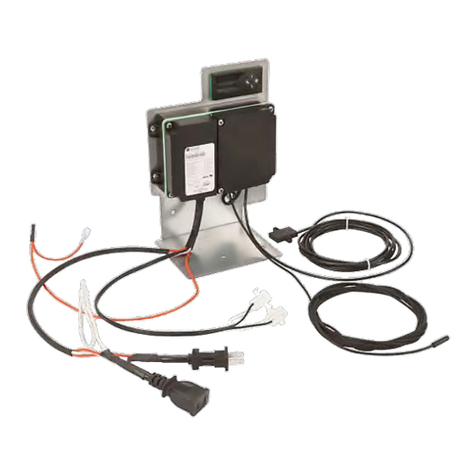
The EMS (Energy Management System) saves energy by allowing the temperature in the cooler to
rise during periods when the outlet is closed. The unit is totally self managing and does not require
any interference of the user. It can substantially reduce the number of service calls whilst saving on
average 38% energy.
To ensure that the product is at the correct temperature, the EMS will switch to operational mode 2
hours before the outlet opens (this timing is adjustable). Subsequently the control will switch to
standby mode 1 hour after the outlet closes (again this timing is adjustable).
Fig. 1
Figure 1 shows a typical temperature graph. During stand-by period the temperature inside the appliance will rise to a higher
(standby) level and the lights will be switched off.

4
INSTALLATION INSTRUCTIONS
The EMS can be mounted either horizontally or vertically however, it is necessary when installing the
EMS or RMD55 to ensure that the motion detection window has a clear and unrestricted view into the
area in front of the cabinet.
CONNECTIONS
All line voltage connections are made via 6.5 mm spade terminals and all low voltage connections are
made via screw terminal blocks. When installing the EMS it is recommended to use insulated
connectors for all line voltage connections.

5
WIRING DIAGRAM
In addition to the above wiring diagram, a door switch should also be wired into the system. This
connection must go directly from the door switch to the terminals on the EMS (see printed label on the
control housing).
If a door switch is not used (not recommended) then a wire loop must be fitted to the door switch
terminals on the EMS (see below).

6
LOCATING THE APPLIANCE SENSOR IN THE RETURN AIR
The most reliable and most accurate representation of the liquid temperature inside the appliance is
the return air temperature. The air coming from the evaporator is, in the average cooler, between
approximately -8 / -12 OC. This air is then distributed over the load of the appliance and therefore
adopts the average temperature of the product it has been in contact with. By the time the air is
returned to the evaporator it is an accurate representation of the (average) liquid temperature inside
the cooler. It is for this reason that the EMS appliance sensor should be located in the return air.
LOCATING THE CONDENSER SENSOR
The EMS has a second temperature sensor for the discharge line, which is used to avoid the
refrigeration system overheating. The compressor manufacturer will usually quote a maximum
operating temperature measured at the top of the dome or on the discharge line 100mm away from
the compressor. It is advised to locate the sensor on the discharge line.

7
To ensure more accurate sensing of the discharge line temperature it is advisable to cover both
sensor and discharge line with an insulation material.
THE FASCIA MEMBRANE
The membrane cannot be removed from the control fascia, if attempted to do so, the membrane will
be permanently damaged and cannot be re-used.
Membranes are available as spare-parts if so required, to order, contact the manufacturer of the
control direct.
OPENING THE CONTROL
The EMS is ultrasonically welded together during its manufacture and thus any attempt to open the
control will result in damage that cannot be rectified.

8
THE SELF LEARNING MODULE
The EMS is capable of learning the opening and closing times of the outlet where the appliance is
located. During opening hours the control will switch the appliance to operational mode and during
closing times the control will automatically switch the appliance to stand-by mode.
To achieve this each day is divided into 48 thirty minute periods and each period is represented by a
single location in the EMS memory. Initially all the memory locations are set to zero (closed period)
and are changed to a one (open period), if sufficient passers by or door openings are registered.
When first installed, the cooler will run in operational mode for the first 48 hours (if the parameter
AF=3). During this period the EMS will monitor the traffic in the vicinity of the cooler and will calculate
its density to be high, medium or low. This is based upon the average number of motion counts and
cooler door openings per day over the 48 hour period.
Category
Number of passers by
registered per 24 hours
Number of door openings
registered per 24 hours
Low traffic (0)
< 45
< 15
Medium traffic (1)
> 45
> 15
High traffic (2)
> 90
> 30
The EMS will then set the AF parameter automatically to one of the following:
High traffic density setting (AF=2) will require 6 passers by or 2 door openings to register an
active period
Medium traffic density setting (AF=1) will require 3 passers by or 1 door opening to register
an active period
Low traffic density setting (AF=0) will require 1 passer by or 1 door opening to register an
active period
After this initial period the control will start to learn the opening pattern of the outlet. For the next 24
hours (or if AF<3) the control will remain in operational mode. After this period and for the next six
days it will act upon the pattern learnt during this 24 hours and will go into its standby mode during
periods of inactivity (outlet closed periods). Once the first week has passed the EMS will implement
the learnt pattern for each individual day whilst verifying that the data for that day is accurate. At the
end of the second week the control will finish learning and will act upon the established activity
pattern.
If the power to the EMS is lost, for whatever reason, then the matrix will remain in the memory for 3
days after this period the matrix will be lost. Once power is restored the EMS will relearn (see below).
To ensure that its firmware is suitable for all global time zones, the EMS is not subjected to “real time”
but is operates purely upon days, hours, minutes and seconds.
Components used to detect activity
For door openings
To detect door openings the EMS has an input for a door switch. This door switch must be a normally
open type and as the contact is a dry (no current is involved) a switch with gold contacts or
alternatively, a reed switch, may be used. Under no circumstances should the door switch be used to
switch any load.

9
For passers by
To detect passers by a passive infra-red motion detector is used. This must be positioned so that it
has an unrestricted view out of the front of the cooler. For the detector to function correctly it must not
be placed behind glass.
The EMS55 has a motion detector integrated into the fascia of the control and the EMS-55-R has a
connection for an external detector (RMD-55).
EMS-55 with integrated motion detector
EMS-55-R with external motion detector (RMD-55)

10
RE-LEARNING
If the outlet’s business times change or the learnt pattern is incorrect then the EMS will automatically
relearn. Under these circumstances the original pattern will be erased and the learning process will
begin again from day 1. Please note that the activity frequency will not be recalculated during a
relearn. For a relearn to occur the EMS must detect movement or the door being opened during a
stand by period. (The EMS can only relearn if it has finished learning).
ERASING THE EMS MEMORY
Half factory reset
If required, the learnt pattern can manually be erased by the using the following procedure:
Defrostbutton used to
erase the matrix
Disconnect the power to the control (unplug the cooler), push and hold the defrost button and restore
the power. Keep the button pressed until the display shows the temperature again, release the button
and the matrix will be erased. The control will then start to relearn. (During this procedure there will be
a short period when the display is blank)
Full factory reset
A full factory reset will erase the matrix, reset all parameters to the default and reset all the statistics
including the compressor running hours.

11
Disconnect the power to the control (unplug the cooler), push and hold the set and defrost buttons
and restore the power. Keep the buttons pressed until the display shows the temperature again,
release the buttons and the reset will be complete. (During this procedure there will be a short period
when the display is blank). The control will then start to relearn. If the parameter AF default setting is
3 then the control will relearn its activity frequency. This reset is only applicable if the compressor is
renewed or the default parameters need to be restored.
SOFT START FUNCTION
When a motor starts the start up current can be up to 6 times the running current, which means that
when a compressor starts the current drawn could be up to 36 amperes for a running current of 6
amps (This inrush will only last a few milliseconds).
This start-up current in an electric motor is unavoidable but yet the total inrush current can be
minimised by starting the motors at intervals. For example, rather than 2 motors starting at the same
time they can be started separately and this is exactly what the EMS does so as to minimise the start-
up current.
The delay between the start of the compressor and evaporator fans is approximately 20 seconds (this
value is not programmable).
MINIMUM COMPRESSOR REST TIME
This feature is designed to avoid unnecessary damage to the compressor (the most expensive
component) of the refrigeration system. When the compressor runs it generates a head pressure and
a back pressure in the refrigeration system. This pressure remains in the system for a period when
the compressor stops but it slowly equalises due to leakage in the valves. Testing has shown that
equalisation of these pressures takes approx. 2 minutes and it is for this reason that the EMS has a
minimum compressor rest time. (This value is adjustable by means of parameter RT and its default
setting is 3 minutes).
The minimum compressor rest time avoids:
High peak current through the windings of the compressor motor
Switching off on the thermal overload protection
Short cycling of the system

12
When a thermostat in a refrigeration system detects its pre-set temperature it switches off the
compressor. If after a short period the door of the cooler is opened, the thermostat may achieve its
switch on temperature very quickly. As there still may be high pressure in the outlet side of the
compressor, an extremely high torque is required to restart the system. If the compressor is a non-
capacitor start type then this may cause the system to switch off on its thermal overload protection. If
this occurs it can take as long as 5 –10 minutes before the thermal overload is restored. If the
compressor is a capacitor (assisted) start type then the capacitor will provide the extra current needed
to push through the existing pressures. However, the (unwanted and damaging) peak current will be
conducted through the windings of the compressor. If however the pressures in the system are
allowed to equalise then an early restart is prevented. Therefore the peak current drawn by the
compressor would be kept to a minimum value.
AUTOMATIC DEFROST MANAGEMENT
To avoid “icing-up” of the cooler, the EMS automatically performs a periodic off cycle defrost
depending upon the setting of parameters DE (defrost intervals) and DD (defrost duration). However,
if the defrost cycle occurs during a high traffic period i.e. frequent door openings of the cooler, then
the defrost cycle will automatically be terminated. This termination is based upon the temperature in
the appliance and can be adjusted by parameter Dt (defrost termination temperature). The
combination of frequent defrosts and the mode change from operational to stand-by will avoid the
cooler icing up.
Keeping the evaporator of a cooler free of ice/frost development enhances the heat exchange and
maintains the efficiency of the refrigeration system. If required a manual defrost can be performed by
pressing the defrost button for 5 seconds. If the cabinet temperature is above the termination
temperature then a manual defrost is inhibited.
VOLTAGE MANAGEMENT PROTECTION SYSTEM
Under voltage and to a lesser extent over voltage is damaging to an electric motors windings. The
EMS is programmed with a Voltage Management Protection System to avoid unnecessary damage to
the compressor when the appliance is installed in areas where the supply voltage is unstable. The line
voltage centre differs around the world and therefore the switching levels are programmable to ensure
that the EMS is suitable for worldwide use. When the system has switched off due to high voltage the
display shows the letters “SHI” (supply high) and when switched off due to low voltage the display
shows the letters “SLO” (supply low)
Please note that the EMS-55 does NOT rectify the voltage but merely monitors it and switches the
refrigeration system on and off if the supply voltage falls below or rises above, the limits programmed
in parameters HI and LO.
Below is the table with the value details for HI and LO parameters for the various voltages used
throughout the world.
110V - 120V Line voltage
Line voltage
LO parameter value
Line Voltage
HI parameter value
95V
120
125V
175
98V
125
131V
180
100V
130
135V
185
103V
135
138V
190
106V
140
141V
195

13
220V –240V Line voltage
LO parameter value
Line Voltage
HI parameter value
Line Voltage
130
173V
190
230V
135
178V
195
235V
140
182V
200
240V
145
187V
205
245V
150
192V
210
250V
155
197V
215
255V
160
203V
220
260V
225
265V
100V Line voltage (Japan)
Line voltage
LO parameter value
Line Voltage
HI parameter value
79V
120
104V
175
81V
125
110V
180
84V
130
114V
185
87V
135
118V
190
90V
140
122V
195
SWITCHING THE LIGHTS ON/OFF
The EMS automatically controls the lights of the cooler and will switch them off during stand-by and
back on during operational periods.
MANAGING THE INTERNAL FAN(S)
The EMS switches the internal evaporator fan(s), which gives the following benefits.
During periods when the compressor is off the fan(s) will cycle and not only will this save
energy but will increase the life expectancy of the fan(s) themselves.
When the cooler door is opened, the fan(s) are switched off (even when the compressor is
running). This means that the cold air in the cooler will not be pushed out and no ambient
(warm) air will be drawn in.
During an uninterrupted pull down the fan(s) will be run continuously even if the door is open.
THE DOOR OPEN ALARM
If the door of an appliance is accidentally left open the following would result:
A rise in temperature of the load inside the appliance
A substantial waste of energy to restore the required situation
Additional and unnecessary running hours for the refrigeration system

14
The EMS monitors the door status by means of the door switch. If the cooler door is left open for the
period set in parameter AD, then an internal buzzer will sound to attract attention. To avoid irritation
caused by this alarm, the buzzer will sound for the length of time set in parameter B1. If the door is
still open after the buzzer has sounded then the EMS will close down the refrigeration system and will
not restart it until the door is finally closed. This function also means that the refrigeration system is
not continuously running during a cabinet reload.
THE BLOCKED CONDENSER WARNING SYSTEM
If the condenser of a refrigeration system is blocked, the result is a rise in temperature of the
discharge line and condenser.
The fact however, is that the final 20-30 % of the blockage generates a high rise in discharge
temperature and therefore can be used as a positive signal.
Other causes of overheating can be:
Extreme ambient temperatures
The appliance being enclosed etc.
Undersized condenser
Oversized compressor/displacement etc.
To detect overheating the condenser sensor must be connected and then attached to the discharge
line. When the system achieves the alarm temperature, the system will be switched off and the alarm
notification will appear on the display of the control. To reset this alarm the UP button must be
pressed.
THE REFRIGERATION SYSTEM FAILURE WARNING
The most common failures in a refrigeration system are:
Blocked condenser
Condenser fan failure
Evaporator fan failure
Refrigerant leak
Blockage (capillary systems only)
Electrical fault
These failures can result in inefficiency or breakdown of the system. If not rectified these can and
eventually damage the refrigeration system, for which the worst and most costly is damage to or even
a burn out of the compressor.
The EMS monitors the time taken to achieve the set point (parameter CT) and if it is not reached in
the set time interval then the refrigeration system will be shut down. In this case the display will show
the letters “RSF” (Refrigeration System Failure). To reset this alarm the DOWN button must be
pressed.
UNINTERRUPTED PULL-DOWN FUNCTION
If the temperature in the appliance rises above the value set in parameter IPD then the EMS will
perform an uninterrupted pull down. This means that the refrigeration system will be activated and all
defrost cycles will temporarily be suspended. This is to ensure that the load in the cooler is reaches its
set temperature in the shortest possible time. In practical circumstances this will occur after, for
example, a re-load. If the cooler is in operational mode the temperature will be reduced to operational
level but when the cooler is in stand-by mode the temperature will be reduced to stand-by level.

15
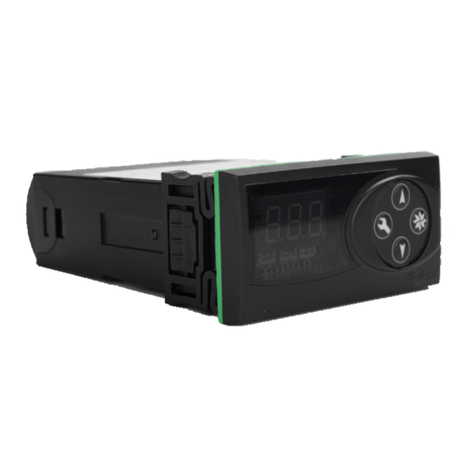
BUTTON COMMANDS AND FASCIA LAY-OUT
Motion detection sensor
The motion detection sensor is fitted with a lens to enhance the detection range and angle.
Compressor “on” indicator light
This is a green LED that illuminates each time the compressor is running.
Fan “on” indicator light
This is a green LED that illuminates each time the (internal) fan(s) is running.
H T Alarm light
This is a red LED that only illuminates when the temperature on the discharge line rises above the
preset parameter temperature. This overheating is often caused by a blocked condenser but can also
be caused by a lack of ventilation to and from the refrigeration system.

16
LED Display
The EMS 3 digit LED display may show any of the following:
During power up the display initially shows 8.8.8. followed by two codes. The first code (e.g. E46)
indicates the firmware version programmed into the control. The second code indicates the default
parameter version (e.g. S04). During the development various upgrades have been produced and are
recognised by these unique codes.
During operational mode the display will show the current appliance sensor temperature.
When the cooler is in stand-by mode or if the door has been left open for a long period then the
display will show three bars - - -.
During normal operating mode press the SET button to access the Set Point. This represents the
compressor cut out temperature during operational mode.
The system is in freeze up protection mode, which means that the temperature in the appliance is
below the value set in parameter DTT. Whilst in this mode the EMS will inhibit the compressor and run
the evaporator fan(s) continuously.
The EMS is performing a defrost cycle.
The door(s) of the appliance is open.

17
Refrigeration system failure on the display indicates that the set point has not been reached during
the time period set in parameter Ct.
Supply Low. The line voltage has dropped to a level that may cause damage to the compressor. The
EMS will not restart the compressor until the voltage reaches a safe level again.
Supply High. The line voltage has increased to a level that may cause damage to the compressor.
The EMS will not restart the compressor until the voltage reaches a safe level again.
A probe failure alarm indicates that the EMS has lost communication with the temperature sensor(s).
This may be caused by a loose connection at the terminal block connection or the probe itself may be
faulty.

18
THE CONTROL SETTINGS
The EMS has the following parameter values:
EMS-55 Parameter Default Settings
Parameter
Description
Degrees C
Range
Units
SP
Set Point
See US & LS
oC
US
Upper Set Point
0-10
oC
LS
Lower Set Point
0-10
oC
DIF
Differential
0.0-9.9
oC
CAL
Calibration
+/-9.9
oC
RT
Minimum Rest Time
1-30
Minutes
DS
Delay to Stand-by
0-120
Minutes
LD
Light Switch Off Delay
0-120
Minutes
SR
Stand-by Restart Period
0-240
Minutes
CT
Refrigeration System Time
Elapse
1-100
Hours
CF
Display in OC or OF
0 or 1
Number
SSP
Stand-by Set Point
0.0-9.9
oC
SD
Stand-by Differential
0.0-9.9
oC
IPD
Uninterrupted Pull Down
Activation Temperature
0-80
oC
DTT
Activation Temperature for
Freeze Up Protection Mode
-10-50
oC
DE
Defrost Interval
1-199
Hours
DD
Defrost Duration
1-199
Minutes
DT
Defrost Termination
1-80
oC
FCO
Evaporator Fan Cycle On
Time
1-30
Minutes
FCF
Evaporator Fan Cycle Off
Time
1-30
Minutes
FSP
Fan Set Point
0-80
oC
HT
Blocked Condenser
Temperature Alarm
50-250
oC
D2
Display Stability
1-254
Units
HI
Over Voltage Protection
90-250
Units
LO
Under Voltage Protection
90-250
Units
BO
Buzzer Enable/Disable
0 or 1
Off/On
B1
Alarm Buzzer Sounding
Time
1-254
Seconds
AD
Alarm Delay
1-30
Minutes
AF
Activity Frequency
0= Low
Unit
1=Medium
2=High
3= Auto
PER
Perishable mode
0 or 1
Off/on

19
HOW TO ENTER THE PARAMETER LIST
The parameters can only accessed with a special and unique sequence. The sequence is as follows:
Step 1 Switch the power to the control off
Step 2 Push and hold the set button
Step 3 Switch the power to the control back on
Step 4 Keep the set button pressed until the word “PAS” appears on the display
Step 5 Release the set button
Step 6 Push the set button 3 times
Step 7 Push the value down button (second button from the left) once
Step 8 Push the value up button (third button from the left) twice
Step 9 Push the defrost button (fourth button from the left) 4 times
The first parameter “US” will now appear on the display, which means that you have entered the
parameters. If the display does not show the letters US then follow the procedure again from the start
(step 1)
CHANGING PARAMETER SETTINGS
Once the parameters have been entered the following button functions are applicable:
Set button. Scroll from parameter to parameter
Down button. To reduce the value of the current parameter.
Up button. To increase the value of the current parameter.
In parameter mode, the display will show firstly the parameter and then the current value.
Scroll through the parameter list until the desired parameter is shown. Then alter the value by
pressing up or down button. Once the desired values are set allow the EMS to show the temperature
again.
EMS-55 PARAMETERS
Parameter
Description
SP
This parameter sets the compressor cut out temperature during operational
mode. This is accessed by pressing the SET button and is not present in the
parameter scroll.
US
Upper set point. Sets the upper limit of the operational set point i.e. the user
will not be able to set the control to a temperature higher than this value.
LS
Sets the lower limit of the operational set point i.e. the user will not be able
to set the control to a temperature below this value.
dIF
Differential. Added to the operational set point to give the compressor cut in
temperature during normal cycling.
CAL
Calibration. Can be used to calibrate the appliance sensor or to add an
offset to aid in positioning of the sensor.
Rt
Compressor rest time. The minimum time the EMS will wait, after reaching
the set point, before allowing the compressor to restart regardless of
whether the cut in temperature has been reached.
dS
Delay to stand by. The time period that the EMS will wait after the outlet has
closed, before going into its standby mode. Must be set to a multiple of 30
Ld
Light delay. The time the control will wait after the time set in parameter dS
has expired, before switching off the cabinet lights. Must be set to a multiple
of 30.

20
Sr
Stand-by restart. To ensure that the product is at the correct temperature
when the outlet opens, the EMS will switch to operational mode before
hand. This parameter sets this period. Must be set to a multiple of 30.
Ct
Refrigeration System Failure. This parameter sets the maximum continuous
compressor run time without the set point being reached. If the set point
temperature is not reached then the EMS will switch off the refrigeration
system and give a warning.
CF
The EMS can be set to display the temperature in either oC or oF
SSP
Stand-by set point. This value is added to the operational set point to give
the cut out temperature during stand by.
Sd
Stand-by differential. This parameter, when added to the operational and
standby set point, will give the cut in temperature, when the EMS is in
standby.
IPd
Uninterrupted Pull Down. When the temperature in the cabinet exceeds the
value set in this parameter the EMS will automatically perform an
uninterrupted pull-down. This means that no defrost cycle will be performed
and is to ensure that after a re-load the temperature of the product is
brought down as quickly as possible.
Dtt
Freeze up protection. If the appliance probe temperature drops below the
value set in this parameter then the EMS will inhibit the refrigeration system
until the temperature rises above the set point.This sets the activation
temperature for freeze up protection mode.
DE
Defrost intervals. This parameter sets the period between defrost cycles.
Dd
Defrost duration. This parameter sets the maximum time a defrost cycle can
be.
Dt
Defrost termination. When the temperature in the cabinet rises above the
value set in this parameter then the EMS will terminate the defrost cycle.
FCO
Fan cycle ON time. During the off cycle of the compressor, the evaporator
fan will cycle. This parameter sets the fan ON time.
FCF
Fan cycle OFF time. As above but for the OFF time.
FSP
Fan Set Point. If the cabinet temperature rises above the value set in this
parameter then the evaporator fan run continuously even if the door is
opened. Once the set point has been reached, the fan will then switch off
during door openings.
HT
High Temperature. This parameter sets the maximum allowable
temperature of the discharge line.
D2
Display stability. This should not be altered for normal operation.
HI
High Voltage. The EMS monitors the mains line voltage for fluctuation. This
parameter sets the maximum limit for over voltage. (see table)
LO
As above but for the minimum limit for under voltage. (see table)
B0
Buzzer enable/disable.
B1
Buzzer duration. If the cabinet door is left open then the buzzer will sound
for this period of time before the EMS disables the refrigeration system.
AD
Alarm Delay. This sets the delay between a door open alarm occurring and
the buzzer activating.
AF
Activity Frequency
This parameter sets the number of door openings/motion counts to signal
an active 30 minute period. If the is set to 3 then the EMS will automatically
learn whether the cabinet is situated in a low, medium or high traffic
location.
PER
Perishable mode. This allows the EMS to keep the operational set point and
differential during standby periods.
This manual suits for next models
1
Table of contents
Other Elstat Control System manuals
Popular Control System manuals by other brands
Victron energy
Victron energy Smart BMS CL 12/100 manual
heat-timer
heat-timer Digi-Span Elite Series HWE-SS Installation and operation instructions

MG
MG Master LV Quick installation guide
HEIDENHAIN
HEIDENHAIN TNC 620 user manual

Mi-Light
Mi-Light fullwat LENNY-PAN-B0 manual
Fagerhult
Fagerhult emLED S4 quick start guide
Pentair
Pentair Hypro ProStop-E Quad 4216N-3404VPSQ Installation and operation manual
Eaton
Eaton Rapid Link RAMO5 manual

Norac
Norac SPRA-COUPE 7000 Series installation manual
SOMFY
SOMFY SOLIRIS Uno installation guide

Mitsubishi Electric
Mitsubishi Electric GB-50ADA-J Instruction book
Amatrol
Amatrol 890-FTS1 manual
