1 NO contact nor potential free
10A/250V AC. Encrypted wireless, bidi-
rectional wireless and repeater function
switchable. Only 0.8 watt standby loss.
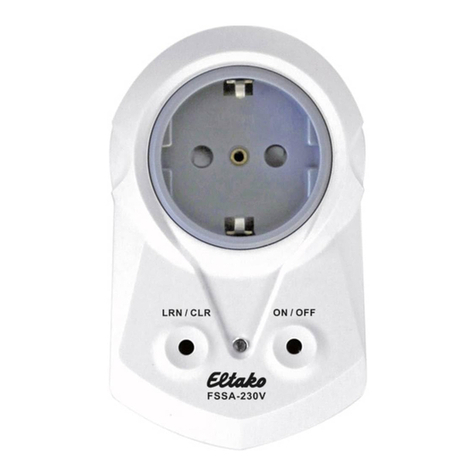
Adapter for German fused safety socket.
With increased shock protection.
Supply and switching voltage 230V.
Zero passage switching.
If a power failure occurs, the switching
state is retained.
Device is programmed to switch off
when the power supply is restored.
After installation, wait for short automat-
ic synchronisation before the switched
consumer is connected to the mains.
Encrypted sensors can be taught in.
Bidirectional wireless and/or a repeater
function can be switched on.
Every change of state is then confirmed
by a wireless telegram. This wireless
telegram can be taught in other actuators
and the GFVS.
The FSHA evaluates the data of wire-
less temperature controllers or sen-
sors. Can be supplemented by window/
door ontacts, window handles, motion
detectors and wireless pushbuttons.
The FSHA operates as a two-point
controller:
Switches off at 'actual temperature >=
set temperature'.
Switches off at 'actual temperature >=
set temperature'.
Hysteresis is defined at 1°.
The frost protection function is always
enabled. As soon as the actual tempera-
ture drops below 8°C, the temperature is
regulated to 8°C.
If one or several windows are open, the
otptremainsoffprovided the win
GB
30 100 008 - 1
Wireless actuator
Wireless socket heating actuator
FSHA-230V
Temperature at mounting location:
-20°C up to +50°C.
Storage temperature: -25°C up to +70°C.
Relative humidity:
annual average value <75%.
,
output remains off provided the win-
dow/door contacts or window handles
are taught-in. However, the frost protec-
tion remains enabled.
As long as all taught-in motion detectors
detect no motion, the device is switched
to setback mode and the reference tem-
perature is set back by 2°. As soon as a
motion detector signals movement again,
the device is switched to normal mode.
When a wireless pushbutton is taught-in,
the assignment of the 4 keys is assigned
with the following fixed functions:
Top right: Normal mode (AUTO), can
also be enabled by timer.
Bottom right: Night setback mode by 4°,
can also be enabled by timer.
Top left: Setback mode by 2°
Bottom left: Off (frost protection enabled)
If the motion detector and wireless
pushbutton are taught-in at the same
time, the last telegram received is al-
ways the one that is valid. A motion de-
tector therefore switches off a setback
mode selected by wireless pushbutton
when a movement is detected.
Malfunction mode:
If a temperature sensor fails to receive a
wireless telegram for longer than 1
hour, the LED lights up and the device
switches to fault mode. The FSHA-230V
switches cyclically between 'ON' for
4.5 minutes and 'OFF' for 10.5 minutes.
When a wireless telegram is again re-
ceived, the LED goes out and the device
switches back to normal mode.
The LED lights up during teach-in. Wire-
less control commands are indicated by
short flickering during operation.
Teaching-in wireless sensors in wire-
less actuators
All sensors must be taught-in in the ac-
tuators so that they can detect and exe-
cute commands.
The teach-in memory is empty on deliv-
ery from the factory. To ensure that a
device was not previously taught-in,
clear the memory completely:
Press the left button
LRN/CLR
for
approximately 3 seconds, the LED flashes
exitedly. Press the right button
AUTO/*
approximately 5 seconds, the LED goes
out. All taught-in sensors are cleared,
the repeater and the confirmation tele-
grams are switched off.
Clear individual taught-in sensors:
Press the left button
LRN/CLR
for
approximately 3 seconds, the LED flashes
exitedly. Press the sensor which is to be
cleared, the LED goes out. If all the
functions of an encrypted sensor are
cleared, teach-in must be repeated as
described under
Teach-in encrypted
sensors.
Teach in sensors:
Teaching in temperature controllers FTR,
FUTH, FTF (set temperature 20°C), motion
detectors, window/door contacts, window
handles and GFVS:
Press the left button LRN/CLR for approx.
0.5 seconds and then release. The LED
lights up
.
Press the teach-in sensor. The LED goes
out.
Teach in wireless pushbuttons:
Press the left button
LRN/CLR
for approx.
0.5 seconds and then release. The LED
lights up. Briefly press the right button
AUTO/*
once to confirm. The LED flickers
once. Press the teach-in wireless push-
button. The LED goes out.
Briefly press the
LRN/CLR
button to exit
the teach-in and clear mode immediately.
The teach-in and clear mode is auto-
matically cleared after 60 seconds.
To prevent unintentional teach-in, teach
in pushbuttons by 'double-clicking'
(pressing rapidly twice in succession).
1. Briefly press the left button LRN/CLR
button 2 times, the LED blinks 2
times for confirmation.
2. Select the desired teaching-in function
with the right button
AUTO/*
.
3.Press the taught-in button with
'double
click'.
The LED goes out.
Unencrypted and encrypted sensors can
be taught-in.
Teach in encrypted sensors:
1. Press the left button
LRN/CLR
for
approximately 0.5 seconds and then
release, the LED lights up.
2. Briefly press the right button
AUTO/*
5times theLEDflashes er e citedl
