Emco 41580 User manual

1
Andersen SDD, PO Box 853
Des Moines, IA 50306-0853
Rev 1-2014 12088 Print in Color
Andersen Storm Door Division is a wholly owned subsidiary of Andersen Corporation.
Andersen Storm Door Division manufactures and supports the limited warranties
for Andersen® and EMCO® storm doors. “Andersen” and “EMCO” and all other
marks where denoted are trademarks of Andersen Corporation. ©2014 Andersen
Corporation. All rights reserved.
for EMCO® Woodcore Series Door
with Lever or Knob Handle Set and Closer
Installation Kit Guide
Do not return product to store!
PLEASE call the storm door Solution Center at 1-800-933-3626,
Your installation kit should contain the following parts. However, in some door models, not all of the parts will be used.
PARTS OVERVIEW
Closer
Jamb bracket base
Jamb bracket arm
Door bracket
#10 x 2” screw, painted (3)
#12 x 5/8” screw, painted (2)
Long pin
Short pin
Preload clip
Hold open washer
Exterior handle, Lever (or Knob with
handle stem, #8 x 5/16” screw)
Interior latch handle
Interior latch handle base
Interior deadbolt
Drill template (not shown)
#6 x 1 1/4” screw (4)
#8 x 1” machine screw (4)
Striker shims (6)
Striker plates (2)
Hex wrench, 3/32”
#8 x 1” screw (8)
#8 x 1” screw, painted (17)
3/8” x 1/2” x 1/2” Spacer Pads (3)
3/16” Plug, color matched
#8 x 1/2” screw, painted (2)
#8 x 1” screw (8)
1/2” x 1” Double sided tape (4)
1/8” Drill bit
T
B
B
Y
G
X
F
F
M
V
DD
AA
S
AA
W
EE
L
U
C
Z
H
H
N
O
P
Q
R
BB
J
K
I
green bag blue bag YellOW bag PInK bag
Closer Parts Handle Parts Mounting Parts Hinge Parts
1
2
3
12
9
4
13
14
5
6
7
8
NO 1
1
2
3
12
9
4
13
14
5
6
7
8
NO 1
T
Y
X
VAA
S
W
U
Z
BB
!
!
1/2”
1/2”
1”
1 1/2”
2”
1 1/2”
5/8”
5/8”
C
G
P
Q
NO
R
I
L
JK
p/n 504135
with any questions regarding installation, lost part replacement, or anything else related to your purchase.
Read this entire guide before you begin your installation. If your abilities do not
match the requirements of this installation, contact an experienced contractor.
#8
#10
#12
#6
3/4”Machine Pan Painted
1/2”SMS Pan
1/2”SMS Pan Painted
1/2”SMS Flathead
1/2”Self-Drill Pan
1/2”Self-Drill Pan Painted
3/4”Machine Flathead
7/8”Machine Pan Painted
1”SMS Pan
1”SMS Pan Painted
1”Machine Pan Painted
1-1/2”Machine Flathead
1-1/2”Machine Flathead
2”SMS Pan Painted
5/8”SMS Pan Painted
1-1/4”SMS Pan

2
SAFETY FIRST: Please read and follow all cautions and warnings in this guide.
RECOMMENDED TOOLS Drill
Safety Glasses
Tape Measure
Gloves
!
!
1/2”
1/2”
1”
1 1/2”
2”
1 1/2”
5/8”
5/8”
Tape
!
!
1/2”
1/2”
1”
1 1/2”
2”
1 1/2”
5/8”
5/8”
Pencil
!
!
1/2”
1/2”
1”
1 1/2”
2”
1 1/2”
5/8”
5/8”
Scissors
!
!
1/2”
1/2”
1”
1 1/2”
2”
1 1/2”
5/8”
5/8”
1. Using a tape measure, nd and mark the
vertical center of the storm door. For 80”
storm doors, the measurement will be 39
1/2”. For 78” storm doors, the measurement
will be 38 1/2”.
2. Check to make sure there will be no
interference between the primary door
handle and storm door handle prior to
drilling. Move the template up or down if
necessary to avoid interference.
1. Place the center line of the template (M) at the location
marked on the door. Fold the template around the edge of
the door, aligning the door edge lines on the template with
the door edges. Tape the template in place.
2. Drill holes from each side of door frame according to the
template, drilling 1/8”shallow starter holes rst. For proper
alignment of holes and to eliminate burrs, drill each hole
from its own side of the door. Do not drill completely
through the door from one side only.
3. Remove the template and properly discard.
PREPARE NEW
STORM DOOR
FOR HANDLE
INSTALLATION
(For replacement
handle sets, proceed
to Step 2)
1
MarK CenTer
MARCAR
CENTRO
MarQueZ
le CenTre CenTer OF DOOr
CENTRO DE LA
PUERTA
CenTre De la
POrTe
a b
M
Drill Bits
3/32”
7/16”
5/8”
!
!
1/2”
1/2”
1”
1 1/2”
2”
1 1/2”
5/8”
5/8”
!
!
1/2”
1/2”
1”
1 1/2”
2”
1 1/2”
5/8”
5/8”
Tools needed:
1/8”
7/16”
5/8”
!
!
1/2”
1/2”
1”
1 1/2”
2”
1 1/2”
5/8”
5/8”
Entry door hardware and handle may become hot when
exposed to sunlight.
warning
Improper use of hand or power tools could result in injury
and/or product damage. Follow equipment manufacturer’s
instructions for safe operation. Always wear safety glasses.
warning
Metal fasteners and other hardware components may corrode when exposed to preservative treated and re-
retardant treated lumber. Obtain and use the appropriate size stainless steel fasteners and hardware as called
out by the installation guide to fasten unit to any rough opening made from pressure treated and re-retardant
treated lumber. Failure to use the appropriate materials for the installation may cause a failure resulting in injury,
property or product damage.
warning
=
=X
vIeW
i
vIeW
eXTerIOr vIeW
VISTA EXTERIOR
vue De l’eXTÉrIeur
InTerIOr vIeW
VISTA InTERIOR
vue De l’InTÉrIeur X
vIeW X
vIeW
Screwdriver
!
!
1/2”
1/2”
1/2”
1”
1 1/2”
2”
1 1/2”
5/8”
5/8”
!
!
1/2”
1/2”
1”
1 1/2”
2”
1 1/2”
5/8”
5/8”

3
1. Slide the interior latch handle with square
spindle (J) into the interior latch base (K).
Tighten the latch base set screw with the
hex wrench from the blue bag.
1. Insert the exterior handle screw bosses
through the holes previously drilled in the
door frame. Align the exterior handle (I) with
inside latch (J) and insert the square spindle
through the hole in the door and into the
square hole of the exterior handle. Tighten the
exterior handle set screw.
2. Thread the two (2) 1”machine screws (O) from
the blue bag through the interior latch and
into the exterior handle screw bosses and
tighten.
1. Fasten the deadbolt (L) in place by
threading two (2) 1”machine screws (O)
from the blue bag into the outside handle
screw bosses and tighten.
1. Fasten the latch striker (Q) with two (2)
1-1/4”screws (N). Your installation may
require striker shims (P) found in the blue
bag. The striker plate and shims are slotted
for adjusment to allow a secure t.
INSTALL
HANDLE SET
(Images shown are for
a Left Hand installa-
tion. A Right Hand
installation would be
on the opposite side
shown.)
2
a
d
b c
FOr COlOnIal DOOr MODelS OnlY
SOLAMENTE PARA LOS MODELOS DE PUETRA
COLONIAL
POur POrTe COlOnIale MODele
SeuleMenT
DOOr
PUERTA
POrTe
DOOr
PUERTA
POrTe
DOOr JaMb
JAMBA DE LA PUERTA
MOnTanT De la POrTe
For door models with exterior door knob (I).
1. Align square nub on door knob with square
hole in handle stem. Push door knob onto
handle stem.
2. Holding door knob onto handle stem. Insert
#8 x 5/16”countersunk screw into interior
square hole handle stem. Tighten screw so
door knob is securely attached to handle
stem.
3/32”
!
!
1/2”
1/2”
1”
1 1/2”
2”
1 1/2”
5/8”
5/8”
L
N
O
O
O
O
P
Q
J
J
K
I
1. Hold the door closed from the interior and
slide the striker plate (Q) behind the interior
latch (J). Your installation may require
striker shims (P) found in the blue bag. Mark
the mounting slot locations through the
slots of the striker onto the door jamb.
2. Open the door. Remove the latch striker
and predrill 3/32”pilot holes at the marked
locations.
f
TOP vIeW
VISTA SUPERIOR
vue Du DeSSuS
DOOr JaMb
JAMBA DE LA
PUERTA
MOnTanT De la
POrTe
PQ
J
I
I
1
2
3
12
9
4
13
14
5
6
7
8
NO 1
1 1/4”
1”
x 4
x 4
Tools needed:
Hex wrench
R
e
!
!
1/2”
1/2”
1”
1 1/2”
2”
1 1/2”
5/8”
5/8”
DOOr / PUERTA / POrTe
InTerIOr / INTERIOR / InTÉrIeur
eXTerIOr / EXTERIOR / eXTÉrIeur
blue bag / BOLSA AZUL / SaC bleu
X
vIeW
i
vIeW
i
vIeW
#8
#10
#12
#6
3/4”Machine Pan Painted
1/2”SMS Pan
1/2”SMS Pan Painted
1/2”SMS Flathead
1/2”Self-Drill Pan
1/2”Self-Drill Pan Painted
3/4”Machine Flathead
7/8”Machine Pan Painted
1”SMS Pan
1”SMS Pan Painted
1”Machine Pan Painted
1-1/2”Machine Flathead
1-1/2”Machine Flathead
2”SMS Pan Painted
5/8”SMS Pan Painted
1-1/4”SMS Pan
N
O
!
!
1/2”
1/2”
1/2”
1”
1 1/2”
2”
1 1/2”
5/8”
5/8”

4
INSTALL
CLOSER
(Images shown are for
a Left Hand installa-
tion. A Right Hand
installation would be
on the opposite side
shown.)
3
1/8”
Tools needed:
2” x 3 x 1
x 2
x 1 x 1
5/8”
1. Position the base (T) onto the door jamb by
touching the front of the base to the back
of the hinge rail (or as close as possible),
position and center the base 2” below the
window opening. Mark the hole locations
on the door jamb.
2. Drill holes in the door jamb at the marked
locations and attach the base to the door
jamb with two (2) 2”screws (W) from the
green bag into the two holes closest to the
interior of the house.
1. Place hold open washer (BB) from the green
bag on closer rod.
2. Pin the closer (S) in place using the short
pin (Z) in the jamb bracket (U) and the long
pin (Y) in the door bracket (V).
3. Pull on the closer so the rod extends
slightly. Snap the orange preload clip (AA)
from the green bag over the rod. The clip
should be pinched tight between the closer
cylinder body and the opposing bumps on
the closer rod.
1. Open the door and then let it close. Note the speed at which the
door closes.
2. Use a screwdriver to adjust the closer to the desired speed:
For a faster closing speed, turn the adjustment screw to the left
(counterclockwise).
For a slower closing speed, turn the adjustment screw to the
right (clockwise).
3. Test the speed at which the door closes after each adjustment.
1. Close the storm door. Swing the closer
assembly over until the door bracket (V) is
resting against the storm door and appears
level. Mark hole locations on the door
frame.
2. Drill holes 5/8”deep and attach the closer
door bracket to the door frame through
the two pre-drilled holes using two (2) 5/8”
screws (X) from the green bag.
1. Attach the arm (U) to the base by inserting
the tabs on the arm into the slots in the
base. Fasten with a 2”screw (W) from the
green bag.
Do not drill completely through door. This will create an
unnecessary hole in the door and may cause water and
air inltration.
caution
ADJUST
CLOSING
SPEED OF
DOOR
(Closer image is for
reference only)
4
Tools needed:
HInge raIl
RIEL ABISAgRADO
MOnTanT à
CHarnIèreS
OPPOSITe vIeW
OTRO PUNTO DE VISTA
vue De FaCe
FrOnT vIeW
VISTA FRONTAL
vue avanT
AA
BB
U
U
TS
S
Z
YV
V
AA
W
W
W
a b c
d
a
Storm door will close more quickly when entry door is open. To achieve the proper closing speed, you will need to adjust
the closer(s) using the built-in adjustment screw. Check for safe closing speed with your entry door in both the closed and
the open position. To prevent injury, make sure people and/or pets are completely through the opening before allowing
the storm door to shut freely.
warning
S
V
2”
!
!
1/2”
1/2”
1”
1 1/2”
2”
1 1/2”
5/8”
5/8”
X
X
!
!
1/2”
1/2”
1”
1 1/2”
2”
1 1/2”
5/8”
5/8”
green bag / BOLSA VERDE / SaC verT
i
vIeW i
vIeW i
vIeW
i
vIeW
i
vIeW
#8
#10
#12
#6
3/4”Machine Pan Painted
1/2”SMS Pan
1/2”SMS Pan Painted
1/2”SMS Flathead
1/2”Self-Drill Pan
1/2”Self-Drill Pan Painted
3/4”Machine Flathead
7/8”Machine Pan Painted
1”SMS Pan
1”SMS Pan Painted
1”Machine Pan Painted
1-1/2”Machine Flathead
1-1/2”Machine Flathead
2”SMS Pan Painted
5/8”SMS Pan Painted
1-1/4”SMS Pan
Y
X
W
Z
!
!
1/2”
1/2”
1/2”
1”
1 1/2”
2”
1 1/2”
5/8”
5/8”

5
pour porte de la série Woodcore de EMCO® avec
ensemble de poignées à levier ou bouton et ferme-porte
Guide de la trousse d'installation
Votre trousse d'installation devrait contenir les pièces suivantes. Cependant, dans certains des modèles, les pièces ne seront pas toutes utilisées.
LISTE DES PIÈCES
Andersen Storm Door Divivion est une filiale en propriété exclusive d'Andersen Corporation. Andersen Storm Door Division fabrique les contre-portes Andersen® et EMCO® et respecte les garanties limitées couvrant ces contre-portes.
«Andersen», «EMCO» et toutes les autres marques où indiqué sont des marques de commerce d'Andersen Corporation. ©2014 Andersen Corporation. Tous droits réservés.
Ferme-porte
Base de support côté huisserie
Bras de support côté huisserie
Support côté porte
Vis n° 10 x 5,08cm (2 po) peinte (3)
Vis n° 12 x 1,59cm (5/8po) peinte (2)
Taquet long
Taquet court
Pinces de préchargement
Rondelle de maintien en position ouverte
Poignée extérieure, levier (ou bouton avec
tige de poignée, vis nº8 x 8mm [5/16po])
Poignée de loquet intérieur
Base de poignée de loquet intérieur
Pêne dormant intérieur de sûreté
Gabarit de perçage (non illustré)
Vis nº6 x 3,81cm (1 1/4po) (4)
Vis mécanique nº8 x 2,54cm (1po) (4)
Cales de gâche (6)
Plaques de gâche (2)
Clé hexagonale de 2,4mm (3/32po)
Vis nº8 x 2,54cm (1po) (8)
Vis nº8 x 2,54cm (1po), peinte (17)
Cales d'espacement 0,95cm x 1,27cm x
1,27cm (3/8po x 1/2po x 1/2po) (3)
Bouchon de couleur assortie 4,8 mm (3/16po)
Vis nº8 x 1,27cm (1/2po), peinte (2)
Vis nº8 x 2,54cm (1po) (8)
Ruban adhésif double face 1,27cm x
2,54cm (1/2po x 1po) (4)
Mèche de perceuse de 1/8po
T
B
Y
G
X
F
M
V
D
AA
S
A
W
E
L
U
C
Z
H
N
O
P
Q
R
BB
J
K
I
SaC verT
SaC bleu
SaC Jaune
SaC rOSe
Pièces de ferme-porte
Pièces de poignée
Pièces de montage
Pièces de la charnière
La quincaillerie pour portes d’entrée et la poignée peuvent être
très chaudes lorsqu’exposées au soleil.
aVErtiSSEMEnt
Une mauvaise utilisation des outils manuels ou électriques peut
entraîner des blessures et/ou endommager le produit. Suivez
les instructions du fabricant pour une utilisation sécuritaire.
Portez toujours des lunettes de sécurité.
aVErtiSSEMEnt
Les xations métalliques et autres articles de quincaillerie peuvent se corroder lorsqu’ils sont exposés à du bois
traité et du bois ignifugé. Vous devez vous procurer et utiliser des xations et des articles de quincaillerie en acier
inoxydable de taille correcte selon les recommandations du guide d’installation pour xer la porte dans toute
ouverture brute en bois traité sous pression et en bois ignifugé. Si les matériaux appropriés ne sont pas utilisés
pour l’installation, il pourrait s’ensuivre des blessures, des dommages matériels et des dommages aux produits.
aVErtiSSEMEnt
LA SÉCURITÉ AVANT TOUT : Veuillez lire et suivre tous les avertissements et mises en garde de ce guide
Perceuse
Ruban
Ciseaux
Ruban à
mesurer
Mèches
pour perceuse
Tournevis Crayon
Gants
Lunettes de
sécurité
OUTILS RECOMMANDÉS
!
!
1/2”
1/2”
1/2”
1”
1 1/2”
2”
1 1/2”
5/8”
5/8”
!
!
1/2”
1/2”
1”
1 1/2”
2”
1 1/2”
5/8”
5/8”
!
!
1/2”
1/2”
1/2”
1”
1 1/2”
2”
1 1/2”
5/8”
5/8”
3/32 po
7/16 po
5/8 po
!
!
1/2”
1/2”
1/2”
1”
1 1/2”
2”
1 1/2”
5/8”
5/8”
!
!
1/2”
1/2”
1”
1 1/2”
2”
1 1/2”
5/8”
5/8”
Veuillez ne pas retourner le produit au magasin!
pour toute question relative à l’installation, le remplacement de pièces perdues ou tout autre problème relatif à l’achat de votre contre-porte.
Lisez ce guide complètement avant de commencer l’installation. Si vous ne vous sentez pas capable
d’installer ce produit, veuillez communiquer avec un entrepreneur expérimenté.
VEUILLEZ appeler le Centre des solutions pour les contre-portes au 1800933-3626,
!
!
1/2”
1/2”
1/2”
1”
1 1/2”
2”
1 1/2”
5/8”
5/8”

6
INSTALLER LE FERME-PORTE
(les images illustrent une installation à gauche). Une installation à droite serait du côté opposé au côté illustré.)
3
1. Insérez les bossages de vis de la poignée extérieure à travers les trous précédemment percés dans l'encadrement de porte. Alignez la poignée
extérieure (I) avec le loquet intérieur (J) et insérez la tige carrée à travers le trou de la porte et dans le trou carré de la poignée extérieure.
Serrez la vis de blocage de la poignée extérieure.
2. Vissez les deux (2) vis mécaniques de 2,54cm (1po) (O) du sac bleu à travers le loquet intérieur et dans les bossages de vis de la poignée
extérieure, puis serrez.
1. Fermez la contre-porte. Balancez l’assemblage du ferme-porte par-dessus
jusqu’à ce que le support côté porte (V) repose contre la contre-porte et
apparaisse à niveau. Marquez les emplacements de trous sur le cadre de la porte.
2. Percez des trous de 1,59cm (5/8po) de profondeur et xez le support côté porte
du ferme-porte au cadre de la porte au moyen de deux vis de 1,59cm (5/8po)
du sac vert à travers les deux trous prépercés.
1. Fixez en place le pêne dormant (L) en taraudant deux (2) vis mécaniques de 2,54cm (1 po) du sac bleu dans les bossages de vis de la poignée
extérieure, puis serrez.
1. Placez la rondelle (BB) de maintien en position ouverte du sac vert sur la tige du ferme-porte.
2. Fixez le ferme-porte (S) en place en utilisant le taquet court (Z) dans le support côté huisserie (U) et le taquet long (Y) dans le support côté
porte (V).
3. Tirez sur le ferme-porte an que la tige s’allonge légèrement. Emboîtez la pince de préchargement orange (AA) du sac vert sur la tige. La pince
doit être fermement serrée entre le corps cylindrique du ferme-porte et les bosses opposées sur la tige du ferme-porte.
1. Fixez la gâche à l'aide de deux (2) vis de 3,17cm (1 1/4 po) (N). Votre installation peut nécessiter l'utilisation des cales de gâche (P) qui se
trouvent dans la trousse d'assemblage de la poignée. Les gâches et les cales sont rainurées pour assurer un ajustement solide.
1. Tenez la porte fermée à partir de l'intérieur et faites glisser la plaque de gâche (Q) derrière le loquet intérieur (J). Votre installation peut
nécessiter l'utilisation des cales de gâche (P) qui se trouvent dans la trousse d'assemblage de la poignée. Marquez l'emplacement des rainures
de xation à travers les rainures de la gâche sur le piédroit de porte.
2. Ouvrez la porte. Retirez la gâche du loquet et prépercez deux (2) avant-trous de 3/32 po aux emplacements marqués.
c
c
d
d
e
f
a
b
1. Positionnez la base (T) sur le piédroit de la porte en touchant l’avant de la base avec l’arrière du montant à charnière (ou en étant le plus près
possible), positionnez et centrez la base à 5,08cm (2po) en-dessous de l’ouverture de la fenêtre. Marquez les emplacements de trous sur le
piédroit de la porte.
2. Percez des trous dans le piédroit de la porte aux endroits marqués et xez la base au piédroit de la porte à l’aide de deux (2) vis de 5,08cm
(2po) dans les deux trous les plus à l’intérieur de la salle.
1. Fixez le bras (U) à la base en insérant les languettes du bras dans les rainures de la base. Serrez à l’aide d’une vis de 5,08cm (2po) du sac vert.
Ne percez pas complètement à travers la porte. Ceci pourrait créer un
trou non nécessaire dans la porte et entraîner l'inltration d'eau et d'air.
attEntion
PRÉPARER LA CONTRE-PORTE NEUVE À L’INSTALLATION DES POIGNÉES
(Pour des ensembles de poignées de remplacement, passez à l'étape2)
1
INSTALLER L’ENSEMBLE DE POIGNÉES
(les images illustrent une installation à gauche). Une installation à droite serait du côté opposé au côté illustré.)
2
1. À l'aide d'un ruban à mesurer, trouvez et marquez le centre vertical de la contre-porte. Pour les contre-portes de 2,03m (80po), la valeur de la
mesure sera de 1,00m (39 1/2po). Pour les contre-portes de 1,98m (78po), la valeur de la mesure sera de 97,8cm (38 1/2po).
2. Vériez pour vous assurer qu'il n'y aura aucune interférence entre la poignée de la porte principale et la poignée de la contre-porte avant de percer.
Déplacez le gabarit vers le haut ou vers le bas au besoin pour éviter l'interférence.
a
a
1. Placez l'axe du gabarit (M) à l'emplacement marqué sur la porte. Pliez le gabarit autour du rebord de la porte de sorte à aligner les lignes du
rebord de porte sur le gabarit avec les rebords de la porte. Maintenez le gabarit en place avec du ruban adhésif.
2. Percez les trous dans la porte de chaque côté en suivant le gabarit. Pour aligner correctement les trous et pour éliminer les bavures, percez
chaque trou à partir de son propre côté de la porte. Ne percez pas complètement à travers la porte à partir d'un seul côté.
3. Retirez le gabarit et débarrassez-vous-en convenablement.
b
b
Pour les modèles de porte avec bouton extérieur (I).
1. Alignez la bosse carrée sur le bouton de porte avec le trou carré dans la tige de la poignée. Poussez le bouton de porte sur la tige de la
poignée.
2. En tenant le bouton de porte sur la tige de la poignée. Insérez une vis à tête fraisée n° 8
x 7,9 mm (5/16 po) dans le trou carré à l'intérieur de la tige de la poignée. Serrez la vis de sorte que le bouton de porte soit solidement xé à
la tige de la poignée.
1. Glissez la poignée à loquet intérieur avec la tige carrée (J) dans la base de loquet intérieur (K). Serrez la vis de pression de la base du loquet à
l'aide de la clé hexagonale du sac bleu.

7
RÉGLER LA VITESSE DE FERMETURE DE LA PORTE
(l’illustration du ferme-porte ne sert qu’à titre de référence)
4
a1. Ouvrez la porte, puis laissez-la se refermer. Note la vitesse à
laquelle la porte se referme.
2. Utilisez un tournevis pour régler le ferme-porte à la vitesse
souhaitée:
Pour une plus grande vitesse de fermeture, tournez la vis de
réglage vers la gauche (sens antihoraire).
Pour une plus faible vitesse de fermeture, tournez la vis de
réglage vers la droite (sens horaire).
3. Vériez la vitesse à laquelle la porte se referme après chaque
réglage.
La contre-porte se fermera plus rapidement lorsque la porte d'entrée est ouverte. Pour
obtenir la vitesse de fermeture appropriée, vous devrez ajuster le(s) ferme-porte(s)
à l'aide de la vis de réglage intégrée.Vériez la vitesse de fermeture sécuritaire avec
votre porte d'entrée dans les positions ouverte et fermée. Pour prévenir les blessures,
assurez-vous que les gens et/ou animaux de compagnie aient complètmement traversé
l'ouverture de la porte avant de permettre à la contre-porte de se refermer librement.
aVErtiSSEMEnt

8
PRIMERO LA SEGURIDAD: Lee y cumple todas las precauciones y advertencias de esta guía.
Los herrajes y la manija de la puerta de entrada pueden
recalentarse bajo la luz del sol.
aDVErtEncia
El uso inapropiado de herramientas eléctricas o manuales
podría ocasionar lesiones y/o daños al producto. Sigue las
instrucciones del equipo suministradas por el fabricante para un
funcionamiento seguro. Usa siempre gafas de seguridad.
aDVErtEncia
Los sujetadores de metal y demás componentes de los herrajes pueden corroerse cuando están expuestos a
maderas tratadas con productos ignífugos o con conservantes. Obtén y usa los herrajes y sujetadores de acero
inoxidable del tamaño apropiado tal como se describen en la guía de instalación para ajustar la unidad a cualquier
abertura sin acabado hecha de maderas tratadas con productos ignífugos o a presión. No utilizar los materiales
apropiados para la instalación puede originar fallas que provoquen lesiones, o daños materiales o al producto.
aDVErtEncia
!
!
1/2”
1/2”
1/2”
1”
1 1/2”
2”
1 1/2”
5/8”
5/8”
!
!
1/2”
1/2”
1”
1 1/2”
2”
1 1/2”
5/8”
5/8”
!
!
1/2”
1/2”
1/2”
1”
1 1/2”
2”
1 1/2”
5/8”
5/8”
!
!
1/2”
1/2”
1/2”
1”
1 1/2”
2”
1 1/2”
5/8”
5/8”
!
!
1/2”
1/2”
1”
1 1/2”
2”
1 1/2”
5/8”
5/8”
Taladro
Cinta
adhesiva
Tijeras
Cinta de
medir
Brocas
detaladro
Destornillador
Lápiz
Guantes
Gafas de
seguridad
HERRAMIENTAS RECOMENDADAS
3/32”
7/16”
5/8”
para el juego de manija con perilla o palanca y brazo
de cierre para puerta EMCO® de la serie Woodcore
Guía de instalación
Tu kit de instalación debe tener las siguientes piezas. Sin embargo, en algunos modelos de puerta, no se usarán todas las piezas.
DESCRIPCIÓN GENERAL DE LAS PIEZAS
Brazo de cierre
Base de soporte de jamba
Brazo de soporte de jamba
Soporte de puerta
Tornillo núm. 10 x 2”, pintado (3)
Tornillo núm. 12 x 5/8”, pintado (2)
Clavija larga
Clavija corta
Sujetador preinstalado
Arandela de apertura permanente
Manija exterior, palanca (o perilla
convástago de la manija, tornillo
núm.8x5/16”)
Manija del pestillo interior
Base de la manija del pestillo interior
Cerrojo interior
Plantilla para taladrar (no se muestra)
Tornillo núm. 6 x 1 1/4” (4)
Tornillo maquinado núm. 8 x 1” (4)
Cuñas de cerradura (6)
Placas de cerradura (2)
Llave hexagonal de 3/32”
Tornillo núm. 8 x 1” (8)
Tornillo núm. 8 x 1”, pintado (17)
Almohadillas espaciadoras
de9.52mmx 1.27 cm x 1.27 cm (3)
Tapón de 4.76 mm, de igual color
Tornillo núm. 8 x 1/2”, pintado (2)
Tornillo núm. 8 x 1” (8)
Cinta adhesiva de doble faz
de1.27cm x 2.54 cm (4)
Broca de taladro de 1/8”
T
B
Y
G
X
F
M
V
D
AA
S
A
W
E
L
U
C
Z
H
N
O
P
Q
R
BB
J
K
I
bOlSa aZul
bOlSa aMarIlla
bOlSa rOSaDa
Piezas del brazo de cierre
Piezas de la manija
Cómo montar las piezas
Piezas de la bisagra
bOlSa verDe
Andersen Storm Door Division es una filial en propiedad absoluta de Andersen Corporation. Andersen Storm Door Division fabrica y respalda las garantías limitadas para las contrapuertas Andersen® y EMCO®. “Andersen” y “EMCO” y todas
las demás marcas indicadas son marcas propiedad de Andersen Corporation. ©2014 Andersen Corporation. Todos los derechos reservados.
¡No devuelvas el producto a la tienda!
si tienes alguna pregunta sobre la instalación, reemplazo de piezas perdidas o sobre algo más relacionado con la compra de tu contrapuerta.
Lee esta guía completa antes de comenzar la instalación. Si no tienes habilidades sucientes para
satisfacer los requisitos de esta instalación, comunícate con un contratista experimentado.
Llama al centro de soluciones de contrapuertas al 1-800-933-3626
!
!
1/2”
1/2”
1/2”
1”
1 1/2”
2”
1 1/2”
5/8”
5/8”

9
PREPARA LA NUEVA CONTRAPUERTA PARA LA INSTALACIÓN DE LA MANIJA
(Para reemplazar los juegos de manijas, procede con el paso 2)
1
1. Con una cinta de medir, busca y marca el centro vertical de la contrapuerta. Para contrapuertas de 2.03 m, la medida será 1.0 m. Para
contrapuertas de 1.98 m, la medida será 0.97 m.
2. Antes de taladrar, asegúrate de que no habrá interferencia entre la manija de la puerta principal y la manija de la contrapuerta. Mueve la
plantilla hacia arriba o hacia abajo, de ser necesario, para evitar interferencia.
a
1. Coloca la línea central de la plantilla (M) en la ubicación marcada en la puerta. Dobla la plantilla alrededor del borde de la puerta, alineando
las líneas del borde de la puerta en la plantilla con los bordes de la puerta. Usando cinta adhesiva, pega la plantilla en su lugar.
2. Taladra oricios en la puerta de cada lado según la plantilla. Para que los oricios queden bien alineados y para eliminar rebabas, taladra cada
uno de ellos desde su propio lado de la puerta. No taladres completamente a través de la puerta desde un solo lado solamente.
3. Retira la plantilla y descártala apropiadamente.
b
1. Inserta los refuerzos de tornillos de la manija exterior a través de los oricios previamente taladrados en el marco de la puerta. Alinea la
manija exterior (I) con el pestillo interior (J) e inserta el eje cuadrado a través del oricio de la puerta en el oricio cuadrado de la manija
exterior. Aprieta el tornillo de jación de la manija exterior.
2. Enrosca los dos (2) tornillos maquinados de 1”(O) de la bolsa azul en el pestillo interior y en los refuerzos de tornillos de la manija exterior y
apriétalos.
1. Fija el cerrojo (L) en su lugar enroscando dos (2) tornillos maquinados de 1”(O) de la bolsa azul en los refuerzos de tornillos de la manija
exterior y apriétalos.
1. Ajusta la placa hembra (Q) con dos (2) tornillos de 1-1/4” (N). Tu instalación puede necesitar cuñas de cerradura (P) que se encuentran en el kit
del juego de manijas. La placa y cuña de la cerradura están ranuradas para ajustarse y para que puedan encajar rmemente.
1. Mantén la puerta cerrada desde el interior y desliza la placa de la cerradura (Q) detrás del pestillo interior (J). Tu instalación puede necesitar
cuñas de cerradura (P) que se encuentran en el kit del juego de manijas. Marca las ubicaciones de las ranuras de montaje a través de las
ranuras de la cerradura dentro de la jamba de la puerta.
2. Abre la puerta. Quita la placa hembra y pretaladra oricios piloto de 3/32”en los lugares marcados.
c
d
e
f
INSTALA EL JUEGO DE MANIJAS
(Las imágenes que se muestran son para instalación a la izquierda. La instalación a la derecha quedaría en el lado opuesto que se muestra).
2
a
b
Para modelos de puerta con perilla exterior (I).
1. Alinea el cubo de la perilla de la puerta con el oricio cuadrado en el vástago de la manija. Empuja la perilla de la puerta hacia el vástago de la
manija.
2. Sosteniendo la perilla de la puerta en el vástago de la manija. Inserta el tornillo avellanado núm. 8 x 5/16”dentro del oricio cuadrado interior
del vástago de la manija. Aprieta el tornillo para que la perilla de la puerta quede bien asegurada al vástago de la manija.
1. Desliza la manija con pestillo interior con eje cuadrado (J) dentro de la base del pestillo interior (K). Aprieta el tornillo de jación de la base del
pestillo con la llave hexagonal de la bolsa azul.
INSTALAR EL CIERRE
(Las imágenes que se muestran son para instalación a la izquierda. La instalación ala derecha quedaría en el lado opuesto que se muestra).
3
1. Cierra la contrapuerta. Pasa el ensamblaje del brazo de cierre hasta que el
soporte de la puerta (V) se apoye contra la contrapuerta y parezca que está a
nivel. Marca las ubicaciones de los oricios en el marco de la puerta.
2. Taladra oricios de 5/8” de profundidad y monta el soporte de la puerta del
brazo de cierre al marco de la puerta por los dos oricios pretaladrados con los
dos (2) tornillos de 5/8”de la bolsa verde.
1. Coloca la arandela de apertura permanente (BB) de la bolsa verde en la barra del brazo de cierre.
2. Sujeta el brazo de cierre (S) en su lugar usando la clavija corta (Z) en el soporte de la jamba (U) y la clavija larga (Y) en el soporte de la puerta
(V).
3. Hala el brazo de cierre para que la barra se extienda ligeramente. Coloca a presión el sujetador preinstalado de color anaranjado (AA) de la
bolsa verde sobre la barra. El sujetador debe quedar apretado entre el cuerpo del cilindro del brazo de cierre y las piezas salientes opuestas de
la barra del brazo de cierre.
c
d
a
b
1. Coloca la base (T) en la jamba de la puerta haciendo que la parte frontal de la base toque la parte posterior del riel de la bisagra (o lo más
cerca posible), coloca y centra la base 5.08 cm por debajo de la abertura de la ventana. Marca las ubicaciones para los oricios en la jamba de
la puerta.
2. Taladra oricios en la jamba de la puerta en las ubicaciones marcadas y monta la base de la jamba de la puerta con dos (2) tornillos de 2”de la
bolsa verde en los dos oricios más cercanos al interior de la casa.
1. Une el brazo (U) a la base insertando las lengüetas del brazo en las ranuras de la base. Asegura con un tornillo de 2” de la bolsa verde.
Ne percez pas complètement à travers la porte. Ceci pourrait créer un
trou non nécessaire dans la porte et entraîner l'inltration d'eau et d'air.
attEntion

10
AJUSTA LA VELOCIDAD DE CIERRE DE LA PUERTA
(La imagen del brazo de cierre es sólo una referencia)
4
a1. Abre la puerta y luego deja que se cierre. Comprueba la
velocidad a la que se cierra la puerta.
2. Ajusta el brazo de cierre con un destornillador Phillips a la
velocidad deseada: Gira el tornillo de ajuste hacia la izquierda
(en sentido contrario a las manecillas del reloj) para aumentar la
velocidad de cierre. Gira el tornillo de ajuste hacia la derecha (en
el sentido de las manecillas del reloj) para reducir la velocidad de
cierre.
3. Comprueba la velocidad de cierre después de cada ajuste.
La contrapuerta cerrará más rápidamente cuando la puerta de entrada esté abierta. Para
alcanzar la velocidad de cierre adecuada, necesitarás ajustar el cierre o los cierres, usando
el tornillo de ajuste incorporado. Verica la velocidad de cierre correcta con la puerta de
entrada tanto cerrada como abierta. Antes de dejar que la contrapuerta se cierre sola,
asegúrate de que cualquier persona o mascota haya pasado completamente por la
entrada para evitar lesiones.
aDVErtEncia
Table of contents
Languages:
Popular Door Lock manuals by other brands

Samsung SDS
Samsung SDS SHS-P718 user manual

Schlage
Schlage P515-302 installation instructions
WABCO
WABCO TTB Series Installation instruction
ANXELL
ANXELL ML-605M Series Installation instruction
Assa Abloy
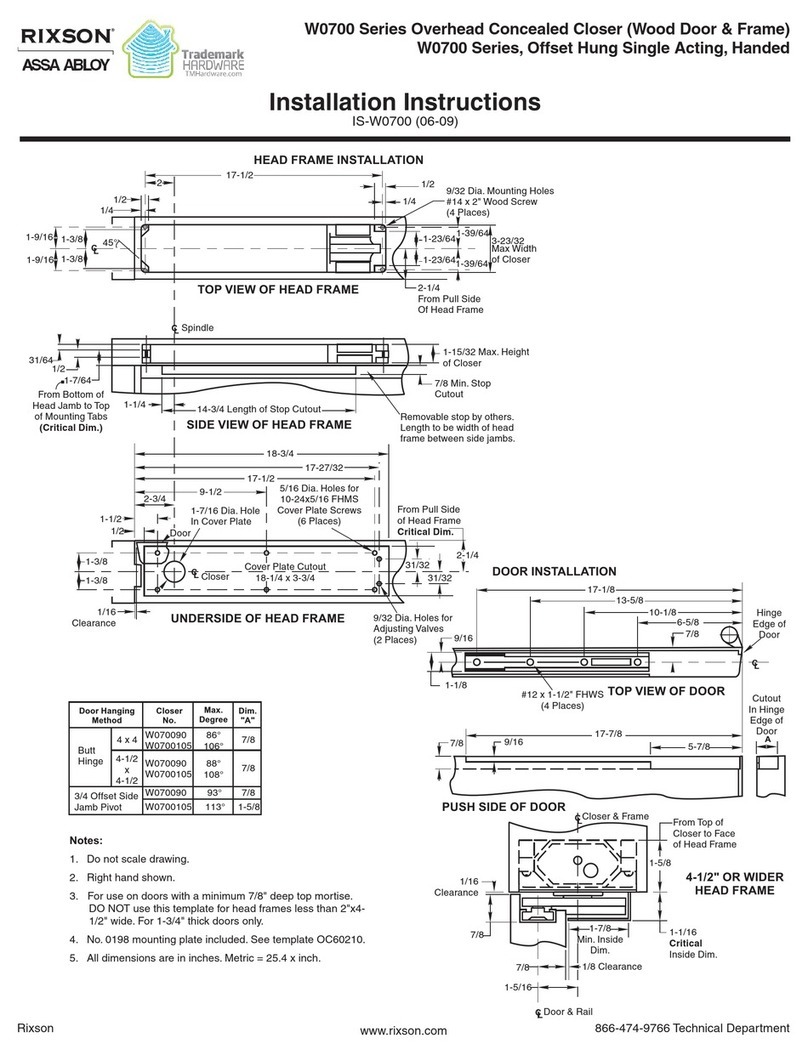
Assa Abloy RIXSON W0700 Series installation instructions
Baldwin
Baldwin RESERVE 47038 / 03 Quick user guide

Assa Abloy
Assa Abloy Sargent Profile G1 Series installation instructions

ZKTeco
ZKTeco PL10 Series installation guide
FAS
FAS DS Series Wiring instructions

NetworX
NetworX Architech Mounting and installation instructions
MALOW
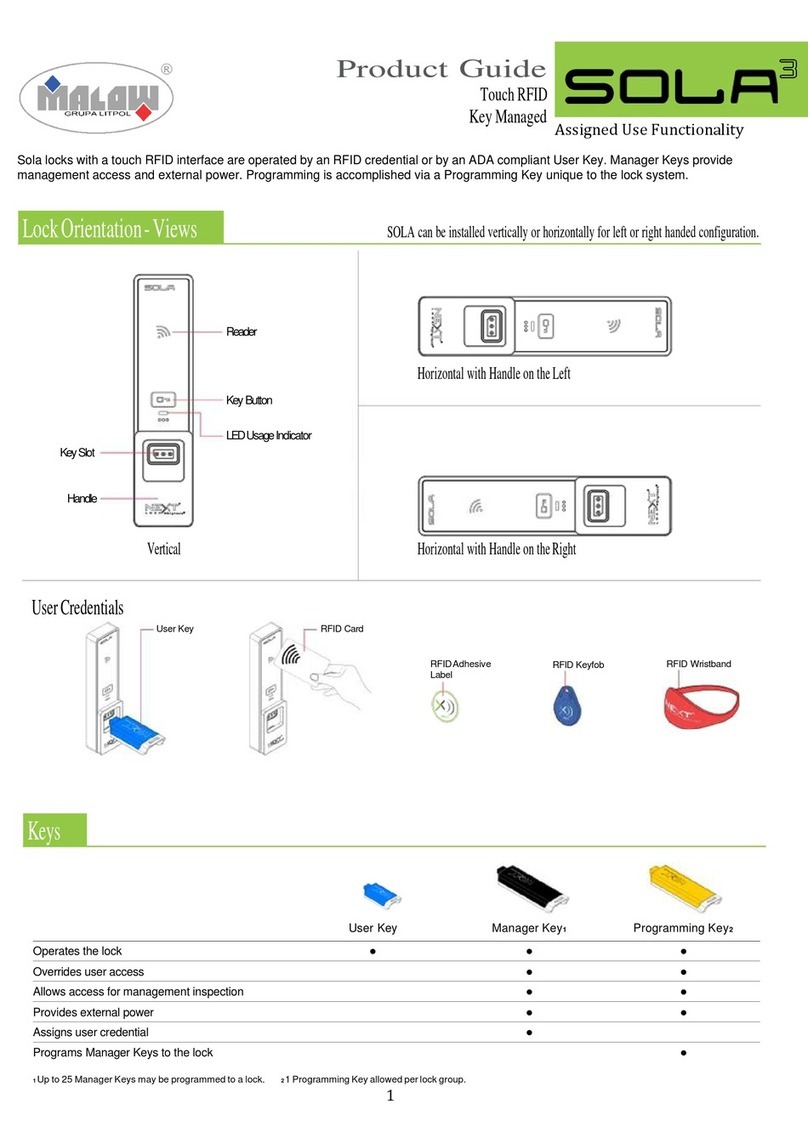
MALOW SOLA3 Product guide
Signature Hardware
Signature Hardware VICTORIAN installation instructions
