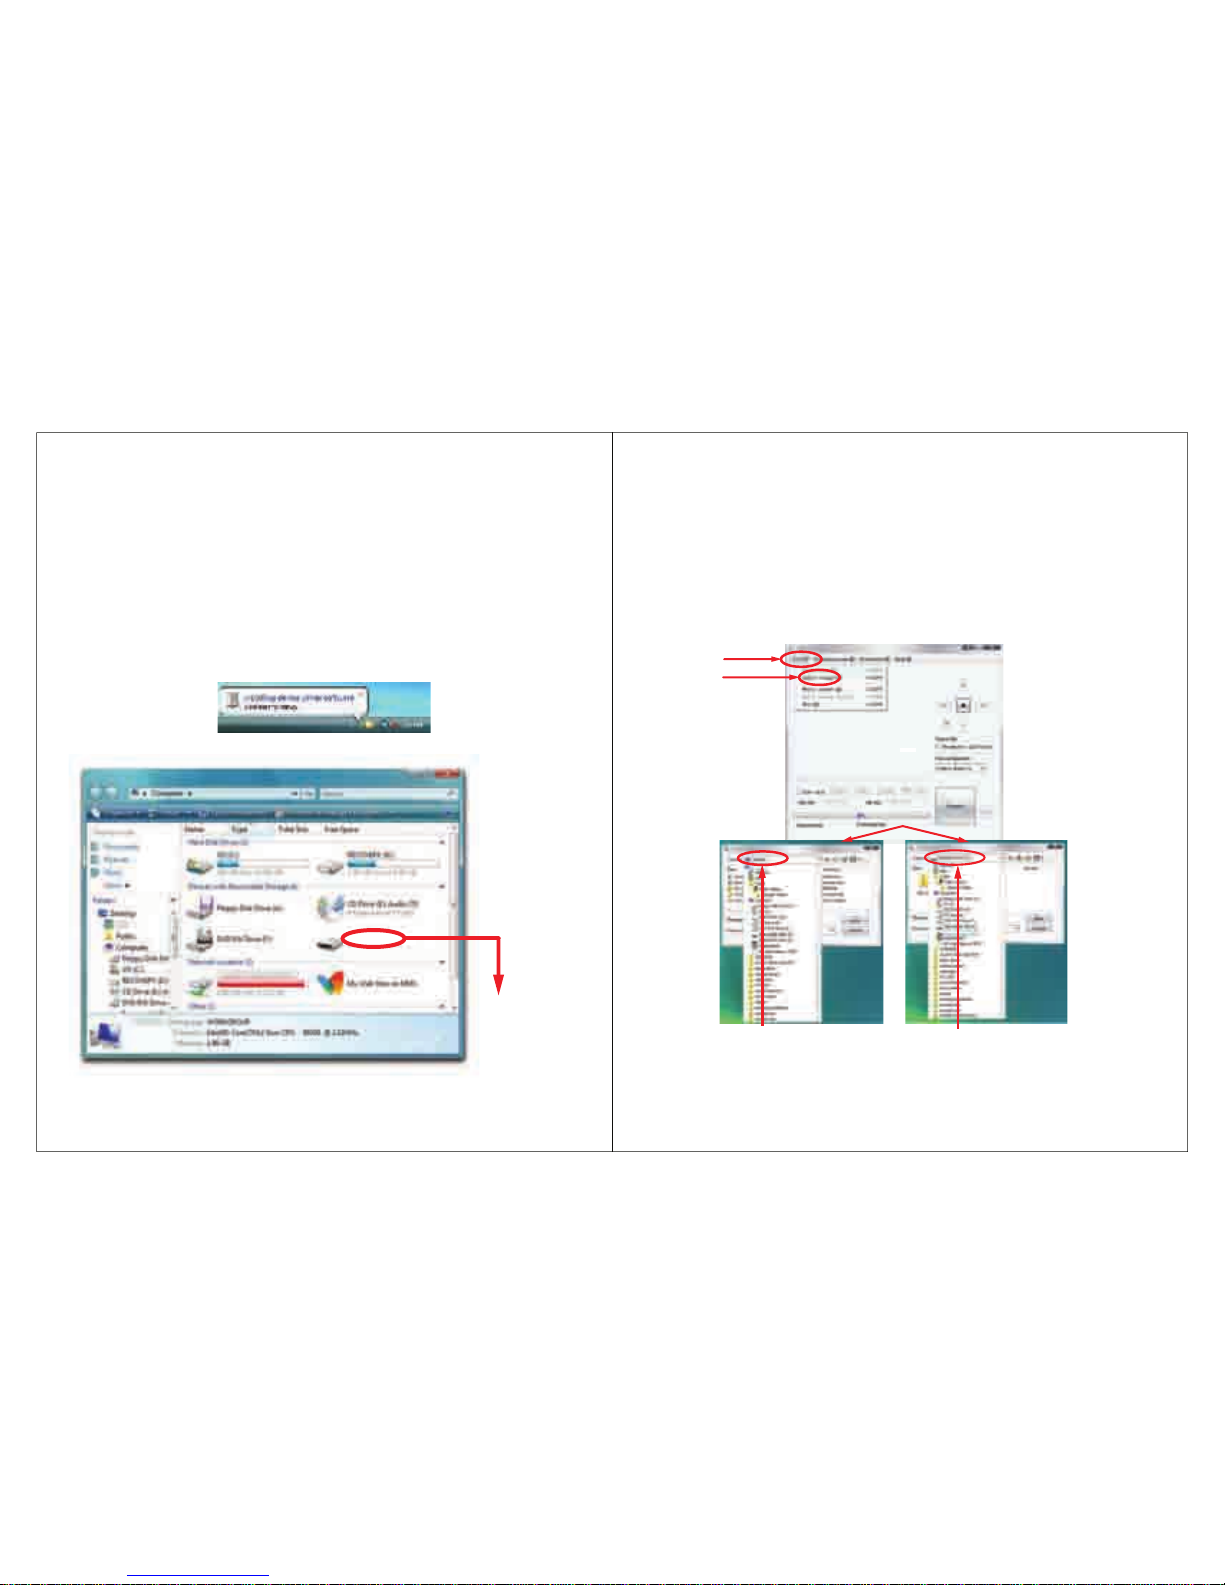
Emerson EMP413-4 User manual

EMP413-4
Quick Start and Media Transfer Guide
* FULL USER GUIDE PROVIDED ON THE CD
Manufactured by:AIT Inc. Brooklyn, NY 11232
Emerson and the G-Clef logo are registered trademarks of Emerson Radio Corp.
Parsippany, New Jersey USA
© 2009 AIT Inc. All rights reserved
Microsoft, the Windows logo, and Windows Media are either registered trademarks
or trademarks of Microsoft Corporation in the United States and / or other countries
4
VOL

1 18
In the Box
VOL
Emerson MP3 Video Player USB 2.0 Cable
(for battery charging
and high speed data transfer)
Installation CD Quick Start Guide
Stereo Headphones
16
8
2
3
4
7 9
5
12. Once finished, click on “OK”, and exit the application.
13. Copy the new converted video file to your player.
See “TRANSFERRING MEDIAFILES TO THE PLAYER” (page 4).
Click “OK”
The complete user guide for your MP3 Player,
which includes detailed descriptions of features,
and important warranty information is located on
the provided CD.

17 2
[POWER]
[NEXT]
9.
MIC
[PLAY]
[VOL]
[MODE]
[PREVIOUS]
1. Headphone jack
2. - Start or stop play / Power On-Off button
3. - Return to the main menu / Confirm
4. - ON / OFFswitch
5. - Voice recording
6. USB 2.0 Hi-Speed connector for battery charging and data transfer
8. - Adjust volume
- Next track / Fast forward / Volume up
7. - Previous track / Fast backwards / Volume down
Converting videos
9. Select the name for the file and click “Save”.
10. Click on the “Fast configurator” drop down window, and choose the
image quality of the new video. High quality will use more memory
and the output file will be bigger.
11. Click “Convert” to start the job queue. If more than one job is present
they will be performed sequentially.
Select the name Click “Save”
Click “Fast
configurator”
and choose the
image quality
Click “Convert”

3 16
Emerson MP3 (G:)
“Emerson MP3”
When it has finished, “Emerson MP3” will appear in “ My Computer”.
Note: Thebattery of the playeris charging whenthe player is connectedto
thecomputer.
Connecting to a computer
Connect the player to a computer to transfer files such as Music,
Pictures, Video orText. When connected to the computer, the player’s
internal battery will recharge.
1. Plug the larger USB connector of the supplied USB cable into the
USB port on the computer.
2. Plug the other end (the smaller end) of the USB cable to the player.
3. The computer system detects “New hardware” and starts to install
the driver automatically. Wait for the system to finish the installation.
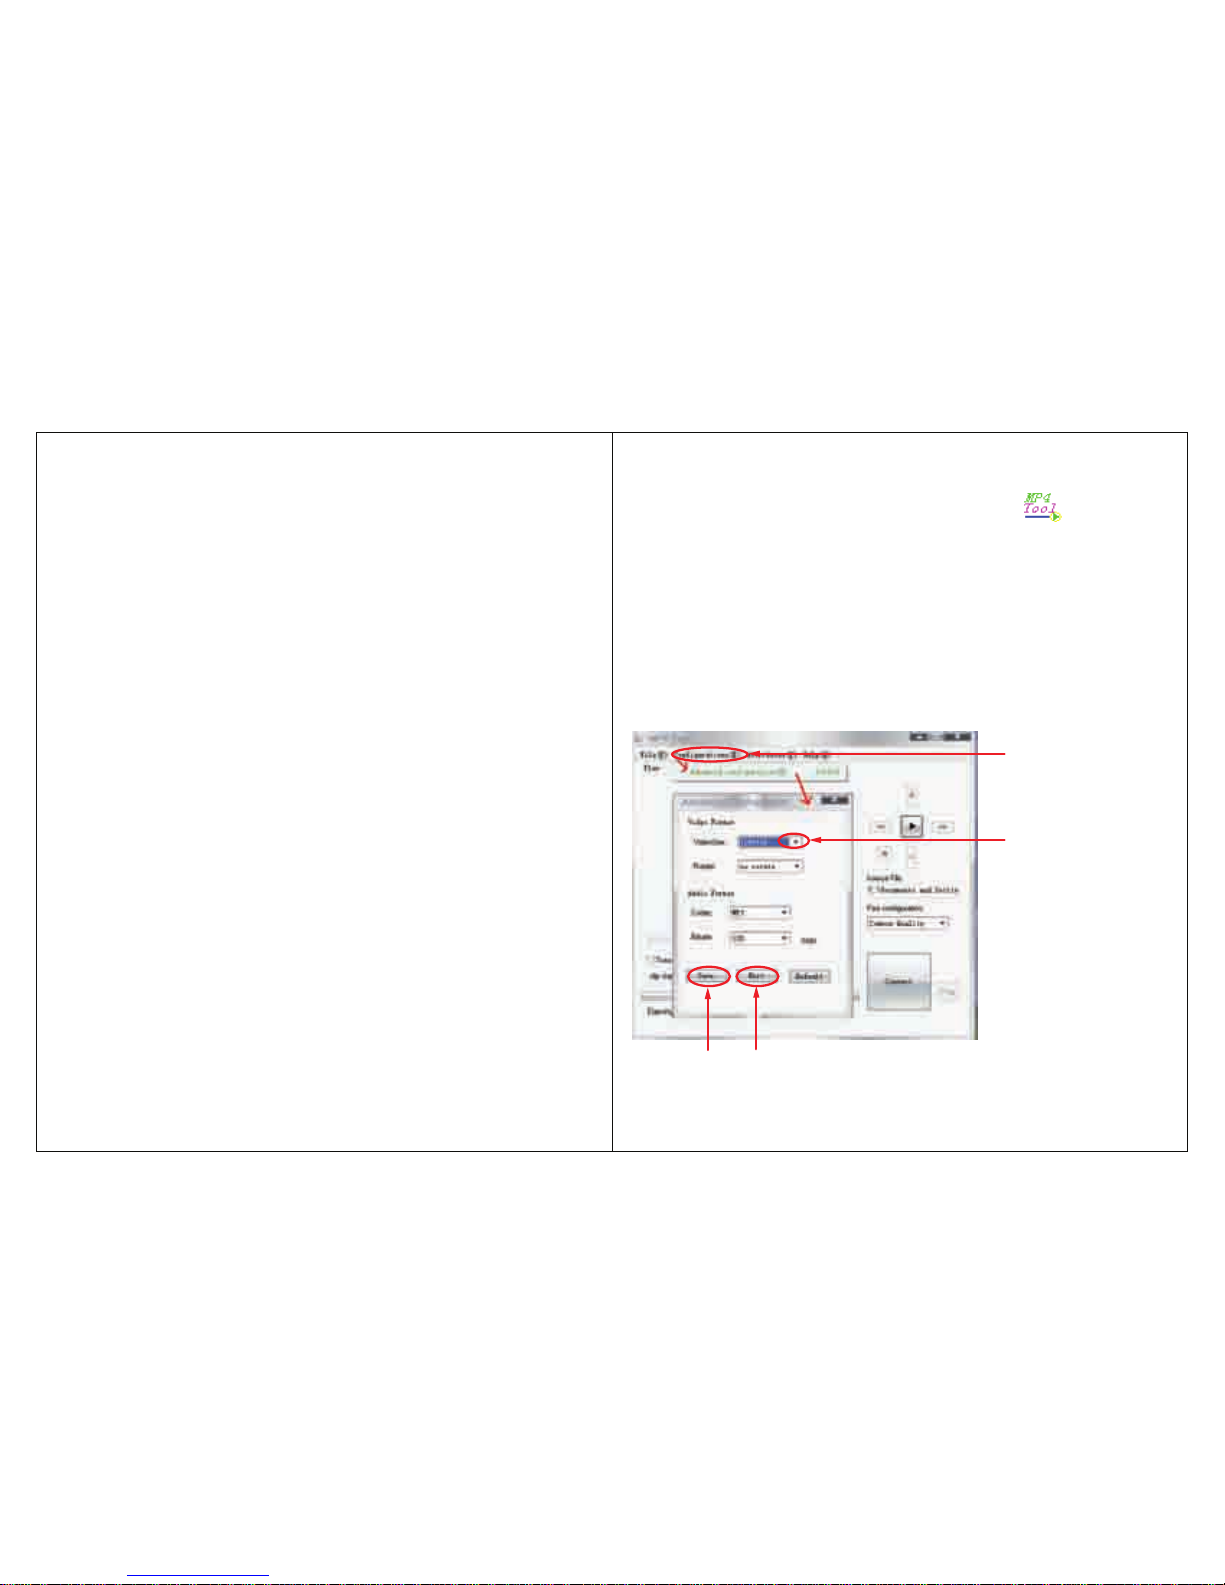
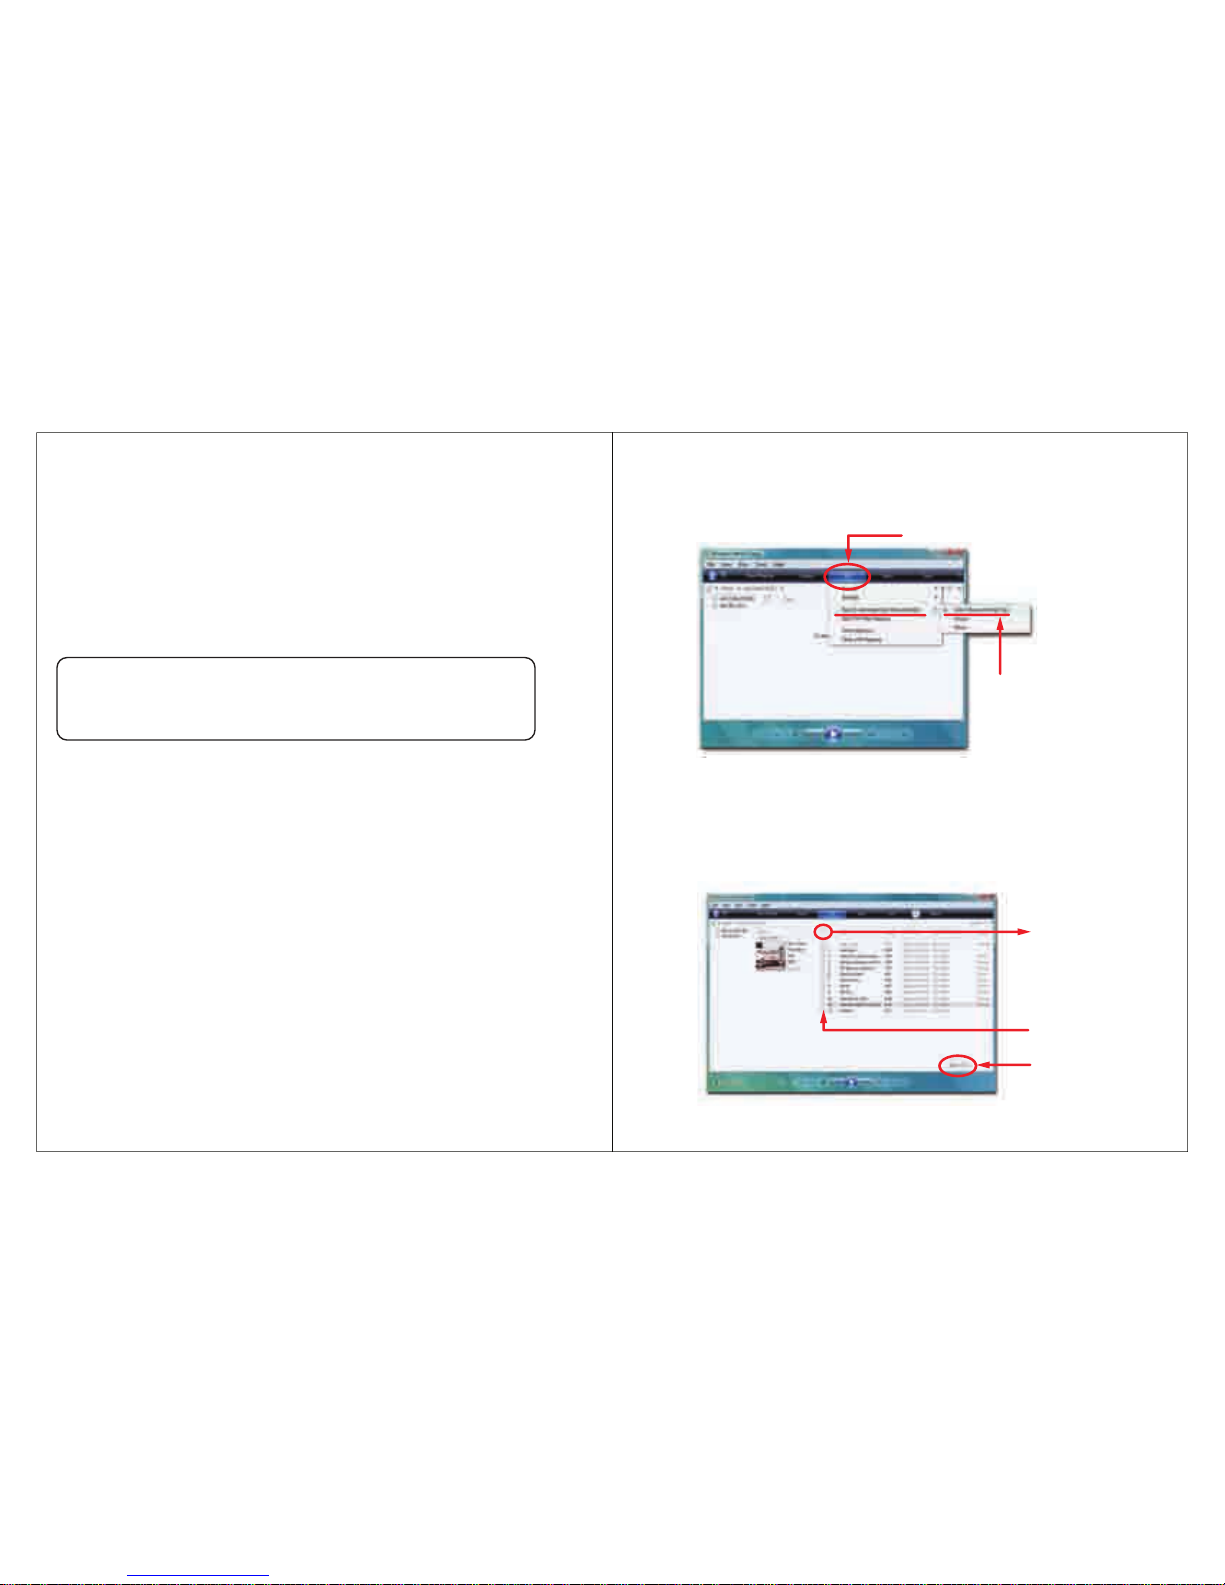
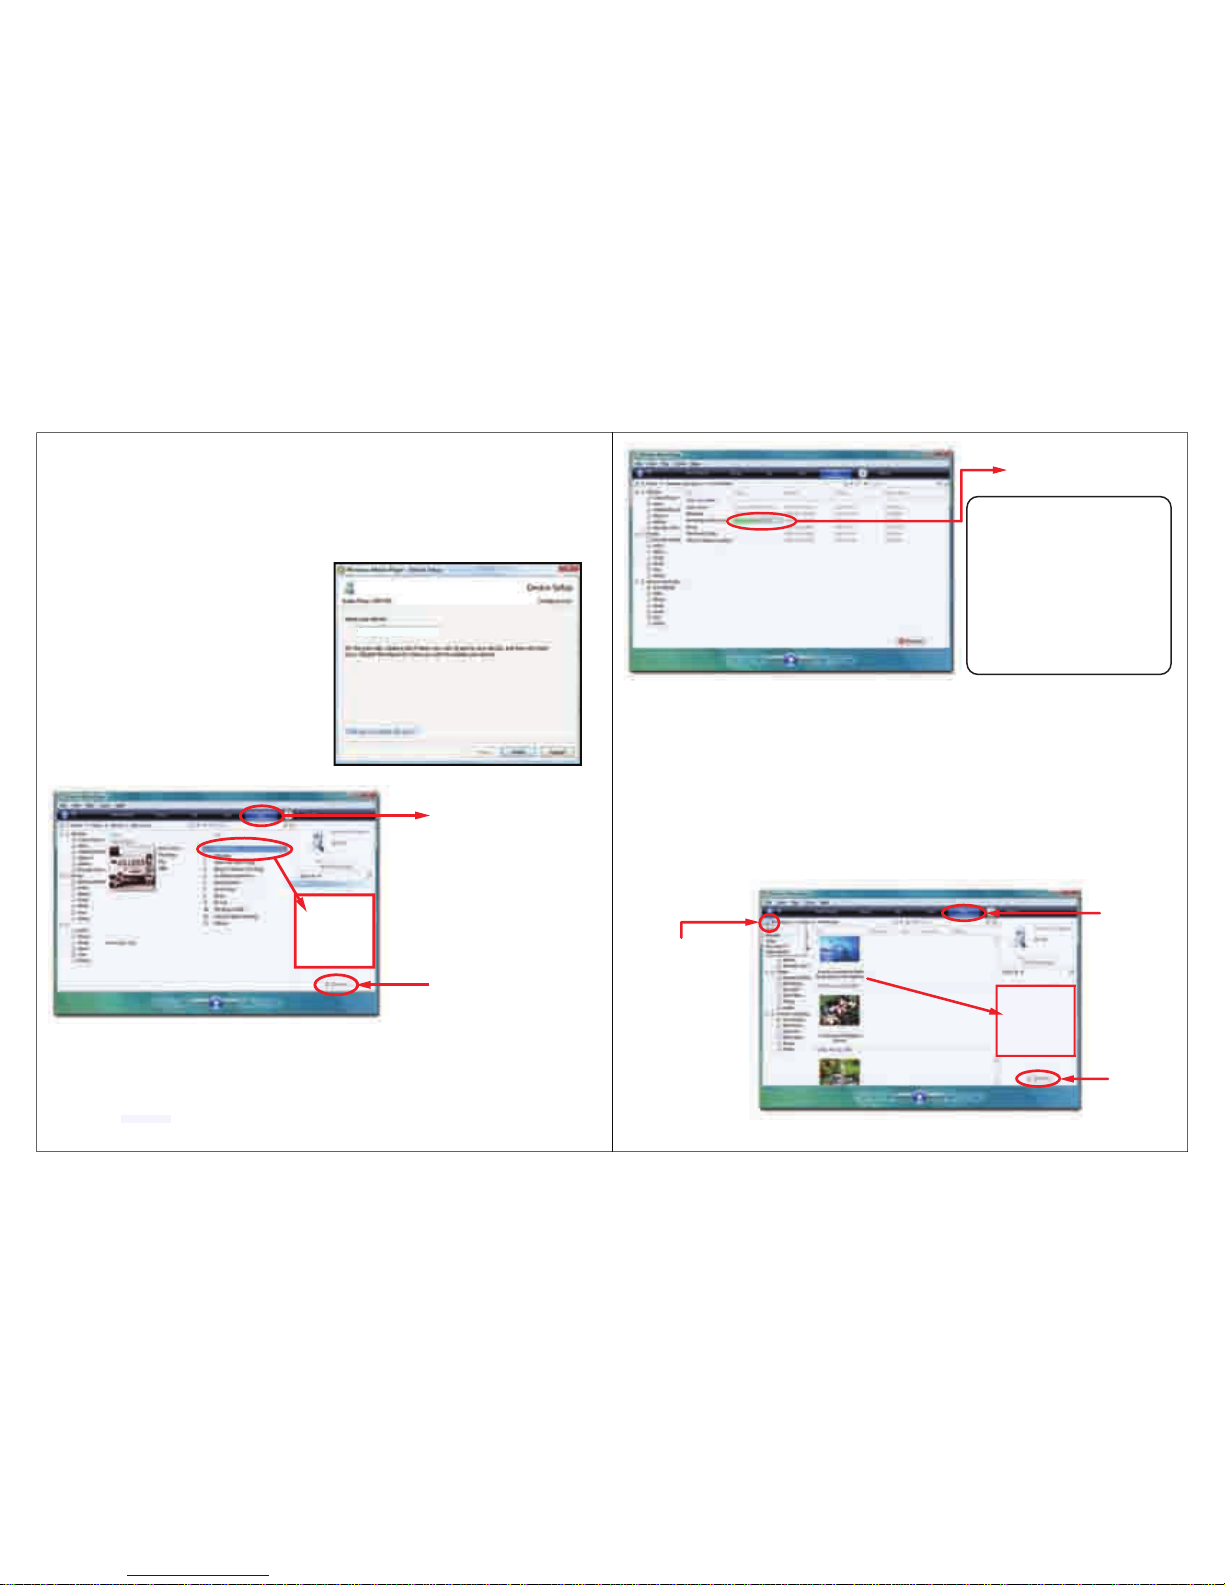
8. Click on “File’and then “Select target” to select the destination for the
converted video. You can send it directly to your player by selecting
“Emerson MP3”, and clicking “OK”, or if you would like to save the
video to your computer, we recommend sending it to your “Desktop”
where you can easily find the video, and transfer it to your player. (See
“TRANSFERRING MEDIAFILES TO THE PLAYER” on page 4)
NOTE: To send a converted video directly to your player, it must be
connected to the computer’s USB port at time of conversion.
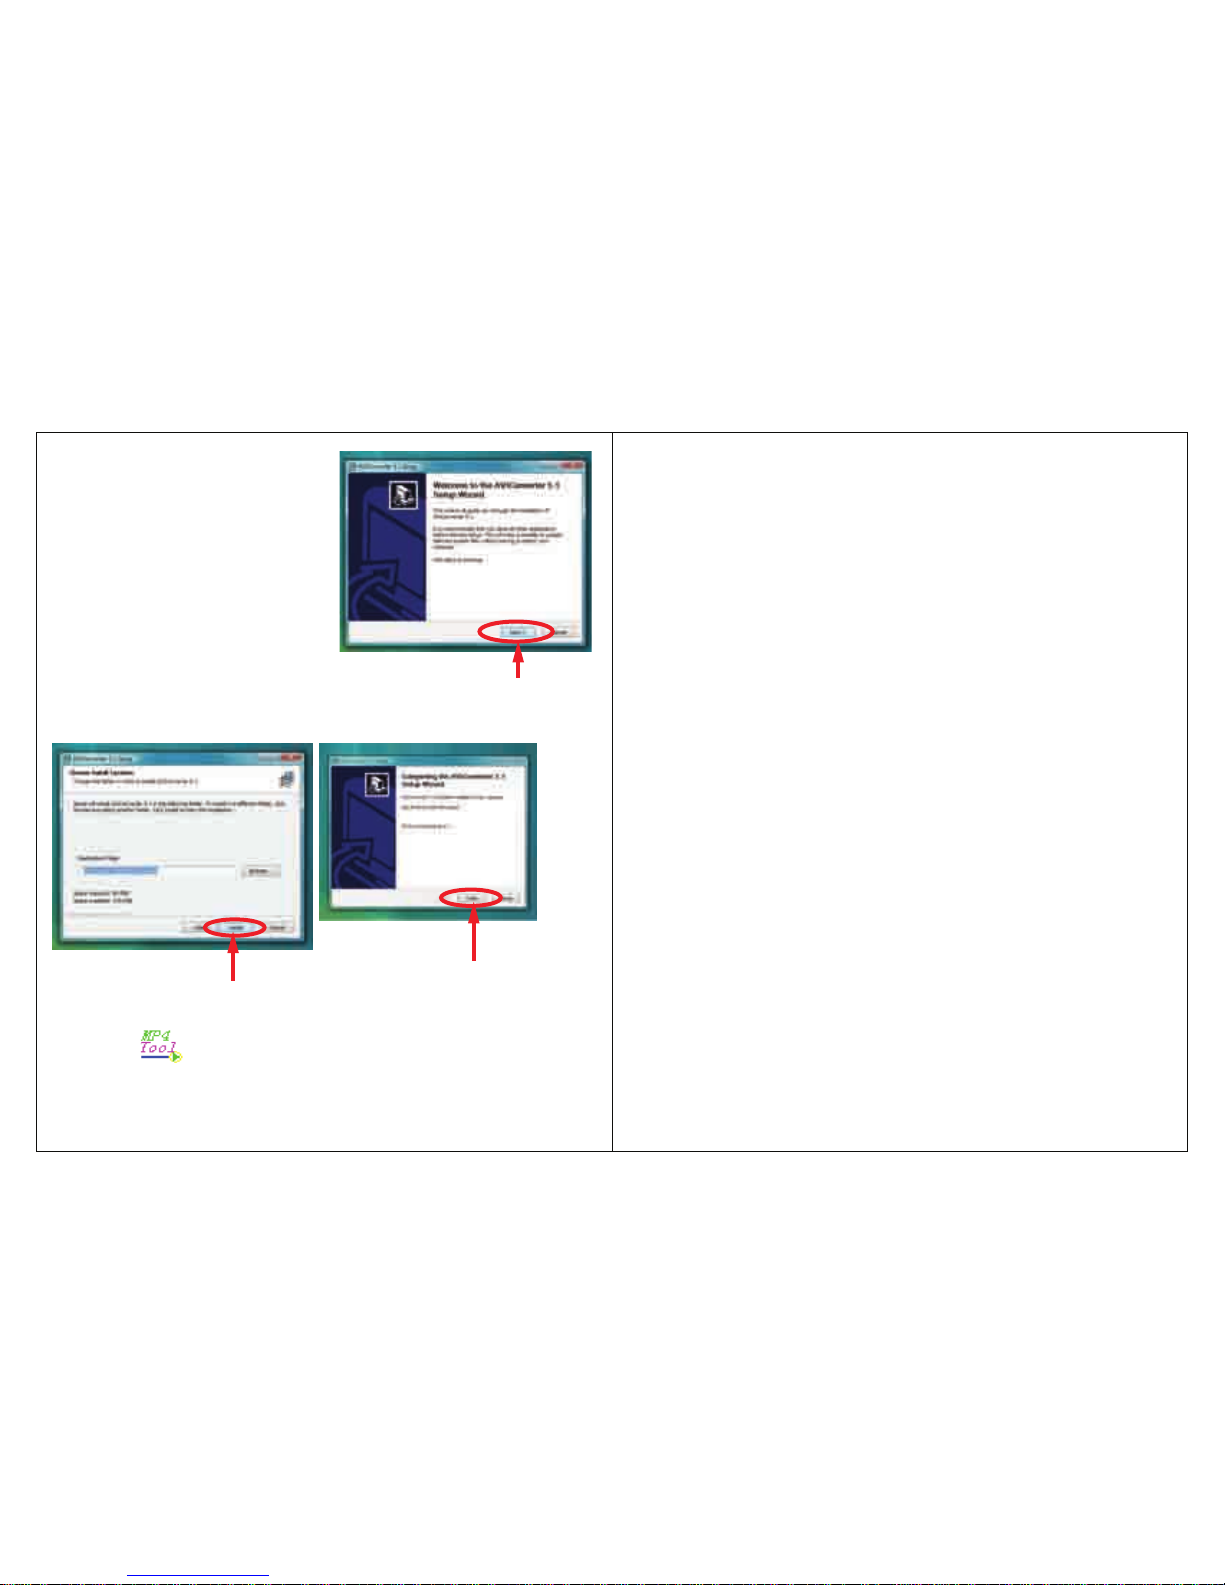
OR
Click “Select
target ”
Click “File”
Choose “Desktop” and save the converted
video to the “Desktop” on your computer.
After saving the converted video to your
desktop, you cantransfer it directly to your
player. See “TRANSFERRING MEDIA FILES
TO THE PLAYER”(page 4).
Choose “Emerson MP3” and save the
converted video directly to your
MP3 Player.
Note: Your MP3 Player must be conne-
cted to the USB port of your computer
during the conversion for this option.

15 4
Emerson MP3 (G:)
Emerson MP3
Drag or copy
files here
Locate “Emerson MP3”
Find your music, picture, or video
files on your computer
Connect the MP3 player to your
computer, and locate “Emerson MP3”.
Drag the files into the area shown below.
Note: Please do not disconnect the USB cable during loading. It
may cause a malfunction of the player and the files.
Transferring media files to the player
To copy and transfer your music, pictures, and videos to the player follow
the steps below:
1) Connect the MP3 Player to the USB port of your computer.
2) Open the “Windows Explorer” or click on “My Computer”, and
locate “Emerson MP3”.
3) Select the files on your computer and simply move it into
“Emerson MP3” in the usual way (drag and drop, or copy and
paste). After copying is completed, the data will be available on the
player.
6.
Click “File” and then “Open source” to find and select the video you
would like to convert.
7. Click on a video and then click “Open”.
Click “Open”
Click on a video
Click
“Open source”
Click “File”

5 14
Basic operation
Make sure your battery is charged, and the headphones are properly
connected.
Turning on/off
● To turn on the player, slide the [ POWER ] switch to the “ON”
position, and press and HOLD the [PLAY] button for 3 seconds until
the LCD screen lights up.
● To turn the player off, press and HOLD the [ PLAY ] button until the
LCD screen shuts off, or slide the [POWER] switch to the “OFF”
position.
NOTE: If you power off the device directly with the [POWER] switch, your
last changes in the settings will be lost, and the player will not
remember the last song played.
Adjusting the volume
Press the [VOL] button then press the [PREVIOUS] button to decrease
the volume, or the [NEXT] button to increase the volume.
Main menu
● Use the [PREVIOUS] or [NEXT] button to select an option from the
main menu, and press the [MODE] button to confirm your selection.
● To return to the main menu, press and HOLD the [MODE] button.
Converting videos
1. Connect the MP3 Player to the USB port of your computer (optional).
2. Click on “MP4Tool” from the “Start” menu, or the icon on
your desktop.
3.
Click on the “Configurations” drop down window, and then
“Advanced configuation”.
4. Click on the “VideoSize” drop down window and select “128 x 128”
resolution.
5. Click “Save”, and then click “Exit”.
Click“Save” Click“Exit”
Click on the “VideoSize”
drop down window
and select “128 x 128”
Click “Configurations”
and then
“Advanced configuration”

613
Windows Media Player
To organize and play your music, rip CD tracks to your hard drive, and
transfer music, picture, and video files to your player, we recommend
using Windows Media Player. If Windows Media Player is not installed
on your computer, you may download the latest version (Windows Media
Player 11) of the player from:
www.microsoft.com/windows/windowsmedia/player/download/
If you are unsure of which version of Windows Media Player is
compatible with your operating system, you may use the link below for
more information regarding previous versions of the Windows Media
Player.
www.microsoft.com/windows/windowsmedia/player/versions.aspx
Click“Install”
Click “Finish”
5) Click the icon on your “Desktop” to open the Video Converter.
4) Click “Install” when you see the screen below, and then click “Finish”.
Click “Next”
3) Click “ Next” and follow
installation instructions to
download the converter to your
computer.

7 12
Install
Windows
Media Player11
Get more
information
Click on “Music”
1) Insert the provided CD into the CD-ROM drive of your computer, and
click on “Music”.
2) Use the links to either download Windows Media Player 11, or
get more information regarding previous versions of Windows Media
Player.
Click on “Video
Converter”
Click “Install”
2) Click “Install”.
1) Insert the provided
CD into the CD-ROM
drive of your computer,
and click on “Video
Converter”.
To install the Video converter on your computer follow the steps
below:

11 8
Default Setting
Click “Rip” tab to start ripping
Click “Start Rip”
Select individual
tracks to rip
Check here to rip
entire album
Getting music on your computer using Windows Media Player 11
1) Open Windows Media Player.
2) Click on the “Rip” tab.
3) Insert a music CD into the CD-ROM drive of your computer.
4) Click the check boxes to select which tracks to rip. If you would
like to rip the entire album, click the check box next to “Album”.
5) Click “Start Rip”.
3) Windows Media Player will display the pictures that you have on your
computer (you may need to search for your picture files if they are not
located in the default folder).
4) Connect your MP3 Player to the USB port of the computer.
5) Click the “Sync” Tab.
6) Drag the pictures you would like to sync to your MP3 Player, and click
on the “Start Sync” button.
7) The selected files will sync to your MP3 Player.
* Referto page 5 ”Basic operation” orthe complete User Guide located
on the provided CD for more information regarding viewing pictures or
videos on your
MP3 Player.
You may also transfer pictures, videos, and other media files by
dragging / copying them directly into your player.
See “Transferring media files to the player” on page 4.
Converting videos
Before transferring video files to the MP3 Player, you must convert them
to the correct format. With the Video Converter software tool you can
easily convert your videos to the correct format (128 x 128 resolution) so
you can enjoy them on your MP3 Player.

9 10
“Device Setup” window
Emerson MP3
“Sync” Tab
Click on “Start Sync”
Drag your
songs here
Getting music on your MP3 Player using Windows Media Player 11
1) Open Windows Media Player.
2) Windows Media Player will display the music that you have on your
computer (you may need to search for your music files if they are not
located in the default folder).
3) Connect your MP3 player to the
USB port of the computer.
4) Click on the “Sync” tab.
5) To easily identify your player
within Windows Media Player,
name it in the “Device Setup”
window.
6) Drag the songs you would like to sync to your MP3 player, and click on
the “Start Sync” button.
7) The selected songs will sync to your MP3 player.
Click on the
“Category”
button and
select “Pictures”Drag your
pictures
here
Click on
“Start Sync”
Click on
“Sync”
Sync in Progress
*Refer to page 5 ”Basic operation” or the complete User Guide
located on the provided CD for more information regarding playing
music on your MP3 Player.
Getting pictures on your MP3 Player using Windows Media Player 11
1) Open Windows Media Player.
2) Click on the “Category” button circled below, and select “Pictures”.
You may also transfer
music or other media files
by dragging / copying them
directly into your player.
See “Transferring media
files to the player” on
page 4.
Other manuals for EMP413-4
1
Table of contents
Other Emerson Media Player manuals