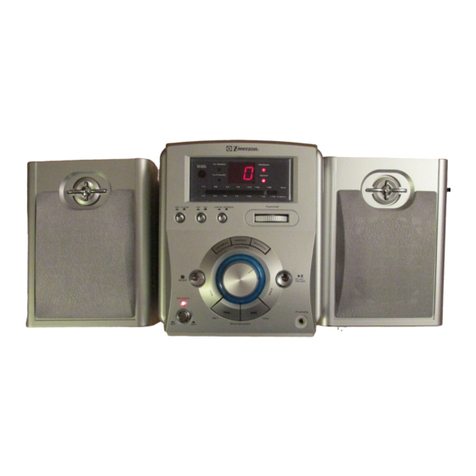
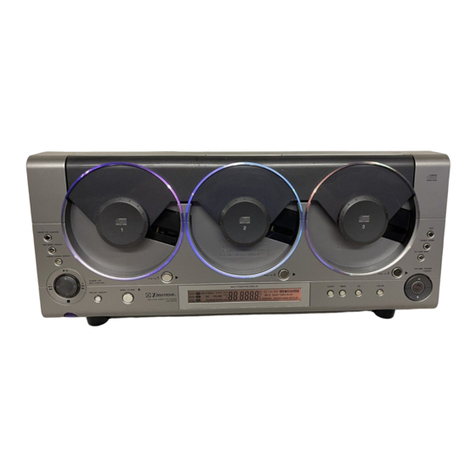
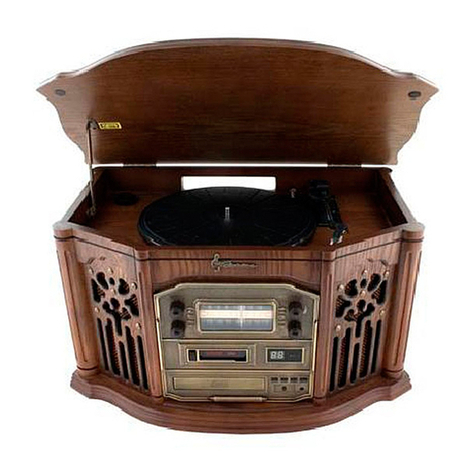
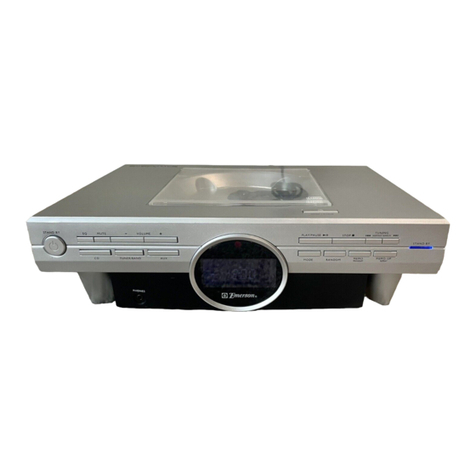
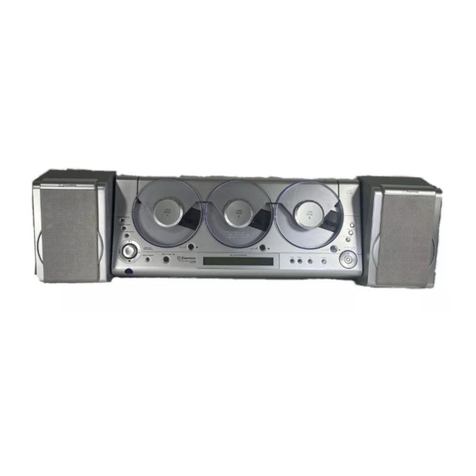
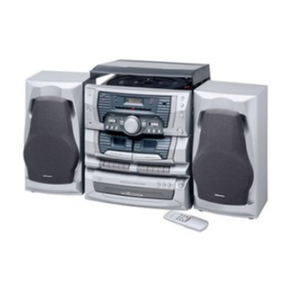
Emerson MS9933TT User manual

OWNER'SMANUAL
MS9933TT
HOMEAUDIOSYSTEM
with5CD CHANGER,
3SPEEDTURNTABLE,
DUALCASSETTEDECK
and REMOTECONTROL
Visitourweb siteatwww.emersonradio.com
MS9933TT_050304.p65 3/5/2004, 10:2636

1
TO PREVENT FIRE OR SHOCK HAZARD, DO NOT USE THIS PLUG WITH AN
EXTENSION CORD, RECEPTACLE OR OTHER OUTLET UNLESS THE BLADES
CAN BE FULLY INSERTED TO PREVENT BLADE EXPOSURE. TO PREVENT FIRE
ORSHOCKHAZARD,DONOTEXPOSETHISAPPLIANCETORAINORMOISTURE.
IMPORTANTSAFETYINSTRUCTIONS
1.) Read these instructions.
2.) Keep these instructions.
3.) Heed all warnings.
4.) Follow all instructions.
5.) Do not use this apparatus near water.
6.) Clean only with dry cloth.
7.) Do not block any ventilation openings. Install in accordance with the manufacturer’s
instructions.
8.) Do not install near any heat sources such as radiators, heat registers, stoves, or other
apparatus (including amplifiers) that produce heat.
9.) Do not defeat the safety purpose of the polarized or grounding-type plug. A polarized plug has
two blades with one wider than the other. A grounding type plug has two blades and a third
grounding prong. The wide blade or the third prong is provided for your safety. If the provided
plug does not fit into your outlet, consult an electrician for replacement of the obsolete outlet.
10.) Protect the power cord from being walked on or pinched particularly at plugs, convenience
receptacles, and the point where they exit from the apparatus.
11.) Only use attachments / accessories specified by the manufacturer.
12.) Unplug this apparatus during lightning storms or when unused for long periods of time.
13.) Refer all servicing to qualified service personnel. Servicing is required when the apparatus
has been damaged in any way, such as power-supply cord or plug is damaged, liquid has
been spilled or objects have fallen into the apparatus, the apparatus has been exposed to rain
or moisture, does not operate normally, or has been dropped.
14.) This appliance shall not be exposed to dripping or splashing water and no object filled with
liquids such as vases shall be placed on the apparatus.
15.) Do not overload wall outlet. Use only power source as indicated.
16.) Use replacement parts as specified by the manufacturer.
17.) The product may be mounted to a wall only if recommended by the manufacturer.
18.) Upon completion of any service or repairs to this product, ask the service technician to
perform safety checks.
!
CAUTION
RISK OFELECTRICSHOCK
DONOTOPEN
The lightning flashwitharrow-
head symbol,withinan equi-
lateraltriangleisintended to
alertthe usertothe presence
ofuninsulated‘dangerousvoltage’
withinthe product’s enclosure
thatmaybe ofsufficient
magnitude toconstitutearisk
ofelectricshock topersons.
The exclamation pointwithin
an equilateraltriangleisin-
tended toalertthe userto
the presenceofimportant
operating and maintenance
(servicing)instructionsin
the literatureaccompany-
ing the appliance.
WARNING:TOREDUCETHE
RISK OFELECTRICSHOCK
DONOTREMOVE COVER
(ORBACK),NOUSER
SERVICEABLEPARTSINSIDE
REFERSERVICINGTO
QUALIFIEDSERVICE
PERSONNEL.
CAUTION
MS9933TT_050304.p65 3/5/2004, 10:251

2
Thank you……………
For purchasing this Emerson complete home audio system including a stereo
radio, 5 disc changer, dual cassette deck, stereo phonograph, matching speakers,
and remote control.
Please read this Owner’s Manual carefully and completely to make sure that you
get the maximum benefit out of all the outstanding features we’ve included in this
compact system. It’s designed to give you many years of trouble free operation
with an absolute minimum of care and maintenance.
Every component in this system was in perfect working order when it left our factory.
If you experience any problems with the set up or operation of this system please
do not return it to the retail store. Please call the Emerson Customer Service
Hotline toll free at 1-800-898-9020 and one of our service technicians will attempt
to diagnose and correct the problem for you.
Once again, thanks for purchasing this Emerson audio product.
The serial number of your system is located on a label on the back panel. Please
take a moment to locate the serial number and write the number in the space
provided below. You may need this number for insurance purposes in the event
your set is damaged or lost. You may also be asked to provide this number when
requesting service.
Model Number: MS9933TT
Serial Number:
MS9933TT_050304.p65 3/5/2004, 10:252

3
IMPORTANTNOTES
•Operatecontrolsand switchesas
described inthe manual.
•Beforeturning ‘On’the power,make
certainthatpowercordisproperly
installed.
•StoreyourCDs,cassettesinacoolarea
toavoiddamage fromheat.
•When moving the set, be suretofirst
disconnectthe powercord.
•Avoidinstalling thisunitinplaces
exposed todirectsunlightorcloseto
heatradiating appliancessuchas
electricheaters,on top ofotherstereo
equipmentthatradiatestoo muchheat,
placeslackingventilationordustyareas,
placessubjecttoconstantvibrationand/
orhumidormoistareas.
•Donotattempttoclean thisunitwith
chemicalsolventsasthismightdamage
the finish.Useaclean drycloth.
CLASS 1LASERPRODUCT
CLASS 1LASERPRODUCT
APPAREILÁLASERDECLASSE 1
PRODUCTOLASERDECLASE 1
CAUTION
INVISIBLELASERRADIATION
WHENOPENAND INTERLOCKS
DEFEATED.
AVOIDEXPOSURETOBEAM
ThisproductcontainsalowpowerLaserDevice.
FCC INFORMATION
Thisequipmenthasbeen tested and found tocomplywiththe limitsforaClass Bdigital
device,pursuanttoPart15 ofthe FCC Rules.Theselimitsaredesigned toprovide
reasonableprotection againstharmfulinterferenceinaresidentialinstallation.This
equipmentgenerates,uses,and can radiateradiofrequency energyand,ifnotinstalled
and used inaccordancewiththe instructions,maycauseharmfulinterferencetoradio
communications.However,thereisno guarantee thatinterferencewill notoccurina
particularinstallation.Ifthisequipmentdoescauseharmfulinterferencetoradioortelevision
reception,whichcan be determined byturning the equipmentoff and on,the useris
encouraged totrytocorrectthe interferencebyone ormoreofthe following measures:
•Reorientorrelocatethe receiving antenna.
•Increasethe separation between the equipmentand receiver.
•Connectthe equipmentintoan outleton acircuitdifferentfromthattowhichthe receiver
isconnected.
•Consultthe dealeroran experienced radio/TVtechnician forhelp.
ThisdevicecomplieswithPart15 ofthe FCC Rules.Operation issubjecttothe following
twoconditions:
(1)Thisdevicemaynotcauseharmfulinterference,and
(2)Thisdevicemustacceptanyinterferencereceived,including interferencethat
maycauseundesired operation.
MS9933TT_050304.p65 3/5/2004, 10:253
4
SPEAKERCONNECTION
Connecteachspeakertothe corresponding speakerterminalson the back panel
ofthe mainunit.
Makesurethatthe left speakerisconnected tothe left pairofspeakerterminals
and the rightspeakertothe rightpairofspeakerterminals.
Alsomakesurethatthe speakerwiresarecorrectlyconnected:
The red wiresareconnected tothe red (+)terminals.
The black wiresareconnected tothe black (–)terminals.
PREPARATIONFORUSE
R
L
SPEAKERS : 4
RED
BLACK
Depress the plasticlevertoopen the terminal,insertthe bareend ofthe speaker
wireintothe opening and release.
RightSpeakerLeft Speaker
MS9933TT_050304.p65 3/5/2004, 10:254

5
CONNECTINGTHEAC POWERCORD
Afterconnecting the speakersunwind theACpowercordfullyand connectittoany
convenienthouseholdACoutlet.
NOTE:Thisproductisdesigned tooperateon normal120V60HzAConly.
Connecting thissystemtoanyotherpowersupplycouldresultindamage tothe
unitwhichisnotcovered byyourwarranty.
You will notethatthissystemisequipped withapolarized ACpowerplug having
one blade widerthan the other.Thisisasafetyfeature.If thisplug doesnotfitinto
yourexisting ACoutlet, do nottrytodefeatthissafetyfeaturebyfiling the wide
blade tomakeitfitintoyouroutlet. If thisplug will notfitintoyouroutlet, you
probablyhavean out-dated non-polarized ACoutlet. You shouldhaveyouroutlet
changed byaqualified licensed electrician.
AC Plug
AC Outlet
MS9933TT_050304.p65 3/5/2004, 10:255

6
PROTECT YOUR FURNITURE
Thismodelisequipped withnon-skidrubber'feet'topreventthe productfrom
moving when you operatethe controls.These'feet'aremade fromnon-migrating
rubbermaterialspeciallyformulated toavoidleaving anymarks orstainson your
furniture.Howevercertaintypesofoil based furniturepolishes,wood preservatives,
orcleaning sprays maycausethe rubber'feet'tosoften,and leavemarks ora
rubberresidue on the furniture.Topreventanydamage toyourfurniturewestrongly
recommend thatyou purchasesmall self-adhesivefeltpads,availableathardware
storesand homeimprovementcenterseverywhere,and applythesepadstothe
bottomofthe rubber'feet'beforeyou placethe producton fine wooden furniture.
MS9933TT_050304.p65 3/5/2004, 10:256

7
LOCATIONOFCONTROLSAND INDICATORS
PLAY
PLAY
REWIND
REWIND
F. FWD
F.FWD
STOP/EJECT
STOP/EJECT
PAUSE PAUSE
RANDOM
INTRO
PLAY/PAUSE
MEMORY
MULTI-FUNCTION LCD DISPLAY
DISC
1
DISC
2
DISC
3
DISC
4
DISC
5
REMOTE
SENSOR
DIGITAL FILTER PROCESSING SYSTEM
REPEAT/MEM. UP
TUNING / SKIP / SEARCH
STOP/MEM. DOWN
4 BAND PRESET EQUALIZER
AM / FM DIGITAL TUNING
STANDBY
VOLUME
PRESET
EQUALIZER
RECORD
AUX/PHONO
TAPE
CD/DISCSKIP
TUNER/BAND
POWER
FM ST. - MONO /
HI-SPEED DUBBING
BASS BOOST
PHONES OPEN/
CLOSE
ROCK
POP FLAT
EQ
PLAYBACK
RECORD
AUTO STOP
PLAYBACK
BBS
5 COMPACT DISC
MODEL
MS9933TT
40 TRACK PROGRAM MEMORY
AUTOMATIC CHANGER
1
2
3
4
5
6
7
8
9
10
11
12
13 14 15 17 19 20
21
22
18
23
24
25
26
27
28
29
30
31
16
FRONTPANEL
MS9933TT_050304.p65 3/5/2004, 10:257

8
1.)5CD CHANGERTray.
2.)CassetteDECKAControlKeys:
RECORD /PLAY/REWIND /F.FWD(FastForward)/STOP-EJECT/PAUSE.
3.)CassetteDECKACompartment.
4.)REPEAT/MEM.UPButton.
5.)TUNING/SKIPSEARCH Button.
6.)INTROButton.
7.)RANDOMButton.
8.)PHONES Jack.
9.)PRESETEQUALIZER(FLAT/CLASSIC/ROCK /POP)Buttons&Indicators.
10.)BASS BOOSTButton.
11.)POWER‘On/Off’Button.
12.)STANDBYIndicator.
13.)FMST.–MONO/HI-SPEEDDUBBINGButton.
14.)BBS(Bass Boost)‘On’Indicator.
15.)REMOTESENSOR.
16.)TurntableDustCover.
17.)MULTI-FUNCTIONLCD DISPLAY.
18.)CD DISC1,2,3,4,5SelectButtons.
19.)TAPE Button.
20.)AUX/PHONOButton.
21.)CD /DISCSKIPButton.
22.)TUNER/BAND Button.
23.)VOLUMEUpButton.
24.)CDTrayOPEN/CLOSE Button.
25.)VOLUMEDownButton.
26.)CD PLAY/PAUSE Button.
27.)TUNING/SKIPSEARCH Button.
28.)STOP/MEM.DOWNN Button.
29.)MEMORYButton.
30.)CassetteDECKBCompartment.
31.)CassetteDECKBControlKeys:
PLAY/REWIND /F.FWD(FastForward)/STOP-EJECT/PAUSE.
MS9933TT_050304.p65 3/5/2004, 10:258

9
32.)SPEAKERTerminals.
33.)FMLead WireAntenna.
34.)RESETButton (Inside pinhole).
35.)AUXIN(RIGHT/LEFT)Jacks.
36.)ACPowerCord.
BACK PANEL
16
32 34
35
36
33
MS9933TT_050304.p65 3/5/2004, 10:259

10
REMOTECONTROL
1.)TUNINGUp/CD SkipFwdButton.
2.)CD Play/PauseButton.
3.)TUNINGDown/CDSkipRevButton.
4.)CDStop /MEMORYDOWNN Button.
5.)CD INTROButton.
6.)MEMORYUP/REPEATButton.
7.)MEMORYButton.
8.)OPEN/CLOSE Button.
9.)TUNER/BAND Button.
10.)TAPE Button.
11.)AUX/PHONOButton.
12.)POWERButton.
13.)MUTEButton.
14.)CD/DISCSKIPButton.
15.)RANDOMButton.
16.)REMAINButton.
17.)VOLUME+Button.
18.)VOLUME–Button.
19.)BatteryCompartment(Back Cabinet).
BATTERYINSTALLATION
1.)Open the batterycompartmentcover.
2.)Inserttwo"AA"(UM3)batteries(notincluded)
tomatchthe polaritiesasindicated inside the
batterycompartment.
3.)Closethe cover.
BATTERYPRECAUTIONS
Followtheseprecautionswhen using batteriesinthisdevice:
1.Useonlythe sizeand type ofbatteriesspecified.
2.Besuretofollowthe correctpolaritywhen installing the batteriesasindicated inthe battery
compartment. Reversed batteriesmaycausedamage tothe device.
3.Donotmixdifferenttypesofbatteriestogether(e.g.Alkalineand Carbon-Zinc)oroldbatteries
withfreshones.
4. If the deviceisnottobe used foralong period oftime,removethe batteriestoprevent
damage orinjuryfrompossiblebatteryleakage.
5.Donottrytorecharge batteriesnotintendedtobe recharged;theycan overheatand rupture.
(Followbatterymanufacturer’s directions.)
VOLUME
MEMORY DOWN
TUNING
POWER
INTRO
REPEAT
REMAIN
MEMORYUP
TUNER
TAPE
AUX/PHONO
BAND
MEMORY OPEN/CLOSE
CD/TUNER CONTROL
RANDOM
CD MUTE
DISCSKIP
R
1
2
3
4
5
6
7
8
9
10
11
12
13
14
15
16
17
18
19
MS9933TT_050304.p65 3/5/2004, 10:2510

11
OPERATINGINSTRUCTIONS
GENERALCONTROLS
PRESETElectronicEQUALIZER
When the unitisswitched ‘On’forthe firsttime,the Equalizerwill be inthe “Flat”
setting.Press the appropriatePRESETEQUALIZERbutton toselect“ROCK”,
“POP”,“CLASSIC”or“FLAT”sound effecttosuityourtaste.The appropriateEQ
Indicatorlightstoconfirmyourselection.
BASS BOOSTSystem
TheBassBoostfeatureintensifieslowfrequencysoundforricherbassreproduction.
1.)Press theBASSBOOSTbuttononcetoactivateBassBoost.TheBBSindicator
will lightup.
2.)Toturn‘Off’the Bass Boostsystem,press the BASS BOOSTbutton again.
The BBSindicatorwill go ‘Off’.
NOTE:If you arelistening tomusicwithheavy bass athigh volume,withEQ
setto“ROCK”and BASS BOOST‘On’,you mayexperiencesomedistortion.
If thisoccurs,setthe EQto“FLAT”,switchthe BASS BOOST‘Off’,orreduce
the volume.
MUTEButton (OnRemoteControlOnly)
Totemporarilyshutoff the sound fromthe speakerspress the MUTEbutton on the
remotecontrol.
The MUTEindicatorwill appearon the LCD
display.Press the MUTEbutton againtocancel
Muteandrestorethe sound.The MUTEindicator
goes“Off”.
FMST.–MONO/HI-SPEEDDUBBINGButton
Thisbutton isused toselectbetween the FMSTEREOand FMMONOoperation
modes.It isalsoused toselecteitherNormalSpeed orHigh Speed tapepe
dubbing.
ToreceiveFMStereo broadcaststhisswitchmustbe settothe FMST.position.
Howeverifyou arelistening toadistantorweakFMStereo station and reception is
unsatisfactory,press the button tothe MONOposition mayprovide some
improvement.
MS9933TT_050304.p65 3/5/2004, 10:2511

12
LISTENING TO THE RADIO
Radio Operation
1.) Press the POWER button to turn the system ‘On’. The STANDBY indicator
goes ‘Off’. The LCD display and the EQ indicator light up.
2.) Press the TUNER/BAND button to select the Radio mode.
3.) To switch between AM and FM bands, press the TUNER/BAND button again.
If you tune in a FM stereo station, and the
the FMST.–MONObutton issetatFMST.
position,the STEREOindicatorwill
appearon the LCD display.
4.) Press the TUNING or TUNING buttons to tune to the desired station as
follows.
Manual Tuning
Press the TUNING or TUNING buttons as many times as required until
the frequency of the desired station appears on the display.
Automatic Tuning
Press and hold the TUNING or TUNING buttons for approximately 2
seconds. The Tuner will begin scanning up or down automatically and will lock
onto the next strong signal.
5.) Adjust the VOLUME, BASS BOOST and EQ controls as desired.
MS9933TT_050304.p65 3/5/2004, 10:2512

13
Memorizing Preset Stations
You can store up to 40 of your favorite FM and AM stations randomly. Once a
station is preset in the memory, you will have quick and easy access to that station.
1.) Press the TUNER/BAND button to select the Radio mode.
2.) To switch between AM and FM bands, press the TUNER/BAND button again.
3.) Select the desired station by pressing the
TUNING or TUNING buttons.
Example: FM 103.5 MHz.
4.) Press the MEMORY button. The MEMORY,
CH, and channel number ‘00’ indicators will
flash in the display.
5.) Press the MEM. UP or MEM. DOWN button
to select any one of the 40 available preset
station memories. Example: CH 01.
6.) Press the MEMORY button again to enter
the selected radio station into the selected
memory location.
7.) Repeat the above steps 2 – 6 to enter all your desired stations into the preset
station memories.
After you have entered up to 40 stations in the preset memories, you can select
any one of the memorized stations quickly and easily by simply pressing the
REPEAT/MEM. UP or STOP/MEM. DOWN buttons until the desired memory
number and station frequency appear in the display.
MS9933TT_050304.p65 3/5/2004, 10:2513

14
Antenna Information
For best FM reception, the FM lead wire antenna, located on the back of the set,
should fully unwound and extended.
TheAM bar antenna is inside the cabinet. To improveAM reception, you may have
to move or slightly rotate the main unit until you obtain the best reception.
PLAY PLAYREWIND REWINDF. FWD F.FWDSTOP/EJECT
STOP/EJECT
PAUSE PAUSE
RANDOM
INTRO
PLAY/PAUSE
MEMORY
MULTI-FUNCTION LCD DISPLAY
DISC
1
DISC
2
DISC
3
DISC
4
DISC
5
REMOTE
SENSOR
DIGITAL FILTER PROCESSING SYSTEM
REPEAT/MEM. UP
TUNING / SKIP / SEARCH
STOP/MEM. DOWN
4 BAND PRESET EQUALIZER
AM / FM DIGITAL TUNING
STANDBY
VOLUME
PRESET
EQUALIZER
RECORD
AUX/PHONO
TAPE
CD/DISCSKIP
TUNER/BAND
POWER
FM ST. - MONO /
HI-SPEED DUBBING
BASS BOOST
PHONES OPEN/
CLOSE
ROCK
POP FLAT
EQ
PLAYBACK
RECORD
AUTOSTOP
PLAYBACK
BBS
5 COMPACT DISC
MODEL
MS9933TT
40 TRACK PROGRAM MEMORY
AUTOMATIC CHANGER
MS9933TT_050304.p65 3/5/2004, 10:2514

15
COMPACT DISC PLAYBACK
This system features a carousel type 5 CD CHANGER which can provide you with
up to 5 hours of uninterrupted music playback. You may load up to 5 CDs in the
changer for continuous playback, or you may program up to 40 tracks among all 5
discs to be played back in the specific order you select.
Loading the Discs
1.) Press the POWER button to turn the system ‘On’.
2.) Press the CD/DISC SKIP button to select the CD mode.
3.) Press theOPEN/CLOSE button to
open the CD tray. When the tray
opens two of the five CD pockets
will be accessible to you.
Load up to 2 CDs in the pockets
making sure that the label side of
thediscs face up and that thediscs
are correctly centered in the
pockets.
4.) Press the CD/DISC SKIP button to rotate the CD tray and expose the 3rd 4th,
and 5th CD pocket.
Insert additional discs in the open pockets if desired.
5.) Press the OPEN/CLOSE button to close the CD tray. The CD player will search
for the first disc and the display will show the number of tracks and total playing
time of that disc.
NOTES:
• Keep the CD disc tray closed when the system is not in use to prevent dirt
and dust from entering the CD mechanism.
• Never place more than one CD in the same pocket of the CD tray. If two
discs are loaded in the same pocket, the CD mechanism may jam and/or
the discs themselves may be damaged.
MS9933TT_050304.p65 3/5/2004, 10:2515

16
To BeginCD Playback
Afteryou haveloaded up the 5CDsinthe changer:
1.)Press the PLAY/PAUSE button tobeginplayback.The changerwill search
forthe firstavailabledisc inthe trayand will
beginplayback fromTrack 1on the firstdisc.
The numberofthe disc being played flashes
on the display.It will continue playing until it
hasplayed all ofthe discs inthe trayand
then stopsautomatically.
NOTE:Tobeginplayback fromaspecificdisc,press the CD/DISCSKIP
button toselectthe desired disc,and then press the PLAY/PAUSE
button.
Or,press the appropriatedisc button (DISC1,DISC2,DISC3,DISC4,
DISC5)forthe disc you wishtostart. Playback will beginon Track 1ofthe
selected disc.It stopsautomaticallyafterfinished playing all discs.
2.)Adjustthe VOLUME,BASS BOOST,orEQcontrolsasdesired.
3.)Totemporarilystop playback,press the PLAY/PAUSE button again.The
“II”indicatorappearsinthe display,and the playtimeflashes.
The disc continuestospin,butno sound is
heard.Press the PLAY/PAUSE button
oncemoretocancelpauseand resume
playback.
4.)Tostop playback beforethe end ofadisc,press the STOPbutton.
IMPORTANT
If the disc issmudged orscratched itmayskiporstop completely.Thisdoes
notindicateaproblemwiththe player.If thisoccurs,tryplaying anotherdisc.
If thatdisc plays properly,you mayassumethatthe firstdisc isdamaged and
unplayable.
MS9933TT_050304.p65 3/5/2004, 10:2516

17
ForwardAnd BackwardSKIP/SEARCH Buttons
Toskipforwardorbackwardtothe beginning ofaparticulartrack during playback,
press the orSKIP/SEARCH buttonsrepeatedlyuntil the desiredtrack number
appearson the display.Playback will beginon the desired track.
Tosearchforaparticularpassage on atrack during playback,press and holdthe
orSKIP/SEARCH buttons.The playerwill searchrapidlyforwardorback.
Releasethe button when you reachthe desired pointon the track and normal
speed playback will resumeatthatpoint.
Remaining TimeIndication
Whilethe CD isplaying,eachtimeyou press the REMAINbutton on the Remote
Control,theDisplaychangesasshownbelow:
1.)Elapsed TimeOfThe Track.
2.)Remaining TimeOfThe Track.
3.)TotalRemaining TimeOfThe Disc.
4.)TotalElapsed PlayTime.
TRACK
TOTALREMAIN
ALL
DISC
MS9933TT_050304.p65 3/5/2004, 10:2517

18
PROGRAMMEDCD PLAYBACK
You can programthe CD changertoplayup toatotalof40 tracks on all 5discs in
anydesired order.
NOTE:You can notprogramthe CD changerduring playback.If adisc isplaying
press the STOPbutton firstand then followthe instructions.
Entering AProgram
1.)Press the MEMORYbutton once.The
MEMORY,the track numberindicatorswill
flashinthe display.ProgramnumberP-01
appears.
2.)Press the CD/DISCSKIPbutton orone of
the fivedisc buttonstoselectthe disc which
containsthe firsttrack you wishtoprogram.
Example:Disc 2.
3.)Press the orSKIPbuttonstoselectct
the firsttrack you wishtoprogram.
Example:Track 08.
4.)Press the MEMORYbutton againtostore
the desired disc and track numberinto
memorylocationNumber1.The displaywill
change fromProgramNumberP-01 to
ProgramNumberP-02.
5.)Usethe CD/DISCSKIPbutton orone ofthe
fivedisc buttonstoselectthe disc containing
the nexttrack you wishtoprogram.
Example:Disc 3.
MS9933TT_050304.p65 3/5/2004, 10:2518

19
6.)Press the orSKIPbuttonstoselectct
the nexttrack you wishtoprogram.
Example:Track 18.
7.)Press the MEMORYbutton againtostorethe desired disc and track into
memorylocation Number02.
Repeatthe aboveprocedureuntil you have
stored up to40 tracks inthe programmemory
and FULL flashesinDisplay.
Afterall yourdesired tracks areprogrammed you maypress the MEMORY
button toreconfirmthatthe information hasbeen stored correctly.The display
will showyou whichdisc and track numberyou haveentered intoprogram
memoryNumber1.
Eachtimeyou press the MEMORYbutton the displaywill showyou whichdisc
numberand track numberisstored ineachsuccessivememorylocation.
ProgrammedPlayback
Afteryou havestored and confirmed the programinformation,press the
PLAY/PAUSE button tobeginprogrammed playback.
Playback will startatthe firstdisc and track
whichyou haveprogrammed and will continue
until all programmed discs and tracks.
Uptoatotalof40 tracks havebeen played.
NOTE:If you press the orSKIPbuttonsduring programmed playback,
the playerwill skipforwardorback tothe nexttrack and disc whichyou have
programmed,notthe nexttrack on the disc whichisbeing played.
To ClearTheProgramMemory
If the disc isplaying,press the STOPbutton tostop the discs.Then press the
STOPbutton againtoclearthe programmemory..
MS9933TT_050304.p65 3/5/2004, 10:2519
Table of contents
Other Emerson Stereo System manuals

Emerson
Emerson MS7622 User manual

Emerson
Emerson ES27 User manual

Emerson
Emerson MS3110 User manual

Emerson
Emerson NR305TT User manual

Emerson
Emerson MS3108 User manual

Emerson
Emerson Research ES299 User manual

Emerson
Emerson MS9920TT User manual

Emerson
Emerson ES769 User manual

Emerson
Emerson ES3 User manual

Emerson
Emerson ES11 User manual

Emerson
Emerson NR290TTC User manual

Emerson
Emerson Research iS133 User manual

Emerson
Emerson MS9903TT User manual

Emerson
Emerson MS3105 User manual

Emerson
Emerson MS7609 User manual

Emerson
Emerson MS9600 User manual

Emerson
Emerson ES50 User manual

Emerson
Emerson MS7616R User manual

Emerson
Emerson ES30 User manual

Emerson
Emerson MS3100 User manual