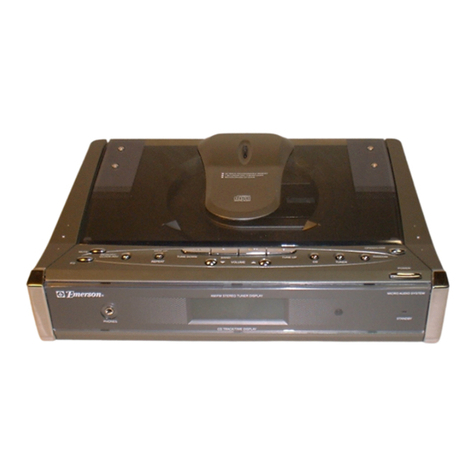
Emerson ES13 User manual

OWNER'SMANUAL
ES13
MICROAUDIOSYSTEM
withCD,CD-R/RWPLAYER
and DIGITALTUNER
Visitourweb siteatwww.emersonradio.com
ES13_draft090902.p65 9/9/2002, 17:3727

1
TOPREVENTFIREORSHOCKHAZARD,DONOTUSE THISPLUGWITHAN
EXTENSIONCORD,RECEPTACLEOROTHEROUTLETUNLESS THEBLADES
CANBE FULLYINSERTEDTOPREVENTBLADEEXPOSURE.TOPREVENTFIRE
ORSHOCKHAZARD,DONOTEXPOSETHISAPPLIANCETORAINORMOISTURE.
IMPORTANTSAFETYINSTRUCTIONS
1.)Read theseinstructions.
2.)Keep theseinstructions.
3.)Heed all warnings.
4.)Followall instructions.
5.)Donotusethisapparatusnearwater.
6.)Clean onlywithdrycloth.
7.)Donotblock anyventilation openings.Install inaccordancewiththe manufacturer’s
instructions.
8.)Donotinstall nearanyheatsourcessuchasradiators,heatregisters,stoves,orother
apparatus(including amplifiers)thatproduceheat.
9.)Donotdefeatthesafetypurposeofthepolarizedorgrounding-typeplug.Apolarizedplughas
twobladeswithone widerthan the other.Agrounding type plug hastwobladesand athird
groundingprong.Thewidebladeorthethirdprongareprovidedforyoursafety.Iftheprovided
plug doesnotfitintoyouroutlet, consultanelectrician forreplacementofthe obsoleteoutlet.
10.)Protectthe powercordfrombeing walked on orpinched particularlyatplugs,convenience
receptacles,and the pointwheretheyexitfromthe apparatus.
11.)Onlyuseattachments/accessoriesspecified bythe manufacturer.
12.)Unplug thisapparatusduring lightning stormsorwhen unused forlong periodsoftime.
13.)Referall servicing toqualified servicepersonnel.Servicing isrequired when the apparatus
hasbeen damaged inanyway,suchaspower-supplycordorplug isdamaged,liquidhas
beenspilledorobjectshavefallenintotheapparatus,theapparatushasbeenexposedtorain
ormoisture,doesnotoperatenormally,orhasbeen dropped.
14.)Thisapplianceshall notbe exposed todripping orsplashing waterand no objectfilled with
liquidssuchasvasesshall be placed on the apparatus.
15.)Donotoverload wall outlet. Useonlypowersourceasindicated.
16.)Usereplacementpartsasspecified bythe manufacturer.
17.)The productmaybe mounted toawall onlyifrecommended bythe manufacturer.
18.)Upon completion ofanyserviceorrepairstothisproduct, ask the servicetechnician to
performsafetychecks.
WARNING
!
CAUTION
RISK OFELECTRICSHOCK
DONOTOPEN
The lightning flashwitharrow-
head symbol,withinan equi-
lateraltriangleisintented to
alertthe usertothe presence
ofuninsulated‘dangerousvoltage’
withinthe product’s enclosure
thatmaybe ofsufficient
magnitude toconstitutearisk
ofelectricshock topersons.
The exclamation pointwithin
an equilateraltriangleisin-
tended toalertthe userto
the presenceofimportant
operating and maintenance
(servicing)instructionsin
the literatureaccompany-
ing the appliance.
WARNING:TOREDUCETHE
RISK OFELECTRICSHOCK
DONOTREMOVE COVER
(ORBACK),NOUSER
SERVICEABLEPARTSINSIDE
REFERSERVICINGTO
QUALIFIEDSERVICE
PERSONNEL.
ES13_draft090902.p65 9/9/2002, 17:371
2
Forfuturereference,recordthe serialnumberinthe spaceprovided.
ModelNo:ES13
SerialNumber:
Thankyou forpurchasing thisEmerson audioproduct. The Emerson brand isyour
assuranceofquality,performanceand value,Ourengineershaveincluded many
usefuland convenientfeaturesinthisproduct. Pleasebe suretoread thisOwner’s
Manualcompletelytomakesureyou aregetting the maximumbenefitfromeach
feature.
Thisproductwasmanufacturedusingthehighestqualitycomponentsandstandards
ofworkmanship.It wastested byEmerson inspectorsand found tobe inperfect
working orderbeforeitleft ourfactory.However,thereisalways the chancethat
someproblemmayoccurbecauseofrough handling during shipmenttothe retail
storeortothe finalconsumer.
If, afterreading thisManual,you experienceanyproblemswiththe operation of
thisproduct, pleaserefertothe instructionsforobtaining serviceatthe end ofthis
Manual.Emerson and Emerson retailersarecommitted toyoursatisfaction.
Onceagain,thanks forpurchasing thisEmerson audioproduct.
ES13_draft090902.p65 9/9/2002, 17:372

3
FCC INFORMATION
Thisequipmenthasbeen tested and found tocomplywiththe limitsforaClass B
digitaldevice,pursuanttoPart15 ofthe FCC Rules.Theselimitsaredesigned to
provide reasonableprotection againstharmfulinterferenceinaresidential
installation.Thisequipmentgenerates,uses,andcanradiateradiofrequencyenergy
and,ifnotinstalledand usedinaccordancewiththeinstructions,maycauseharmful
interferencetoradiocommunications.However,thereisno guarantee that
interferencewill notoccurinaparticularinstallation.If thisequipmentdoescause
harmfulinterferencetoradioortelevision reception,whichcan be determined by
turning the equipmentoff and on,the userisencouraged totrytocorrectthe
interferencebyone ormoreofthe following measures:
•Reorientorrelocatethe receiving antenna.
•Increasethe separation between the equipmentand receiver.
•Connectthe equipmentintoan outleton acircuitdifferentfromthattowhich
the receiverisconnected.
•Consultthe dealeroran experienced radio/TVtechnician forhelp.
ThisdevicecomplieswithPart15 ofthe FCC Rules.Operation issubjecttothe
following twoconditions:
(1)Thisdevicemaynotcauseharmfulinterference,and
(2)Thisdevicemustacceptanyinterferencereceived,including interference
thatmaycauseundesired operation.
•Operatecontrolsand switchesas
described inthe manual.
•Beforeturning on the power,make
certainthatthe connecting cordsand
powercordareproperlyinstalled.
•StoreyourCDsinacoolareatoavoid
damage fromheat.
•When moving the set, be suretofirst
disconnectthe powercordand
removecordsconnected toother
equipment.
•Avoidinstalling thisunitinplaces
exposed todirectsunlightorcloseto
heatradiating appliancessuchas
electricheaters,ontopofotherstereo
equipmentthatradiatesheat, places
lacking ventilation ordustyareas,
placessubjecttoconstantvibration
and/orhumidormoistareas.
•Donotattempttoclean thisunitwith
chemicalsolventsasthismight
damage the finish.Useaclean dry
cloth.
IMPORTANTNOTES
CLASS 1LASERPRODUCT
CLASS 1LASERPRODUCT
APPAREILÁLASERDECLASSE 1
PRODUCTOLASERDECLASE 1
CAUTION
INVISIBLELASERRADIATION
WHENOPENAND INTERLOCKS
DEFEATED.
AVOIDEXPOSURETOBEAM
ThisproductcontainsalowpowerLaserDevice.
ES13_draft090902.p65 9/9/2002, 17:373

4
UNPACKINGAND SET-UP
•Carefullyremovethe unitfromthe carton and removeall packing material
fromthe unit.
•Removeanylabelsorstickerswhichmaybe on the frontortop ofthe set, but
do notremoveanylabelsfromthe back orbottom.
•Wesuggestthatyou retainthe originalcarton and packing materialsincaseit
everbecomesnecessarytoreturnyourunitforservice.Thisisthe onlysure
waytoprotectthe unitfromdamage intransit.
•If you do disposeofthe carton and packing materials,pleasedo soproperly.
Emerson caresaboutourenvironment.
AC OPERATION
1.)Unwind the ACPowerCordcompletely.
2.)Insertthe plug intoanyconvenient120V60HzACoutlet.
POWERSOURCE
Thissystemisdesigned tooperateon 120V60HzAChousecurrent.Connecting
thissystemtoanyotherpower
supplycouldresultindamagetothe
unitwhichisnotcovered byyour
warranty.You will notethatthis
systemisequippedwithapolarized
ACpowerplug having one blade
widerthan theother.Thisisasafety
feature.If thisplug doesnotfitinto
yourexisting ACoutlet, do nottrytodefeatthissafetyfeaturebyfiling the wide
blade tomakeitfitintoyouroutlet. If thisplug will notfitintoyouroutlet, you
probablyhavean out-dated non-polarized ACoutlet. You shouldhaveyouroutlet
changed byaqualified licensed electrician.
PREPARATIONFORUSE
AC Plug
AC Outlet
AC Outlet
FM Antenna
ES13_draft090902.p65 9/9/2002, 17:374

5
LOCATIONOFCONTROLSAND INDICATORS
1.)PLAY/PAUSE Button.
2.)STOPButton.
3.)MultiFunction LCD Display.
4.)POWEROn/Off Button.
5.)STANDBY LEDIndicator.
6.)PHONES Jack.
7.)BASS BOOST(Lighted)Button.
8.)PresetEQ(Lighted)Buttons.
(POP/ROCK/CLASSIC/FLAT)
9.)CD Button.
10.)TUNER/BAND Button.
11.)SKIPSEARCH /
TUNING(SET)Button.
12.)SKIPSEARCH /
TUNING(SET)Button.
13.)CD Door.
14.)VOLUMEButton.
15.)VOLUMEButton.
16.)PRESETUP/RANDOM/INTRO
Button.
17.)TIMESET/MEMORYButton.
18.)FMMODE/REPEATButton.
19.)CDDOOROPEN/CLOSEButton.
20.)RemoteControlSensor.
2
1
3
6
4
7
8
9
10
11
12
13
14
15
16
17
18
19
20
5
ES13_draft090902.p65 9/9/2002, 17:375

6
1.)VOLUME/Buttons.
2.)TIMERSETButton.
3.)SLEEP Button.
4.)PRESETButtons.
5.)SNOOZEButton.
6.)Stop Button.
7.)TUNING(SET)/
CD SKIPSEARCH /Buttons.
8.)CD Button.
9.)OPEN/CLOSE Button.
10.)0-9NumberButtons.
11.)MUTEButton.
12.)STANDBY ON/OFF Button.
13.)TUNER/BAND Button.
14.)FMMODE/REPEATButton.
15.)Play/PauseButton.
16.)MEMORYButton.
17.)PRESET/INTROButton.
18.)RANDOMButton.
19.)TIMEROFF Button.
REMOTECONTROL
BATTERYINSTALLATION
Insert2pcs‘AA’size(Alkaline)batteries(notincluded)intothebatterycompartment
ofthe remotecontroller.Besuretoobservethe polaritymarkingswhichare
engraved inside the batterycompartment, then closethe cover.
2
1
3
4
5
6
7
913
15
16
17
19
10
12
11
814
18
ES13_draft090902.p65 9/9/2002, 17:376

7
BATTERYREPLACEMENT
When the batteriesbecometoo weak,the operating distanceofthe remote
controllerisgreatlyreduced and you will need toreplacethe batteries.
NOTES:
•Tomaintainthe accuracy and long lifeofthe transmitter,do notpress twoor
morebuttonssimultaneously.
•If the remotecontrolisnottobe used foralong time,removethe batteriesto
preventpossibledamage through leaking batteries.
•Donotmixdifferenttypesofbatteries,oroldbatterieswithnewones.
USINGTHEREMOTECONTROLLERCORRECTLY
•Pointthe remotecontrolleratthe RemoteSensor.
•The functionsofthe buttonson the remotecontrolarethe sameasthe
corresponding controlson the mainunit.
•When thereisastrong ambientlightsource,the performanceofthe infrared
RemoteSensormaybe degraded,causing unreliableoperation.
•The maximumeffectivedistanceforremotecontroloperation isabout15 feet.
BATTERYPRECAUTIONS
Followtheseprecautionswhen using batteriesinthisdevice:
1.Useonlythe sizeand type ofbatteriesspecified.
2.Besuretofollowthe correctpolaritywhen installing the batteriesasindicated inthe battery
compartment. Reversed batteriesmaycausedamage tothe device.
3.Donotmixdifferenttypesofbatteriestogether(e.g.Alkaline and Carbon-Zinc)oroldbatteries
withfreshones.
4. If the deviceisnottobe used foralong period oftime,removethe batteriestoprevent
damage orinjuryfrompossiblebatteryleakage.
5.Donottrytorecharge batteriesnotintended tobe recharged;theycan overheatand rupture
(Followbatterymanufacturer’s directions.)
ES13_draft090902.p65 9/9/2002, 17:377

8
RED
BLACK
BLACK
RED
OPERATINGINSTRUCTIONS
SPEAKERCONNECTION
Connecteachspeakertothe corresponding speakerterminalson the back panel
ofthe mainunit. Makesurethatthe left (black)speakerwireisconnected tothe
left (L)black speakerclipand the right(red)speakerwireisconnected tothe right
(red)speakerclip.
RightSpeakerLeft Speaker
SPEAKERS
RED
BLACK
ES13_draft090902.p65 9/9/2002, 17:378

9
SETTING THE CLOCK
The clock should be set while the system is in the Standby mode (Power ‘Off’).
1.) Press and hold the TIME SET/MEMORY
button on the top panel for at least two
seconds. The hour digits and theAM/PM
indicator begin to flash.
2.) Press the TUNING (SET) or buttons on the top panel or on the remote
control to adjust the clock to the correct hour, AM or PM.
3.) Press the TIME SET/MEMORY button
once more. The minute digits begin to
flash.
4.) Press the TUNING (SET) or buttons on the top panel or on the remote
control to adjust the clock display to the correct minutes.
5.) Press the TIME SET/MEMORY button once more. The display will show
“12 H” meaning that the time will be displayed in ’12 hour format’
(6 PM = 6:00). If you prefer ‘24 hour format’ (6 PM = 18:00), press either the
TUNING (SET) or buttons on the top panel or on the remote control to
switch between “12H” and “24H” time formats.
6.) Press the TIME SET/MEMORY button
once more. The time display returns and
the clock begins to run.
The time will appear on the display whenever the system is in the Standby (Power
‘Off’) mode. The STANDBY LED lights up.
Note: If the AC power is disconnected for an extended period, the time memory
will be lost and the clock will have to be reset when power is restored.
:
AM
:
PM
:
PM
ES13_draft090902.p65 9/9/2002, 17:379

10
TONE CONTROLS
Preset Equalizer
This system includes a 4 mode preset electronic equalizer that allows you to tailor
the sound output for the most popular types of music. The settings are POP,
ROCK, CLASSIC, and FLAT (Equalizer Off). Press the appropriate button on the
top panel to select the desired setting. The button lights to confirm your selection.
Note: The Equalizer controls are only found on the top panel. There are no EQ
controls on the remote control.
BASS BOOST
The Bass Boost control is designed to provide additional bass response, especially
at lower volume levels where the bass tends to disappear. Press the BASS BOOST
button on the top panel to turn the Bass Boost ‘On’ or ‘Off’. The button lights when
Bass Boost is on.
Note: If you have the EQ set to Rock, the Bass Boost ‘On’, and your are listening
to loud music with heavy bass, you may experience some distortion. If this occurs,
lower the volume, turn the Bass Boost ‘Off’, or set the EQ to the FLAT position.
ES13_draft090902.p65 9/9/2002, 17:3710

11
LISTENING TO THE RADIO
1.) Press the POWER/STANDBY button on the top panel or on the remote control
to turn the system ‘On’.TheSTANDBY indicator goes ‘Off’ and the main display
comes ‘On’.
2.) Press the TUNER/BAND button on the top panel or remote control to select
the Tuner function, and press again to switch between AM and FM bands. The
display will show an AM or FM frequency.
3.) Press the TUNING (SET) or buttons on the top panel or on the remote
control to tune to the desired station.
• Manual Tuning – repeatedly press the TUNING (SET) or buttons until
the display shows the frequency of the desired station.
Note: Use this method to tune in weaker stations.
• Automatic Tuning –Press and hold the TUNING (SET) or buttons
until the display begins to move, then release the buttons. The tuner will search
up or down for the first strong station and stop on that station. Repeat until the
tuner stops on the desired station.
4.) Press the VOLUME or buttons on the top panel or on the remote
control to adjust the volume.
5.) Adjust the Equalizer and BASS BOOST controls as desired.
6.) When you are finished listening press the POWER/STANDBY button on the
front panel or on the remote control to turn the system ‘Off’. The main display
goes ‘Off’ and the STANDBY indicator comes ‘On’ again.
FM
MHz
ES13_draft090902.p65 9/9/2002, 17:3711

12
ANTENNA INFORMATION
FM
Theleadwireantennashould be extendedtoitsfull length foroptimumFMreception.
AM
The AM antenna is inside the main unit. If AM reception is weak try turning the
main unit slightly until the AM reception improves. In the worst case you may have
to move the entire unit to another location.
MONO/STEREO MODE SWITCH
If you tune to an FM Stereo station the FM STEREO indicator will appear in the
display. However if the FM Stereo reception is unsatisfactory press the FM MODE/
REPEAT button on the top panel or on the remote control. The MONO indicator
will appear in the display and reception should improve, although the sound is no
longer in stereo.
In most cases leave the FM MODE selector set to STEREO.
FM Wire Antenna
ES13_draft090902.p65 9/9/2002, 17:3712

13
PRESETTING STATIONS IN THE TUNER MEMORY
You can store up to 20 of your favorite stations, in any combination ofAM and FM,
in the tuner memory for immediate recall. For your convenience use the remote
control to perform this operation.
1.) Tuner to the first station you wish to memorize by either the Manual orAutomatic
tuning method. Example: FM 103.5 MHz
2.) Press the MEMORY button on the remote control. The Memory indicator will
begin flashing in the display.
3.) Press either the PRESET or buttons on the remote control to select a
desired memory number. Example: Channel Memory 7.
4.) Press the MEMORY button on the remote control once more to enter the
station into the selected memory number.
5.) Repeat this procedure, selecting a different preset number each time, until
you have entered up to 20 stations in the tuner memory.
FM
MHz
MEMORY
FM
MHz
MEMORY
CH
ES13_draft090902.p65 9/9/2002, 17:3713

14
RECALLING PRESET STATIONS
• In Tuner mode, press either the PRESET or buttons on the remote
control to locate the desired station. You may also press the PRESET UP/
RANDOM/INTRO button on the top panel to scroll upward through the presets
in numerical order.
• In Tuner mode to select a preset directly press the appropriate number buttons
on the remote control.
Note: When you press numbers 1 through 9 the tuner will pause for a moment
waiting for you to enter a second number. After a few seconds it will tune to the
number you entered. To select presets 11 through 20 simply press the appropriate
number buttons on the remote in the correct sequence.
CHANGING PRESET STATIONS
Tune to the new station you want to memorize. Press the MEMORY button, then
press the PRESET or buttons to select the memory number that you want
to change. When the memory number appears on the display press the MEMORY
button again. The new station will be memorized and the old station will be deleted
from the memory.
ES13_draft090902.p65 9/9/2002, 17:3714

15
PLAYING COMPACT DISCS
IMPORTANT:This player will play normal CDs plus CD-R and CD-RW discs.
However the playability of CD-R and CD-RW discs is determined by the software
that was used to create the discs, and the quality of the blank media used for
recording. 100% playability cannot be guaranteed. This is not an indication of a
problem with your system.
1.) Press the POWER/STANDBY button on the front panel or remote control to
turn the system ‘On’.
2.) Press the CD function button on the front panel or remote control to select CD
mode.
3.) Press the CD door OPEN/CLOSE button on the front panel or remote to open
the CD door. If you have not already done so remove and discard the CD
transit protection card.
4.) Place your CD on the center spindle with printed label side up. Gently press
down around the center hole to make sure the disc is properly seated on the
spindle. Close the CD door.
5.) The disc will begin to spin, the display will show the total tracks and playing
time and then playback begins on track 1.
6.) Adjust the VOLUME, EQUALIZER, and BASS BOOST controls as desired.
7.) After the last track has played the disc stops and the display again shows the
totaltracksand playing time.You may also stop playback at anytime by pressing
the STOP button on the top panel or remote control.
8.) When the disc has stopped completely press the CD door OPEN/CLOSE
button on the front panel or remote control to open the door. Remove your
disc, close the door, and shut the system ‘Off’.
TRACK
ES13_draft090902.p65 9/9/2002, 17:3715

16
PAUSE CONTROL
To pause temporarily during playback press the PLAY/PAUSE button again.
The sound stops and the time display flashes but the disc continues to spin. Press
the PLAY/PAUSE button once more to cancel pause and resume normal
playback.
SKIP/SEARCH CONTROLS
During playback press the SKIP/SEARCH or controls repeatedly to skip to
higher or lower numbered tracks.
During playback press and hold the SKIP/SEARCH or controls to search
forward or backward at high speed to locate a particular passage within a track.
When you hear the desired passage release the buttons and normal playback will
resume from that point.
REPEAT PLAYBACK
You can repeat a single track or the entire disc automatically.
All Tracks Repeat – Start playback and press the FM MODE/REPEAT button
on the top panel or on the remote control one time. The Repeat indicator appears
in the display. The entire disc will be repeated continuously.
One Track Repeat – Start playback and skip to the track you wish to repeat.
Press the FM MODE/REPEAT button on the top panel or remote control twice.
The Repeat indicator flashes in the display. The selected track will be repeated
continuously.
TRACK
TRACK
ES13_draft090902.p65 9/9/2002, 17:3716

17
To cancel Repeat Playback press the FM MODE/REPEAT button until the Repeat
indicator no longer appears in the display. Repeat Playback will also be canceled
if you switch to Tuner mode, open the CD door, or switch the power ‘Off’.
RANDOM PLAYBACK
Use the Random Playback feature to play all of the tracks on the disc in a random
order.
While in Stop mode press the RANDOM button on the remote control, or press the
PRESET UP/RANDOM/INTRO button on the top panel once. The RANDOM
indicator appears in the display. Press the PLAY/PAUSE button to begin
Random playback. After all the tracks have been played in random order the player
stops and the display shows the total tracks and playing time.
To cancel Random Playback press the RANDOM button on the remote control, or
press the PRESET UP/RANDOM/INTRObuttononthetop panel until theRANDOM
indicator no longer appears in the display. Random Playback will also be canceled
if you switch to Tuner mode, open the CD door or switch the power ‘Off’.
INTRO SCAN PLAYBACK
Intro Scan playback plays only the first 10 seconds of each track on the disc. This
feature is useful if you are trying to locate a particular song but you do not remember
the title.
While in Stop mode press the PRESET UP/RANDOM/INTRO button on the top
panel twice, or press the PRESET /INTRO button the remote control. The
Intro indicator appears in the display. Press the PLAY/PAUSE button to begin
Intro playback.After the first 10 seconds of all tracks have been played the player
stops and the display shows the total tracks and playing time.
TRACK
RANDOM
TRACK
INTRO
ES13_draft090902.p65 9/9/2002, 17:3717

18
To cancel Intro Playback at any time press the PRESET /INTRO button on the
top panel or the remote control until the Intro indicator no longer appears in the
display. Intro Playback will also be canceled if you switch to Tuner mode, open the
CD door or switch the power ‘Off’.
PROGRAMMED PLAYBACK
You can program the player to play only the tracks you want to hear in the specific
order that you want them to play. The maximum number of tracks that can be
programmed is 20. You may program tracks to play more than once if desired.
Note: You cannot program the player while a disc is playing. If a disc is playing
press the STOP button to stop playback and then follow the steps below..
1.) While in Stop mode press the TIME SET/MEMORY button on the top panel,
or the MEMORY button on the remote control. The MEMORY indicator flashes
and the program number “Pr 1” appears in the display.
2.) Press the / SKIPS EARCH or 9 buttons to select the first track that you
want to program. Example: Track number 7.
3.) Press the TIME SET/MEMORY button on the top panel, or the MEMORY button
on the remote control again to enter the selected track in program memory
number 1. The MEMORY indicator stops flashing.
TRACK
MEMORY
TRACK
MEMORY
TRACK
MEMORY
ES13_draft090902.p65 9/9/2002, 17:3718

19
4.) Press the / SKIP SEARCH or 9 buttons to select the second track that
you want to program. The program number display advances to “ Pr 2”.
5.) Repeat steps 3 and 4, selecting a different track each time, until you have
entered up to 20 tracks in the program memory.
6.) Press the PLAY/PAUSE button to begin programmed playback. The
Program indicator stops flashing and remains in the display. The tracks you
selected will play in the order in which they were programmed.
7.) After the last programmed track has played the player stops and the display
shows as below illustration.
8.) Press PLAY/PAUSE button to repeat the programmed playback.
9.) To cancel the programmed track, press the STOP button while in Stop
mode. The display shows the total tracks and playing time on the disc.
Note: You can use the Repeat and Programmed Play features together to repeat
a programmed sequence of tracks continuously. After you enter the desired tracks
in the program memory and begin playback, press the FM MODE/REPEAT button
once to select All Tracks Repeat. The program will be repeated continuously.
TRACK
MEMORY
TRACK
MEMORY
TRACK
MEMORY
ES13_draft090902.p65 9/9/2002, 17:3719
Table of contents
Other Emerson Stereo System manuals

Emerson
Emerson Research ES299 User manual

Emerson
Emerson NR303TT User manual

Emerson
Emerson MS3108C User manual

Emerson
Emerson ES769 User manual

Emerson
Emerson Research iS133 User manual

Emerson
Emerson ES830 User manual

Emerson
Emerson ES920 User manual

Emerson
Emerson MS9933TT User manual

Emerson
Emerson ES88 User manual

Emerson
Emerson MS3100 User manual

Emerson
Emerson MS7609 User manual

Emerson
Emerson RS1008 User manual

Emerson
Emerson MS3103 User manual

Emerson
Emerson ES79 User manual

Emerson
Emerson MS3111M User manual

Emerson
Emerson MS7622 User manual

Emerson
Emerson ES28 User manual

Emerson
Emerson MS9903TT User manual

Emerson
Emerson ES27 User manual

Emerson
Emerson Research iE600 User manual