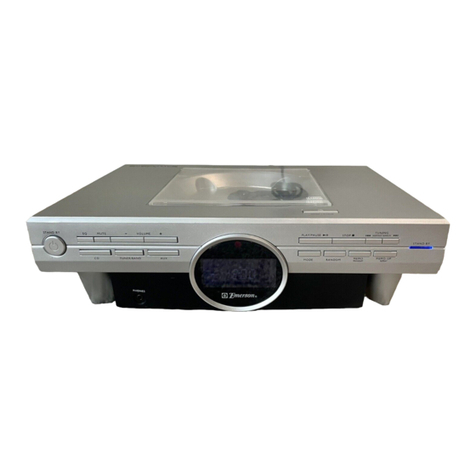
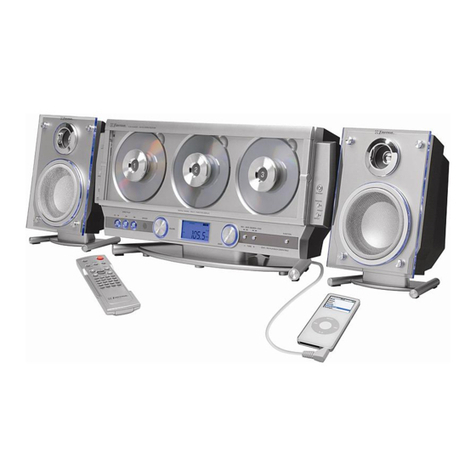
Emerson CKD9906 User manual

OWNER'S MANUAL
CKD9906
Stereo Radio, CD-R/RW Player
with Dual Alarm Clock
Visit our web site at www.emersonradio.com
CKD9906_071905.p65 19/7/2005, 14:2427

1
TO PREVENT FIRE OR SHOCK HAZARD, DO NOT USE THIS PLUG WITH AN
EXTENSION CORD, RECEPTACLE OR OTHER OUTLET UNLESS THE BLADES
CAN BE FULLY INSERTED TO PREVENT BLADE EXPOSURE. TO PREVENT FIRE
ORSHOCKHAZARD,DONOTEXPOSETHISAPPLIANCETORAINORMOISTURE.
IMPORTANTSAFETYINSTRUCTIONS
1.) Read these instructions.
2.) Keep these instructions.
3.) Heed all warnings.
4.) Follow all instructions.
5.) Do not use this apparatus near water.
6.) Clean only with dry cloth.
7.) Do not block any ventilation openings. Install in accordance with the manufacturer’s instructions.
8.) Do not install near any heat sources such as radiators, heat registers, stoves, or other apparatus
(including amplifiers) that produce heat.
9.) Do not defeat the safety purpose of the polarized or grounding-type plug. A polarized plug has two
blades with one wider than the other. A grounding type plug has two blades and a third grounding
prong. The wide blade or the third prong is provided for your safety. If the provided plug does not
fit into your outlet, consult an electrician for replacement of the obsolete outlet.
10.) Protect the power cord from being walked on or pinched particularly at plugs, convenience
receptacles, and the point where they exit from the apparatus.
11.) Only use attachments / accessories specified by the manufacturer.
12.) Unplug this apparatus during lightning storms or when unused for long periods of time.
13.) Refer all servicing to qualified service personnel. Servicing is required when the apparatus has
been damaged in any way, such as power-supply cord or plug is damaged, liquid has been spilled
or objects have fallen into the apparatus, the apparatus has been exposed to rain or moisture,
does not operate normally, or has been dropped.
14.) This appliance shall not be exposed to dripping or splashing water and no object filled with liquids
such as vases shall be placed on the apparatus.
15.) Do not overload wall outlet. Use only power source as indicated.
16.) Use replacement parts as specified by the manufacturer.
17.) The product may be mounted to a wall only if recommended by the manufacturer.
18.) Upon completion of any service or repairs to this product, ask the service technician to perform
safety checks.
!
CAUTION
RISK OFELECTRICSHOCK
DONOTOPEN
The lightning flashwitharrow-
head symbol,withinan equi-
lateraltriangleisintended to
alertthe usertothe presence
ofuninsulated‘dangerousvoltage’
withinthe product’s enclosure
thatmaybe ofsufficient
magnitude toconstitutearisk
ofelectricshock topersons.
The exclamation pointwithin
an equilateraltriangleisin-
tended toalertthe userto
the presenceofimportant
operating and maintenance
(servicing)instructionsin
the literatureaccompany-
ing the appliance.
WARNING:TOREDUCETHE
RISK OFELECTRICSHOCK
DONOTREMOVE COVER
(ORBACK),NOUSER
SERVICEABLEPARTSINSIDE
REFERSERVICINGTO
QUALIFIEDSERVICE
PERSONNEL.
CAUTION
The Caution Marking was located at the bottom enclosure of the apparatus.
CKD9906_071905.p65 19/7/2005, 14:261

2
BeforeWeBegin
Thankyou forpurchasing thisEmerson audioproduct.The Emerson brand
isyourassuranceofquality,performanceand value.
Ourengineershaveincluded manyusefuland convenientfeaturesinthis
product. Pleasebe suretoread thisowner'smanualcompletelytomake
sureyou aregetting the maximumbenefitfromeachfeature.
Thisproductwasmanufactured using the highestqualitycomponentsand
standardsofworkmanship.It wastested byEmerson inspectorsand found
tobe inperfectworking orderbeforeitleft ourfactory.However,thereis
alwaysthechancethatsomeproblemmayoccurbecauseofroughhandling
during shipmenttothe retail storeortothe finalconsumer.
If,afterreadingthismanual,youexperienceanyproblemswiththeoperation
ofthisproduct, pleaserefertothe instructionsforobtaining serviceatthe
end ofthismanual.Emerson and Emerson retailersarecommitted toyour
satisfaction.
Onceagain,thanks forpurchasing thisEmerson audioproduct.
CKD9906_071905.p65 19/7/2005, 14:262

3
FCC Information
Thisequipmenthasbeen tested and found tocomplywiththe limitsforaclass B
digitalDevice,pursuanttopart15 ofthe FCC Rules.Theselimitsaredesigned to
provide reasonableprotection againstharmfulinterferenceinaresidential
installation.Thisequipmentgenerates,uses,and can radiateradiofrequencyenergy
and,ifnotinstalledand usedinaccordancewiththeinstructions,maycauseharmful
interferencetoradiocommunications.However,thereisno guarantee that
interferencewill notoccurinaparticularinstallation.If thisequipmentdoescause
harmfulinterferencetoradioortelevision reception,whichcan be determined by
turning the equipmentoff and on,the userisencouraged totrytocorrectthe
interferencebyone ormoreofthe following measures:
•Reorientorrelocatethe receiving antenna.
•Increasethe separation between the equipmentand receiver.
•Connectthe equipmentintoan outleton acircuitdifferentfromthattowhichthe
receiverisconnected.
•Consultthe dealeroran experienced radio/TVtechnician forhelp.
Thisdevicecomplieswithpart15 ofthe FCC Rules.Operation issubjecttothe
following twoconditions:
(1)Thisdevicemaynotcauseharmfulinterference,and
(2)Thisdevicemustacceptanyinterferencereceived,including interference
thatmaycauseundesired operation.
IMPORTANTNOTES
CLASS 1LASERPRODUCT
ThisproductcontainsalowpowerLaserDevice.
CAUTION
INVISIBLELASERRADIATION
WHENOPENANDINTERLOCKS
DEFEATED.
AVOIDEXPOSURETOBEAM
CLASS 1LASERPRODUCT
APPAREILÁLASERDECLASSE 1
PRODUCTOLASERDECLASE 1
•Avoidinstalling thisunitinplaces
exposed todirectsunlightorcloseto
heatradiating appliancessuchas
electricheaters,on top ofotherstereo
equipmentthatradiatestoo much
heat, placeslacking ventilation or
dustyareas,placessubjecttoconstant
vibration and/orhumidormoistareas.
•Operatecontrolsand switchesas
described inthe manual.
•Beforeturning ‘On’the power,make
certainthatthe powercordisproperly
installed.When moving the set, be
suretofirstdisconnectthepowercord.
•StoreyourCDs,inacoolarea toavoid
damage fromheat.
CKD9906_071905.p65 19/7/2005, 14:263
4
Unpacking And SetUp
•Removethe unitfromthe carton,and removeall packing materialsfromthe
unit.
•Savethecartonand packingmaterialsincasethe uniteverneedstobereturned
forservice.Using the originalcarton and packing materialsisthe onlywayto
safelyrepack the unitforshipment.
•Removeanydescriptivelabelsorstickersfromthe top orfrontofthe unit. Do
notremoveanylabelsfromthe back orbottomofthe cabinet.
•Removeanysmall stripsoftape thatmayhavebeen used topreventthe CD
doorfromopening intransit.
•Press on the OPEN/CLOSE area on the CD doortoopen the CD door,and
removethe dummyCD protection cardfromthe CD compartment. Discardit
and closethe CD door.
•Unwind the FMwireantenna on the back cabinetand extend ittoitsfull length.
•Unwind theACpowercordand extend ittoitsfull length.
•Placethe uniton astable,levelsurfacesuchasatable,desk,shelf, etcwithin
easy reachofan ACoutlet, outofdirectsunlight, and awayfromsourcesof
excessiveheat, dust, moistureorhumidity.
PREPARATIONFORUSE
Protect Your Furniture
Thismodelisequipped withnon-skidrubber'feet'topreventthe productfrom
moving when you operatethe controls.These'feet'aremade fromnon-migrating
rubbermaterialspeciallyformulated toavoidleaving anymarks orstainson your
furniture.Howevercertaintypesofoil based furniturepolishes,wood preservatives,
orcleaning sprays maycausethe rubber'feet'tosoften,and leavemarks ora
rubberresidue on the furniture.Topreventanydamage toyourfurniturewestrongly
recommend thatyou purchasesmall self-adhesivefeltpads,availableathardware
storesand homeimprovementcenterseverywhere,and applythesepadstothe
bottomofthe rubber'feet'beforeyou placethe producton fine wooden furniture.
CKD9906_071905.p65 19/7/2005, 14:264

5
Power Source
This system is designed to operate on 120V AC 60Hz house current only.
Connecting this system to any other power source may cause damage to the
system and such damage is not covered by your warranty.
Note:The systemhaspolarized ACplug withone wide blade and one narrow
blade.The plug will onlyfitintomatching polarized ACoutlets.
Thisisasafetyfeaturetoreducethe possibilityofelectricshock.If the plug will not
fitinyourACoutlet, you probablyhavean outdated non-polarized outlet. You should
haveyouroutdated outletchanged byaqualified,licensed electrician.
Donotfilethe wide blade on the plug,orusean adaptertomakethe plug fitinto
youroutlet. Thisdefeatsthe safetyfeatureand couldexposeyou toelectricshock.
AC Plug
AC Outlet
CKD9906_071905.p65 19/7/2005, 14:265

6
BatteryBack UpSystem
Thisunitusesasingle9-Voltbattery(notincluded)tomaintainthe timeand alarm
settingsintheeventthatitisaccidentallyunplugged,oryouexperienceatemporary
powerfailure.Werecommend thatyou install awell-knownbrandofAlkaline battery
forlongestlifeandbestperformance.Tokeepthebatterybackupsystemoperational
you shouldinstall anewbatteryevery6to9months.Somepeoplefind itconvenient
toreplacethe back up batteriesintheiralarmclocks,clock radios,and smoke
detectorstoo,atthe beginning and end ofDaylightSaving Time.
Toinstall the back up battery,turnthe unitupside down,and
1.)Press on the batterydoor“ ”markand slide itinthe direction ofthe “arrow”to
open.
2.)Connectthe batterytothe batteryterminal,pushthe batteryback intothe
compartmentand replacethe batterydoor.
If the powerisinterrupted the clock displaywill go off butthe batterywill maintain
the clock and alarmtimesettings.When powerisrestored the timedisplaywill be
correctand youralarmsetting will alsobe maintained.
If you noticethatthe timedisplayis“flashing”you probablyexperienced apower
failurewithaweakorexhausted batteryinthe compartment. Resetthe clock and
replacethe batteryassoon aspossible.
CKD9906_071905.p65 19/7/2005, 14:266

7
LOCATIONOFCONTROLSAND INDICATORS
Top Panel
FrontPanel22
5
9
10
11
5
12
1
1314
15
1617
18
1920
3
21
23
24
2
303133
4
25
26
29
28
27
7
32
6
8
CKD9906_071905.p65 19/7/2005, 14:267

8
1.)SNOOZEButton.
2.)BUZZER-CD-FMST-AMSelectorSwitch.
3.)Power‘On’Indicator.
4.)POWER(On/Off)/ALARMOFF Button.
5.)Speakers.
6.)CD compartment.
8.)ACPowerCord.
7.)Back UpBatteryCompartment(Atbottomcabinet).
9.)FMWireAntenna.
10.)VOLUMEControl.
11.)TUNINGControl.
12.)Play/PauseButton.
13.)Stop Button.
14.)CD DoorOPEN/CLOSE Area.
15.)SkipSearchForward/HR.(Hour) Button.
16.)SkipSearchReverse/MIN.(Minute)Button.
17.)P-MODEButton.
18.)PROGRAMButton.
19.)AL(Alarm)1SETButton.
20.)SLEEP Button.
21.)AL(Alarm)2SETButton.
22.)TIMEButton.
23.)DISPLAYButton.
24.)ALARM1‘On’Indicator.
25.)PMIndicator.
26.)FMSTEREOIndicator.
27.)Tuning Dialpointer.
28.)LEDDisplay.
29.)ALARM2‘On’Indicator.
30.)REPEATIndicator.
31.)RANDOMIndicator.
32.)PROGRAMIndicator.
33.)SLEEP Indicator.
CKD9906_071905.p65 19/7/2005, 14:268

9
OPERATINGINSTRUCTIONS
Setting TheTimeOfDay
•Connectthe powercordtoyourACoutlet. Makesuretousean outletthatis
always ‘live’.Donotusean outletthatiscontrolled byawall switch.
•When the unitisplugged inforthe firsttimethe
displaywill showflashing “12:00”(AM).
1.)Whilethe displayisflashing,press the HR.button tosetthe hour.Besure
toobservethe PMindicatortosetthe hourcorrectly.If the PMindicatoris‘On’
the hourdisplayed isPM.
2.)Press MIN.button tosetthe minutecorrectly..
3.)Press the TIMEbutton once.The timeisset.
The displayremains‘On’.
Note:You mayproceed tore-setthe timeagainbypressing the TIMEbutton
onceduring Power-off orCD,FM,AM,Buzzermodes.
ImportantNotes !!
If you press and holdthe TIMEbutton anytime,the clock will change to
European 24-Hourformat, and viceversa.
ALARM 2
PM
ALARM 1
ALARM 2
PM
ALARM 1
ALARM 2
PM
ALARM 1
ALARM 2
PM
ALARM 1
CKD9906_071905.p65 19/7/2005, 14:269

10
Setting TheWake UpTimes
The unithastwoseparatewakeup alarmsthatcan be setand used independently.
1.)Pressthe AL1orAL2button once.Thedisplaywill change fromthe respective
timeofthe daytowakeup timeand beginflashing.
The ALARM1orALARM2indicatorcomes“On”.
2.)Press the HR.button tosetthe wakeup hour.SetcorrectlyforAMorPM.
3.)Press the MIN.button tosetthe minutecorrectly..
Press the respectiveALbutton once.The Alarmtimeisset.
The displayreturnstocorrecttime.
Note:Press the AL1orAL2button oncetoturnthe respectiveAlarmtime
‘Off’.The ALARM1orALARM2indicatorwill go ‘Off’.
ALARM 2
PM
ALARM 1
ALARM 2
PM
ALARM 1
CKD9906_071905.p65 19/7/2005, 14:2610

11
Listening To TheRadio
1.)Press the POWER/ALARMOFF Button toturnthe unit‘On’.The Power
indicatorcomes‘On’.
2.)Setthe BUZZER-CD-FMST-AMselectortoFMSTorAMposition.
3.)Turnthe TUNINGcontroltofind the desired station.
If you slide the selectortoFMSTposition,and tune toaFMStereo station,the
FMSTEREOindicatorlightcomes‘On’.
4.)Adjustthe VOLUMEcontroltothe desired level.
5.)When you arefinished listening press the POWER/ALARMOFF button
toturnthe unit‘Off’.The Powerindicatorgoes‘Off’.
FM STEREO
ALARM 2
PM
ALARM 1
CKD9906_071905.p65 19/7/2005, 14:2611

12
AntennaInformation
AM
The AMferritebarantenna isinside the cabinet. If AMreception isunsatisfactory
tryturning the entireunitslightlyuntil you find the direction thatprovidesthe best
reception forthe desired station.
FM
Makesurethe FMlead wireantenna isextended toit’s full length.You mayhaveto
varythe direction ofthe wireantenna tofind the position thatprovidesthe best
reception.
CKD9906_071905.p65 19/7/2005, 14:2612

13
Playing CompactDiscs
Note:Although thisCD playercan read CD-Rand CD-RWdiscs,inaddition to
normalCDs,howeverthe playabilityofCD-R/RWdiscs maybe affected by
the type ofsoftwarethatwasused tocreatethe discs,aswell asthe quality
and condition ofthe blankmediayou areusing.100%playabilitycannotbe
guaranteed.Thisisnotan indication ofaproblemwiththe player.
NormalPlayback
1.)Press the POWER/ALARMOFF button toturnthe unit‘On’.The Power
indicatorcomes‘On’.
2.)Setthe BUZZER-CD-FMST-AMselectortothe CD position.
3.)Press on the OPEN/CLOSE position on CD doortoopen the CD door.
4.)Placeyourdisc on the centerspindlewiththe printed labelside facing up.
Closethe CD door.
CKD9906_071905.p65 19/7/2005, 14:2613

14
5.)Twodashes“––”flashwhilethe playerreadsthe tableofcontentsofthe disc.
The displaywill showthe totalnumberoftracks forafewsecondsand then
returntothe correcttime.
Note:If the disc isinserted incorrectly,orifthe disc isbadlyscratched
and cannotbe read bythe player,“no”will appearon the displayforafew
seconds,and then the displayreturnstothe correcttime.
6.)Press the button tobeginplayback.
The displaywill brieflyshow“01”(Track 01)and playback on track 01 begins.
Afterafewsecondsthe displayreturnstothe correcttime.
Press the DISPLAYbutton toreturntoTrack numberagainforfewseconds.
7.)ToPausebrieflyduring playback press the button.
The track numberflashesbrieflyand the sound stops,butthe disc continues
tospin.
Press button againtocancelpauseand resumeplayback.
8.)Toskipforwardorbackwardtoothertracks repeatedlypress the or
buttonsuntil the desired track numberappearsinthe display.Playback will
beginon the selected track.
9.)Tostop playback atanytimepress the Stop button.Afterthe lasttrack hass
played the disc stopsautomatically.Open the CDdoorand removeyourdisc.
ALARM 2
PM
ALARM 1
ALARM 2
PM
ALARM 1
ALARM 2
PM
ALARM 1
ALARM 2
PM
ALARM 1
ALARM 2
PM
ALARM 1
ALARM 2
PM
ALARM 1
ALARM 2
PM
ALARM 1
ALARM 2
PM
ALARM 1
ALARM 2
PM
ALARM 1
CKD9906_071905.p65 19/7/2005, 14:2614

15
To StartPlayback FromASpecificTrack
Load yourdisc and waituntil the displayshowsthe totalnumberoftracks.
Press the orbuttonstoselectthe desired track.
Whilethe track numberisstill flashing press the
button.
Playback will beginon the selected track and continue until the end ofthe disc.
High SpeedMusicSearch
You can searchrapidlyforwardorbackwardwithinatrack tolocateaspecific
musicalpassage.
Depress and holdthe orbuttonstobeginhigh speed search.The display
will showthe currenttrack and the playermovesrapidlyforwardorbackward.
When you reachthe desired passage releasethe orbutton and normal
playback resumes.
Note:The volumelevelisautomaticallyreduced during high speed music
search.
RandomPlayback
Tolisten tothe tracks on adisc inrandomorder:
1.)Load yourdisc and waituntil the totaltrack numberisdisplayed.
2.)Press the P-MODEbutton three times.
The RANDOMindicatorcomes‘On’.
3.)Press the button.The playerwill selectatrack atrandomand playback
beginson thattrack.The selected track numberappearsinthe displayfora
fewseconds.
Aftereachtrack hasplayed oncethe playerstopsautomatically.
Tocancelrandomplayback atanytime,press the P-MODEbutton until RANDOM
indicatorgoes‘Off’.
ALARM 2
PM
ALARM 1
ALARM 2
PM
ALARM 1
CKD9906_071905.p65 19/7/2005, 14:2615

16
RepeatPlayback
You can programthe playertorepeatasingletrack orthe entiredisc continuously.
OneTrack Repeat
1.)Load yourdisc and waituntil the totaltrack numberisdisplayed.
2.)Press the P-MODEbutton once.
The REPEATindicatorflashes.
3.)Press orbutton toselectthe track tobe repeated.
When the track numberisstill flashing,press
the button.The selected track will be
repeated continuously.
All Tracks Repeat
1.)Load yourdisc and waituntil the totaltrack numberisdisplayed.
2.)Press the P-MODEbutton twice.
The REPEATindicatorremains‘On’.
3.)Press the button.All tracks will be repeated continuously..
Tocancelrepeatplayback press the P-MODEbutton until the REPEATindicator
goes‘Off’,orpress the Stop button.
ALARM 2
PM
ALARM 1
ALARM 2
PM
ALARM 1
ALARM 2
PM
ALARM 1
CKD9906_071905.p65 19/7/2005, 14:2616

17
ProgrammedPlayback
The CDplayerinthisunithasa20 track programmablememorywhichallowsyou
toprogramanydisc toplayjustthe tracks you wanttohearinthe exactorderthat
you wanttohearthem.You mayprogramatrack ortracks toplaymorethan once
ifdesired.
Note:Programming can onlybe done whilethe playerisinthe Stop mode.If
adisc isplaying press the Stop button tostop playback beforeperforming
the programming stepsbelow.
1.)Turnthe unit‘On’,selectthe CD function and load the desired disc inthe
player.Waituntil the playerreadsthe disc and the displayshowsthe totaltrack
number.
2.)Press the PROGRAMbutton.The PROGRAMindicatorflashesand the display
brieflyshows“P 01”then “00”flashesindicating thatyou can selectthe first
track tobe programmed.
3.)Press the orbuttonstoselectthe first
track.The desired track numberflasheson the
display.
4.)Press the PROGRAMbutton again.The selected track isentered inprogram
memorynumber01 and the displayadvancesto“P 02”then “00”flashesagain
indicating thatyou can selectthe nexttrack tobe programmed.
5.)Press the orbuttonstoselectthe nexttrack tobe programmed,andnd
press the PROGRAMbutton toenterthe track inthe memory.
6.)Repeatstep 5toprogramup to20 tracks inthe memory.
ALARM 2
PM
ALARM 1
ALARM 2
PM
ALARM 1
ALARM 2
PM
ALARM 1
ALARM 2
PM
ALARM 1
ALARM 2
PM
ALARM 1
CKD9906_071905.p65 19/7/2005, 14:2617

18
7.)Afteryou haveprogrammed all the desired tracks press the button tobegin
programmed playback.
The PROGRAMindicatorstopsflashing and remains‘On’.Playback will begin
on the firsttrack you programmed and continue until all programmed tracks
havebeen played.
Notes:
•Afterall programmed tracks haveplayed the playerstopsbutthe program
remainsinthe memory.
Press the PROGRAMbutton and then the button tobeginprogrammed
playback again.
•Toclearthe programfromthe memoryafterthe disc stops,press the
PROGRAMbutton and then press the Stop button.
Opening the CDdoor,pressing the POWER/ALARMOFF button toshut
the unit‘Off’,orbyswitching tootherfunction alsoclearsthe program.
ProgramRepeatPlayback
You mayusethe Programand Repeatfeaturestogethertorepeataprogrammed
sequenceoftracks.
Simplyenterthe desired tracks inthe programmemoryasdescribed on page 17,
then press the P-MODEbutton twicetoselect‘All Tracks Repeat’.
The PROGRAMand REPEATindicatorswill both
come‘On’.
Press tobeginProgramRepeatplayback.
ALARM 2
PM
ALARM 1
ALARM 2
PM
ALARM 1
ALARM 2
PM
ALARM 1
CKD9906_071905.p65 19/7/2005, 14:2618

19
Alarm Operation
Thisunitgivesyou the option ofwaking toan electronicBuzzeralarm,theAM/FM
Radio,orthe CD player.
Note:Whicheveralarmmode you select–BUZZER,CD,FMSTorAM–will
applytobothalarms.
Referto“Setting TheWake UpTimes”on page 10.Adjustthe wakeup time(s)if
necessary.
1.)Setthe BUZZER-CD-FMST-AMselectortothe desired wakeup mode.
2.)Press the AL1and/orAL2buttonsonce.The respectivealarmtimeflashes
forfewseconds,then returnstocorrecttime.
The ALARM1,ALARM2orbothindicatorscome‘On’.
3.)Atthe selected wakeup timethe selected alarmmode turns‘On’.
The ALARMindicatorflashes.
The selected alarmwill continue for60 minutesand then turn‘Off’and reset
itselfforthe following day.
4.)Tostop the alarmimmediately,press the POWER/ALARMOFF button.
The alarmstopsand resetsitselfforthe following day.
5.)Tocancelthe alarmcompletelypress the AL1and/orAL2buttonsonceto
turn‘Off’.The respectiveALARMindicatordisappears.
ALARM 2
PM
ALARM 1
ALARM 2
PM
ALARM 1
ALARM 2
PM
ALARM 1
CKD9906_071905.p65 19/7/2005, 14:2619
Table of contents
Other Emerson Stereo System manuals

Emerson
Emerson PD6511 User manual

Emerson
Emerson MS9923TT User manual

Emerson
Emerson MS9903TT User manual

Emerson
Emerson MS3105 User manual

Emerson
Emerson ES79 User manual

Emerson
Emerson ES11 User manual

Emerson
Emerson MS3100 User manual

Emerson
Emerson SpongeBob SquarePants SB230 User manual

Emerson
Emerson ES1065 User manual

Emerson
Emerson ES3 User manual

Emerson
Emerson Research iE600 User manual

Emerson
Emerson ES27 User manual

Emerson
Emerson MS9920TT User manual

Emerson
Emerson MS3100 User manual

Emerson
Emerson ES920 User manual

Emerson
Emerson ES28 User manual

Emerson
Emerson NR305TT User manual

Emerson
Emerson MS9933TT User manual

Emerson
Emerson MS9600 User manual

Emerson
Emerson NR303TT User manual