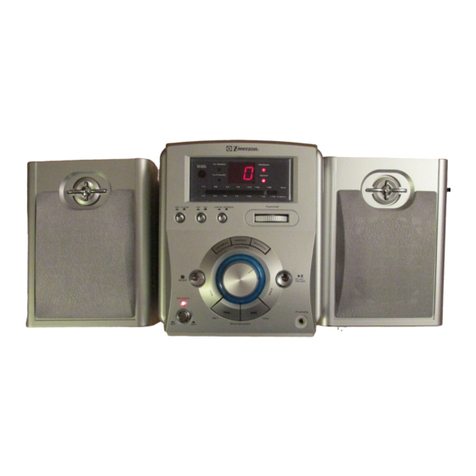
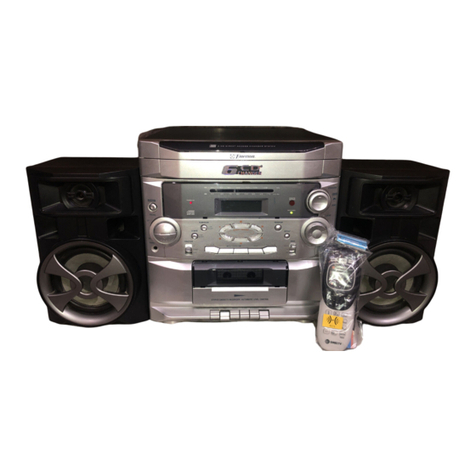
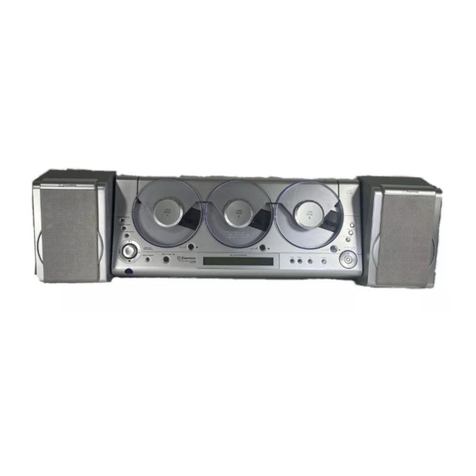
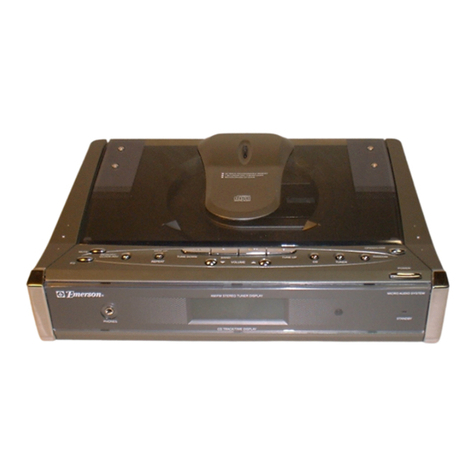
Emerson ES27 User manual

OWNER'SMANUAL
ES27
MICRO AUDIO SYSTEM
withCD PLAYER
and DIGITALTUNER
Visitourweb siteatwww.emersonradio.com
ES27_ib_drafts.p65 19/3/2002, 16:1022

1
TOPREVENTFIREORSHOCKHAZARD,DONOTUSE THISPLUGWITHAN
EXTENSIONCORD,RECEPTACLEOROTHEROUTLETUNLESS THEBLADES
CANBE FULLYINSERTEDTOPRESENTBLADEEXPOSURE.TOPREVENTFIRE
ORSHOCKHAZARD,DONOTEXPOSETHISAPPLIANCETORAINORMOISTURE.
IMPORTANTSAFETYINSTRUCTIONS
1.Read theseinstructions.
2.Keep theseinstructions.
3.Heed all warnings.
4.Followall instructions.
5.Donotusethisapparatusnearwater.
6.Clean onlywithdrycloth.
7.Donotblock anyventilation openings.Install inaccordancewiththe manufacturer’s
instructions.
8.Donotinstall nearanyheatsourcessuchasradiators,heatregisters,stoves,orother
apparatus(including amplifiers)thatproduceheat.
9.Donotdefeatthe safetypurposeofthe polarized orgrounding-type plug.Apolarized
plughastwobladeswithonewiderthantheother.Agroundingtypeplughastwoblades
and athirdgrounding prong.The wide blade orthe thirdprong areprovided foryour
safety.If the provided plug doesnotfitintoyouroutlet, consultan electrician for
replacementofthe obsoleteoutlet.
10.Protectthe powercordfrombeing walked on orpinched particularlyatplugs,
conveniencereceptacles,and the pointwheretheyexitfromthe apparatus.
11.Onlyuseattachments/accessoriesspecified bythe manufacturer.
12.Unplug thisapparatusduring lightning stormsorwhen unused forlong periodsoftime.
13.Referall servicing toqualified servicepersonnel.Servicing isrequired when the
apparatushasbeen damaged inanyway,suchaspower-supplycordorplug is
damaged,liquidhasbeen spilled orobjectshavefallen intothe apparatus,the
apparatushasbeen exposed torainormoisture,doesnotoperatenormally,orhas
been dropped.
14.Thisapplianceshall notbe exposed todripping orsplashing waterand thatno object
filled withliquidssuchasvasesshall be placed on the apparatus.
!
WARNING
RISK OFELECTRICSHOCK
DONOTOPEN
The lightning flashwitharrow-
head symbol,withinan equi-
lateraltriangleisintented to
alertthe usertothe presence
ofuninsulated‘dangerousvoltage’
withinthe product’s enclosure
thatmaybe ofsufficient
magnitude toconstitutearisk
ofelectricshock topersons.
The exclamation pointwithin
an equilateraltriangleisin-
tended toalertthe userto
the presenceofimportant
operating and maintenance
(servicing)instructionsin
the literatureaccompany-
ing the appliance.
CAUTION:TOREDUCETHE
RISK OFELECTRICSHOCK
DONOTREMOVE COVER
(ORBACK),NOUSER
SERVICEABLEPARTSINSIDE
REFERSERVICINGTO
QUALIFIEDSERVICE
PERSONNEL.
WARNING
ES27_ib_drafts.p65 19/3/2002, 16:091
2
BEFOREWEBEGIN
Thankyou………………
forpurchasing thisEmerson audioproduct. The Emerson brand isyourassurance
ofquality,performanceand value,and hasbeen since1912.
Ourengineershaveincluded manyusefuland convenientfeaturesinthisproduct.
Pleasebe suretoread thisOwner’s Manualcompletelytomakesureyou are
getting the maximumbenefitfromeachfeature.
Thisproductwasmanufacturedusingthehighestqualitycomponentsand standards
ofworkmanship.It wastested byEmerson inspectorsand found tobe inperfect
working orderbeforeitleft ourfactory.However,thereisalways the chancethat
someproblemmayoccurbecauseofrough handling during shipmenttothe retail
storeortothe finalconsumer.
If, afterreading thisManual,you experienceanyproblemswiththe operation of
thisproduct, pleaserefertothe instructionsforobtaining serviceatthe end ofthis
Manual.Emerson and Emerson retailersarecommitted toyoursatisfaction.
Onceagain,thanks forpurchasing thisEmerson audioproduct.
Forfuturereference,recordthe serialnumberinthe spaceprovided.
ModelNo:ES27
SerialNumber:
ES27_ib_drafts.p65 19/3/2002, 16:092

3
FCC INFORMATION
Thisequipmenthasbeen tested and found tocomplywiththe limitsforaClass B
digitaldevice,pursuanttoPart15 ofthe FCC Rules.Theselimitsaredesigned to
provide reasonableprotection againstharmfulinterferenceinaresidential
installation.Thisequipmentgenerates,uses,andcan radiateradiofrequencyenergy
and,ifnotinstalledand usedinaccordancewiththeinstructions,maycauseharmful
interferencetoradiocommunications.However,thereisno guarantee that
interferencewill notoccurinaparticularinstallation.If thisequipmentdoescause
harmfulinterferencetoradioortelevision reception,whichcan be determined by
turning the equipmentoff and on,the userisencouraged totrytocorrectthe
interferencebyone ormoreofthe following measures:
•Reorientorrelocatethe receiving antenna.
•Increasethe separation between the equipmentand receiver.
•Connectthe equipmentintoan outleton acircuitdifferentfromthattowhich
the receiverisconnected.
•Consultthe dealeroran experienced radio/TVtechnician forhelp.
ThisdevicecomplieswithPart15 ofthe FCC Rules.Operation issubjecttothe
following twoconditions:
(1)Thisdevicemaynotcauseharmfulinterference,and
(2)Thisdevicemustacceptanyinterferencereceived,including interference
thatmaycauseundesired operation.
•Operatecontrolsand switchesas
described inthe manual.
•Beforeturning on the power,make
certainthatthe connecting cordsand
powercordareproperlyinstalled.
•StoreyourCDsinacoolarea toavoid
damage fromheat.
•When moving the set, be suretofirst
disconnectthe powercordand
removecordsconnected toother
equipment.
•Avoidinstalling thisunitinplaces
exposed todirectsunlightorcloseto
heatradiating appliancessuchas
electricheaters,ontopofotherstereo
equipmentthatradiatesheat, places
lacking ventilation ordustyareas,
placessubjecttoconstantvibration
and/orhumidormoistareas.
•Donotattempttoclean thisunitwith
chemicalsolventsasthismight
damage the finish.Useaclean dry
cloth.
IMPORTANTNOTES
CLASS 1LASERPRODUCT
CLASS 1LASERPRODUCT
APPAREILÁLASERDECLASSE 1
PRODUCTOLASERDECLASE 1
CAUTION
INVISIBLELASERRADIATION
WHENOPENAND INTERLOCKS
DEFEATED.
AVOIDEXPOSURETOBEAM
ThisproductcontainsalowpowerLaserDevice.
ES27_ib_drafts.p65 19/3/2002, 16:093

4
UNPACKINGAND SET-UP
•Carefullyremovethe unitfromthe carton and removeall packing material
fromthe unit.
•Removeanylabelsorstickerswhichmaybe on the frontortop ofthe set, but
do notremoveanylabelsfromthe back orbottom.
•Wesuggestthatyou retainthe originalcarton and packing materialsincaseit
everbecomesnecessarytoreturnyourunitforservice.Thisisthe onlysure
waytoprotectthe unitfromdamage intransit.
•If you do disposeofthe carton and packing materials,pleasedo soproperly.
Emerson caresaboutourenvironment.
AC OPERATION
1.Unwind the ACPowerCordcompletely.
2. Insertthe plug intoanyconvenient120V60HzACoutlet.
POWERSOURCE
Thissystemisdesigned tooperateon 120V60HzAChousecurrent.Connecting
thissystemtoanyotherpowersupplycouldresultindamage tothe unitwhichis
notcovered byyourwarranty.You
will notethatthissystemis
equippedwithapolarizedACpower
plug having one blade widerthan
the other.Thisisasafetyfeature.
If thisplug doesnotfitintoyour
existing ACoutlet, do nottryto
defeatthissafetyfeaturebyfiling
thewidebladetomakeitfitintoyour
outlet. If thisplug will notfitinto
youroutlet, you probablyhavean out-dated non-polarized ACoutlet. You should
haveyouroutletchanged byaqualified licensed electrician.
PREPARATIONFORUSE
AC Plug
AC Outlet
ES27_ib_drafts.p65 19/3/2002, 16:094

5
LOCATIONOFCONTROLSAND INDICATORS
1.POWEROn/Off Button.
2.CD Compartment.
3.CDDoorOpen/CloseButton.
4.REPEAT/MEMORYUPButton.
5.PROG./MEMORYButton.
6.PresetEQButton.
7.BAND Button.
8.TUNERButton.
9.CD Button.
10.MultiFunction Display.
11.RemoteControlSENSOR.
12.MUTEIndicator.
13.ReverseSkipSearch/TUNING
DOWNButton.
14.ForwardSkipSearch/TUNINGUP
Button.
15.Play/PauseButton.
16.STOPButton.
17.VOLUMEUP/DOWNButtons.
18.FMWireAntenna.
19.AMExternalLoop ANTJack.
20.SpeakerJacks.
21.PHONES Jack.
22.ACPowerCord.
1
2
3
4
5
6
7
8
9
10
11
12
13
14
15
16
17
18
20
19
21
22
BACKPANEL
TOPPANEL
FRONTPANEL
ES27_ib_drafts.p65 19/3/2002, 16:095

6
78
910
11
5
4
3
2
1
6
1.)VOLUMEUP/DOWNButtons.
2.)POWEROn/Off Button.
3.)CD STOPButton.
4.)CD PLAY /PAUSE Button.
5.)CD Button.
6.)TUNERButton.
7.)Tuning UP/DOWN/
CD SkipSearch/Buttons.
8.)MEMORY/PROG.(PROGRAM)Button.
9.)M-UP/REPEATButton.
10.)BAND Button.
11.)MUTEButton.
REMOTECONTROL
BATTERYINSTALLATION
Insert2pcs ‘AAA’size(Alkaline)
batteries(notincluded)intothe battery
compartmentofthe remotecontroller.
Besuretoobservethe polaritymarkingswhichareengraved inside the battery
compartment, then closethe cover.
BATTERYREPLACEMENT
When the batteriesbecometoo weak,the operating distanceofthe remote
controllerisgreatlyreduced and you will need toreplacethe batteries.
NOTES:
•Tomaintainthe accuracy and long lifeofthe transmitter,do notpress twoor
morebuttonssimultaneously.
•If the remotecontrolisnottobe used foralong time,removethe batteriesto
preventpossibledamage through leaking batteries.
•Donotmixdifferenttypesofbatteries,oroldbatterieswithnewones.
USINGTHEREMOTECONTROLLERCORRECTLY
•Pointthe remotecontrolleratthe RemoteSensor.
•The functionsofthe buttonson the remotecontrolarethe sameasthe
corresponding controlson the mainunit.
•When thereisastrong ambientlightsource,the performanceofthe infrared
RemoteSensormaybe degraded,causing unreliableoperation.
•The maximumeffectivedistanceforremotecontroloperation isabout15 feet.
ES27_ib_drafts.p65 19/3/2002, 16:096

7
OPERATINGINSTRUCTIONS
SPEAKERCONNECTION
Connecteachspeakertothe corresponding speakerterminalson the back panel
ofthe mainunit. Makesurethatthe left speakerplug isconnected tothe left (L)
speakerjack and the rightspeakerplug isconnected tothe right(R)speakerjack.
PRESETEQUALIZER(EQ)
•Thisunitisequipped withapresetequalizerwhichhasbeen addedtoenhance
yourlistening pleasurebyaltering the frequency responseofthe music.
•Press the PresetEQbutton on mainunitrepeatedlytocyclethrough the
following equalization modes.
RightSpeakerLeft Speaker
ES27_ib_drafts.p65 19/3/2002, 16:097

8
LISTENINGTORADIO
OPERATION
1.)Press the POWERbutton toturnthe unit‘On’.
2.)Selectthe Tunerfunction bypressing the TUNERbutton.
3.)Selectthe desired band (AMorFM)withthe BAND button.
4.)Tunetothe desiredradiostationbypressingthe TUNINGUPorDOWN
buttonson the unitoron the remotecontrol.
5.)Ifyouholdthe TUNINGUPorDOWNbutton formorethan halfasecond
the Tunerwill begintoautomaticallyscan until astrong signalisfound.
6.)Toturnoff theradio,pressthePOWERbuttontoswitchtheunitintostandby
mode.
STORINGPRESETSTATIONS
1.)Tune eitherautomaticallyormanually(asdescribed insteps4or5above)to
the station tobe stored.
2.)PressthePROG/MEMORYbuttononce.
“MEMORY”will flashinthe displayfor5
seconds.Duringthistimeyoumustselect
thedesiredmemorylocationbypressing
the REPEAT/MEMORYUPbutton.
3.)PressthePROG/MEMORYButtonagain
tostorethe station atthatlocation.
4.)The unitcan storeup to20 FMstations,20 AMstations.
TUNINGTOAPRESETSTATION
Selectthe desired station presetnumberbypressing the REPEAT/MEMORYUP
button.
MHz
FM
POP
MEMORYCH STEREO
MHz
FM
POP
CH STEREO
ES27_ib_drafts.p65 19/3/2002, 16:098

9
ANTENNA
FM
ForFMreceptionthereisabuilt-in3ftFMantennawireattherearoftheunit.Unravel
the wireand moveitaround toobtainthe bestreception.
AM
Thissystemincludesan externalAMLoop antenna.AssembletheAMloop antenna
and then connectthe wirefromthe antenna tothe AMantenna terminalon the
back ofthe setasshown.You mayhavetovarythe position and direction ofthis
AMLoop antenna until you find the position thatprovidesthe clearestreception for
eachofyourfavoriteAMstations.
ES27_ib_drafts.p65 19/3/2002, 16:099

10
CLOCK SETTING
1.)Switchthe unittoStandbymode bypressing the POWERbutton.
2.)Press thePROG/MEMORYbutton.The
hourdigitswill flashinthe display.
3.)Usethe /buttonstosetthe required hour.Besuretosetcorrectlyfor
AMorPM.
4.)PressthePROG/MEMORYbuttonagain.
TheHourisnowsetandtheMinutedigits
starttoflashinthe display.
5.)Usethe /buttonstosetthe required minute.
6.)PressthePROG/MEMORYbuttonagain.
The Minutesarenowsetand the clock
will start.
NOTE:
•Clock timeisonlyretained whilethe unitisplugged intothe ACoutlet. Inthe
eventofapowerfailurethe clock will need tobe resetwhen the powersupply
resumes.
•Clock timeisonlyshownwhen unitisinStandbymode.
:
AM
:
PM
:
PM
ES27_ib_drafts.p65 19/3/2002, 16:0910

11
PLAYINGCOMPACTDISCS
LOADINGAND UNLOADINGCOMPACTDISCS
1.)Press the POWERbutton toturnthe unit‘On’.
2.)Selectthe CD function bypressing the CD button.
3.)Press the the CD DoorOpen /Closebutton toopen the CD compartment.
4.)When the disc compartmenthasopened,insertthe disc withthe labelside
facing up.Pushdowninthe centeruntil disc islocked inplace.
5.)Closethe disc compartmentbypressing the CD DoorOpen /Closebutton.
When the compartmentisfullyclosed,the disc will startturning automatically.
The totalnumberoftracks and playing timewill appearinthe display.
6.)The disc compartmentmaybe opened atanytimebyfirstpressing the STOP
button and then pressing the CD DoorOpen /Closebutton.Removethe
CD onlyafterthe compartmenthasfullyopened and the disc hasstopped
spinning.
CAUTION
•Donotputanything exceptacompactdisc intothe compartment.
•Foreign objectscan damage the mechanism.
•Keepthedisccompartmentclosedwhennotinusetopreventdirtand dustfrom
entering the mechanism.
•Neverplacemorethan one disc intothe disc compartmentatanytime.
•If the disc iscorrectlyloaded,the totalnumberoftracks on the disc will be
displayed.
NOTES:
Afterthe disc compartmentisfullyclosed,the disc information maynotappearon
the display.Thismeansthatthe disc isimproperlyloaded (mostlikelyitisupside
down).Tocheck,open the disc compartmentagainand reload the disc.
ES27_ib_drafts.p65 19/3/2002, 16:0911

12
DISCPLAY
1.)InsertaCDasdescribedintheprevioussectionandclosethedisccompartment.
2.)The displaywill then showthe totalnumberoftracks and totalplaytime.
3.)PressthePLAY/PAUSE button.Disc
playwill beginfromthe startofthe first
track ofthe disc.
4.)Aseachtrack on the CD disc isplayed,the corresponding track numberwill
flashinthe Calendardisplay.The “OVER”indicatorwill appearifthe disc inthe
playercontainsmorethan 10 tracks.
5.)Aparticulartrack can be selected using eitherofthe CD Skip/buttons.
If thisisdone beforepressing the PLAY/PAUSE button,disc playwill start
withthe selected track when the PLAY/PAUSE button ispressed.
6.)Atthe end ofthe disc,the unitwill switchtostop mode.
NOTES:
•If the disc isdeeplyscratched,ortoo dirty,disc playmaynotstart.
•If the disc isinserted incorrectly,orthe disc isdamaged the “no disc”indicator
will flashon display.
:
POP
TRACK
1
2
3
4
5
6
7
8
9
10
OVER
POP
:
POP
TRACK
1
2
3
4
5
6
7
8
9
10
OVER
CALENDAR
DISPLAY
ES27_ib_drafts.p65 19/3/2002, 16:0912

13
DISCERRORS
•Thiscompactdisc playerhasbuilt-inerrorcompensation circuitstocorrectfor
minordefectsinadisc.Therearelimits,however,tothe amountofcorrection
available.
•Insomecases,theCDplayermayskipsometracks,orpartsoftracks,onadisc
during disc play.Thisproblemmaybe caused bydefects(suchasscratches)
inthe disc being played,whicharetoo large forthe errorcompensation circuits
tohandle.If you encounterthisproblem,check the CD player'soperation as
follows,beforehaving the unitserviced:
Playanewdisc.If the CD playeroperatesnormally,the skipping problemis
probablydue toadefectivedisc.
TOSTOPACD BEFORETHEDISCENDS
1.)Press the STOPbutton.Disc playwill
stop,and the displaywill showthe total
numberoftracks.
2.)Totemporarilystop disc play(Pausemode),press the PLAY /PAUSE
button.Disc playwill stop atthe currentplayposition.The displayand the track
playing timewill flash.
3.)Toresumedisc play,press the PLAY /PAUSE button again.
:
POP
TRACK
1
2
3
4
5
6
7
8
9
10
OVER
:
POP
TRACK
1
2
3
4
5
6
7
8
9
10
OVER
ES27_ib_drafts.p65 19/3/2002, 16:0913

14
TRACK SKIP
Starting disc play fromthebeginning ofaparticulartrack
Press the ForwardorReverseSkip
Track buttonstoselectthe desired track.
The numberofthe selected track will be
shownon the CD display.
Press the PLAY/PAUSE button tostartplay.
To skiptothenexttrack
Forexample,toskipahead tothe beginning oftrack 5whiletrack 4isplaying.
1.)Press the ForwardSkiptrack button once.Disc playwill resumeatthe
beginning oftrack 5.
2.)The CD playerwill skipahead tothe nexttrack eachtimethe ForwardSkip
track button ispressed.Repeatedlypressingthe ForwardSkiptrack button
makesthe CD playerskipahead through the disc track bytrack.Oncethe
beginning ofthe lasttrack isreached the CD playeradvancetothe firsttrack.
To skiptotheprevioustrack on adisc
Forexampletoskipback tothe beginning oftrack 3whiletrack 4isplaying.
1.)Press the ReverseSkiptrack button twice.Disc playwill resumeatthe
beginning oftrack 3.
2.)The CD playerwill skipback one track eachtimethe ReverseSkiptrack
buttonispressed.If thisbuttonispressedinthemiddleofatrack,theCDplayer
willskipback tothe beginningofthattrack.Tomakeitskipback totheprevious
track press the ReverseSkiptrack button twice.
3.)Repeatedlypressing the ReverseSkiptrack button makesthe CD player
skipback through the disc track bytrack.Oncethe beginning ofthe firsttrack
isreached,the CD playerwill go tothe lasttrack.
NOTES:
TheForwardand ReverseSkiptrack buttonscanbeusedtoselectadesired
track toplaybeforedisc playstarts.Inthiscasethe numberofthe selected track
will be displayed until the PLAY/PAUSE button ispressed.
POP
TRACK
6
7
8
9
10
OVER
ES27_ib_drafts.p65 19/3/2002, 16:0914

15
TRACK SEARCH
You can searchthrough the track byholding the ForwardorReversetrack
skipbutton down.Normalplaywill resumewhen the button isreleased.
REPEATDISCPLAY
Usethe REPEATbutton toplayan entiredisc orone track continuously.
Repeatplay ofall tracks
1.)Press the REPEAT/MEMORYUPbutton once.The “REPEAT”indicator
appearsinthe display.
2.)Press the PLAY /PAUSE button.
3.)Thediscwillthenbeginplayingthroughtotheendofthelasttrack.Atwhichpoint
itwill automaticallyreturntothe beginning ofthe firsttrack.Thiswill continue
until the STOPbutton ispressed.
4.)If the REPEAT/MEMORYUPbutton ispressed twicemore,the “REPEAT”
indicatorwill disappearsand repeatplaywill end.Normaldisc playwill resume
fromthatpoint.
5.)When the lasttrack hasfinished playing,the CD playwill Stop.
Repeatdisc play ofoneofthetracks
1.)Selectthe desired track bypressing the ForwardorReverseSkiptrack
buttons.The track will be showninthe display.
2.)PresstheREPEAT/MEMORYUPbutton
twice.The “REPEAT”indicatorflashesin
the display.
3.)Press the PLAY /PAUSE button.
4.)Theselectedtrack will thenbeginplaying throughtoitsend.Atwhichpointitwill
automaticallyreturntothe beginning ofthattrack.Thiswill continue until the
STOPbutton ispressed.
:
POP
TRACK
1
2
3
4
5
6
7
8
9
10
OVER
REPEAT
:
POP
TRACK
1
2
3
4
5
6
7
8
9
10
OVER
REPEAT
ES27_ib_drafts.p65 19/3/2002, 16:1015

16
5.)If the REPEAT/MEMORYUPbutton ispressed oncemore,the “REPEAT”
indicatorwill disappearand,repeatplaywill end.Normaldisc playwill resume
fromthatpoint.
6.)When the lasttrack hasfinished playing,the CD playerwill then Stop.
PROGRAMMEDDISCPLAY
•Itispossibletoprogramthetracksyouwishtoplayinasequenceofyourchoice.
It isnotpossibletoenterprogramadisc during playback.Press the STOP
button first, then followthe instructionsbelow.
•Itiseasiertousetheremotecontrolforthefollowingsettings,howeveryoumay
alsousethe controlson the mainunitifdesired.
ENTERINGAPROGRAM
1.)Press the PROG /MEMORYbutton.
“TRACKMEMORY”flashesand “P-01”
will be displayed on the display.
2.)Selectthe firstdesired track using the Forwardand ReverseSkip
buttons.
3.)Press thePROG/MEMORYbutton.The
firstprogramselection isnowstored in
the programmemory.The displaywill
nowshow“P-02”.
4.)Selectthe nextdesired track using the Forwardand ReverseSkip
Buttons.
5.)Press the PROG /MEMORYbutton.Continue entering tracks inthiswayuntil
all the desired tracks arestored (up to20 tracks).
NOTES:
•If the PLAY/PAUSE buttonispressedbeforethePROG/MEMORYbutton
ispressed tostoreatrack,the track will notbe programmed,and the disc will
startplaying fromthe firstselected track.
POP
TRACK MEMORY
POP
TRACK MEMORY
ES27_ib_drafts.p65 19/3/2002, 16:1016

17
:
POP
TRACK MEMORY
2
4
6
8
9
10
•Anytrack can be programmed toplaymorethan once.
•Repeatedlypressingthe PROG /MEMORYbutton will enableyou tocheck the
programifrequired.
LISTENINGTOPROGRAMMEDTRACKS
1.)Enterall tracks you wanttoprogramintomemoryfollowing the procedureson
page 16.
2.)Press the PLAY /PAUSE button.
Disc playwill startatthe beginning ofthe
firstprogrammed track.
“TRACKMEMORY”indicatorappears
on the display.
TOCLEAR THEPROGRAMMEMORY
•Press PROG /MEMORYbutton toenterprogramming mode,then press the
STOPbutton.
•The programmemorywill alsobe cleared ifthe disc compartmentisopened,
ifthe function ischanged,orifthe poweristurned ‘Off’.
MUTE
•Press the MUTEbutton on remotecontroltoswitchoff the sound,the MUTE
indicatorwill illuminate.
•Press MUTEagaintorestorethe sound tothe previouslevel.MUTEindicator
will extinguish.
STEREOHEADPHONEJACK
Forprivatelistening withoutdisturbing othersconnectasetofstereo headphones
(notincluded)tothe PHONES Jack on the back panel.The built-inspeakers
automaticallyshutoff when stereo headphonesareconnected tothe headphone
jack.When using stereo headphonesalways startwiththe volumecontrolsettoa
lowleveland graduallyincreaseuntil you find the desired level.
ES27_ib_drafts.p65 19/3/2002, 16:1017

18
COMPACTDISCCARE
•Toremoveadisc fromitsstorage case,press downon the centreofthe case
and lift the disc outs,holding itcarefullybythe edges.
•Fingerprintsand dustshouldbe carefullywiped off the disc’s recorded surface
withasoft cloth.Unlikeconventionalrecords,compactdiscs haveno grooves
tocollectdustand microscopicdebris,sogentlywiping withasoft clothshould
removemostparticles.Wipe inastraightline fromthe inside tothe outside of
the disc.Small dustparticlesand lightstainswill haveabsolutelyno effecton
reproduction quality.
•Clean the disc periodicallywithasoft, lint-free,drycloth.Neverusedetergents
orabrasivecleanerstoclean the disc.If necessary,useaCD cleaning kit.
•Neverwriteon oraffixlabelstothe surfaceofcompactdiscs.
CAREOFTHECABINETS
•If the cabinetsbecomedustywipe themwithasoft drydustcloth.Donotuse
anywaxorpolishsprays on the cabinets.
•If the frontpanelbecomesdirtyorsmudged withfingerprintsitmaybe cleaned
withasoft clothslightlydampened withamildsoap and watersolution.Never
useabrasiveclothsorpolishesasthesewill marthe finishofyourunit.
CAUTION:
Neverallowanywaterorotherliquidstogetinside the unitwhilecleaning.
CAREAND MAINTENANCE
ES27_ib_drafts.p65 19/3/2002, 16:1018

19
TROUBLESHOOTINGGUIDE
Shouldthisunitexhibitaproblem,checkthefollowing beforeseeking service.
SymptomPossibleCause Solution
Radio
Noiseorsound Station nottuned properlyforRetune the AMorFM
distorted on AMorAMorFM.broadcaststation.
FMbroadcasts.FM:Wireantenna isnotExtend FMWireantenna.
extended.
AM:The Loop antenna isnotReposition the Ant. until
positioned correctly.bestreception isobtained.
FMSTEREOindicatorFMstation ismono orstation Extend FMWireantenna.
doesnotlight. signalisweak.Tryotherstrong stations.
AMorFM,no sound.Function isnotsettoTuner.Press TUNERbutton to
selectTunerfunction.
Volumeatminimum. IncreaseVolume.
CompactDisc Player
CD Playerwill notFunction isnotsettoCD.Press CD button toselect
play.CD function.
CD isnotinstalled orInsertCD withIabelside
installed incorrectly.up.
CD skipswhileplaying.Disc isdirtyorscratched.Wipe disc withclothoruse
anotherdisc.
FORADDITIONALSET-UPOROPERATINGASSISTANCE
PLEASE CALL:
1-800-898-9020
TOFIND THELOCATIONAND PHONE
NUMBEROFYOUR NEARESTSERVICE
CENTERPERMITTEDTOPERFORM
WARRANTY...
CALL TOLL FREE:1-800-695-0098
SERVICE
FORCUSTOMERSERVICE,PLEASE WRITETO:
Emerson RadioCorp.,
ConsumerAffairsDept.,
1901 DiplomatDrive,
FarmersBranch,TX75234.
R
ES27_ib_drafts.p65 19/3/2002, 16:1019
Table of contents
Other Emerson Stereo System manuals

Emerson
Emerson MS3105 User manual

Emerson
Emerson MS9923TT User manual

Emerson
Emerson MS9903TT User manual

Emerson
Emerson ES128 User manual

Emerson
Emerson MS7618R User manual

Emerson
Emerson MS7616R User manual

Emerson
Emerson ES3 User manual

Emerson
Emerson ES28 User manual

Emerson
Emerson MS3106 User manual

Emerson
Emerson MS7630 User manual

Emerson
Emerson ES13 User manual

Emerson
Emerson MS9700 User manual

Emerson
Emerson MS3100 User manual

Emerson
Emerson ES30 User manual

Emerson
Emerson NR303TTC User manual

Emerson
Emerson ES79 User manual

Emerson
Emerson CKD9906 User manual

Emerson
Emerson PD6511 User manual

Emerson
Emerson MS7625 User manual

Emerson
Emerson ES58 User manual