manuals.online logo
Brands
  1. Home
  2. •
  3. Brands
  4. •
  5. EMG
  6. •
  7. Accessories For Musical Instruments
  8. •
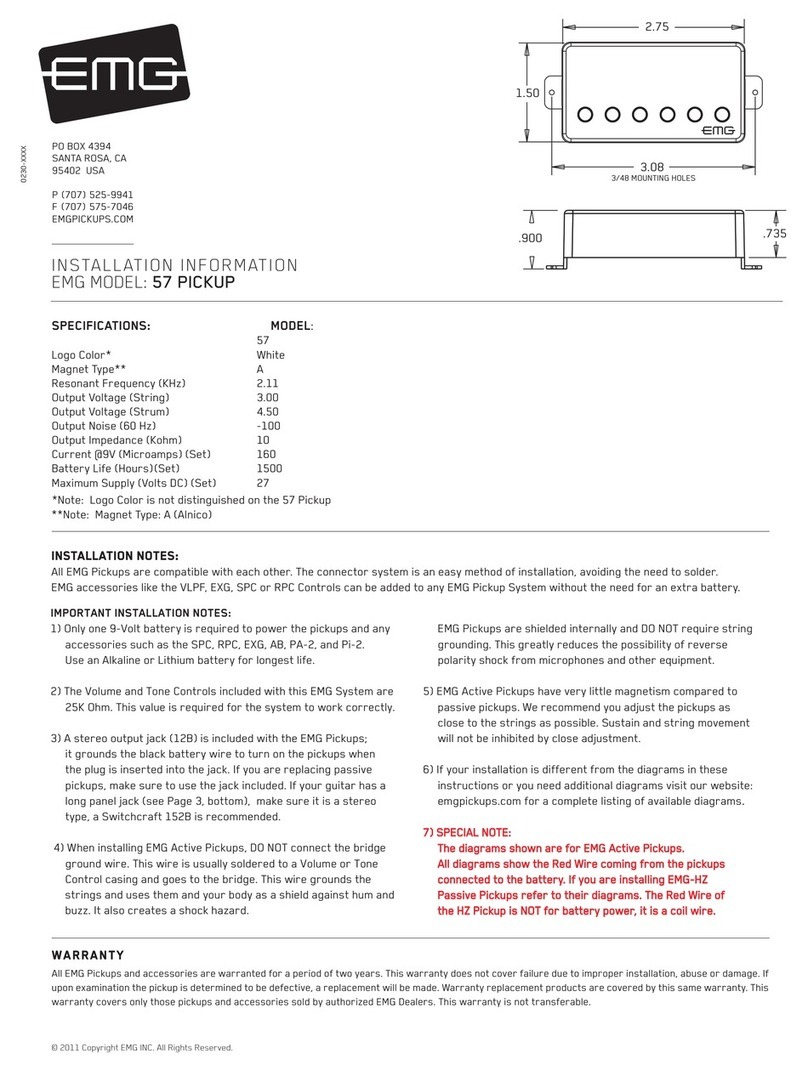
  9. EMG 81 Service manual

EMG 81 Service manual

Powering EMG’s:
Only one 9-Volt battery is required to power the pickups and any
accessories such as the EXB, BTC, B125 Blend, and BQ Controls.
There are instances where using +18 Volts for the supply is preferred
and these are explained here. Compared to many devices that use a
battery, EMG Pickups require very little power, and can be described as
“micro-powered”.
Battery Choice:
It is always best to use an Alkaline or Lithium Battery for EMG’s. Re-Chargable
batteries and inexpensive carbon batteries are not recommended. Alkaline and
Lithium batteries are also easily recycled. A battery is a the cleanest supply you
can have, guaranteeing low noise.
Using an AC Adapter (Battery Eliminator):
Using an AC Adapter is not a great idea. They tend to be noisy. EMG has yet to
spec or design an AC Adapter. Effects pedals tend to be noisy because they
ususally add alot of gain. Since the pickup is the first element of the chain it’s
best for it to have as quiet a power supply as possible, thus a battery. Both the
ES-9 and ES-18 power supplies from EMG have inputs for Adapters. The choice
is yours if you can tolerate any extra noise from an Adapter.
Battery Life:
The typical 9-Volt Alkaline battery is rated at 500 maH (Milliamp Hours).
Lithium batteries can be rated as high as 1200 maH. The more current capacity
(maH) the battery has, the longer it will last. The most important specification
(known as the “hours to cutoff voltage”) is often not specified by the makers.
The cutoff voltage is typically 1/2 of the original battery voltage, or 4.5V in this
case. Because batteries are used in so many different types of applications it’s
hard to predict battery life.
See: http://en.wikipedia.org/wiki/Nine-volt_battery
Current/ Voltage:
The typical EMG Pickup requires about 80 Micro-amps of current. For a battery
rated at 500 MilliAmp Hours it translates like this:
1 MilliAmp = 1000 MicroAmps
1000 MicroAmps / 80 MicroAmps = 12.5 times
12.5 * 500maH = 6250 maH
6250 / 2 (battery cutoff voltage 4.5V) = 3125 Hours per pickup
The Lithium Cell will usually deliver about twice as many hours as the Alkaline
cell, but the cost is higher.
So, from a typical 9-Volt battery you can expect about 3000 hours of battery
life until the battery voltage will be reduced to 4.5 Volts. With 2 pickups in the
instrument, battery life will be about half that, or about 1500 Hours. Adding
EMG Accessories will increase the current drain and lessen battery life.
Headroom (+9 or +18 Volts):
Headroom is defined as the ability of the pickup to deliver a clean, undistorted
waveform. But...while current is being drained from the battery, the battery
voltage is decreasing, and so is the headroom.
EMG Pickups never put out more voltage than is being supplied. Using a 9 Volt
battery will limit the output signal of the pickup to slightly less than 9 Volts.
Older EMG Pickups may have a maximum output of 4.5 Volts, one half of the
supply. If you supply the pickups with 18 Volts the headroom will double,
creating even more headroom for the signal. Doubling the supply voltage to 18
Volts will increase the amount of current drain. You don’t get something for
nothing.
Rules of thumb for choosing a 9 or 18 Volt Supply:
Single-Coil Pickups for Guitar:
If you are using EMG Single-Coil pickups a 9-Volt supply allows sufficient
signal headroom even when using EMG accessories that boost the signal
like the EMG-SPC or EXG.
Dual-Coil Pickups for Guitar:
If you have EMG Dual-Coil pickups, i.e. EMG-81, EMG-85 and play the
instrument very hard you can consider 18-Volt operation but it’s not
necessary.
Single-Coil Pickups for Bass:
The output from a bass guitar is higher than a 6-string guitar. SIngle-Coil
EMG Pickups such as the EMG-J models will work fine with a +9 Volt supply but
if you play aggressively 18-Volts is recommended.
Also, if you use any EMG EQ products, like the BT, or BQ controls and use a
generous amount of boost the signal will be cleanest with 18-Volts.
Dual-Coil Pickups for Bass:
Dual-Coil Bass Pickups like the EMG-CS and DC Series should be supplied
with 18-Volts. The amount of output from slapping the lower strings will
benefit with more headroom. As above, if you use any EMG EQ products,
like the BT, or BQ controls and use a generous amount of boost then the signal
will be cleanest with 18-Volts.
Powering your instrument with more than 9-Volts will not make it louder.
You may notice some difference in the distortion quality of your guitar, or
a different result from your bass amp. We encourage you to experiment.
Battery Death:
When the battery is coming to the end of its useful life, and headroom is limited,
you will notice a distortion at the initial attack of the string. It will sound like an
unnatural (ech!) and you should consider changing the battery. If you just have
EMG Pickups in your guitar without any accessories the pickups will operate on
a 2.5 Volt battery. Accessories will have a higher threshhold, typically abouit 4.5
Volts. Always, ALWAYS! install a new battery.
Unplug your guitar:
Be sure to unplug your guitar when you are not using it. You can leave it
plugged in during your sessions, rehearsals, or performances, but afterwards
be sure to unplug it, even if you leave it on the stand.
Storing your guitar long term:
If you’re going to store your instrument for a long period you should remove
the battery(s) from your instrument. Batteries can have a tendency to leak
their chemistry and make a mess. Just don’t forget you removed them when
you plug back in.
Power Tips Page 1
INSTALLATION INFORMATION
POWERING EMG’S / TIPS AND TRICKS
0230-0190C
PO BOX 4394
SANTA ROSA, CA
95402 USA
P (707) 525-9941
F (707) 575-7046
EMGPICKUPS.COM
© 2011 Copyright EMG INC. All Rights Reserved.
Power Tips Page 2
Diagram #10
Solder the RED wire from the Battery Holder and/or
pickups and re-insert the Header into the insulation cover
13
Soldering to the battery buss:
If your instrument has an older EMG Pickup you can solder the
pickup RED wire to the buss. Simply use some needle nose pliers,
pull out the V+ header and solder the RED Wire from the pickup(s)
to any of the pins and then re-insert the header into the housing.
2
BLACK to RING terminal
of the Output Jack
RED TO BATTERY BUSS (+18Volts)
- 9V +
- 9V +
T
R
S
RED
BLACK
+18 Volt Wiring Option (Standard Battery Connector):
If you want to operate your instrument at +18 Volts for more
headroom then use 2 batteries wired as below.
Also, if you are using any type of EQ in your instrument
(EMG-BT, BQ) or anything that boosts the pickup signal then
+18 Volts is recommended.
Solder the Black and Red
wires together and cover
the connection with shrink
tubing, or other insulation.
- 9V +
BLACK
RED
- 9V +
BLACK
RED
To the Pro-Series PC Board
RED to BATTERY BUSS OR PICKUP BUSS
BLACK to RING terminal
of the Output Jack
EMG Standard Battery Connectors:
EMG employs two types of battery connectors.
1) EMG Standard Battery Connector
The Standard EMG battery connector has two different terminals.
The Battery Negative (Black) is a Push-on style connector designed to
push directly onto the output jack. The Battery Positive (Red) is made
to push directly onto the Battery Buss, or onto the B157 Pickup Buss.
RED TO BATTERY BUSS (+18Volts)
- 9V +
- 9V +
RED
BLACK
+18 Volt Wiring Option (Pro-Series Connector):
If you want to operate your Pro-Series System at +18 Volts for more
headroom then use 2 batteries wired as below.
Also, if you are using any type of EQ in your instrument
(EMG-BT, BQ) or anything that boosts the pickup signal then
+18 Volts is recommended.

Solder the Black and Red
wires together and cover
the connection with shrink
tubing, or other insulation.
9 VOLT
BATTERY
HOLDER
Cover these connections with the
shrink tubing provided.
BLACK to RING terminal
of the Output Jack
RED to BATTERY OR PICKUP BUSS
9 VOLT
BATTERY
HOLDER
Cover these connections with the
shrink tubing provided.
EMG Systems with a Battery Holder:
If your instrument has a 9 or 18-Volt battery holder and you have
an EMG Pro-Series System you can adapt the existing battery clip to
use the EMG Connector to supply power to the PC Board.
Cut and strip the wires from the battery clip provided.
Put Red to Red, Black to Black and use the shrink tubing included
to cover the connections. Soldering the wires is recommended.
TIP
RING
SLEEVE
FROM TONE
OR VOLUME
BATTERY
NEG (-)
RED to BATTERY BUSS
Soldering to the 152B Panel Jack:
If your instrument has a long Panel Jack like the one below
you will have to solder the output cable as shown.
Ground (Black) to the Sleeve
Signal (White) to the Tip
Battery Negative (Black) to the Ring
- 9V +
9 VOLT
BATTERY
HOLDER
18 VOLT
BATTERY
HOLDER
BLACK to RING terminal
of the Output Jack
RED TO BATTERY BUSS (+18Volts)
T
R
S
RED
BLACK Solder the Black and Red
wires together and cover
the connection with shrink
tubing, or other insulation.
2) EMG Pro-Series and S/S/S (H) Systems Battery Connector
Shown below is the Pro-Series style battery connector.
This is used because of the difficulty making a connection on the
Stratocaster style guitars. The Pro-Series 2 pin connector inserts
directly on the PC Board.

This manual suits for next models

5

Other EMG Accessories For Musical Instruments manuals

EMG LJV-HZ-EP5 User manual

EMG

EMG LJV-HZ-EP5 User manual

EMG 66-7H PICKUP Service manual

EMG

EMG 66-7H PICKUP Service manual

EMG TB-HZ Service manual

EMG

EMG TB-HZ Service manual

EMG 89-X Service manual

EMG

EMG 89-X Service manual

EMG P Service manual

EMG

EMG P Service manual

EMG EMG-S7 Service manual

EMG

EMG EMG-S7 Service manual

EMG X Series Service manual

EMG

EMG X Series Service manual

EMG EMG-91 ARCHTOP Service manual

EMG

EMG EMG-91 ARCHTOP Service manual

EMG FLAT 6 MEDIUM Service manual

EMG

EMG FLAT 6 MEDIUM Service manual

EMG P-HZ Service manual

EMG

EMG P-HZ Service manual

EMG SPC User manual

EMG

EMG SPC User manual

EMG BQS-HZ SYSTEM Service manual

EMG

EMG BQS-HZ SYSTEM Service manual

EMG 45-TW Service manual

EMG

EMG 45-TW Service manual

EMG SA/SA/85 Set Service manual

EMG

EMG SA/SA/85 Set Service manual

EMG 91 Service manual

EMG

EMG 91 Service manual

EMG EMG Series Service manual

EMG

EMG EMG Series Service manual

EMG EMG-HZ Series Service manual

EMG

EMG EMG-HZ Series Service manual

EMG 60-8X Service manual

EMG

EMG 60-8X Service manual

EMG X Series Service manual

EMG

EMG X Series Service manual

EMG PJ5 Service manual

EMG

EMG PJ5 Service manual

EMG ZW Set Service manual

EMG

EMG ZW Set Service manual

EMG 40P5-X User manual

EMG

EMG 40P5-X User manual

EMG MMTW Service manual

EMG

EMG MMTW Service manual

EMG EXG Service manual

EMG

EMG EXG Service manual

Popular Accessories For Musical Instruments manuals by other brands

Becos TS8-MS Overdrive Midi Switching quick start guide

Becos

Becos TS8-MS Overdrive Midi Switching quick start guide

Pickup LesLee Gibson SG installation manual

Pickup LesLee

Pickup LesLee Gibson SG installation manual

Perry's Music ChordBuddy user guide

Perry's Music

Perry's Music ChordBuddy user guide

Wenger Legacy Series Rework Instructions

Wenger

Wenger Legacy Series Rework Instructions

BYO Guitar JEM Assembly

BYO Guitar

BYO Guitar JEM Assembly

AXESS ELECTRONICS AXSGTR OTS1 user manual

AXESS ELECTRONICS

AXESS ELECTRONICS AXSGTR OTS1 user manual

Kaman Gibraltar 6600 Series Setup instructions

Kaman

Kaman Gibraltar 6600 Series Setup instructions

Schatten Design RG-03 instructions

Schatten Design

Schatten Design RG-03 instructions

PianoDisc ProRecord Installation Procedure With Troubleshooting Guide

PianoDisc

PianoDisc ProRecord Installation Procedure With Troubleshooting Guide

Fishman FLUENCE TIM HENSON SIGNATURE Series installation guide

Fishman

Fishman FLUENCE TIM HENSON SIGNATURE Series installation guide

DOLFINOS The Cello Grip-Foot Standard Edition manual

DOLFINOS

DOLFINOS The Cello Grip-Foot Standard Edition manual

Auralex Acoustics GeoFusor-22 Installation & user guide

Auralex Acoustics

Auralex Acoustics GeoFusor-22 Installation & user guide

on stage KS7365-EJ Assembly instructions

on stage

on stage KS7365-EJ Assembly instructions

Behringer Racktuner BTR2000 manual

Behringer

Behringer Racktuner BTR2000 manual

manuals.online logo
manuals.online logoBrands
  • About & Mission
  • Contact us
  • Privacy Policy
  • Terms and Conditions

Copyright 2025 Manuals.Online. All Rights Reserved.