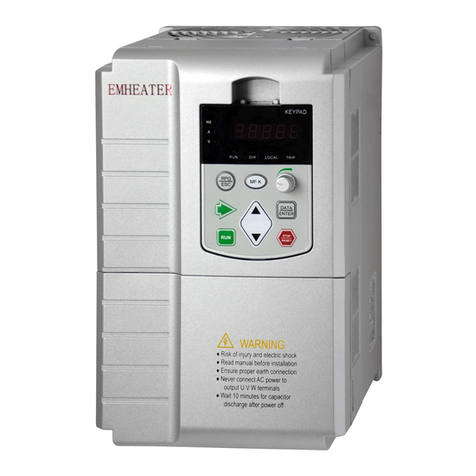
Emheater EMSD5 Series User manual


Safety Caution
Before product storage, installation, wiring, operation, inspection or maintenance, the user must be
familiar and comply with the following important matters to ensure to use the product safely .
Danger
Application
⚫Forbidden to use the product when it is exposed to water gas, corrosive gas and
combustible gas. Or it could cause an electric shock or a fire.
⚫Forbidden to use products in places with more direct sunlight, dust, salt and metal powder.
⚫Forbidden to use products in places where water, oil and medicine are dripping.
Caution
Wiring
⚫Please ground the grounding terminal reliably. Poor grounding may cause electric shock or
fire.
⚫Please do not connect 380V power supply to 220 V servo drives, otherwise it will cause
equipment damage and electric shock or fire.
⚫The U、V、W motor output terminal and the motor wiring terminal must be connected
one-to-one correspondence, otherwise the motor may cause equipment losing and
casualties caused by the over speed vehicle.
⚫Please fasten the power supply and motor output terminals, otherwise it may cause fire.
Operation
⚫When the mechanical equipment starts operation, it must match proper parameters. If it
does not adjust to the appropriate setting values, it may cause the mechanical equipment to
lose controlling.
⚫Before starting operation, please confirm if you can start emergency switch shutdown at
any time.
⚫Please test whether the servo motor is running normally without load firstly, and then
connect the load to avoid unnecessary loss.
⚫Do not switch on and off power frequently, otherwise it will cause drive overheating.
Prohibition
Working
⚫When the motor is running, it is forbidden to touch any parts in rotation, otherwise it will
cause casualties.
⚫When the equipment is in operation, it is forbidden to move connecting cables, otherwise it
will cause injury to the person or damage to the equipment.
Version: V1.0.0


Table of Content
Chapter 1 Product Inspection And Installation .............................................................................. 1
1.1 Product Inspection ........................................................................................................... 1
1.2 Product Front Panel ......................................................................................................... 1
1.3 Product Installation.......................................................................................................... 3
Chapter 2 Servo Specifications...................................................................................................... 6
2.1 Servo Drive Specification................................................................................................ 6
2.2 Servo Drive Naming Rule ............................................................................................... 7
2.3 Servo Motor Naming Rule............................................................................................... 7
2.4 Servo Motor And Matched Servo Drive List ................................................................... 8
Chapter 3 Drive and Motor Dimension ......................................................................................... 9
3.1 Drive Dimension.............................................................................................................. 9
3.2 Motor Dimension........................................................................................................... 10
Chapter 4 Wiring and Introduction .............................................................................................. 12
4.1 Servo System Wiring ..................................................................................................... 12
4.2 Servo driver terminals Introduction ............................................................................... 14
4.3 Main Circuit Terminal ................................................................................................... 15
4.4 CN1 Control Signal Terminal ........................................................................................ 16
4.5 CN2 Encoder Signal Terminal ....................................................................................... 28
4.6 CN3 And CN4 Terminal Definition ............................................................................... 30
4.7 Anti-jamming Countermeasures of Power Wiring ......................................................... 33
Chapter 5 Running Mode and Wiring.......................................................................................... 37
5.1 Position Control Mode................................................................................................... 37
5.2 Speed Control Mode Wiring .......................................................................................... 43
5.3 Torque Control Mode..................................................................................................... 46
5.4 Origin Regression Function And Relevant Parameters Introduction ............................. 48
5.5 Pre-operational Inspection ............................................................................................. 50
Chapter 6 Operation And Display................................................................................................ 52
6.1 Drive Panel Introduction................................................................................................ 52
6.2 Main Menu .................................................................................................................... 52
6.3 Steps To Set Parameters................................................................................................. 53
6.4 Status Monitoring .......................................................................................................... 53

6.5 Analog Quantity Zeroing Adjustment ............................................................................ 55
6.6 Encoder Selection .......................................................................................................... 55
6.7 How To Reset Default Parameters ................................................................................. 55
Chapter 7 Parameters................................................................................................................... 56
7.1 PA Group ....................................................................................................................... 56
7.2 P3 Group Parameters For Multifunctional Terminals .................................................... 71
7.3 P4 Group Parameters For Internal Position Command.................................................. 78
Chapter 8 Fault and Troubleshooting........................................................................................... 84

EMSD5 AC Servo Manual Chapter 1 Product Inspection And Installation
1
Chapter 1 Product Inspection And Installation
1.1 Product Inspection
This product has made the complete function test before delivery, please check below points
After unpacking. (for prevented the product to be abnormal owing to shipping process, please
make detail inspection as the following items after breaking the seal:)
⚫(Inspect the types of servo driver and servo motor and ensure that are the same types in the
order form.) The purchased product is identical with your desired.
⚫Please do not power it on if there is any damage on the product appearance.
⚫Inspect the parts of servo driver and servo motor to see any loosen parts such as loosened or
fallen off screw.
⚫Rotate the servo motor shaft by hand and should be smooth rotation. But the servo motor
with holding brake is unable to rotate directly.
If there is any break down item or abnormal phenomenon mentioned above, please contact with
the dealer immediately.
1.2 Product Front Panel
Fig.1-1 EMSD5-A Front Panel Introduction

Chapter 1 Product Inspection And Installation EMSD5 AC Servo Manual
2
Fig.1-2 EMSD5-B Front Panel Introduction
Item
Terminal
Introduction
A
B
①
①
CN3、CN4
Communication terminal
②
②
CN1
Input and output control signal terminal
③
-
CN2
Encoder signal terminal
④
L1,L2
Power supply terminal
-
③
CN2A
Encoder signal terminal for 2500ppr incremental encoder
-
④
CN2B
Encoder signal terminal for 17 bits absolute encoder
⑤
L1, L2, L3
Power supply terminal for 3 phases 220VAC
⑤
⑥
CHARGE
Bus voltage indicator. It is used to indicate the bus capacitance in a
charged state. When the indicator lights on, even if the power
supply is off, the internal capacitor of the servo unit may still have
a charge. Therefore, do not touch the power terminal when the
lights on to avoid electric shock.
⑥
⑦
P,D,C,N
Regeneration resistance terminal
⑦
⑧
U,V,W
Servo motor UVW connection terminal
⑧
⑨
PE
Ground terminal

EMSD5 AC Servo Manual Chapter 1 Product Inspection And Installation
3
1.3 Product Installation
1.3.1 Servo Drive Installation
⚫Installation direction
The normal mounting direction of the servo drive is vertical and upright..
⚫Fixed installation
During installation, please tighten the 2pcs M4 fixing screws at the back of the servo drive.
⚫Grounding
Be sure to ground the driver grounding terminal, otherwise there may be a risk of electric
shock or interference to produce wrong action.
⚫Wiring requirement
When connecting the drive, please wire the cable down (refer to the below picture) to avoid
any liquid attached on the cable and then it flows into the drive along with the cable.
Fig.1-3 Wring Direction Requirement
⚫Installation interval
Refer to Fig.1-4 for the distance between drives and installation intervals with other
devices,and please note that the picture indicates the smallest size, in order to ensure the
performance and life of the drives, please leave the full installation interval as far as
possible.
⚫Cooling
The servo drive adopts natural cooling mode and forced heat dissipation mode.
⚫Installation considerations
Prevent dust or iron chips from entering the servo drive when installing the electrical
controlling cabinet.

Chapter 1 Product Inspection And Installation EMSD5 AC Servo Manual
4
Fig.1-4 Installation Interval
1.3.2 Environment Condition For Installation
Since the environment conditions for servo driver installation have the direct influence to the
normal function and service life of the servo driver, therefore the environment conditions must be
conformed to the following conditions:
⚫Ambient temperature: 0 to 40℃; Ambient humidity: less than 80% (no condense).
⚫Storage temperature: -40 to 50℃; Storage humidity: less than 93% (no condense).
⚫Vibration: less than 0.5G.
⚫Preventive measure shall be taken against raindrop or moist environment.
⚫Avoid direct sunlight.
⚫Preventive measure shall be taken against corrosion by oil mist and salinity.
⚫Keep away from radioactive and inflammable substances.
⚫Free from corrosive liquid and gas.
1.3.3 Servo Motor Installation
⚫For horizontal installation:In order to prevent water, oil, etc. From entering inside of the
servo motor, please put the cable connector downward.
⚫For vertical installation: if the shaft of the servo motor is in upward direction with a speed
reducer, some prevention measure shall be taken43 against entering inside of the servo
motor by oil come from the speed reducer.
⚫In case of installation or removing the servomotor, please do not hit the servo motor with a

EMSD5 AC Servo Manual Chapter 1 Product Inspection And Installation
5
hammer, otherwise the shaft and the encoder can be damaged.
1.3.4 Motor Rotation Direction Definition
The motor rotating direction description in this handbook is defined as facing the shaft of the servo
motor, if the rotating shaft is in counterclockwise direction will be called as positive direction, or in
clockwise as reversal direction.
Fig.1-5 Motor Rotation Direction

Chapter 2 Servo Specifications EMSD5 AC Servo Manual
6
Chapter 2 Servo Specifications
2.1 Servo Drive Specification
Model
EMSD5-A
EMSD5-B
Power
0.05KW~1KW
1KW~3KW
Main Circuit
1 phase AC220V-15%~10%
50/60Hz
1 phase/3 phases AC220V-15%~10%
50/60Hz
Control Mode
0:Position.
1:Speed.
2:Torque.
3:Position and speed.
4:Position and torque.
5:Speed and torque
Protection
Function
Over speed, Over voltage, Under voltage,Overload, Abnormal of main
power, Abnormal encoder, Out of position error etc.
Monitor Function
Speed, Current position, Command pulse accumulation, Position deviation,
Motor torque, Motor current, Running state etc.
Control Input
1:Servo on
2:Alarm clearance
3:CCW drive inhibition
4:CW drive inhibition
5:Deviation counter clearance
6:Command pulse inhibition
7:CCW torque limit
8:CW torque limit
Control Output
Servo ready/Servo alarm/Positioning completion/Mechanical braking
Regeneration
Braking
Built-in/ Built-out
Load
Less than 3 times of motor torque
Display
5 LED digital display and 4 keys
Communication
RS485
Position Control
Mode
Input
Mode
0:pulse+direction
1:CCW/CW pulse
2:A/B phase orthogonal pulse
3:Internal position control
Electronic gear ratio
1-32767/1-32767

EMSD5 AC Servo Manual Chapter 2 Servo Specifications
7
2.2 Servo Drive Naming Rule
EMSD5 - A S 040
Serial No.
Definition
EMSD5 series ac servo drive.
A and B frame
S: Simple load pulse
H: Heavy load pulse
E: Ether CAT
The branch power range: 040: 400W; 075: 750W.
2.3 Servo Motor Naming Rule
EM - 60 S 024N 30 S 2 2
Serial No.
Definition
EMHEATER Servo Motor
Flange: 60(mm),80(mm), 110(mm),130(mm)
Rated voltage: 220V(S)
Rated torque(×0.1N.m): 048=4.8N.m.
Rated speed(×100rpm): 30=3000rpm.
Encoder resolution:
S: 17 bit absolute encoder
I: 2500ppr incremental encoder
W: with battery
R: resolver
1: No
2: with oil seal
3: with brake
4: with oil seal and brake
1: Flat without keys.
2: Flat with keys and screw thread

Chapter 2 Servo Specifications EMSD5 AC Servo Manual
8
2.4 Servo Motor and Matched Servo Drive List
Table 2-1
Flange
Model
Power
(W)
Speed
(RPM)
Matched Drive
Encoder
60mm
EM-60S006N30S22
200
3000
EMSD5-A
17-bit
absolute
encoder
EM-60S013N30S22
400
3000
80mm
EM-80S024N30S22
750
3000
EMSD5-A
EM-80S032N30S22
1000
3000
110mm
EM-110S020N30I22
600
3000
EMSD5-B
2500ppr
incremental
encoder
EM-110S040N20I22
800
2000
EM-110S040N30I22
1200
3000
EM-110S050N30I22
1500
3000
EM-110S060N20I22
1200
2000
EM-110S060N30I22
1800
3000
130mm
EM-130S040N25S22
1000
2500
17-bit
absolute
encoder
EM-130S050N25S22
1300
2500
EM-130S060N25S22
1500
2500
EM-130S077N25S22
2000
2500
EM-130S100N10S22
1000
1000
EM-130S100N15S22
1500
1500
EM-130S100N25S22
2600
2500
EM-130S150N15S22
2300
1500
EM-130S150N25S22
3800
2500
1. The code 02430 means the motor rated toque is 2.4N.m and rated speed is
3000rpm.
2. The rated power: P=0.1047×N×T=0.1047×2.4×3000=753.84W≈0.75KW.
T=rated torque, N=rated speed.

EMSD5 AC Servo Manual Chapter 3 Drive and Motor Dimension
9
Chapter 3 Drive and Motor Dimension
3.1 Drive Dimension
The user can install the servo drive with the bottom plate and the installed direction is
perpendicular to the installation facing. Recommended to cool the servo drive with fan or natural
cooling.
Fig.3-1 EMSD5-A dimension
Fig.3-2 EMSD5-B dimension

Chapter 3 Drive and Motor Dimension EMSD5 AC Servo Manual
10
3.2 Motor Dimension
● Flange 60mm
Fig.3-3 Flange 60mm And Table 3-2
Model
W
L
LE
S
LA
LB
LC
LD
M
EM-60S006N30S22
60
72
70
14
50
25
5
30
4
EM-60S013N30S22
60
90
70
14
50
25
5
30
4
●Flange 80mm
Fig.3-4 Flange 80mm And Table 3-3
Model
W
L
LE
S
LA
LB
LC
LD
M
EM-80S024N30S22
80
96
90
19
70
25
6
38
6
EM-80S032N30S22
80
113.5
90
19
70
25
6
38
6
EM-80S040N25S22
80
191
90
19
70
25
6
35
6
◆EMSD5-AS040 doesn’t have the heat sink with a fan.

EMSD5 AC Servo Manual Chapter 3 Drive and Motor Dimension
11
● Flange 130mm
Fig.3-5 Flange 130mm And Table 3-2
Model
W
L
LE
S
LA
LB
LC
LD
M
EM-130S040N25S22
130
166
145
22
110
42
6
57
6
EM-130S050N25S22
130
171
145
22
110
42
6
57
6
EM-130S060N25S22
130
179
145
22
110
42
6
57
6
EM-130S077N25S22
130
192
145
22
110
42
6
57
6
EM-130S100N10S22
130
213
145
22
110
42
6
57
6
EM-130S100N15S22
130
213
145
22
110
42
6
57
6
EM-130S100N25S22
130
209
145
22
110
42
6
57
6
EM-130S150N15S22
130
241
145
22
110
42
6
57
6
EM-130S150N25S22
130
231
145
22
110
42
6
57
6

Chapter 4 Wiring and Introduction EMSD5 AC Servo Manual
12
Chapter 4 Wiring and Introduction
4.1 Servo System Wiring
4.1.1 Servo Drive Wiring
Fig.4-1Servo System Wiring

EMSD5 AC Servo Manual Chapter 4 Wiring and Introduction
13
4.1.2 Wiring Introduction
Wiring Notes:
⚫The control cable length should be less than 3 meters and the encoder cable length 20
meters.
⚫Check that the power supply and wiring of L1,L2 or L1,L2,L3 are correct.
⚫Please do not connect to 380V power supply.
⚫The output terminals(U,V,W ) must be connected with the servo motor connections(U,V,W )
correspondently, otherwise the servo motor will stop or over speed. However, by
exchanging three-phase terminal cannot cause the motor to reverse; this point is different
with asynchronous motor.
⚫Earthed wiring must be reliable with a single-point connection.
⚫Pay attention to the correct direction of freewheel diode which is connected with the delay
at the output terminal, other can cause the output circuit breakdown.
⚫In order to protect the servo driver from noise interference that can cause malfunction,
please use an insulation transformer and noise filter on the power lines.
⚫Wiring the power cables(power supply , main circuit ,etc) at a distance over 30cm away
from the control signal cables, do not lay them together.
⚫Install a non-fuse circuit breaker that can shut off the external power supply immediately
for in case of the servo driver fault.
4.1.3 Electric Wire Specifications
Connect Terminal
Symbol
Wire Specification
Main Power Supply
L1, L2, [L3]
1.5~4mm2
Servo Motor
U, V, W
1.5~4mm2
Ground
1.5~4mm2
Control Signals
CN1
≧0.14mm2(AWG26), Shielded.
Encoder Signals
CN2
≧0.14mm2(AWG26), Shielded.
Regenerative
Resistors Terminals
P、D/P、C
1.5~4mm2
◆Must use a twisted pair wire cable for the encoder signal wiring. If the encoder
signal cable is too long(>20m), in which the encoder power supply can be
insufficient, may use multi wires or thick wire for the power supply wiring.

Chapter 4 Wiring and Introduction EMSD5 AC Servo Manual
14
4.2 Servo driver terminals Introduction
Fig.4-2EMSD5-A Drive Terminals
Fig.4-3EMSD5-B Drive Terminals

EMSD5 AC Servo Manual Chapter 4 Wiring and Introduction
15
4.3 Main Circuit Terminal
4.3.1 Main Circuit Terminal Introduction
Fig.4-4Main Circuit Terminal
Terminal Name
Symbol
Detailed Explanation
Main Power Supply
L1、L2
Connect to external AC power supply ,1 phase
220VAC -15%~+10%,50/60Hz.
L1、L2、L3
Connect to external AC power supply ,3 phases
220VAC -15%~+10%,50/60Hz.
NC
Null
Regenerative Resistance
P、D
When use thebuilt-in resistor, please connect P and D.
P、C
When the external regeneration resistance is required,
please disconnect P and D and crossover it to terminal
P and C. Leaving N disconnected.
Servo Motor
U、V、W
UVW phase output to servo motor.
Ground with servo motor and power supply.
4.3.2 Regeneration Resistance Connection
If use the built-in resistor, please connect P and D( a 4 pins connector for built-in resistor has
◆The above picture shows the pins arrangement of the drive.
◆ The built-in resistor has been set as default by factory: P and D connector
are in short-cut condition.
This manual suits for next models
2
Table of contents
Other Emheater DC Drive manuals
Popular DC Drive manuals by other brands
Vicon
Vicon 239-03-00 Series Installation & configuration guide
Danfoss
Danfoss VLT FC 300 instruction manual

Lenze
Lenze 8200 motec Mounting instructions

Conrad
Conrad 57 00 56 operating instructions
Franklin Electric
Franklin Electric Fhoton 2 installation guide
Aumuller
Aumuller FVUI Assembly and commissioning instructions
Parker
Parker AC20 Series Hardware installation manual
Assurance Engineering
Assurance Engineering Emergency Lighting Si-36 instruction manual

SEW-Eurodrive
SEW-Eurodrive MOVITRAC B System manual
Lambda
Lambda SR474 Operation manual
Nidec
Nidec DFS Series Power Installation Guide
Moons'
Moons' STF-Multi axis Series Hardware manual
