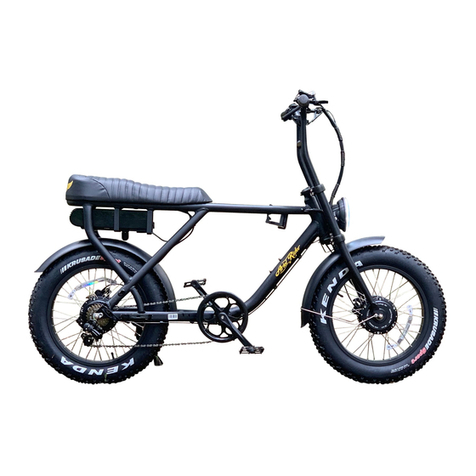
EMOJO PROWLER User manual

OWNER’S MANUAL

1
3
5
13
16
17
19
20
21
2
6
7
8
9-12
14
18
4
15
Front wheel installation and seat adjustment
PAS Control
Contact us 22

Instructions
1.
4.
5.
8.
9.
1

2

Overall Bike
L
a
y
out
Actual product may slightly differ from this picture
P
edals
S
te
m
B
atte
r
y
Mid-Drive
E
lect
r
ic
m
oto
r
Gears cassette
Derrailleur
S
eat pole
S
eat pole
qu
ick
r
elease le
v
e
r
Fr
ont shocks
H
andle
b
a
r
ad
ju
st
m
ent
cla
m
p
3
Handlebar c
onnecto
r
s

Diagram of the Electric Bicycle:
4

Main Technical Parameters
Item Index
I
5

Hand Throttle Control
EM
J
5
6

Gears
MOJO
9
7

Correct Operation Stages
ON
(
)
4
Motor On/Pedal Assist
Power
2
B:
Th
rottle onl
y
Y
M
Note:
8
2
O
/O

Pedal Assist Mode Control
Your model EM
OJO
PROWLER
is equipped with an handlebar
control module to turn on and set the P
AS
(
Pedal
A
ssist
)
.
B
e
f
ore
you turn the control on, make sure the battery is fully inserted into
the bike, properly connected and the on/off switch is in the on "I"
position.
PEDAL ASSIST
AD
JU
STMENT
B
U
TTONS
B
U
TTON
F
OR HEADLIGHT
INSTALLATION
(OPTIONAL)
PO
W
ER B
U
TTON
Press the power button on the control module
located near the left grip on the handlebars to tum it on.
You can adjust the pedal assist power level to have more power
by hitting the [ +] button (right button) and can move to a lower
level power by hitting the [-] button (left button).
When not riding your bike, you can tum off the meter by holding
down the power button (M button) for several seconds.
C
ont
r
ols
1-Power On/Off
Press the Power button to power on the display. To power off display and power supply to the
bicycle press and hold for 3 seconds
2-Lights
There is a preset button to turn on
'
off a headlight if you shall install one
(
optional e
q
uipment,
headlight is not included
)
3-Menu
Press the
"
i
"
button on the control to access and navigate the menus on the screen.
9
MEN
U
B
U
TTON
S
p
eed
li
m
it s
e
ttin
g
s
When the speed field displays SPL, the distance field displays the value of
the speed limit. Minimum speed limit is 12km/h,
maximum speed limit is 60km/h.
After setting, Briefly Press (< 0.3 seconds) to enter the menu of battery
com-munication.

LCD DISPLAY CONTROLS
Please read the following steps and images to help you understand how
to read and operate all the functions.
Press the power button on the LCD screen module located near
the left grip on the handlebars to tum it on.
You can adjust the pedal assist power level to have more power
by hitting the [ +] button (top button) and can move to a lower
level power by hitting the [-] button (bottom button).
When not riding your bike, you can tum off the meter by holding
down the power button for several seconds.
10
•Speed mode: average speed (AVG km/h),
maximum speed (MAXS km/h).
•Speed display: display of the speed, km/h or mph.
•Battery level: 10-segment battery indication; the
voltage that each segment represents can be
customized.
•Headlight indication: only shows when headlight or
backlight are on.
•Error display: When a fault is detected the wrench
symbol will be displayed.
•Maintenance warning: When there is a need for
maintenance the symbol SERVICE
will be displayed (riding distance or the number of
battery charge cycles exceed the set value,
function can be deactivated).
•Level indication: The chosen level 1–5 will be
displayed; if there is no numeric display, it means
that there is no assistance (by the motor). If the
rider is walking and pushing the e-bike, walk will
be displayed.
•Distance mode: display of the maximum speed
MXA, average speed AVG, the single-trip distance
TRIP, the total distance TOTAL, remaining
distance TO GO, power W, consume energy C.
•Distance indication: display of the distance
depending on the setting.
•Walk assistance
Press the " i" button to switch between distance and speed.
Single-trip distance (TRIP km) , total distance (TOTAL km)
maximum speed (MAXS km/h) ,average riding speed (AVG
km/h) , remaining distance(RANGE) and energy
consumption (C) are displayed in successive order.(Switch
mode interface as below)
•Switch between distance and speed modes
Press the "-" button for 2 seconds. The e-bike enters the
walk assistance mode, and the symbol WALK is displayed.
Once the key is released, the e-bike will exit the walk as-
sistance mode.)

Pedal Assist Mode LCD Screen
PARAMETER
SETTINGS
11
1
6
7
8
9
10
11
2
3
4
5
1-Battery level
2-Maintenance warning
3-Headlight indicator
4-Distance mode
5-Assistance
6-Malfunction indication
7-Menu
8-Speed display mode
9-Speed mode
10-Distance indicator
11-PAS level indicator
Headlight button
Power button
Mode button
Up button
Down button
•Items to be Set
1 〉Data reset
2 〉Km/mile
3 〉Light sensitivity
4 〉Display backlight brightness
5 〉Automatic off time
6 〉Maintenance warning settings
7 〉Check wheel diameter
8 〉Speed Limit Setting
9 〉Speed model
10 〉Battery infromation10 error code
•Setting Preparation
•When the display is active, press twice (interval < 0.3 seconds). The system
will enter the MENU parameter setting state, in which the display parameters
can be set.
•If no operation is performed for 10 sec-onds, the display will return to the
normal riding display.
•In the parameter setting state, when the parameter you want to set begins to
flash, press the + or - buttons to adjust the value of parameters. Press the "i"
button to switch between parameters to be set. Press the "i" button twice to
exit the submenu.
•Press the "i" twice (interval < 0.3 seconds) –the display enters the MENU
state. In the speed field tC is displayed. If you press a "y" is also displayed.
Now all temporary data, e.g. maximum speed (MAXS), average speed
(AVG) and single trip distance (TRIP) can be cleared. Briefly press the "i"
button (< 0.3 sec-onds) to enter the km/mile setting interface.
•If you do not reset the data, the single trip distance and the accumulated
total rid-ing time will be automatically cleared when the accumulated total
riding time exceeds 99 hours and 59 minutes.
•* The data will not be cleared when the display’s light-sensing function is set
to 0 or when it is switched off!
•Km/mile
When the speed field displays S7, press
+/- to switch between km/h and mph, or to set km or mile. After this setting, briefly press the
"i" button (< 0.3 seconds) to enter the setting interface of light sensitivity. Default display is
km.

12
Error code Error definition Error-shooting method
“04” The throttle has not returned Check if throttle is stuck or has returned
“05” Throttle fault Check the throttle
“07” Overvoltage protection Check the battery voltage
“08” Motor hall signal cable fault Check the motor module
“09” Motor phase cable fault Check the motor module
“11” Controller temperature sensor failure Check the controller
“12” Current sensor failure Check the controller
“13” Battery temperature fault Check the battery
“14” Motor temperature fault Check motor
“21” Speed sensor fault Check installation position of speed sensor
“22” BMS communication fault Replace the battery
“30” Communication fault Check the controller connection

Charging Methods and Steps
Slide open the protective hatch to access the charging port
13

Attention:
Battery mounting and removal
in
ing
Insert the battery into the designated area behind the seat pole, aligning the battery
guide and botto
m
power socket. Aer hearing a click, the battery
is properly installed.
U
se the pro
v
ided keys to lock the battery to the
f
ra
m
e.
B
B
14

Fro
nt
wh
eel inst
a
ll
a
ti
o
n
z
z
E
OJO
Assembly of the ont wheel unit:
I
t
Adjustment of Saddle:
Sa Line
Fig A.
Free rotation between disc
and caliper.
15

Disc Brakes
E
OJO
10
1
j
Figure 1
WARNING:
(b)
New Bres Bed-in Procedure
1
Important Note: Do not lock up the wheels at any point
2
3
4
16

4. Pedal Installation and Adjustment:
5. Check and Adjustment of Tire Pressure
6. Brake Adjustment
4
0
PSI
10CM
A.
z
: 20 x 4.0 K1188
Tube size:
x 4
17

Magnetic disk
3-Smm
Sensor
Freewheel
Chain
Common Faults and Maintenance
Common Faults Troubleshooting
18
Table of contents


