manuals.online logo
Brands
  1. Home
  2. •
  3. Brands
  4. •
  5. Endress+Hauser
  6. •
  7. Measuring Instrument
  8. •
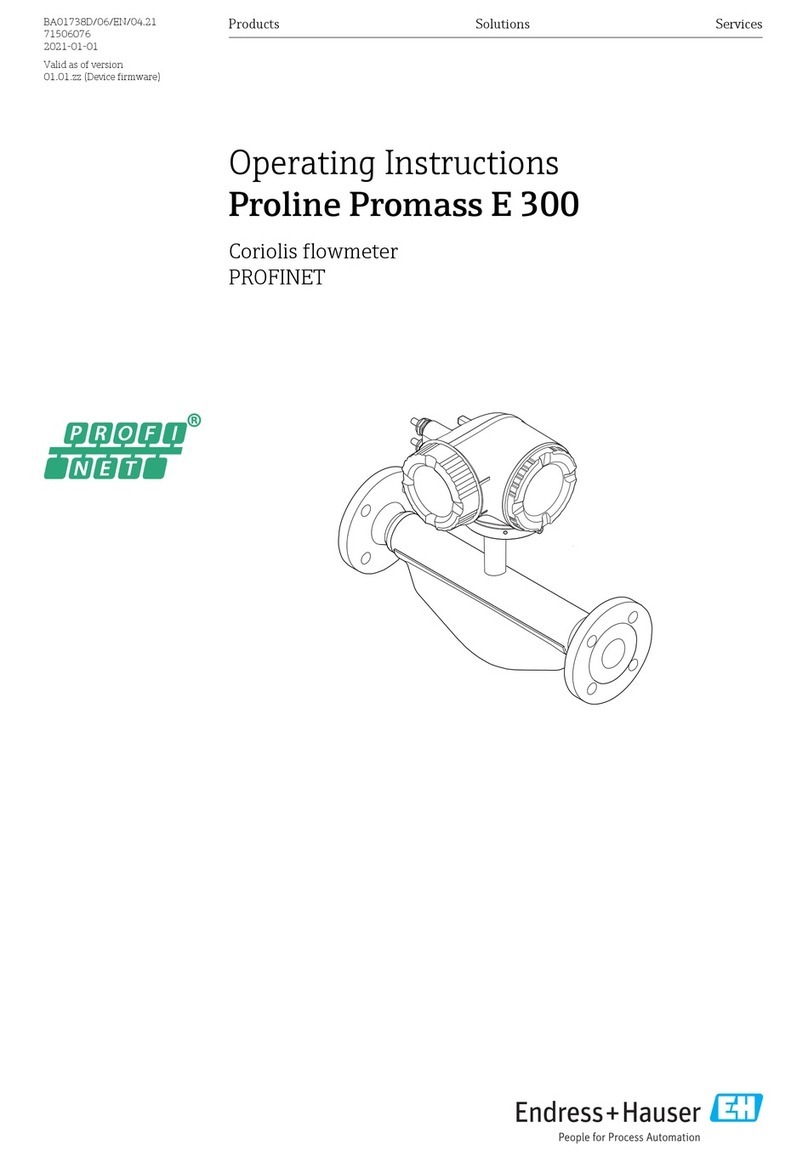
  9. Endress+Hauser RIA452 User manual

Endress+Hauser RIA452 User manual

BA265R/09/en/06.08
71072364
Software version
2.01.xx
Operating Instructions
RIA452
Panel meter
RIA452 Endress+Hauser
2573
m³/min
RIA452
2Endress+Hauser
Brief overview
For rapid and easy commissioning:
Block circuit diagram
G09-RIA452xx-05-00-xx-en-000
Fig. 1: RIA452 block circuit diagram
Safety instructions →ä3
Æ
Installation →ä5
Æ
Wiring →ä7
Æ
Display and operating elements →ä15
Æ
Commissioning →ä18
Device configuration - explanation and use of all the configurable
device functions with the associated value ranges and settings.
RIA452 Safety instructions
Endress+Hauser 3
1 Safety instructions
Safe operation of the process display unit is only guaranteed if these Operating Instructions have
been read and the safety instructions have been observed.
1.1 Designated use
The process display unit analyzes analog process variables and depicts them on its multicolored
display. Processes can be monitored and controlled using analog and digital outputs and limit relays.
The device provides the user with a wide range of software functions for this purpose.
Power can be supplied to 2-wire sensors with the integrated transmitter power supply.
– The device is seen as an associated electrical apparatus and may not be installed in hazardous
areas.
– The manufacturer does not accept liability for damage caused by improper or non-designated use.
The device may not be converted or modified in any way.
– The device is designed for installation in a panel and may only be operated in an installed state.
1.2 Installation, commissioning and operation
This device has been constructed to state-of-the-art technology and meets all applicable standards
and EU directives. The device, however, can be a source of application-related danger if used
improperly or other than intended.
Installation, wiring, commissioning and maintenance of the device must only be carried out by
trained technical personnel. They must have read and understood these Operating Instructions and
must follow the instructions they contain. The information in the electrical wiring diagrams (see
Section 4 'Wiring') must be observed closely.
1.3 Operational safety
Technical improvement
The manufacturer reserves the right to adapt technical details to the most up-to-date technical
developments without any special announcement. Contact your local sales center for information
about the current state of and possible extensions to the Operating Instructions.
1.4 Return
For a return, e.g. in case of repair, the device must be sent in protective packaging. The original
packaging offers the best protection. Repairs must only be carried out by your supplier's service
organization.
!Note!
Please enclose a note describing the fault and the application when sending the unit in for repair.
Identification RIA452
4Endress+Hauser
1.5 Notes on safety conventions and icons
The safety instructions in these Operating Instructions are labeled with the following safety icons
and symbols:
"Caution!
This symbol indicates an action or procedure which, if not performed correctly, can result in
incorrect operation or destruction of the device.
#Warning!
This symbol indicates an action or procedure which, if not performed correctly, can result in injury,
a safety hazard or the destruction of the device.
!Note!
This symbol indicates an action or procedure which, if not performed correctly, can have an indirect
effect on operation or trigger an unexpected response on the part of the device.
2 Identification
2.1 Device designation
2.1.1 Nameplate
Compare the nameplate on the device with the following diagram:
G09-RIA452xx-18-00-xx-xx-000
Fig. 2: Nameplate of the process display unit (example)
1 Order code and serial number of the deviceTab/
2 Power supply
3 Software version number
4 Ambient temperature
5 Power consumption
2.2 Scope of delivery
The scope of delivery of the process display unit comprises:
• Process display unit for panel mounting
• Multilanguage Brief Operating Instructions as hard copy
• Operating Instructions on CD-ROM
• CD-ROM with PC configuration software and interface cable RS232 (optional)
• Fixing clips
• Sealing ring
!Note!
Please note the device accessories in Section 8 'Accessories' in the Operating Instructions.
RIA452-A211A11A
12345B123BE
Software:
Order Code:
Ser.No.:
Made in Germany 20XX
-20°C (-4°F) < Ta < 60°C (140°F)
20-36V 20-28V 50/60Hz
ILU10xA 24VA
1
2
3
5
4
RIA452 Installation
Endress+Hauser 5
2.3 Certificates and approvals
CE mark, declaration of conformity
The process display unit is designed to meet state-of-the-art safety requirements, has been tested
and left the factory in a condition in which it is safe to operate. The device meets the relevant
standards and directives as per IEC 61 010-1 "Safety requirements for electrical equipment for
measurement, control and laboratory use".
The device described in these Operating Instructions thus meets the legal requirements of the EU
directives. The manufacturer confirms that the device has been tested successfully by affixing the
CE mark.
3 Installation
3.1 Installation
The permitted ambient conditions (see Section 10 "Technical data" in the Operating Instructions)
must be observed when installing and operating. The device must be protected against the effects
of heat.
3.1.1 Dimensions
Please note the installation depth of 150 mm (5.91 inches) for the measuring device plus cable.
Additional dimensions are provided in →Fig. 3 and Section 10 "Technical data" in the Operating
Instructions.
3.1.2 Mounting location
Installation in panel with cutout 92x92 mm (3.62x3.62 inches) (as per 'EN 60529'). The mounting
location must be free from vibrations.
3.1.3 Orientation
Horizontal +/- 45° in every direction.
Installation RIA452
6Endress+Hauser
3.2 Installation instructions
The required panel cutout is 92x92 mm (3.62x3.62 inches). Please note the installation depth of
150 mm (5.91 inches) for the measuring device plus cable.
G09-RIA452xx-17-01-06-xx-001
Fig. 3: Installation in panel
1. Push the device with the sealing ring (item 1) through the panel cutout from the front.
2. Keep the device horizontal and suspend the two fixing clips (item 2) in the recesses provided.
3. Tighten the screws of the fixing clips evenly with a screwdriver.
4. Remove the protective strip from the display.
The dimensions of the process display unit are provided in the "Technical data" section of the
Operating Instructions.
RIA452 Wiring
Endress+Hauser 7
4 Wiring
4.1 Quick wiring guide
G09-RIA452ZZ-04-01-xx-en-000
Fig. 4: Terminal assignment of the process display unit (universal input →Page 9)
Terminal Terminal assignment Type
L/L+ L for AC
L+ for DC
Power supply
N/L- N for AC
L- for DC
NC Not connected
J1 Jumper for locking device operation via
hardware. If the jumper is set to J1, the
configuration cannot be modified.
!Note!
The device can always be configured with the
PC software via RS232 even if the jumper is set
to J1.
J2 Not connected
11 + 0/4 to 20 mA signal Current input
12 Signal ground (current)
Wiring RIA452
8Endress+Hauser
81 24 V sensor power supply 1 Transmitter power supply (optionally
intrinsically safe)
82 Ground, sensor power supply 1
41 Normally closed (NC)
Relay 142 Common (COM)
43 Normally open (NO)
51 Normally closed (NC)
Relay 252 Common (COM)
53 Normally open (NO)
44 Normally closed (NC)
Relay 345 Common (COM)
46 Normally open (NO)
54 Normally closed (NC)
Relay 455 Common (COM)
56 Normally open (NO)
141 Normally closed (NC)
Relay 5 (optional)142 Common (COM)
143 Normally open (NO)
151 Normally closed (NC)
Relay 6 (optional)152 Common (COM)
153 Normally open (NO)
144 Normally closed (NC)
Relay 7 (optional)145 Common (COM)
146 Normally open (NO)
154 Normally closed (NC)
Relay 8 (optional)155 Common (COM)
156 Normally open (NO)
96 Ground for digital status inputs
Digital inputs
97 + digital status input 1
197 + digital status input 2
297 + digital status input 3
397 + digital status input 4
Terminal Terminal assignment Type
RIA452 Wiring
Endress+Hauser 9
Universal input option
The device can be optionally equipped with a universal input instead of a current input.
G09-RIA452xx-04-10-xx-en-002
Fig. 5: Universal input terminal assignment
Terminal assignment
31 + analog output
Analog output (optional)
32 Ground, analog output
33 + digital output
Digital output (optional)
34 Ground, digital output
91 24 V sensor power supply 2
Transmitter power supply
92 Ground, sensor power supply 2
Terminal Terminal assignment Type
Terminal Terminal assignment
11 + 0/4 to 20 mA signal
12 Signal ground (current, voltage, temperature)
13 + 1 V, + thermocouples, - resistance thermometer signal (3/4 wire)
15 + resistance thermometer signal (4-wire)
17 + 30 V
19 + resistance thermometer power supply (3-wire/4-wire)
Wiring RIA452
10 Endress+Hauser
4.2 Connecting the device
"Caution!
Do not install or wire the device when it is connected to the power supply. Failure to comply with
this precaution can result in irreparable damage to the electronics.
4.2.1 Connecting the power supply
"Caution!
• Before wiring the device, ensure that the supply voltage corresponds to the specification on the
nameplate.
• For the 90 to 250 V AC version (power supply connection), a switch marked as a separator, as
well as an overvoltage organ (rated current ≤10 A), must be fitted in the supply line near the
device (easy to reach).
G09-RIA452xx-04-10-xx-xx-000
Fig. 6: Connecting the power supply
4.2.2 Connecting external sensors
!Note!
Active and passive sensors with analog, TC, resistance and RTD sensors can be attached to the
device.
Depending on the type of signal of the sensor in question, the terminals can be freely selected.
Current input 0/4 to 20 mA
G09-RIA452xx-04-10-xx-en-001
Fig. 7: Connection of the two-wire sensor to the current input 0/4 to 20 mA
RIA452 Wiring
Endress+Hauser 11
Universal input
G09-RIA452xx-04-10-xx-en-003
Fig. 8: Connection of the four-wire sensor, transmitter power supply and universal input
4.3 Post-connection check
Device condition and specifications Notes
Is the device or cable damaged (visual inspection)? -
Electrical connection Notes
Does the supply voltage match the specifications on the nameplate? 90 to 250 V AC (50/60 Hz)
20 to 36 V DC
20 to 28 V AC (50/60 Hz)
Are all of the terminals firmly engaged in their correct slots? Is the coding
on the individual terminals correct?
-
Are the mounted cables strain relieved? -
Are the power supply and signal cables correctly connected? See wiring diagram on the
housing
Are all screw terminals firmly tightened? -
Operation RIA452
12 Endress+Hauser
5Operation
5.1 Quick operation guide
M1 Analog input
INPUT
Signal typeConnection type* Curve Signal damping
Signal type Connection Curve Damp
Dimension Decimal point 0% value 100% value
Dimension Dec. point 0% value 100% value
Offset Comparat.
temperature*
Fixed comparat.
temp.*
Open circuit
detection
Offset Comp. temp. Const. temp. Open circ.
M2 Display
DISPLAY.
Assign numerical
display
Alternating display Assign bargraph Decimal point
bargraph
Ref. num. Displ. sw. Ref. bargraf Dec. point
Bargraph 0% value Bargraph 100% value Assign bargraph
Bar 0% Bar 100% Ref. bargraf
M3 Analog output*
ANALOG OUT
Assignment Damping Output range Decimal point
Ref. num. Out damp Out range Dec. point
0% value 100% value Offset Output in the event of
a fault
Out 0% Out 100% Offset Fail mode
Value in the event of a
fault
Simulation mA Simulation Volt
Fail value Simu mA Simu V
*) Only available if the option in question is installed in the device
RIA452 Operation
Endress+Hauser 13
M5 Digital input 1-
4
DIGITAL INP.
Function digital input 1-
4
Active level 1-4 Pump monitoring
sampling time
Function Level Sampl. time
M10
-
M17
Limit 1-4 (8)*
LIMIT
Assignment Function 1-4 (8) Decimal point Switch point A Switch point B
Ref. num Function Dec. point Setpoint A Setpoint B
Hysteresis or switch-
back gradient
Switching delay 1-4
(8) in seconds
Alternate function 1-4 Delay for 1st switch-
on every 24 h
Switch-on period for
switch-on every 24 h
Hysteresis Delay Alternate Sw. delay Sw. period
Display runtime 1-8 Display switch.
frequency 1-8
Reset switch.
frequency and
runtime
Relay simulation
Runtime Count Reset Simu relay
M18 Totalizer*
INTEGRATION
Signal source for
totalizer
Pre-
counter
Totalizer base Decimal point factor Conversion factor
Ref. Integr. Pre-counter Integr. base Dec. factor Factor
Dimension totalizer Decimal point
totalizer
Set pre-counter Set preliminary alarm Display totalizer
Dimension Dec. point T Set count A Set count B Totalizer
Reset totalizer Flow calculation Dimension of input
signal
Dimension of
linearized value
Decimal point for
formula
Reset total Calc flow Dim. Input Dim. flow Dec. flow
Decimal point for
display
Alpha value Beta value Gamma value C value
Dec. point Alpha Beta Gamma C
Khafagi- Venturi
channels
Iso-Venturi channels Venturi channels as
per British Standard
Parshall
channels
Parshall-
Bowlus
channels
Kha Venturi Iso-Venturi BST-Venturi Parshall Parshall-Bow
Rectangular weirs Rectangular weirs
with constriction
Rectangular weirs as
per NFX
Rectangular weirs as
per NFX with
constriction
Trapezoid. weirs
Rect. WTO Rect. WThr NFX Rect. WTO NFX Rect. WThr Trap. WTO
Triangular
weirs
Triangular weirs as
per British Standard
Triangular weirs as
per NFX
Width
V. weir BST V. weir NFX V. weir width
M19 Pulse output*
PULSE OUT
Decimal point pulse
value
Pulse value Pulse width Simulation pulse
output
Dec value Unit Value Pulse width Sim pulseout
*) Only available if the option in question is installed in the device
Operation RIA452
14 Endress+Hauser
M20 Min/Max
memory
MIN/MAX
Signal source for Min/
Max
Decimal point Display minimum
value
Ref. min/max Dec. point Min. value
Display maximum value Reset minimum vaule Reset maximum value
Max. value Reset min Reset max
M21 Linearizationta
ble
LIN-TABLE
Number of support
points
Dimension of
linearized value
Decimal point Y-axis Delete all support
points
Display all support
points
Counts Dimension Dec. Y value Del points Show points
M23
-
Mxx
Lin. support
points
NO 01 NO 32
X-axis Y-axis
X value Y value
M55 Operating
parameters
PARAMETERS
User code Limit value lock Program name Program version Pump alternation
function
User code Limit lock Prog. name Version Func. alt.
Relay lock time Relay failsafe mode Time for gradient
evaluation
Failsafe mode 4-20
mA input
Error limit 1
Lock time Rel. Mode Grad. Time Namur Range 1
Error limit 2 Error limit 3 Error limit 4 Display contrast
Range 2 Range 3 Range 4 Contrast
M56 SERVICE Only for service staff. The service code must be entered.
M57 EXIT Exit the menu. If you have changed parameters, you are asked whether you want to save the changes.
M58 SAVE Changes are saved and you exit the menu.
*) Only available if the option in question is installed in the device
RIA452 Operation
Endress+Hauser 15
5.2 Display and operating elements
!Note!
Remove the protective strip from the display as this restricts display legibility otherwise.
G09-RIA452xx-19-00-06-xx-000
Fig. 9: Display and operating elements
1) Green operating indicator, lights up when supply voltage is applied
2) Red fault indicator, flashes in event of sensor or device error
3) Limit value display: if power is supplied to a relay, the symbol is displayed.
4) Digital input status: green indicates ready for operation, yellow indicates a signal is present
5) Bar graph yellow, 42-section with orange/red range overshoot and undershoot
6) 7-digit 14-segment display in white for measured values
7) 9x77 DOT matrix in white for text, units and menu icons
8) Key or lock symbol indicates whether device operation is locked (see Section 5.3.3)
9) Jog/shuttle dial for local device operation
5.2.1 Display
Relay display
No power to relay: no display
Power to relay: (symbol lit)
Digital input status display
Digital input configured: (green)
1
2
3
4
5
6
7
8
9
123467 89
Range Display Relay Analog output Totalizer
Input current is
below the lower
error limit
Display " " Fault condition Set failsafe mode No totalizer
Input current above
lower error limit
and below lower
limitations of
validity
Display " " Normal limit value
behavior
Normal behavior with
max. 10% overrange.
No output < 0 mA/
0 V possible
Normal behavior
(negative totalizing
not possible)
Input current in
valid range
Display scaled
measured value
Normal limit value
behavior
Normal behavior with
max. 10% overrange.
No output < 0 mA/
0 V possible
Normal behavior
(negative totalizing
not possible)
Input current below
upper error limit
and above upper
limitations of
validity
Display " " Normal limit value
behavior
Normal behavior with
max. 10% overrange.
No output < 0 mA
possible.
Normal behavior
(negative totalizing
not possible)
Input current above
upper error limit
Display " " Fault condition Set failsafe mode No totalizer
Operation RIA452
16 Endress+Hauser
Signal at digital input: (yellow)
!Note!
Information on troubleshooting can be found in Sections 9.1 and 9.2 of the Operating Instructions.
5.3 Local operation
Operating menu activated by pressing the jog/shuttle dial for 3 seconds at least.
5.3.1 Operation via the jog/shuttle dial
A) 3-key function
B) Selection from list
5.3.2 Entering text
G09-RIA452ZZ-19-00-00-en-001
Fig. 12: Text entry
G09-RIA452ZZ-19-00-00-xx-002
Fig. 10: Operation via jog/shuttle dial
• Press = "Enter"
• Rotate in clockwise direction = "+"
• Rotate in counterclockwise direction = "-"
G09-RIA452ZZ-19-00-00-xx-003
Fig. 11: Selecting from list via jog/shuttle
dial
ÆArrow pointing down:
Option is at the top of the picklist. The other entries
become visible when the jog/shuttle is turned in the
clockwise direction.
Å
Æ
Both arrows visible:
User is in the middle of the picklist.
ÅArrow pointing up:
The end of the picklist is reached. The user moves back
towards the start when the jog/shuttle is turned in the
counterclockwise direction.
m³/h
1
m³/h
2
3
3
4
5
2
Jog/shuttle dial
pressed briefly,
then next character
Turn to
right/left
Entry
accepted
Entry
rejected
Turn to
right/left,
the symbol
“ “ can be used
to jump to the
previous character.
Jog/shuttle dial
pressed longer than
1 s and released again
Jog/shuttle dial pressed
Jog/shuttle dial
pressed briefly
Jog/shuttle dial pressed
longer than 3 sec.
RIA452 Operation
Endress+Hauser 17
Possible characters
The following characters can be entered:
Space +ABCDEFGHIJKLMNOPQRSTUVWXYZabcdefghijklmnopqrstuvwxyz0123456789/
\%°23+-.;:*() followed by return symbol (arrow to left)
5.3.3 Disabling the programming mode
User code
The configuration can be protected against unintentional access by means of a four-digit code. This
code is defined in menu item 55 "Parameter/user code". All the parameters remain visible but can
only be changed after entering the user code.The "key" symbol is shown on the display. If the limit
values are also to be locked, the "Limit code" must be set to "On" in menu item 55. Limit values can
then only be changed after entering the user code. If the limit code is set to "Off", limit values can
be changed without entering the user code. All the other parameters are locked, however.
Hardware locking
In addition, configuration can also be locked using a connector on the rear of the device (see
drawing). This is indicated by the "padlock" symbol on the display.
To hardware-lock the measuring device, insert the jumper into position J1 in the top right-hand
corner on the rear of the device.
G09-RIA452ZZ-19-00-00-xx-004
Fig. 13: Position of the jumper on the rear of the device
!Note!
The hardware lock does not affect the PC operating software.
Item
No.
Description
1 Activate the operating menu by pressing the jog/shuttle dial for at least 3 seconds. The first
character then starts flashing.
2 You can change the flashing (selected) character by turning the jog/shuttle dial (see "Possible
characters" in the next paragraph). You can go back to the previous character by selecting the
back symbol (arrow to left).
3 Press the jog/shuttle dial to accept the selected character and to switch to the next character.
4 Press the jog/shuttle dial briefly for the last character to accept the entry.
5 Press the jog/shuttle dial for longer than 1 second (max. 2 seconds) to reject the entry at the
point in question.
Commissioning RIA452
18 Endress+Hauser
6 Commissioning
6.1 Function check
Make sure that all post-connection checks have been carried out before you commission your
device:
• Checklist Section 4.3 'Post-connection check'
!Note!
Remove the protective strip from the display as this restricts display legibility otherwise.
6.2 Switching on the measuring device
Once the operating voltage is applied, the green LED indicates that the instrument is operational.
• When the unit is delivered, the device parameters are used as per the factory settings.
• When commissioning a device already configured or preset, measuring is immediately started as
per the settings. The limit values only switch once the first measured value has been determined.
• The limit values are only activated as per their configuration once a valid measured value is
present.
6.3 Device configuration
This section describes all the configurable instrument parameters with the associated value ranges
and factory settings (default values, marked in bold).
6.3.1 Analog input - INPUT/M1
All the parameters that can be selected for the input can be found under the analog input menu item
which is marked as INPUT in the device.
Function
(menu item)
Parameter setting Description
Signal type 4 - 20 mA
0 - 20 mA
0 - 5 mA (*)
0 - 100 mV (*)
0 - 200 mV (*)
0 - 1 V (*)
0 - 10 V (*)
± 150 mV (*)
± 1 V (*)
± 10 V (*)
± 30 V (*)
Type B (IEC584) (*)
Type J (IEC584) (*)
Type K (IEC584) (*)
Type L (DIN43710) (*)
Type L (GOST) (*)
Type N (IEC584) (*)
Type R (IEC584) (*)
Type S (IEC584) (*)
Type T (IEC584) (*)
Type U (DIN43710) (*)
Type D (ASTME998) (*)
Type C (ASTME998) (*)
Selects the signal type of the connected sensor. Parameters
marked with an asterisk (*) can only be selected with the
universal input option.
RIA452 Commissioning
Endress+Hauser 19
Signal type PT50 (GOST) (*)
PT100 (IEC751) (*)
PT100 (JIS1604) (*)
PT100 (GOST) (*)
PT500 (IEC751) (*)
PT500 (JIS1604) (*)
PT500 (GOST) (*)
PT1000 (IEC751) (*)
PT1000 (JIS1604) (*)
PT1000 (GOST) (*)
Cu50 (GOST) (*)
Cu100 (GOST) (*)
30 - 3000 Ohm (*)
Selects the signal type of the connected sensor. Parameters
marked with an asterisk (*) can only be selected with the
universal input option.
Connection 3 Wire
4 Wire
Configures the sensor connection in 3-wire or 4-wire
technology. Can only be selected for "Signal type" 30-3000
Ω, PT50/100/1000, Cu50/100
Curve Linear
Quad.
°C
°F
Kelvin
Linear or quadratic (quad.) characteristic of the sensor
used. Can be selected for analog signals. °C, °F, Kelvin
physical measured variable, can be selected for temperature
sensors.
Damp 0..99.9
0
Signal damping of measuring input with 1st order low pass.
Time constant can be selected from 0 to 99.9 sec.
Dimension XXXXXXXXX
%
The technical unit or an arbitrary text for the measured
value of the sensor can be configured here. Max. length 9
characters.
Dec. point XXXXX
XXXX.X
XXX.XX
XX.XXX
X.XXXX
Number of places after the decimal point for displaying the
measured value.
0% value -99999..99999
0
Start value of measured value, can be selected for analog
signal types
100% value -99999..99999
100.0
End value of measured value, can be selected for analog
signal types
Offset -99999..99999
0.0
Shifts the zero point of the response curve. This function is
used to adjust the sensor.
Comp. temp Intern
const
Comparative temperature for thermocouple measurement.
An internal cold junction (= Intern) or a constant value (=
const) can be selected.
Const. temp 9999.9
20.0
Fixed comparative temperature.
This can only be selected if const is set for "Cmp. Temp".
Open circ. No
Yes
Switch cable open circuit detection off or on for
thermocouples
Function
(menu item)
Parameter setting Description
Commissioning RIA452
20 Endress+Hauser
Adjusting the analog input
The input can be adjusted to the sensor with the aid of the following parameters.
For current, voltage and resistance sensors, a scaled value is calculated from the sensor signal.
For temperature outputs, the scaled value is calculated from linearization tables. The temperature
value can be converted to degrees Celsius, degrees Fahrenheit or Kelvin. In addition, the
temperature value can be corrected by means of an offset.
!Note!
The signal types 4 to 20 mA, thermocouples and resistance thermometers are monitored for cable
open circuit. Long reaction times can occur in the case of resistance thermometers.
6.3.2 Display - DISPLAY/M2
All of the display settings are grouped under this menu item.
Function
(menu item)
Parameter setting Description
Ref. num. Input
Lin. table
Total (*)
Inp.+Lint.
Inp.+Tot. (*)
Lint.+Tot. (*)
In+Lin+Tot (*)
Batch (*)
For choosing the display value on the display.
(If a combination is selected, e.g. "Inp.+Lint", the display
alternates between the selected display values, e.g.
measured value (Inp.) and linearized measured value
(Lint.))
• Input = measured value
• Lin. table = linearized measured value or current flow
rate for calculation of channel
• Total = integrated value
• Inp.+Lint. = alternates between measured value and
linearized measured value
• Inp.+Tot. = alternates between measured value and
integrated value
• Lint.+Tot. = alternates between linearized measured
value and integrated value
• In+Lin+Tot = measured value, linearized measured
value or integrated value
• Batch = preset counter
Settings marked with an asterisk (*) are only available if the
pulse output or totalizer option is available and has been
configured
Display sw. 0 to 99 sec
0
Selectable period for displaying the individual values if
combinations of display values have been selected under
Ref. num.
This setting is only available if the pulse output or totalizer
option is available and has been configured
Ref. bargraf Input
Lintab
Selects the signal source for the bar graph
Dec. point XXXXX
XXXX.X
XXX.XX
XX.XXX
X.XXXX
Number of digits after the decimal point for bar graph
scaling.
Bar 0% -99999..99999
0.0
Start value for the bar graph
Bar 100% -99999..99999
100.0
End value for the bar graph
Bar rise Right
Left
Bar graph orientation.
• Right = 100% value (rising from left to right)
• Left = 100% value left (falling from left to right)

Other manuals for RIA452

9

Other Endress+Hauser Measuring Instrument manuals
Endress+Hauser Proline Promass 84 User manual

Endress+Hauser

Endress+Hauser Proline Promass 84 User manual

Endress+Hauser prolevel FMC 661 User manual

Endress+Hauser

Endress+Hauser prolevel FMC 661 User manual

Endress+Hauser Deltapilot M FMB50 Technical specifications

Endress+Hauser

Endress+Hauser Deltapilot M FMB50 Technical specifications

Endress+Hauser Liquiline System CA80TP Technical specifications

Endress+Hauser

Endress+Hauser Liquiline System CA80TP Technical specifications

Endress+Hauser Prosonic T FMU30 Technical specifications

Endress+Hauser

Endress+Hauser Prosonic T FMU30 Technical specifications

Endress+Hauser Micropilot FMR62 Manual

Endress+Hauser

Endress+Hauser Micropilot FMR62 Manual

Endress+Hauser Levelflex FMP53 Manual

Endress+Hauser

Endress+Hauser Levelflex FMP53 Manual

Endress+Hauser Gammapilot M FMG60 User manual

Endress+Hauser

Endress+Hauser Gammapilot M FMG60 User manual

Endress+Hauser Proline Promag W 400 HART User manual

Endress+Hauser

Endress+Hauser Proline Promag W 400 HART User manual

Endress+Hauser Proline Promag 10 Technical specifications

Endress+Hauser

Endress+Hauser Proline Promag 10 Technical specifications

Endress+Hauser Proline Prosonic Flow P 500 User manual

Endress+Hauser

Endress+Hauser Proline Prosonic Flow P 500 User manual

Endress+Hauser Flowfit CYA27 User manual

Endress+Hauser

Endress+Hauser Flowfit CYA27 User manual

Endress+Hauser NRF81 User manual

Endress+Hauser

Endress+Hauser NRF81 User manual

Endress+Hauser Gammapilot M FMG60 User manual

Endress+Hauser

Endress+Hauser Gammapilot M FMG60 User manual

Endress+Hauser FEC 12 User manual

Endress+Hauser

Endress+Hauser FEC 12 User manual

Endress+Hauser Gammapilot M FMG60 User manual

Endress+Hauser

Endress+Hauser Gammapilot M FMG60 User manual

Endress+Hauser Liquicap M FTI51 User manual

Endress+Hauser

Endress+Hauser Liquicap M FTI51 User manual

Endress+Hauser Memograph M RSG40 Manual

Endress+Hauser

Endress+Hauser Memograph M RSG40 Manual

Endress+Hauser Levelflex FMP50 Manual

Endress+Hauser

Endress+Hauser Levelflex FMP50 Manual

Endress+Hauser Endress+Hauser Technical specifications

Endress+Hauser

Endress+Hauser Endress+Hauser Technical specifications

Endress+Hauser Teqwave H Technical specifications

Endress+Hauser

Endress+Hauser Teqwave H Technical specifications

Endress+Hauser Prosonic Flow 90 User manual

Endress+Hauser

Endress+Hauser Prosonic Flow 90 User manual

Endress+Hauser StamoLys CA 70 User manual

Endress+Hauser

Endress+Hauser StamoLys CA 70 User manual

Endress+Hauser Memosens CFS51 User manual

Endress+Hauser

Endress+Hauser Memosens CFS51 User manual

Popular Measuring Instrument manuals by other brands

Katronic KATflow 200 Quick start manual

Katronic

Katronic KATflow 200 Quick start manual

Svantek SV 258PRO user manual

Svantek

Svantek SV 258PRO user manual

Carlson Boretrak2 quick start guide

Carlson

Carlson Boretrak2 quick start guide

Sonel MRU-21 user manual

Sonel

Sonel MRU-21 user manual

JAMAR Technologies RAC Plus I quick start

JAMAR Technologies

JAMAR Technologies RAC Plus I quick start

EXFO PPM1 user guide

EXFO

EXFO PPM1 user guide

Shaw Superdew 3 operating instructions

Shaw

Shaw Superdew 3 operating instructions

FAHM ULM84 Series user manual

FAHM

FAHM ULM84 Series user manual

Ambient Weather BA30806 user manual

Ambient Weather

Ambient Weather BA30806 user manual

DeNovix DS-11 Series user guide

DeNovix

DeNovix DS-11 Series user guide

SYMEO LPR-1D24 Product documentation

SYMEO

SYMEO LPR-1D24 Product documentation

Pixsys STR581 user manual

Pixsys

Pixsys STR581 user manual

Hanna Instruments HI 93739 instruction manual

Hanna Instruments

Hanna Instruments HI 93739 instruction manual

Sper scientific 800050 instruction manual

Sper scientific

Sper scientific 800050 instruction manual

EUTECH INSTRUMENTS ECOSCAN DO 6 DO METER instruction manual

EUTECH INSTRUMENTS

EUTECH INSTRUMENTS ECOSCAN DO 6 DO METER instruction manual

FlowLine LI25 Series instruction manual

FlowLine

FlowLine LI25 Series instruction manual

Greenlee 93-172 instruction manual

Greenlee

Greenlee 93-172 instruction manual

Kamstrup MULTICAL 62 Technical description

Kamstrup

Kamstrup MULTICAL 62 Technical description

manuals.online logo
manuals.online logoBrands
  • About & Mission
  • Contact us
  • Privacy Policy
  • Terms and Conditions

Copyright 2025 Manuals.Online. All Rights Reserved.