Eneo ICB-62M2712M5A User manual

EN
User Manual
1/2.8" Network Camera, 1920x1080,
Day&Night, DOL-WDR, 2.7-12mm,
Infrared, IP67
ICB-62M2712M5A


CAUTION: TO REDUCE THE RISK OF ELECTRIC SHOCK,
DO NOT REMOVE COVER (OR BACK).
NO USER SERVICEABLE PARTS INSIDE.
REFER SERVICING TO QUALIFIED SERVICE PERSONNEL.
To prevent electric shocks and risk of fire hazards, do NOT use other than
specific power source.
Warning :
This equipment has been tested and found to comply with the limits for a Class
A digital device, pursuant to part 15 of the FCC Rules. These limits are designed
to provide reasonable protection against harmful interference when the equipment
is operated in a commercial environment. This equipment generates, uses, and
can radiate radio frequency energy and, if not installed and used in accordance with
the instruction manual, may cause harmful interference to radio communications.
Operation of this equipment in a residential area is likely to cause harmful
interference in which case the user will be required to correct the interference at
his own expense.
Caution :
Any changes or modifications in construction of this device which are not expressly
approved by the party responsible for compliance could void the user's authority
to operate the equipment.
Mains power quality should be that of a typical commercial environment. If the user
of the model requires continued operation during power mains interruptions, it is
recommended that the model be powered from an uninterruptible power supply
(UPS) or a battery.
The symbol is intended to alert the user to the presence of important
operating and maintenance(servicing) instructions in the literature
accompanying the unit.
The symbol is intended to alert the user to the presence of uninsulated
"dangerous voltage" within the product's enclosure that may be of
sufficient magnitude to constitute a risk of electric shock to persons.
Safety Precaution
03
MEGA-PIXEL NETWORK CAMERA

Safety Precaution
04
NOTICE
• The image used in this instruction manual are processed to help comprehension
and may differ from actual video of the camera.
• Avoid installing areas where has shock or vibration which results in the problems.
• Pay attention to safety when laying the connection cable and observe that the cable
is not subjected to heavy loads, kinks or damage and no moisture can get in.
• Never open the device such as boards or lens.
The warranty becomes void if repairs are undertaken by unauthorized persons.
• Maintenance and repair have to be carried out only by authorized service centers.
• Use only a mild detergent to clean the housing body.
• The camera should never be operated beyond the technical specifications.
This can lead to destruction.
• The camera should never be operated in water.
MEGA-PIXEL NETWORK CAMERA

Contents
05
MEGA-PIXEL NETWORK CAMERA
Safety Precaution . . . . . . . . . . . . . . . . . . . . 03~04p
Contents . . . . . . . . . . . . . . . . . . . . . . . . . . . . . . . 05p
Features . . . . . . . . . . . . . . . . . . . . . . . . . . . . . . . 06p
Composition . . . . . . . . . . . . . . . . . . . . . . . . . . . 07p
Dimensions . . . . . . . . . . . . . . . . . . . . . . . . . . . . 07p
Part Names . . . . . . . . . . . . . . . . . . . . . . . . . . . . 08p
Installation Instructions . . . . . . . . . . . . . . . . 09~16p
Operating Instructions . . . . . . . . . . . . . . . . . 19~22p
. . . . . . . . . . . . . . . . . . . . . . . . . 17~18p
Specifications
Full Menu Setup . . . . . . . . . . . . . . . . . . . . . 23~72p
Troubleshooting . . . . . . . . . . . . . . . . . . . . . 73~74p
3-1. Information
3-2. Video & Image
3-3. Audio
3-4. Record
3-5. Event
3-6. System
1. LIVE VIEW
2. PLAYBACK
3. SETUP
........................................................ 23p
........................................................ 25p
............................................... 26p
......................................... 26p
.............................................................. 26p
4. 4 EYES PRINCIPLE ......................................... 72p
......................................................... 42p
...................................................... 43p
......................................................... 46p
...................................................... 61p

Features
06
MEGA-PIXEL NETWORK CAMERA
• Full-HD 2.16Mega Pixel, NETWORK CAMERA, 1920x1080(30/25p)
• The best low light performance with SONY’s STARVIS sensor
• ONVIF Conformance
• ONVIF Event Mapping
• Zero configuration
• Cross Web Browsing (IE, Edge, Safari, Firefox, Chrome)
• Adaptive web resizing depending on layout & resolution of
display device by RESPONSIVE WEB
• Increased usability for all PC, tablet and mobile
• HTML5 playback for recorded video on Micro SD card
• Simultaneously H.265(+), H.264(+) & MJPEG (Multi streaming)
• f=2.7~12mm, Motorized vari-focal lens
• Motorized Zoom & Focus Adjustment
• DOL WDR (Digital Overlap Wide Dynamic Range)
• D-WDR (Digital Wide Dynamic Range)
• Improved noise figure with the enhanced 3DNR
• LDC(Lens Distortion Compensation)
• Smart Stream, ROI(Region of Interest)
- Enables to process video data smartly according
to users demand.
- Available to deliver high quality video on interested
region while less quality video on non interested region.
- Lowering overall bandwidth and reduce the storage burden
• Privacy Mask, Motion Detection, Defog, HLC/ BLC,
Digital Zoom(~x10), Mirror/Flip, Contrast, Brightness, Hue,
Saturation, Sharpness, DIS (Digital Image Stabilization)
• PoE(IEEE Std. 802.3af)
• 4pcs High power SMD LED
• Dual window for protecting IR reflection
• One-touch 3-Axis locking bracket with Junction Box
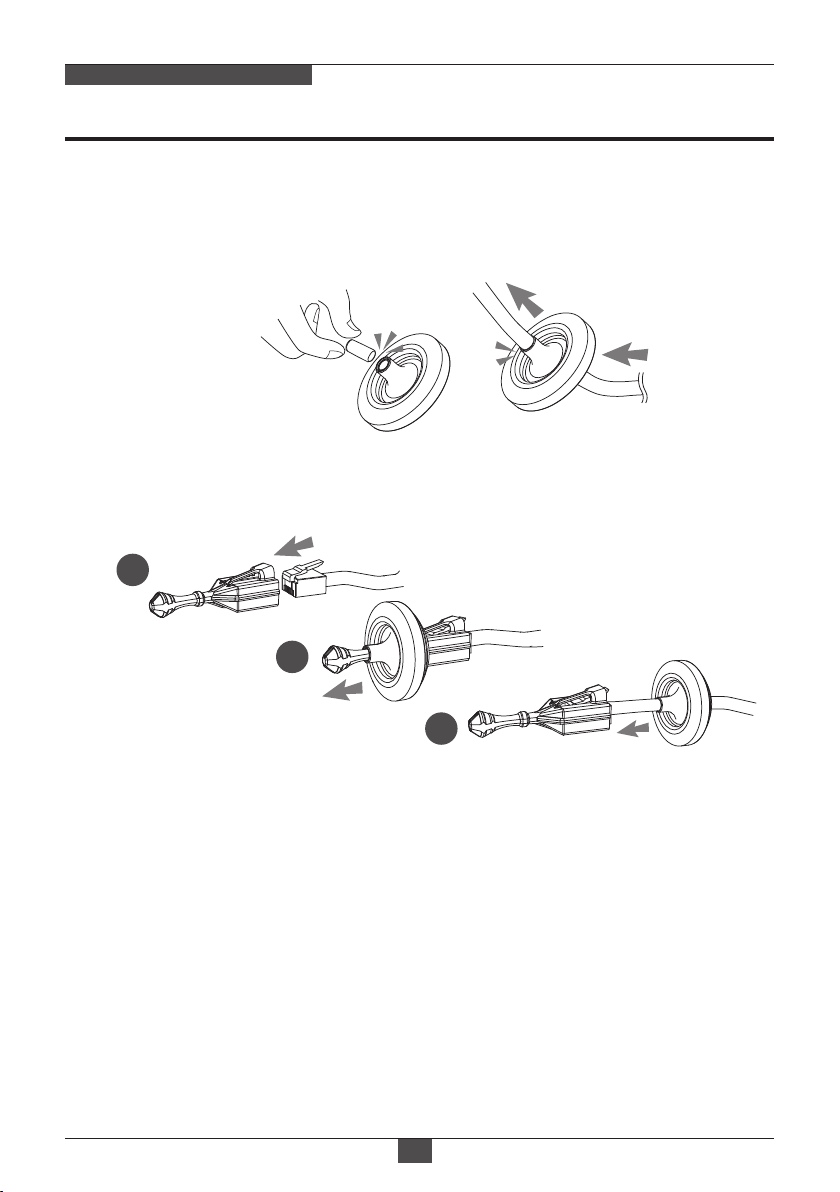
• Integral and Handheld Junction Box
- Both RJ-45 and Network wiring connector(LSA) are provided
for flexible Network/PoE connection.
- Junction Box cover opening (Sabotage) alarm can be triggered
and integrated with various event actions.
- Simple wiring and tidy cable arrangement.
- A handheld Junction Box provides the easiest and most flexible
installation
• Cooling Fan & Optimized Heat sink System
• IP67 Protection

Composition
07
Dimension (unit : mm)
MEGA-PIXEL NETWORK CAMERA
Camera unit
Sunshield
79.18
82.15 265.80
145.90 51.40
31.00
130.50
109.20
79.00
69.10
Torque Wrench:
3mm (1pc)
Cable tie (2pcs)
Hinge pin (1pc)
Mounting Screw:
4 x 30mm (4pcs)
Plastic Anchor:
6 x 30mm (4pcs)
Mounting
Template
Operating
Instruction
Grommet (2pcs)
Cable fixation plate
with Fixing screw
RJ45 Easy Cap
for Grommets

MEGA-PIXEL NETWORK CAMERA
Part Names
08
DUAL
WINDOW
BODY CASE
SUNSHIELD
BRACKET
JUNCTION BOX TOP
JUNCTION BOX
BASE
2x Lock/Unlock Screw
2x Water drain
Hinge Pin
[ JUNCTION BOX BOTTOM ]
Ethernet from Cam.
User Network
Network wiring
Connector
Junction Box
Open Alarm
Power & I/O
to Cam.
Alarm/ Audio
[ Inside of Opening Cover ]
IP
RESET
SD MEMORY
Micro
SD Card Slot
IP Reset (Default) : pressing for 5~8 secondsresets
all parameters to original factory settings.

Installation Instructions
09
Cover Opening(Sabotage) Alarm and External Alarm Input are electrically tied
together internally.
Alarm contact types, N.O or N.C are selectable by the Alarm Input Selection
Jumper and the selection types should be matched with Alarm Type in setup
menu.
When both of Cover Opening Alarm and External Alarm Input are used at the
same time, the alarm contact types must match. Otherwise, alarm malfunctions.
When External Alarm Input only is used with disabling Cover Opening Alarm,
remove the jumper cap of Alarm Input Selection Jumper.
Default setting for Alarm Input selection jumper is N.C. It prevents from Alarm is
generating when Junction box is OPEN during installation. Alarm Input selection
jumper should be set to N.O and Event Trigger/Action should be dened to enable
Cover opening alarm.
For Cover Opening Alarm, please go to SETUP> Event Rules> Event Processing>
Add Event Trigger should be set to “Alarm In” and then Event Action should be
set as available options.
• Cover Opening Alarm and External Alarm Input :
CAUTION
N.O : Alarm is generated when Junction box is OPEN.
N.C : Alarm is generated when Junction box is CLOSED.
[N.O] [N.C]
Cover opening alarm switch
(Sabotage alarm)
Alarm Input selection jumper
MEGA-PIXEL NETWORK CAMERA

Installation Instructions
10
• Using Grommet :
Tear off the cocks of grommets properly and pull up the grommet so that sealing
can
wrap the cable properly as illustrated. If it doesn’t wrap the cable properly,
it could cause the water leakage problem.
3
2
1
• Using RJ45 Easy Cap for Network cable :
• Recommended cable length into the Junction box base :
- CABLE with RJ-45 Connector: 70mm~80mm
- CABLE for Network Wiring Connector: 20mm~30mm (excluding cable tripping section)
8P cable stripping distance: 20mm~30mm
- Alarm/Audio CABLE: 20mm~30mm (excluding cable tripping section)
6P cable stripping distance: 20mm~30mm
MEGA-PIXEL NETWORK CAMERA

Installation Instructions
11
20~30mm20~30mm
1
3
①Locate the mounting template at the installation position and drill the wall if
needed.
②Route the Power/Ethernet cables through the grommets from the wall.
Insert the grommets onto the Junction box base.
③Place the Junction box base on pre-drilled position and fix it through using
mounting screws (4x30mm).
2
MEGA-PIXEL NETWORK CAMERA
70~80mm
20~30mm20~30mm
20~30mm20~30mm
Install the mount onto a strong structure.
Prepare the Junction box base and the accessaries for installation.

Installation Instructions
12
● Connections to LSA connectors
1
2
4
5
3
6
7
8
TIA/EIA 568A
1. Green-White
2. Green
3. Orange-White
4. Blue
5. Blue-White
6. Orange
7. Brown-White
8. Brown
TIA/EIA 568B
1. Orange-White
2. Orange
3. Green-White
4. Blue
5. Blue-White
6. Green
7. Brown-White
8. Brown
④Hook up the I/O wires and Network cable to the connectors.
Network cable can be connected to either RJ-45 connector or LSA connectors.
4
5
● Connections to RJ-45 connector
4
5
⑤Fix the cable fixation plate and tie up
the cable to it.
MEGA-PIXEL NETWORK CAMERA

Installation Instructions
13
* Caution:
If assembly screws are not firmly
assembled, it causes water leakage.
6
7
9
⑨Cover the Junction box top and
tighten with assembly screws.(4pcs)
⑧Set Alarm Input Selection Jumper.
( Refer to ‘Cover Opening Alarm
and External Alarm Input’ on p.9 )
Junction Box Top
Hinge pin
⑥
Assemble the Junction box top to the Junction box base using a hinge pin.
Hinge can be inserted at either side for convinience.
⑦Connects the Power/Ethernet cables from camera.
MEGA-PIXEL NETWORK CAMERA

Installation Instructions
14
⑩Set the camera’s orientation and tighten the Lock/Unlock screws using
hex wrench.
⑪Open the Opening cover to insert the Micro SD memory.
⑫After all the setting, close the Opening cover and tighten it.
⑬Put the sunshield to the camera unit and tighten the sunshield bolts.
• Extreme care should be taken NOT to scratch the surface of window while
the camera installing or adjusting.
• Care should be taken the cable is NOT to be damaged, kinked or exposed in
the hazardous area.
• Do not expose the camera directly to a strong light source such as the sun or
spot light.
CAUTION
MEGA-PIXEL NETWORK CAMERA
■Adjustment of viewing angle with a bracket
Hex
wrench

Installation Instructions
15
MEGA-PIXEL NETWORK CAMERA
• Unlock the screw on the camera bracket through using the hex wrench supplied.
• Set the camera’s viewing angle then lock the screw on the bracket.
Pan & Tilt adjustments
1) Pan limit:
Pan is limited to +/- 90°.
3) Inclination limit
(Horizontal image alignment):
Inclination limited to +/-90° max.
2) Tilt limit:
Tilt is limited to 0°(2°) min ~ 90° max.
for wall(ceiling) installation respectively
with reference to the wall(ceiling) when
the inclination of camera module is 0°,
that is, the image is aligned horizontally.
±90°
80° 80°
88°
• on the wall • on the ceiling
90°

Installation Instructions
16
MEGA-PIXEL NETWORK CAMERA
Sunshield Assembling
• After all adjustments, assemble the sunsheild with the camera unit as illustrated.
①Cover the sunsheild to the camera unit.
② Slide foward to straight the camera front case.
③Push down the front part of sunshield until clicking sound.
Make sure the sunshield is fixed with camera.

Specifications
17
MEGA-PIXEL NETWORK CAMERA
ITEM
Imaging Sensor
Effective Pixels
Sensitivity
Scanning mode
Video Compression
Video Frame Rate
H.265(+) Main profile, H.264(+) High, Main, Base line profile MJPEG
Video Resolution
FTP Uploading MJPEG Still Image
Video Streaming
Simultaneously H.265(+), H.264(+) & MJPEG
(Multi Streaming)
Independent Frame Rate and Bandwidth Control, VBR/CBR
Power Source
Housing
NETWORK SPECIFICATION
Color: 0.06 Lux, B/W: 0.003 Lux
Progressive Scan
S/N Ratio
WDR
DOL WDR (Digital Overlap Wide Dynamic Range)
Day & Night mode
ICR by Auto, Day, Night, External, Color D/N
DNR
2D-NR, 3D-NR
Lens
Functions
Dimension
50dB
Up to 30fps@1920x1080p
Shutter Speed
Control
f=2.7~12mm, Motorized vari-focal lens
IP67, Aluminum Cast, Dual window, One-touch 3-Axis locking bracket
with Junction Box, Cooling Fan & Optimized Heat sink System
Automatic: Min. 1/10,000 sec ~ Max.1/25 sec
Manual: Min. 1/10,000 sec ~ Max.1/25 sec
PoE(IEEE Std. 802.3af )
1/2.8" Sony 2.16 Mega pixel RGB STARVIS CMOS Sensor
1945(H) x 1097(V) approx. 2.13M pixels
82.15(W)x130.5(H)x265.8(L)_with Junction Box / About 1.25kg
1920X1080, 1600X900, 1280X720, 960X540, 640X360, 320X180
Installation Temp.
Operating Temp.
-20°C ~ +50°C (Humidity : 20%RH ~ 80%RH, Non-condensing)
-50°C ~ +50°C (Humidity : 20%RH ~ 80%RH, Non-condensing)
Privacy Mask, Motion Detection, Defog, HLC/ BLC, Digital Zoom(~x10),
Mirror/Flip, Contrast, Brightness, Hue, Saturation, Sharpness,
LDC (Lens Distortion Correction), DIS (Digital Image Stabilization)
LED
4pcs x 850nm High power SMD LEDs
Auto White Balance
mode
ATW-Indoor/Outdoor, Shade, Clear sky, Fluorescent light,
Light bulb, Flame, Manual
Gain Control
Automatic: ~ Max. 69dB / Manual: ~ Max. 69dB
NTSC PAL

Specifications
18
MEGA-PIXEL NETWORK CAMERA
Multi User Authority, IP Filtering, HTTPS, Video Stream, Export/Import
Security
Synchronize Computer/NTP Server, Manual
Network Time Sync.
Protocol
Restart, Reset, Factory Default
Software Reset
Backup, Restore
Auto Recovery
Using Web Browser
Remote Upgrade
Built-In Web, ONVIF Compatible 3rd Party VMS
Client Software
API, ONVIF Profile S Compliant
Slot for Micro SD memory card (H.264 recording)
SDK Support
SD memory card
Audio & Alarm
(*) Design and specifications are subject to change for product improvements without prior notice.
TCP/IP, UDP, IPv4/v6, HTTP, HTTPS, FTP, UPnP, RTP, RTSP,
RTCP, DHCP, ARP, Zeroconf, Bonjour
Login Authority Administrator, Operator, Guest
2way Audio & Alarm input / output

Operating Instructions
19
MEGA-PIXEL NETWORK CAMERA
Setup Menu table
Category Menu
Configuration
LIVE VIEW
PLAYBACK
SETUP
Player Control
Video Stream
Protocol
PTZ Control
Information
Video & Image
Source
General, System Information, Open source Information
Stream1/2/3
Smart
Video Stream
Image
Display (Window Fit, Full Screen, Custom)
Stream1, Stream2, Stream3
HTTPS, HTTP, TCP, UDP
Zoom, Focus, Push AF
Pause, Snapshot, Speaker, Microphone, Record
Privacy Mask
Digital Zoom
Basic Brightness, Contrast, Saturation, Hue,
Sharpness, Enable flip image, Enable
mirror image
Enable text OSD, Enable date&time
OSD, Enable zoom&focus OSD
Mode
Mode, Level
Mode, Rotation
WDR(Mode, Level), DWDR(Mode, Level),
Defog(Mode, Level)
BLC(Mode, Level), HLC(Mode)
3DNR(Mode, Level)
Mode, Switching time, Threshold (D->N),
Threshold (N->D), IR LED Control
OSD
AE
Mode, RGain, GrGain, GbGain, BGain
AWB
Day&Night
WDR
BLC
DNR
LDC
VerticalView
Color, Name
Level
DIS
Event Search, Timeline Search, Timeline Bar
AF Mode, Speed, Lens Locking, Locking
Timer, Lens Calibration, Enable Day&
Night sync focus, Lens initialize on boot
ROI(Region Of Interest), Dynamic GOP
Audio Compression, Sample rate, Bitrate, Input Volume, Output Volume,
Audio auto activation on ONVIF access
Mode, Slow shutter, Luminance compensation,
Auto Iris, Auto Flickerless, Shutter,
Max. Shutter, Gain, Max. Gain

Operating Instructions
20
MEGA-PIXEL NETWORK CAMERA
Record
Record
Overwrite when storage is full,
Continuous record setting
Schedule
Recycling
Storage
Format, Remove, Storage Information
Recycling Time Setting
SETUP
System User, HTTPS, IP Filter, ONVIF, Video Stream,
Export/Import
Language
Current Time, New Time, Time Zone, Date & Time
Display
TCP/IP, DDNS, RTP, UPnP, Zeroconf, Bonjour
Security
Date & Time
Network
English, Deutsch, Français, 한국어
Maintain (Restart, Reset, Default), Upgrade,
Setup Export, Setup Import
Logs (Database Capacity, Search Condition, Log
List), Log Sever, Report
Maintenance
Logs & Report
Event
Record, Alarm Out, E-Mail, FTP, Video Boost,
Notification Server
Actions
Triggers
Rules
Event Processing, ONVIF Mapping
Motion, Alarm In, System, Manual, Network,
Timer, Day/Night, Audio Detect
LOG OUT
Approval #1/2
4 EYES PRINCIPLE
Table of contents
Other Eneo Security Camera manuals

Eneo
Eneo VKC-1362 User manual

Eneo
Eneo HDC-2080Z03 User manual

Eneo
Eneo PXD-2018PTZ1080 User manual

Eneo
Eneo EDC-IPS-1 User manual

Eneo
Eneo MPD-62V2812P0B User manual

Eneo
Eneo ISM-78F0021W0A User manual

Eneo
Eneo VKC-1416B User manual

Eneo
Eneo MED-62V2812M0B User manual

Eneo
Eneo VKC-1327B-IR/W3 User manual

Eneo
Eneo MEP-63M2812M0A User manual

Eneo
Eneo VKC-1370/12-24 User manual

Eneo
Eneo IPB-62M2712M5A User manual

Eneo
Eneo VKC-1310S User manual

Eneo
Eneo PLD-2036PTZ User manual

Eneo
Eneo PXB-2080MIR B User manual

Eneo
Eneo MPD-78M2713M0A User manual

Eneo
Eneo IND Series User manual

Eneo
Eneo IPP-82A0030MHA User manual

Eneo
Eneo APD-7SV2812MVA User manual

Eneo
Eneo NXP-880F26 User manual