manuals.online logo
Brands
  1. Home
  2. •
  3. Brands
  4. •
  5. EnGenius
  6. •
  7. Wireless Access Point
  8. •
  9. EnGenius EnStation 6 User manual

EnGenius EnStation 6 User manual

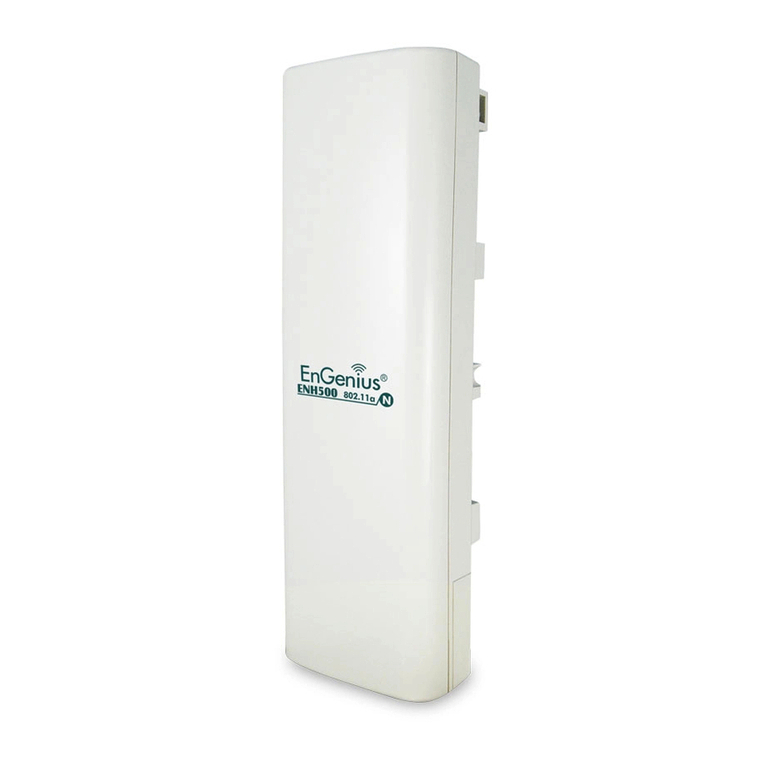
EnStation 6 | ENH500-AX
User Manual
EnStation 6 | ENH500-AX User Manual
Wi-Fi 6 Outdoor Long Range Wireless Point to Point Bridge
To install this Access Point please refer to the Quick Installation Guide included in the product packaging.
IMPORTANT
IMPORTANT...................................................................... 1
Product Overview ������������������������������������������������������� 3
Introduction....................................................................... 3
System Requirements......................................................3
Key Features ..................................................................... 3
Technical Specifications ��������������������������������������������4
Before You Begin��������������������������������������������������������� 6
Computer Settings ...........................................................6
Windows XP/Windows 7/Windows 8/Windows 10 .......6
Apple Mac OS X ................................................................7
EnStation 6����������������������������������������������������������������� 8
Hardware Installation EnStation 6 ..................................9
Wall mounting the EnStation 6 ......................................10
Pole mounting the EnStation 6...................................... 10
ENH500-AX���������������������������������������������������������������� 11
Hardware Installation ENH500-AX................................ 12
Wall mounting the ENH500-AX ..................................... 13
Pole mounting the ENH500-AX..................................... 13
Configuring Your Access Point ��������������������������������� 14
Web Interface Configuration ......................................... 14
Default Setting ................................................................ 14
EnWiFi App Configuration.............................................. 14
Download EnWiFi App .................................................... 14
Table of Contents
Building a Wireless Network ������������������������������������� 15
Access Point Mode ........................................................ 15
Station Mode................................................................... 15
WDS Access Point Mode .............................................. 16
WDS Station Mode ......................................................... 16
WDS Repeater Mode ...................................................... 16
Status������������������������������������������������������������������������17
Main Status..................................................................... 17
Save Changes ................................................................. 17
Device Status .................................................................. 17
Connection...................................................................... 18
5 GHZ Connection List................................................... 18
WDS Link List.................................................................. 18
Realtime .......................................................................... 18
Network �������������������������������������������������������������������� 19
Basic IP Settings............................................................. 19
IPv4/IPv6 Settings.......................................................... 19
Spanning Tree Protocol (STP) Settings ........................ 19
Wireless Connection ������������������������������������������������20
Wireless...........................................................................20
Wireless Settings............................................................20
Wireless Network ...........................................................20
Wireless Setting-5GHz...................................................20
SSID Profile ....................................................................21
EnStation 6 | ENH500-AX User Manual
Wireless Security ...........................................................21
Radius Setting.................................................................21
Radius Accounting .........................................................22
Fast Roaming .................................................................22
Wireless MAC Filtering...................................................22
Wireless Traffic Shaping................................................22
Guest Network Settings.................................................23
RSSI Threshold ..............................................................23
Management VLAN Settings.........................................23
Management������������������������������������������������������������� 24
Advanced Settings .........................................................24
SNMP Settings ...............................................................24
CLI Settings ....................................................................24
Email Alert.......................................................................25
Time Zone .......................................................................25
Date and Time Settings..................................................25
Time Zone .......................................................................25
Auto Reboot Settings .....................................................26
Wi-Fi Scheduler...............................................................26
Tools ................................................................................26
Ping Test Parameters.....................................................26
Traceroute Test Parameters .........................................26
Nslookup Test Parameter ..............................................26
Speed Test Parameters..................................................27
Device Discovery ............................................................27
Account ...........................................................................27
Account Settings ............................................................27
Firmware .........................................................................27
Frimware Upgrade ..........................................................27
Backup/Restore ..............................................................28
User Setting ....................................................................28
Log ...................................................................................28
System Log ....................................................................28
Remote Log.....................................................................28
Logout .............................................................................29
Reset................................................................................29
EnWiFi App����������������������������������������������������������������30
About EnWiFi App...........................................................30
Features...........................................................................30
Single Configuration.......................................................30
Group Configuration.......................................................30
Device Management ......................................................30
Discover Device ..............................................................30
Connected Status Monitor.............................................30
Backup and Restore .......................................................30
Configuring Device in EnWiFi App.................................30
Single Configuration.......................................................30
WDS Link .........................................................................31
Group Configuration.......................................................31
Discover Device ..............................................................34
Monitor & Management .................................................34
Backup.............................................................................35
Restore ............................................................................35
Appendix������������������������������������������������������������������� 36
Appx. A: FCC Interference Statement ..........................36
Appx. B: Professional Installation Instruction (FCC) ...36
Appx. C: IC Interference Statement ..............................37
Appx. D: Professional Installation Instruction (IC).......38
Instructions d’installation professionnelle ...................39
EnStation 6 | ENH500-AX User Manual
System Requirements
The following are the Minimum System Requirements in
order to configure the device.
• Computer with an Ethernet interface or wireless
network capability
• Windows OS (XP, Vista, 7, 8, 10), Mac OS, or Linux-
based operating systems
• Web-Browsing Application (i.e.: Internet Explorer,
Firefox, Safari, or another similar browser
application)
Package Contents
The EnStation 6 package contains the following items:*
• EnStation 6 Customer Premises Equipment
• PoE Adapter (EPA5006GR)
• Power Cord
• Pole Mount Strap
• Wall Mount Bracket Base
• Screw Sets Kit
• Sealing Nut
• Dynamic Stick
• Quick Installation Guide
*(all items must be in original packaging to issue a refund)
Product Overview
Introduction
The EnStation 6 / ENH500-AX is a high-powered, ultra long-range 2x2 Wireless 802.11ax/ac/a/n Outdoor Access Point
(AP)with speeds up to 1200 Mbps on both its high-powered 5 GHz radios.
Built in EnGenius Beamforming technology, this AP can transmit data more efficiently, avoid collisions,and reduce
latency and packet losses. It can be configured as an Access Point, Station, Repeater, WDS Access Point, WDS Station
and WDS Repeater.
The EnStation 6 / ENH500-AX is designed to operate in various of outdoor environments.
Its high- powered, long-range characteristics make it a cost-effective alternative to ordinary Access Points that don’t
have the range and reach to connect to a growing number of wireless point to point bridge who wish to connect to a
business network.
The EnStation 6 / ENH500-AX supports the 5 GHz frequency band for communicating to other 5GHz frequency bands
Access Points concurrently.
Several EnStation 6 / ENH500-AX can be networked in a campus setting using the 5 GHz band between countries, which can
easily to be installed in virtually any location with its included PoE (Power over Ethernet) Adapter for quick outdoor installation.
The EnStation 6 / ENH500-AX enables network administrators to control its transmit power and features settings for
selecting VHT80 bandwidth to perform true AX transmission.
It also supports wireless encryption including Wi-Fi Protected Access (WPA2-PSK) Encryption and IEEE 802.1X with RADIUS.
• Supports IEEE802.11ax/ac/a/n wireless standards with up
to 1200 Mbps data rate.
• Antennas
• EnStation 6: Internal 15.2dBi high gain directional antenna.
• ENH500-AX: Internal 14dBi high gain directional antenna.
• Power Source
• EnStation 6 / ENH500-AX Can be used with included 54V
PoE adapter
• Device can be reset from remote PoE adapter
• Advanced 1024-QAM technology to achieve optimal
performance throughout ultra-long distance
• EnGenius EnWiFi App can provide device configuration and
monitoring easily on a smartphone or tablet.
Key Features
The ENH500-AX package contains the following items:*
• PoE Adapter (EPA5006GR)
• Power Cord
• Pole Mount Strap
• Wall Mount Screw Set
• Quick Installation Guide
*(all items must be in original packaging to issue a refund)
EnStation 6 | ENH500-AX User Manual
Technical Specifications
Standard
IEEE802.11 ax/ac/a/n on 5 GHz
Antenna
Internal 15.2dBi high gain directional antenna EnStation 6
Internal 14dBi high gain directional antenna ENH500-AX
Physical Interface
2 x 10/100/1000 Gigabit Ethernet Port with PoE support
LED Indicator
Power
LAN 1
LAN 2
WLAN
WLAN LED (Weak, Medium, Strong)
Power Requirements
ENH500-AX Include PoE Adapter, 54V 0.6A
EnStation6 Include PoE Adapter, 54V 0.6A
Operation Modes
Access Point
Station
Repeater
WDS Access Point
WDS Station
WDS Repeater
Optimal Performance
Distance Control (Ack Timeout)
Multicast Supported
Data Rate Selection
Auto Channel Selection
BSSID Support
Easily Management
VLAN Tag / VLAN Pass-through
Guest Network
QoS: Complaint with IEEE 802.11e /WMM
RADIUS Accounting
Wireless STA (Client) connection list
Traffic Shaping (Per SSID)
Intuitive Tools
SNMP v1/v2c/v3 support
MIB I/II, Private MIB
Save Configuration as Default
CLI Support
WiFi-Scheduler/Auto Reboot
E-mail Alert
Reinforcement Security
WPA2 Enterprise
Hide SSID in beacons
MAC address filtering, up to 32 MACs per SSID
Wireless STA (Client) connection list
Https Support
SSH Support
QoS (Quality of Service)
Complaint with IEEE 802.11e standard
Physical/Environment Conditions
Operating:
• Temperature: -20°C to 60°C (-4°F to 140°F) Humidity (non-
condensing): 90% or less
Storage:
• Temperature: -30°C to 80°C (-22°F to 176°F) Humidity (non-
condensing): 90% or less
EnStation 6 | ENH500-AX User Manual
1) 2)
3)
5) 6)
1)
2) 4)
3)
EnStation 6
ENH500-AX
Physical Interface EnStation 6
Dimensions and Weights
Dimension: 190mm (7.48”)
Height: 38mm (1.9”)
Weight: 527g (1.16 lbs)
1 WLAN Signal LED: Applied on Client Bridge/WDS
(1) Red: Weak Signal: Connecting quality is bad.
(2) Yellow: Connecting quality is Normal.
(3) Green: Connection quality is Good.
2 LAN(PoE) Signal LED
3 LAN Signal LED of the 2nd Port
4 Power Signal
5 LAN Port 1
Gigabit Ethernet port for RJ-45 cable.
6 LAN Port 2
Gigabit Ethernet port for RJ-45 cable.
Physical Interface ENH500-AX
Dimensions
Length: 260mm (10.24”) Width: 84 (3.31”)
Depth: 55mm (2.17”)
1 LAN Port 1 (Proprietary 54V PoE)
Ethernet port for RJ-45 cable.
2 LAN Port 2
Ethernet port for RJ-45 cable.
3 Reset Botton
*The installation angle of antenna must be vertical to the
ground.
EnStation 6 | ENH500-AX User Manual
Before You Begin
Computer Settings
Windows XP/Windows 7/Windows 8/Windows 10
In order to use the Access Point, you must first configure the
TCP/IPv4 connection of your Windows OS computer system.
1.
a. Click the Start button and open the Control Panel.
b. Move your mouse to the lower right hot corner to
display the Charms Bar and select the Control Panel in
Windows 8 OS.
c. In Windows 10 and Windows 11, click Start to select
All APs to enter the Windows system folder and select
Control Panel.
2.
a. In Windows XP, click Network Connections.
b. In Windows 7/Windows 8/Windows 10,
click View Network Status and Tasks in the
Network and Internet section, then select
Change adapter settings.
3. Right click on Local Area Connectionand select Properties.
4. Select Internet Protocol Version 4 (TCP/IPv4) and
then select Properties.
5. Select Use the following IP address and enter an IP
address that is different from the Access Point and
Subnet mask, then click OK.
Note: Ensure that the IP address and Subnet mask are
on the same subnet as the device.
• For example: EnStation6 / ENH500-AX IP address:
192.168.1.1
• PC IP address: 192.168.1.3 – 192.168.1.255
• PC Subnet mask: 255.255.255.0
EnStation 6 | ENH500-AX User Manual
Apple Mac OS X
1. Go to System Preferences (Which can be opened in the Applications folder or selecting it in the Apple Menu).
2. Select Network in the Internet & Network section.
3. Highlight Ethernet.
4. In Configure IPv4, select Manually.
5. Enter an IP address that is different from the Access Point and Subnet mask then press OK.
Note: Ensure that the IP address and Subnet mask are on the same subnet as the device.
For example:
• EnStation6/ENH500-AX IP address: 192.168.1.1
• PC IP address: 192.168.1.3 – 192.168.1.255
• PC Subnet mask: 255.255.255.0
6. Click Apply when done.
EnStation 6 | ENH500-AX User Manual
EnStation 6
Using the provided hardware, the EnStation6 can be attached to a wall or a pole.
Device *1
Sealing nut*1
Dynamic Stick*1
PoE Adapter*1
Bracket*1
Screw Set*1
Product Card
Power Cord*1
Pole Mounting Strap*1
EnStation 6 | ENH500-AX User Manual
Hardware Installation EnStation 6
a. Remove the rear bottom panel.
b. Connect one end of the Ethernet Cable to the LAN(PoE) port of the EnStation6 / ENH500-AX and the other end to
the PoE Port on the PoE Adapter.
c. Connect the Power Cord to the PoE Adapter and plug the other end into an electrical outlet.
d. Connect the second Ethernet Cable to the LAN port of the PoE Adapter and the other end to the Ethernet Port of
the computer.
e. Place the panel removed from step “a” back into the device.
Note:
• The device should ONLY be powered via Ethernet Cable connected to the included PoE Adapter EnStation 6.
d)
a)
b)
c)
e)
EnStation 6 | ENH500-AX User Manual
Wall mounting the EnStation 6
a. Plug the dynamic stick into the bracket.
b. Screw the sealing nut and assembled parts, and tighten
it with 80kgf.cm.
c. Put the lock washer on the dynamic stick.
d. Assemble the mounting parts to the device.
Pole mounting the EnStation 6
a. Plug the dynamic stick into the bracket.
b. Screw the sealing nut and assembled parts, and tighten it with 80kgf.cm.
c. Put the lock washer on the dynamic stick.
d. Assemble the mounting parts to the device.
e. Thread the open end of the pole strap through the two tabs on the bracket.
f. Lock and tighten the pole strap to the secure bracket to the pole.
e. Determine the mounting location. Mark and drill two
pilot holes aligning to the screw holes of the bracket.
f. Put wall anchors into the holes and insert the screw
into the wall anchor.
g. Screw and secure the bracket in place.
a)
b)
c)
d)
g)
f)
e)
Wall
EnStation 6 | ENH500-AX User Manual
ENH500-AX
Using the provided hardware, the device can be attached to a wall or a pole. The height should not exceed 2 meters.
Waterproof*1
PoE Adapter*1 Product Card
Power Cord*1 Screw Set*1
Pole Mounting Strap*1Adhesive Label
Device *1
EnStation 6 | ENH500-AX User Manual
Hardware Installation ENH500-AX
a. Remove the rear bottom panel.
b. Connect one end of the Ethernet Cable to the LAN(PoE) port of the AP/Bridge and the other end to the PoE Port on the
PoE Adapter.
c. Connect the Power Cord with the PoE Adapter and plug the other end to an electrical outlet.
d. Connect the second Ethernet Cable to the LAN port of the PoE Adapter and the other end to the Ethernet Port on
the computer.
e. Place the panel removed from step “A” back into the device.
Note: The device should ONLY be powered via Ethernet Cable connected to the included PoE Adapter.
b) c)
d)
e)
a)
EnStation 6 | ENH500-AX User Manual
Wall mounting the ENH500-AX
a. Determine where the Access Point is to be placed and stick the Adhesive label on the surface.
b. Use the appropriate drill bit to drill the 8.1 mm diagram and 26 mm depth holes on the markings of the label.
c. Remove the label and Screw the anchors unto the holes until they are flush with the wall.
d. Screw the included screws into the anchors, and place the Access Point against a wall with the mounting screw heads.
Pole mounting the ENH500-AX
a. Thread the open end of the Pole Strap through the two tabs on the Pole Mount Bracket.
b. Lock and tighten Pole Strap to secure Pole Mount Bracket to the pole.
a)
b)
c)
Wall
EnStation 6 | ENH500-AX User Manual
Configuring Your Access Point
Web Interface Configuration
Default Setting
Please use your Ethernet port or wireless network adapter
to connect the Access Point.
IP ADDRESS 192.168.1.1
USERNAME/PASSWORD admin/admin
1. Open a web browser (Internet Explorer/Firefox/Safari/
Chrome) and enter the IP Address http://192.168.1.1
Note: If you have changed the default LAN IP Address of
the Access Point, ensure you enter the correct IP Address.
2. The default username and password are admin.
Once you have entered the correct username and
password, click the Login button to open the web-based
configuration page
• The model name will vary by different models.
3. If successful, you will be logged in and see the device’s
User Interface.
EnWiFi App Configuration
Download EnWiFi App
1. Please download and install EnWiFi App from Google
Play or iOS App Market .
2. Before accessing the device, you need to find
Management SSID and connect to it first. Then you can
see your device in the Device List.
3. For more details on configuring and managing devices
via EnWiFi App, please see Chapater “EnWiFi App”.
Android iOS
Click it to CONNECT
or to CHANGE
management SSID
Connect to management
SSID before adding your
device to the Device List�
EnStation 6 | ENH500-AX User Manual
Building a Wireless Network
Before starting to configure this Access Point, you may realize the used scenario under varied operating modes.
The AP can transmit data more efficiently, avoid collisions, and reduce latency and packet losses.
Access Point Mode
In Access Point Mode, the device behaves like a central connection for stations or clients that support IEEE 802.11ax/ac/
a/n networks. The stations and clients must be configured to use the identical SSID (Service Set Identifier) and security
password to associate with the EnStation6/ENH500-AX. The EnStation6/ENH500-AX supports up to one (1)/eight (8)
SSIDs per band simultaneously for secure access.
Station Mode
The device essentially acts as a wireless adapter that connects to an access point to allow wireless access to the network
in the station mode. Since the client is on the same subnet, the device can broadcast to reach the client’s device.
If you use the station mode in the device, you can use the AP Detection feature to scan for Access Points within range.
When you find an Access Point, configure the device to use the identical SSID and Security Password as the Access
Point to associate with it.
Access Point Mode
5GHz
Station Mode
EnStation 6 | ENH500-AX User Manual
WDS Access Point
5GHz
WDS Station
WDS Access Point Mode
The device also supports WDS AP mode. This operating mode allows wireless connection to the other devices via the
WDS technology. Configure the MAC addresses in both Access Points to enlarge the wireless area in this mode by
enabling WDS Link settings. WDS supports up to four (4) AP MAC addresses.
WDS Station Mode
Station mode expands the WDS by receiving a wireless signal/service and sharing it through the Ethernet port.
WDS Repeater Mode
Extend the coverage area of your WiFi network. It works by receiving your existing WiFi signal, amplifying it and then
transmitting the boosted signal.
WDS Station WDS Station
WDS AP
EnStation 6 | ENH500-AX User Manual
Status
Main Status
Save Changes
This page lets you save and apply the settings shown under
the Unsaved changes list or cancel the unsaved changes
and revert to the previous settings that were in effect.
* Different models will vary the model name
Device Status
Clicking the Device Status link under the Overview menu shows
the status information about the current operating mode.
• The Device Information section shows general system
information such as Device Name, MAC Address, Current
Time, Firmware Version, and Management VLAN ID.
* Different models will vary the model name
Note: VLAN ID information is only applicable in Access
Point or WDS AP mode.
• The Memory Information section shows memory usage
such as Total Available, Free, Cached, and Buffered.
• The LAN Information section shows the Local Area
Network settings including the LAN IP Address, Subnet
mask, and DNS Address.
• The Wireless LAN Information 5 GHz section shows
wireless information such as Operating Mode,
Frequency, and Channel. Since the EnStation6 and
ENH500-AX supports multiple-SSIDs, information
about each SSID, the ESSID, and security settings, are
displayed.
Note: Profile Settings are only applicable in Access Point
and WDS AP modes.
EnStation 6 | ENH500-AX User Manual
Connection
5 GHZ Connection List
Click the connection link under the Overview menu displays
the connection list of clients associated with 5 GHz, along
with the MAC addresses and signal strength for each
client. Clicking Refresh updates the client list.
Note: Only applicable in Access Point and WDS AP modes.
WDS Link List
Click the connection link under the Overview menu. This
page displays the current status of the WDS link, including
WDS Link ID, MAC Address, Link Status and RSSI.
Realtime
The Realtime section contains the following options:
CPU Loading: 3 minutes CPU loading percentage
information. It displays current loading, average loading and
peak loading status. The left bar is the loading percentage;
the button is time tracing. The interval is every 3 seconds.
Traffic Loading: 5GHz and Ethernet port inbound and
outbound traffic by current, average and peak time.
Realtime Connection (Pkts): Overview of current
active network connections. It displays UDP and TCP
packet information and other connection statuses. UDP
connections curve is in blue; TCP connection curve is
in green; others curve is in red. Below of chart shows
connections source and destination.
EnStation 6 | ENH500-AX User Manual
Network
Basic IP Settings
IPv4/IPv6 Settings
This page allows you to modify the device’s IP settings.
IP Network Settings: Select whether the device IP address
will use a static IP address specified in the IP address field
or be obtained automatically when the device connects to
a DHCP server.
IP Address: The IP address of this device. Subnet Mask:
The IP Subnet mask of this device.
Gateway: The Default Gateway of this device. Leave it
blank if you are unsure of this setting.
Primary/Secondary DNS: The primary/secondary DNS
address for this device.
Save: Click Save to confirm the changes.
Spanning Tree Protocol (STP) Settings
This page allows you to modify the Spanning Tree settings.
Enabling the Spanning Tree protocol will prevent network
loops in your LAN network.
Spanning Tree Status: Enables or disables the Spanning
Tree function.
Hello Time: Specifies Bridge Hello Time in seconds. This
value determines how often the device sends handshake
packets to communicate information about the topology
throughout the entire Bridged Local Area Network.
Max Age: Specifies Bridge Max Age in seconds. If another
bridge in the spanning tree does not send a hello packet
for an extended period, it is assumed to be inactive.
Forward Delay: Specifies Bridge Forward Delay in seconds.
Forwarding delay time is the time spent in each of the
Listening and Learning states before the Forwarding state
is entered. This delay is provided to allow a new bridge
comes onto a busy network, it analyzes data traffic before
participating in the network.
Priority: Specifies the Priority Number. A smaller number
has a greater priority than a larger number.
Save: Click Save to confirm the changes.
EnStation 6 | ENH500-AX User Manual
Wireless Connection
Wireless
Wireless Settings
Wireless Network
EnStation 6 / ENH500-AX supports 802.11 ax/ac/n mixed
mode in 5 GHz.
Operation Mode: Select Operation Mode.
When the EnStation6 / ENH500-AX can be set as an
Access Point, Station, Repeater, WDS Access Point, WDS
Station, WDS Repeater.
Channel HT Mode: The default channel bandwidth is 20
MHz/ 40 /80 MHz. The larger the channel, the greater the
transmission quality, and speed.
Channel: Click the Configuration button to open a new window
to configure the channels for performing wireless service.
Transmit Power: Sets the power output of the wireless signal.
Bit Rate: 5GHz is default 6 Mbps. The range can control by
BAR via scroll from 6Mbps to 54Mbps.
* Different models will vary the model name
Device Name: Enter a name for the device. The name you
type appears in SNMP management. This name is not the
SSID and is not broadcasted to other devices.
Save: Click Save to confirm the changes.
Client Limits: You can set the limitation of client numbers
then the maximum associated client devices will be
restricted at this number.
AP Detection: AP Detection can select the best channel to
use by scanning nearby areas for Access Points.
Distance: Specifies the distance between Access Points
and client devices. The proper setting for this parameter
may assist Access Points in avoiding the improper
operation when transmitting data under a filed application.
*High level means this client will get 10/16 of AP’s time resource.
Wireless Setting-5GHz
Current Profile: You can configure up to eight(8)different
SSID. If multiple client devices will be accessing the
network, you can arrange the devices into SSID groups.
Click Edit to configure the profile and check whether you
want to enable extra SSID.

Other manuals for EnStation 6

1

This manual suits for next models

1

Other EnGenius Wireless Access Point manuals

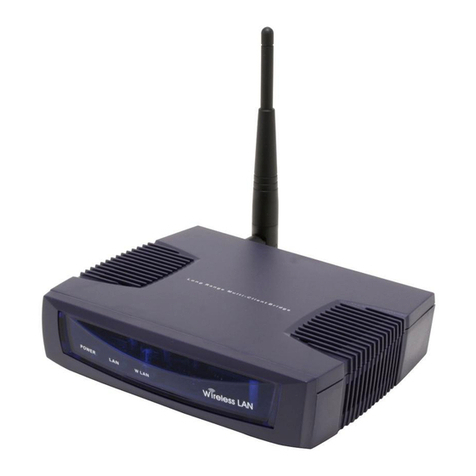
EnGenius EAP-3660 User manual

EnGenius

EnGenius EAP-3660 User manual

EnGenius ENH900EXT User manual

EnGenius

EnGenius ENH900EXT User manual

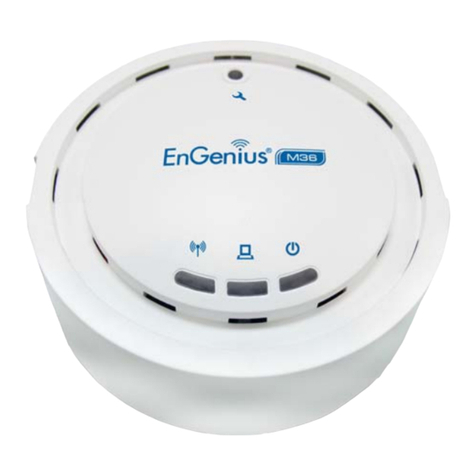
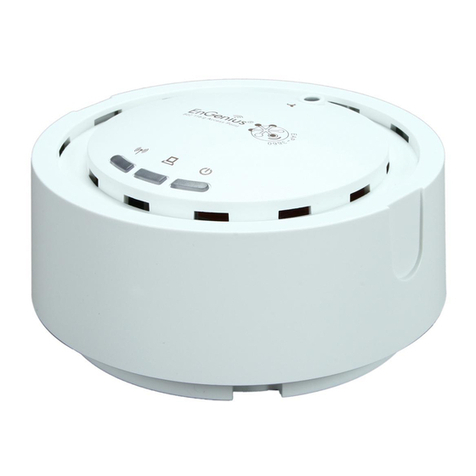
EnGenius EAP300 User manual

EnGenius

EnGenius EAP300 User manual

EnGenius EWS375-FIT User manual

EnGenius

EnGenius EWS375-FIT User manual

EnGenius M8000 User manual

EnGenius

EnGenius M8000 User manual

EnGenius ETA1305 User manual

EnGenius

EnGenius ETA1305 User manual

EnGenius EOC5510 User manual

EnGenius

EnGenius EOC5510 User manual

EnGenius EAP350 User manual

EnGenius

EnGenius EAP350 User manual

EnGenius EWS385AP User manual

EnGenius

EnGenius EWS385AP User manual

EnGenius EWS377AP User manual

EnGenius

EnGenius EWS377AP User manual

EnGenius EMD2 User manual

EnGenius

EnGenius EMD2 User manual

EnGenius ECB600 User manual

EnGenius

EnGenius ECB600 User manual

EnGenius User Guide User manual

EnGenius

EnGenius User Guide User manual

EnGenius ECB1750 User manual

EnGenius

EnGenius ECB1750 User manual

EnGenius EAP150 User manual

EnGenius

EnGenius EAP150 User manual

EnGenius EOC2611P User manual

EnGenius

EnGenius EOC2611P User manual

EnGenius EOC5611P User manual

EnGenius

EnGenius EOC5611P User manual

EnGenius M35 User manual

EnGenius

EnGenius M35 User manual

EnGenius ECB600 User manual

EnGenius

EnGenius ECB600 User manual

EnGenius ENS200 User manual

EnGenius

EnGenius ENS200 User manual

EnGenius EWS377-FIT User manual

EnGenius

EnGenius EWS377-FIT User manual

EnGenius EOC1650 User manual

EnGenius

EnGenius EOC1650 User manual

EnGenius ENS200 User manual

EnGenius

EnGenius ENS200 User manual

EnGenius EOC5510 User manual

EnGenius

EnGenius EOC5510 User manual

Popular Wireless Access Point manuals by other brands

D-Link AirPremier N DAP-2360 user manual

D-Link

D-Link AirPremier N DAP-2360 user manual

MDS iNET 900 Series installation guide

MDS

MDS iNET 900 Series installation guide

Aerohive AP330 user guide

Aerohive

Aerohive AP330 user guide

Cisco Small Business AP541N Administration guide

Cisco

Cisco Small Business AP541N Administration guide

Eusso UOW2000 Series user manual

Eusso

Eusso UOW2000 Series user manual

3Com 3CRWE675075 - 11a/b/g Wireless LAN Workgroup... quick start guide

3Com

3Com 3CRWE675075 - 11a/b/g Wireless LAN Workgroup... quick start guide

Dell TrueMobile 4350 user guide

Dell

Dell TrueMobile 4350 user guide

Edge-Core EAP104 quick start guide

Edge-Core

Edge-Core EAP104 quick start guide

TRENDnet TEW-825DAP(V1) Quick installation guide

TRENDnet

TRENDnet TEW-825DAP(V1) Quick installation guide

Enterasys WS-AP3660 installation guide

Enterasys

Enterasys WS-AP3660 installation guide

Alcatel-Lucent 9763 Operation and installation

Alcatel-Lucent

Alcatel-Lucent 9763 Operation and installation

Renkforce RF-WFE-200 operating instructions

Renkforce

Renkforce RF-WFE-200 operating instructions

TP-Link EAP265 Quick installation guide

TP-Link

TP-Link EAP265 Quick installation guide

Motorola AP-7522 installation guide

Motorola

Motorola AP-7522 installation guide

HPE Aruba AP-344 Product End-of-Life Disassembly Instructions

HPE

HPE Aruba AP-344 Product End-of-Life Disassembly Instructions

Cisco MERAKI MR57 installation guide

Cisco MERAKI

Cisco MERAKI MR57 installation guide

Devolo dLAN pro 500 Wireless+ user guide

Devolo

Devolo dLAN pro 500 Wireless+ user guide

OBERON 1060-00 installation instructions

OBERON

OBERON 1060-00 installation instructions

manuals.online logo
manuals.online logoBrands
  • About & Mission
  • Contact us
  • Privacy Policy
  • Terms and Conditions

Copyright 2025 Manuals.Online. All Rights Reserved.