enphase RGM Owner's manual

INSTALLATION AND OPERATION MANUAL
141-00019, Rev 01
Revenue Grade Meter (RGM)
for Enphase Metering and Management Solution™

Metering and Management Solution Installation &Operation
Copyright ©2012 Enphase Energy 141-00019 Rev 01
2
Contact Information
Enphase Energy Inc.
1420 N. McDowell Blvd.
Petaluma, CA 94954
http://www.enphase.com
FCC Approvals
This device complies with Part 15 of the FCC rules. Operation is subject to the following two conditions: (1)
this device may not cause harmful interference, and (2) this device must accept any interference received,
including interference that may cause undesired operation.
WARNING: To satisfy FCC RF exposure requirements for mobile transmitting devices, a separation distance
of 20 cm (8 inches) or more should be maintained between the antenna of this device and persons during
operation. To ensure compliance, operations at closer distances than this are not recommended.
Changes or modifications not expressly approved by the party responsible for compliance may void the
user’s authority to operate the equipment.
Other Information
Product information is subject to change without notice. All trademarks are recognized as the property of
their respective owners.
User documentation is updated frequently; Check the Enphase website
(http://www.enphase.com/support/downloads) for the latest information.
Copyright © 2012 Enphase Energy. All rights reserved.

Metering and Management Solution Installation &Operation
Copyright ©2012 Enphase Energy 141-00019 Rev 01
3
Table of Contents
Important Safety Information ......................................................................................................................... 5!
Read this First.................................................................................................................................. 5!
Safety Instructions ........................................................................................................................... 5!
The Enphase Metering and Management Solution ........................................................................................ 6!
Preparing for RGM Installation....................................................................................................................... 7!
Parts and Tools Required................................................................................................................. 7!
Required Enphase Equipment...................................................................................................... 7!
Optional Enphase Equipment....................................................................................................... 7!
Other Tools and Equipment ......................................................................................................... 7!
Before Installing the RGM................................................................................................................. 8!
Install the PV System and Verify Site Service ................................................................................ 8!
Turn Off the Solar Backfeed Breaker(s)......................................................................................... 8!
Install the Form 2S Meter Socket ................................................................................................. 8!
Installing the RGM......................................................................................................................................... 9!
Installation Workflows....................................................................................................................... 9!
Workflow 1: Install a Preprovisioned RGM........................................................................................ 9!
Preprovision the RGM before Visiting the Site............................................................................. 10!
Step 1. Activate (Register) the System ................................................................................................. 10!
Step 2. Connect the Envoy and Insert the ZigBee Stick ....................................................................... 11!
Step 3. Configure the RGM ................................................................................................................. 12!
Install the Preprovisioned RGM at the Site.................................................................................. 13!
Step 4. Install the RGM........................................................................................................................ 13!
Step 5. Power Up the RGM ................................................................................................................. 13!
Step 6. Verify the Installation................................................................................................................ 13!
Step 7. Install the Meter Band.............................................................................................................. 14!
Step 8. Build the Virtual Array .............................................................................................................. 14!
Workflow 2: Install and Provision an RGM on Site .......................................................................... 15!
Step 1. Install the RGM........................................................................................................................ 15!
Step 2. Power Up the RGM ................................................................................................................. 15!
Step 3. Activate (Register) the System ................................................................................................. 16!
Step 4. Verify Envoy Installation and Insert the ZigBee Stick................................................................. 17!
Step 5. Configure the RGM ................................................................................................................. 18!
Step 6. Verify the Installation................................................................................................................ 19!
Step 7. Install the Meter Band.............................................................................................................. 19!
Step 8. Build the Virtual Array .............................................................................................................. 19!
Enable API Access (Optional) ......................................................................................................... 21!
Install a Repeater (Optional)............................................................................................................ 22!
Step 1. Plug the Repeater into a Wall Outlet ........................................................................................ 22!
Step 2. Configure the Repeater ........................................................................................................... 22!
Step 3. Mate the Repeater................................................................................................................... 23!
Remove a Repeater ....................................................................................................................... 23!
Operation.................................................................................................................................................... 24!
How to Read the Envoy’s ZigBee Device Configuration Page......................................................... 24!
How to Read the RGM Display ...................................................................................................... 24!
How to View a Production Report in Enlighten ............................................................................... 24!

Metering and Management Solution Installation &Operation
Copyright ©2012 Enphase Energy 141-00019 Rev 01
4
How to Read the RGM LED ........................................................................................................... 25!
Error Reporting and Troubleshooting .......................................................................................................... 26!
Do I Need a Repeater? .................................................................................................................. 26!
Status and Event Messages........................................................................................................... 27!
Meter Status Messages on the Envoy LCD ................................................................................ 27!
RGM Event Messages................................................................................................................ 27!
Troubleshooting ............................................................................................................................. 28!
Issues Observed at the RGM ..................................................................................................... 28!
RGM Issues Observed at the Envoy Interface............................................................................. 29!
RGM Issues Observed on the Envoy LCD .................................................................................. 30!
When to Contact Enphase ............................................................................................................. 30!
Replacing an RGM...................................................................................................................................... 31!
Step 1. Turn Off the Solar Backfeed Breakers(s) in the Main Load Center............................................ 31!
Step 2. Remove the Old RGM ............................................................................................................. 31!
Step 3. Install the Replacement RGM .................................................................................................. 31!
Step 4. Unmanage the RGM................................................................................................................ 32!
Step 5. Install and Configure the New ZigBee Stick ............................................................................. 32!
Step 6. Power Up the RGM ................................................................................................................. 32!
Step 7. Verify the Installation................................................................................................................ 33!
Step 8. Install the Meter Band.............................................................................................................. 33!
Step 9: Retire the Old RGM in Enlighten .............................................................................................. 33!
Technical Data ............................................................................................................................................ 34!
Specifications, Compliance, and Ordering Information ................................................................... 34!
RGM Specifications and Compliance ......................................................................................... 34!
Sample RGM Wiring Diagram –Single Branch ............................................................................... 35!
Sample RGM Wiring Diagram –Multiple Branches ......................................................................... 36!

Metering and Management Solution Installation &Operation
Copyright ©2012 Enphase Energy 141-00019 Rev 01
5
Important Safety Information
Read this First
This manual contains important instructions for use during installation and maintenance of the Enphase-
Compatible Revenue Grade Meter (RGM), a component of the Enphase Metering and Management Solution
(EMMS). Follow the instructions in this section to install the RGM.
To reduce the risk of electrical shock, and to ensure the safe installation and operation of the RGM, the
following safety symbols appear throughout this document to indicate dangerous conditions and important
safety instructions.
DANGER / WARNING! This indicates a situation where failure to follow instructions may be
a safety hazard or cause equipment malfunction. Use extreme caution and follow
instructions carefully.
NOTE: This indicates information particularly important for optimal system operation. Follow
instructions closely.
Safety Instructions
This equipment must be installed by a licensed electrician in accordance with all locally
recognized electrical codes, including National Electrical Code (NEC), ANSI/NFPA 70.
Use this equipment only with a safety certified meter socket.
Read and follow all instructions and cautionary markings for the RGM and for the meter socket
you are using.
Do not attempt to open or repair the following items:
oEnphase-Compatible Revenue Grade Meter (RGM)
oZigBee USB stick for RGM
oZigBee Repeater for RGM
These items contain no user-serviceable parts. If any of these items fails, please contact
Enphase customer service to obtain an RMA (return merchandise authorization) number and
start the replacement process. Tampering with or opening these items will void the warranty.
Do not use Enphase equipment in a manner not specified by the manufacturer. Doing so may
cause death or injury to persons, or damage to equipment.

Metering and Management Solution Installation &Operation
Copyright ©2012 Enphase Energy 141-00019 Rev 01
6
The Enphase Metering and Management Solution
The Enphase Metering and Management Solution delivers a single platform to manage both microinverter
and meter data. The Solution monitors a single phase Enphase Microinverter System and measures its
power production with revenue grade accuracy. At the same time, it meets the needs of Power Purchase
Agreement providers (PPAs), third party solar financiers and solar installers requiring a Revenue Grade Meter.
System elements include:
•Enphase-Compatible Revenue Grade Meter (RGM)
•ZigBee USB stick for RGM (for use only with the Enphase Envoy Communications GatewayTM)
•Enphase Envoy Communications GatewayTM
•Enphase EnlightenTM web-based monitoring and analysis software
This manual describes installation of the RGM, also known as the RGM-MTR-01, Enphase compatible, GE
i210+ Revenue Grade Meter with integrated ZigBee communication by Silver Spring Networks.
The RGM is a single phase, watt-hour, revenue grade meter. It measures energy production from the array
and sends data to the Envoy Communications GatewayTM, which then forwards the data to EnlightenTM over
the Internet.
NOTE: The RGM does not replace the utility meter, but works along side it. The electric
meter installed by your local utility measures net electric consumption, while the RGM
measures solar production.
The RGM works with 240V service and requires a form 2S meter socket for installation. For more
information, see the Technical Data page 34 of this manual.

Metering and Management Solution Installation &Operation
Copyright ©2012 Enphase Energy 141-00019 Rev 01
7
Preparing for RGM Installation
The instructions in this manual do not cover installation of the PV system (microinverters, PV modules,
racking, and associated hardware) or the Envoy Communications Gateway.
•For information on microinverter installation, refer to the Enphase Microinverter Installation Manual for
the model being installed at http://www.enphase.com/support/downloads.
•For information on Envoy Installation, refer to the Envoy Installation and Operation Manual.
DANGER: Be aware that installation of this equipment includes risk of electric shock.
Installation must be done by a certified electrician.
WARNING: Do not reuse an RGM in a second location! An RGM permanently retains
information from its original installation and cannot be reset.
NOTE: We do not recommend reusing a ZigBee stick in a second location.
Parts and Tools Required
In addition to the existing PV system (microinverters, PV modules, racking, and associated hardware), you
will need the following equipment.
Required Enphase Equipment
•Enphase Compatible GE i210+ Revenue Grade Meter (RGM) with integrated ZigBee (RGM-MTR-01)
•ZigBee USB stick for Envoy communication with RGM (RGM-ZGB-01)
•Enphase Envoy Communications Gateway (ENV-120-01)
Optional Enphase Equipment
Enphase recommends that you take a repeater (Enphase order number RGM-RR-01) with you when
installing an RGM. To determine if you need a Repeater, see “Do I Need a Repeater?” on page 26.
Other Tools and Equipment
•Appropriate tools for meter socket and meter installation
•A form 2S meter socket
•If there is more than one solar branch circuit, you must add a dedicated subpanel on the array side
of the RGM
•Laptop or other computer to configure the Envoy for the RGM
•A broadband router with an always-on Internet connection
Metering and Management Solution Installation &Operation
Copyright ©2012 Enphase Energy 141-00019 Rev 01
8
Before Installing the RGM
Install the PV System and Verify Site Service
•Verify that you have installed the PV modules, microinverters, and Envoy before installing the RGM.
NOTE: So that you can verify RGM operation and see evidence of power produced after
installing the RGM, it is best practice to install the RGM as the last element in the Enphase
solar microinverter system.
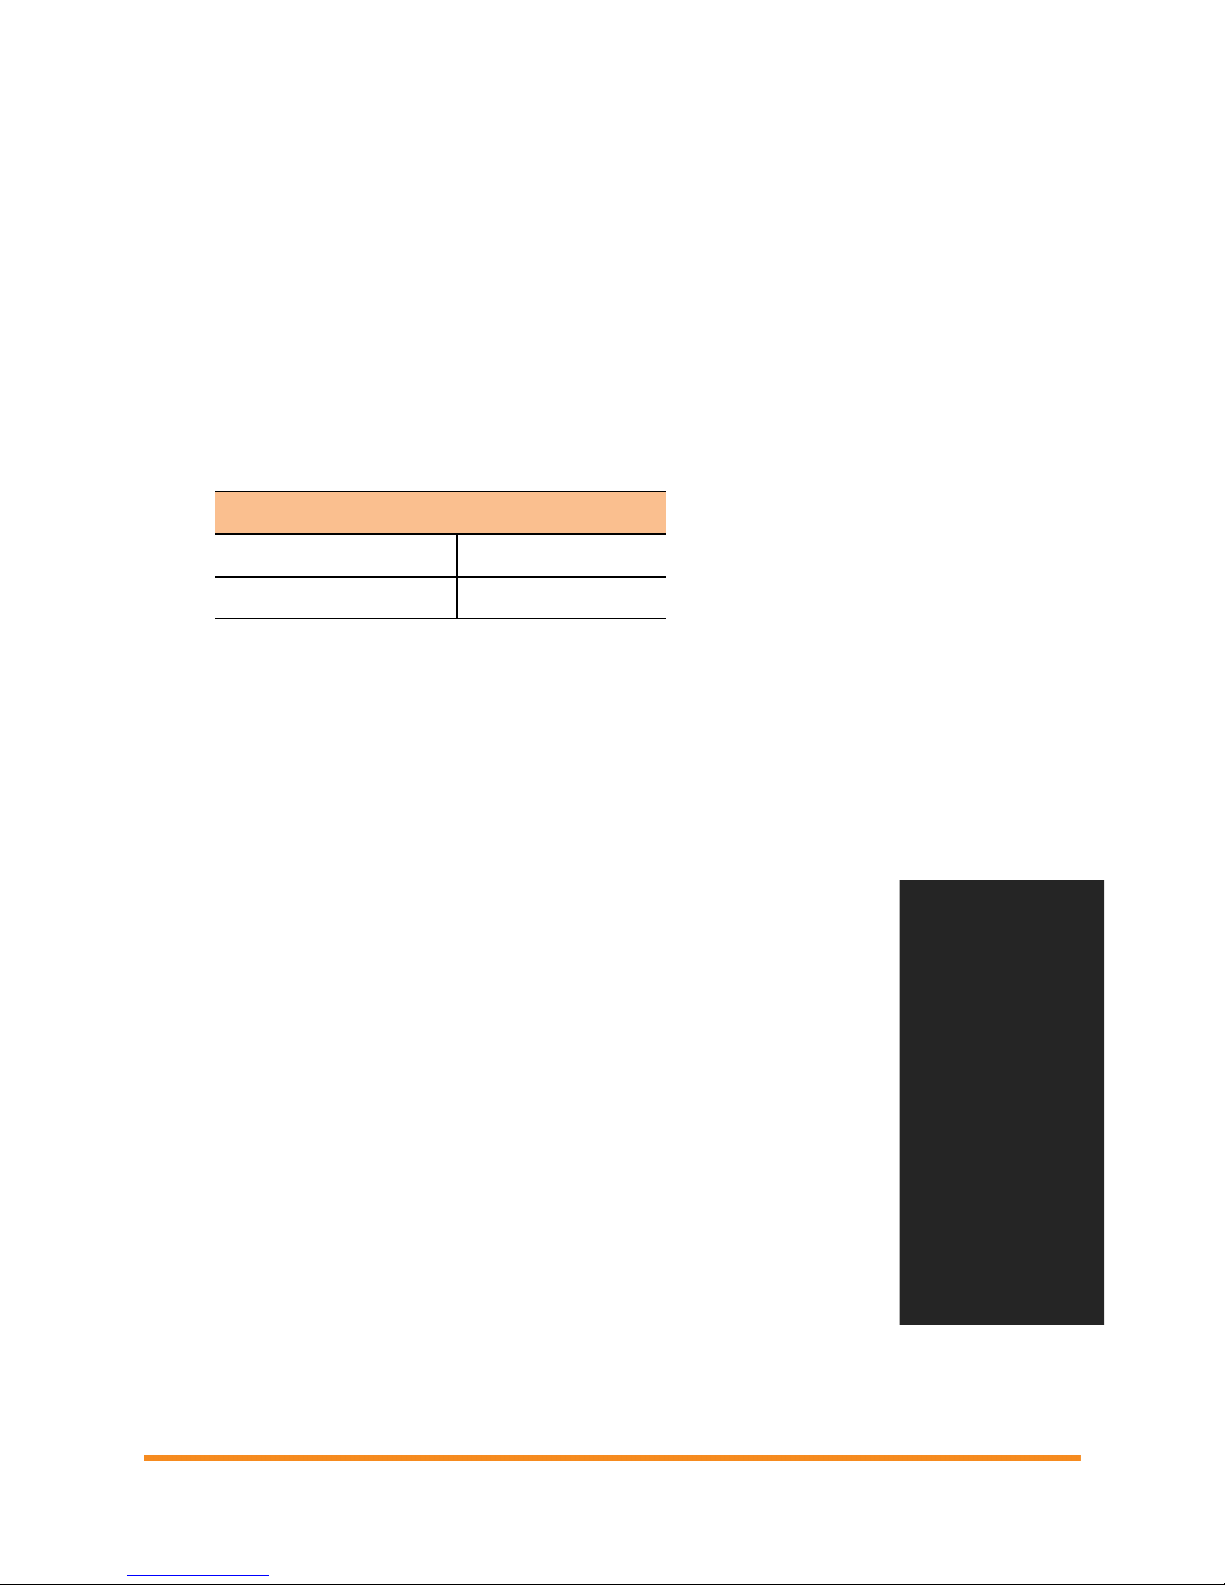
•Measure AC line voltage at the electrical utility
connection to confirm that it is within range. The
following table shows acceptable ranges.
Single phase 240 Volt AC
L1 to L2
211 to 264 VAC
L1, L2 to neutral
106 to 132 VAC
Turn Off the Solar Backfeed Breaker(s)
•Turn off the solar backfeed breaker in the main load center.
•Verify that the AC branch circuits are not energized.
Install the Form 2S Meter Socket
•Reference the sample wiring diagrams on pages 35 and 36.
•Install the socket near the load center. The socket must be wired in series,
not in parallel.
•Wire the socket so that the top meter contacts connect to the array. If
there are multiple solar circuits, you must combine them, so that all circuits
connect to the socket.
WARNING: Wire the socket so that the top meter contacts connect
to the array! Otherwise, power produced will register as consumed.
•Conductors from the array may be narrower than would normally be landed
at this type of socket. In this case, be careful to place the conductors so that
they do not slip out of place and to ensure adequate contact with the socket
terminals.

Metering and Management Solution Installation &Operation
Copyright ©2012 Enphase Energy 141-00019 Rev 01
9
Installing the RGM
Follow the instructions in this section to install the RGM.
Installation Workflows
There are two recommended workflows for RGM installation. Choose the workflow that best suits your
needs. The two alternatives are:
•You can preprovision one or more RGMs to ready them for physical installation, thus eliminating the
need to bring a laptop computer to the installation site.
•You can install and configure an RGM on site. In this case, you will need to bring a laptop computer
to the installation site.
Workflow 1: Install a Preprovisioned RGM
In this workflow, perform steps one through three in advance,before traveling to the installation site. Perform
steps 4 through 9 on site at the same time you install the meter socket. (See “Install the Form 2S Meter
Socket”on page 8.)
NOTE: With this workflow, you must maintain matched sets of preprovisioned Envoy,
ZigBee stick and RGM. If preprovisioned units become mixed, you must provision them
again before or during physical installation.
The following pages detail these steps:
Before Visiting the Site, Preprovision the RGM
Step 1 – Activate (Register) the System
Step 2– Connect the Envoy and Insert the ZigBee Stick!
Step 3– Configure the RGM
Install the Preprovisioned RGM at the Site
Step 4– Install the RGM
Step 5– Power Up the RGM!
Step 6– Verify the Installation
Step 7– Install the Meter Band
Step 8– Build the Virtual Array

Metering and Management Solution Installation &Operation
Copyright ©2012 Enphase Energy 141-00019 Rev 01
10
Preprovision the RGM before Visiting the Site
Step 1. Activate (Register) the System
To activate the site in Enlighten, perform the following steps.
•Log into the Enlighten installer portal. (Go to enlighten.enphaseenergy.com and enter your email
address (username) and password or create a new Enlighten account)
•From the Installer Dashboard, click Add New Activation.
•Create a new site activation by entering the following site information:
a. Enter the name of the homeowner in the “System Name” field
b. Select “residential” as the system type
c. Check the “This is a PPA
or Leased System”
checkbox.
d. For System Host, enter
the homeowner
information, or leave this
information blank. (This
information is optional or
you can enter it later.)
e. Enter the homeowner street
address in the “Location
Information”
f. In the “Owner Information”
section enter the email
address supplied by the
third party owner.

Metering and Management Solution Installation &Operation
Copyright ©2012 Enphase Energy 141-00019 Rev 01
11
g. Enter the Envoy serial number under “System Information”
h. Enter the total number of branch circuits and modules under “Array Information”.
•Click Save to submit the form. You will receive a confirmation message: “Activation Created
Successfully”.
Step 2. Connect the Envoy and Insert the ZigBee Stick
When powered up and connected for the first time, the Envoy may retrieve an automatic upgrade from
Enphase. Because this upgrade may take up to 45 minutes, connect the Envoy before preprovisioning the
RGM so that the Envoy performs the upgrade well before you begin provisioning the RGM.
WARNING: Do not unplug the Envoy during software upgrade!
•Plug the Envoy’s Ethernet cable into the Ethernet port on
the Envoy, and plug the other end of the Ethernet cable
into a spare port on a broadband router with an active
Internet connection.
•Plug the ZigBee stick into either USB port on the Envoy.
•Check that the ZigBee stick is fully seated in the USB port.
•Plug the Envoy’s AC power cord into the input on the
Envoy, and plug the other end of the cord into an AC
outlet.

Metering and Management Solution Installation &Operation
Copyright ©2012 Enphase Energy 141-00019 Rev 01
12
Step 3. Configure the RGM
•Open an Internet browser on a computer connected to the same local network as the Envoy.
•In the browser address window, enter the IP address displayed in the LCD screen of the Envoy.
•On the Envoy home page, verify that the current
software version is R3.2.0 or greater. If the software
version is lower than R3.2.0, contact
NOTE: If the Envoy is running software
version lower than R3.2.0, completing the
Enphase Activation (see page 10) and
selecting the “This is a PPA or Leased
System” checkbox will start an automatic
Envoy upgrade to R3.2.0.Do not unplug
the Envoy during upgrade.
•Click Administration to access the Administration menu. Log in using the following credentials:
oUsername: admin
oPassword: admin
•From the Administration menu, select ZigBee Device Configuration.
NOTE: If the ZigBee Device Configuration screen is blank, check that you have fully installed
the ZigBee stick into the Envoy.
•Under Add New ZigBee Device, enter the Device EUI64 code (16 characters) from the face of the RGM.
•Enter the Device Install Code (20 characters) from the back of the RGM.
NOTE: This is a hexadecimal number. While it may contain the letters A, B, C, D, E, and F, it
does not contain letters that can be easily mistaken for numbers, such as I, S, and O.
•Click Add Device. The page will show the message “Install code accepted for ZigBee device.
Device scan started.” The Envoy and ZigBee stick will begin the joining process.
•Once the page shows the device (RGM) Network Discovery state as “Preconfigured”, the
configuration process is complete.
•Power down the Envoy for delivery to the installation site with the matching ZigBee Stick and RGM.

Metering and Management Solution Installation &Operation
Copyright ©2012 Enphase Energy 141-00019 Rev 01
13
Install the Preprovisioned RGM at the Site
Step 4. Install the RGM
•Confirm that the solar backfeed breaker in the main load center is off.
•The RGM has current and potential terminals that extend from the back of the
RGM. Orient these terminals with the socket jaws.
•Plug the meter into the form 2S socket. A spring in the socket jaws provides
heavy contact force. Alternatively, some heavy-duty sockets include a handle or
wrench to provide the needed contact force.
•Wait until step 7 before installing the meter band.
Step 5. Power Up the RGM
•Turn on the solar backfeed breaker in the main load center.
•Verify that the RGM LCD indicates power is on. (The LCD screen is active.)
•Check that the lower left display on the meter shows approximately 240 Volts.
•After the solar circuit has been on for five minutes, the microinverters begin to
convert energy, and the meter startsto show solar production (during daylight
hours). The RGM LCD lower left display indicatesthe kW being produced by
the system. Check that the lower right display shows “Delivered”. The value on the lower left of the
RGM LCD alternates between Volts and instantaneous power (kW).
Step 6. Verify the Installation
•After the RGM LCD has been indicating solar production for approximately five minutes, check that
the Envoy LCD screen reads:
•If the Envoy does not show a connection to the RGM after a ten minute wait, start a new ZigBee
device scan from the Envoy. To do this, hold down the menu button (on the right side of the Envoy)
and release it when the menu item “Scan ZigBee Network” appears.
•If the Envoy does not show a connection to the RGM within ten minutes after rescanning the ZigBee
network, double-check that the EUI64 code from the meter faceplate exactly matches the code as
typed at the Envoy interface on the ZigBee Device Configuration page. If you find that a code was
entered incorrectly, select and unmanage the incorrect EUI64, then add a new device with the
correct EUI64 and Install Code. If the code is correct, you may need to install a repeater. If you do
not have one, order part number RGM-RR-01. To install a repeater, see “Install a Repeater”on page
22.
Meter status:
OK

Metering and Management Solution Installation &Operation
Copyright ©2012 Enphase Energy 141-00019 Rev 01
14
Step 7. Install the Meter Band
•Install the meter band that was provided with the Form 2S meter socket, as needed.
Step 8. Build the Virtual Array
•Once all the microinverters at the site are detected, and the Envoy has successfully connected to
the Internet, you will be notified that the array for site can be built. Click the link provided, and use
Enlighten’s Array Builder to build the virtual array for the site.
NOTE: You must build the array for the Activation to be complete and for the system to
begin reporting normally.
•(Optional) Upload the installation map to the site activation form in Enlighten. The installation map
should include serial number stickers for all units installed at the site.
Reminder: For site data to be consistently available on Enlighten, each site must have an
Enphase Envoy installed. That Envoy must be installed in an interior space as close to the
load center as possible and maintain a consistent connection to the Internet.
For more information on Envoy installation, refer to the Envoy Installation and Operation
Manual at http://www.enphase.com/support/downloads.
To see the Array Builder demo,
visit http://enphase.com/support/videos/build-a-simple-array-in-enlighten/.

Metering and Management Solution Installation &Operation
Copyright ©2012 Enphase Energy 141-00019 Rev 01
15
Workflow 2: Install and Provision an RGM on Site
In this workflow, perform all steps on site at the same time that the meter socket is installed. (See “Install the
Form 2S Meter Socket”on page 8.) The following pages detail these steps:
Step 1– Install the RGM
Step 2– Power Up the RGM
Step 3 – Activate (Register) the Enphase System
Step 4– Verify Envoy Installation and Insert the ZigBee Stick!
Step 5– Configure the RGM!
Step 6– Verify the Installation
Step 7– Install the Meter Band
Step 8– Build the Virtual Array
Step 1. Install the RGM
•Make note of two codes from the labels on the RGM, as you will need
them later in the installation process. These codes are:
oThe Device EUI64 code (16 characters) from the face of the RGM.
oThe Device Install Code (20 characters) from the back of the RGM.
Tip: If possible, take pictures of the codes with your smart phone.
•The RGM has current and potential terminals that extend from the back of the RGM. Orient these
terminals with the socket jaws.
•Plug the meter into the form 2S socket. A spring in the socket jaws provides
heavy contact force. Alternatively, some heavy-duty sockets include a handle or
wrench to provide the needed contact force.
•Wait until step 7 before installing the meter band.
Step 2. Power Up the RGM
•Turn on the solar backfeed breaker in the main load center.
•Verify that the RGM LCD indicates power is on. (The LCD screen is active.)
•Check that the lower left display on the meter shows approximately 240 Volts.
•After the solar circuit has been on for five minutes, the meter startsto show solar production (during
daylight hours). The RGM LCD lower left display indicatesthe kW being produced by the system.
Check that the lower right display shows “Delivered”. The value on the lower left of the RGM LCD
alternates between Volts and instantaneous power (kW).

Metering and Management Solution Installation &Operation
Copyright ©2012 Enphase Energy 141-00019 Rev 01
16
Step 3. Activate (Register) the System
To activate the site in Enlighten, perform the following steps.
•Log into the Enlighten installer portal. (Go to enlighten.enphaseenergy.com and enter your email
address (username) and password or create a new Enlighten account)
•From the Installer Dashboard, click Add New Activation.
•Create a new site activation by entering the following site information:
a. Enter the name of the homeowner in the “System Name” field
b. Select “residential” as the system type
c. Check the “This is a PPA
or Leased System”
checkbox.
d. For System Host, enter
the homeowner
information, or leave this
information blank. (This
information is optional or
you can enter it later.)
e. Enter the homeowner street
address in the “Location
Information”
f. In the “Owner Information”
section enter the email
address supplied by the
third party owner.

Metering and Management Solution Installation &Operation
Copyright ©2012 Enphase Energy 141-00019 Rev 01
17
g. Enter the Envoy serial number under “System Information”
h. Enter the total number of branch circuits and modules under “Array Information”.
•Click Save to submit the form. You will receive a confirmation message: “Activation Created
Successfully”.
Step 4. Verify Envoy Installation and Insert the ZigBee Stick
When powered up and connected for the first time, the Envoy may retrieve an automatic upgrade from
Enphase. Because this upgrade may take up to 45 minutes, connect the Envoy before configuring the RGM
so that the Envoy performs the upgrade well before the RGM configuration begins.
WARNING: Do not unplug the Envoy during software upgrade!
•Check that the Envoy is powered up and plugged into an
AC outlet.
•Check that the Envoy has an always-on connection to the
Internet.
•Plug the ZigBee stick into either USB port on the Envoy.
•Check that the ZigBee stick is fully seated in the USB port.

Metering and Management Solution Installation &Operation
Copyright ©2012 Enphase Energy 141-00019 Rev 01
18
Step 5. Configure the RGM
•Open an Internet browser on a computer connected to the same local network as the Envoy.
•In the browser address window, enter the IP address displayed in the LCD screen of the Envoy.
•On the Envoy home page, verify that the current
software version is R3.2.0 or greater. If the software
version is lower than R3.2.0, contact
NOTE: If the Envoy is running software
version lower than R3.2.0, completing the
Enphase Activation (see page 16) and
selecting the “This is a PPA or Leased
System” checkbox will start an automatic
Envoy upgrade to R3.2.0.Do not unplug
the Envoy during upgrade.
•Click Administration to access the Administration menu. Log in using the following credentials:
oUsername: admin
oPassword: admin
•From the Administration menu, select ZigBee Device Configuration.
NOTE: If the ZigBee Device Configuration screen does not appear, check that you have fully
installed the ZigBee stick into the Envoy.
•Under Add New ZigBee Device, enter the Device EUI64 code (16 characters) from the face of the RGM.
•Enter the Device Install Code (20 characters) from the back of the RGM.
NOTE: This is a hexadecimal number. While it may contain the letters A, B, C, D, E, and F, it
does not contain letters that can be easily mistaken for numbers, such as I, S, and O.
•Click Add Device. The page should show the message “Install code accepted for ZigBee device.
Device scan started.” The Envoy and ZigBee stick will begin the joining process.
•Once the page shows the device (RGM) Network Discovery state as “Active”, the configuration
process is complete.

Metering and Management Solution Installation &Operation
Copyright ©2012 Enphase Energy 141-00019 Rev 01
19
Step 6. Verify the Installation
•After the RGM LCD has been indicating solar production for approximately five minutes, check that
the Envoy LCD screen reads:
•If the Envoy does not show a connection to the RGM after a ten minute wait, start a new ZigBee
device scan from the Envoy. To do this, hold down the menu button (on the right side of the Envoy)
and release it when the menu item “Scan ZigBee Network” appears.
•If the Envoy does not show a connection to the RGM within ten minutes after rescanning the ZigBee
network, double-check that the EUI64 code from the meter faceplate exactly matches the code as
typed at the Envoy interface on the ZigBee Device Configuration page. If you find that a code was
entered incorrectly, select and unmanage the incorrect EUI64, then add a new device with the
correct EUI64 and Install Code. If the code is correct, you may need to install a repeater. If you do
not have one, order part number RGM-RR-01. To install a repeater, see “Install a Repeater” on page
22.
Step 7. Install the Meter Band
•Install the meter band that was provided with the Form 2S meter socket, as needed.
Step 8. Build the Virtual Array
•Once all the microinverters at the site are detected, and the Envoy has successfully connected to
the Internet, you will be notified that the array for site can be built. Click the link provided, and use
Enlighten’s Array Builder to build the virtual array for the site.
NOTE: You must build the array for the Activation to be complete and for the system to
begin reporting normally.
•(Optional) Upload the installation map to the site activation form in Enlighten. The installation map
should include serial number stickers for all units installed at the site.
Reminder: For site data to be consistently available on Enlighten, each site must have an
Enphase Envoy installed. That Envoy must be installed in an interior space as close to the
load center as possible and maintain a consistent connection to the Internet.
For more information on Envoy installation, refer to the Envoy Installation and Operation
Manual at http://www.enphase.com/support/downloads.
Meter status:
OK

Metering and Management Solution Installation &Operation
Copyright ©2012 Enphase Energy 141-00019 Rev 01
20
For an Array Builder demo, see http://enphase.com/support/videos/build-a-simple-array-in-
enlighten/.
Table of contents
Other enphase Measuring Instrument manuals


Popular Measuring Instrument manuals by other brands


AQUALEAK
AQUALEAK EMS-5X instruction manual

KORINS
KORINS SEM3000 Series operating manual

Fluke
Fluke 1773 Calibration manual

ORTEC
ORTEC 551 Operating and service manual

EUTECH INSTRUMENTS
EUTECH INSTRUMENTS WATERPROOF CYBERSCAN PD 300 PHDISSOLVED OXYGEN... instruction manual

Eastron
Eastron SDM630MV-2L user manual


