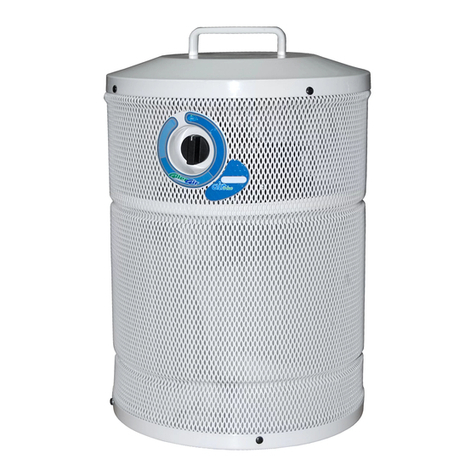
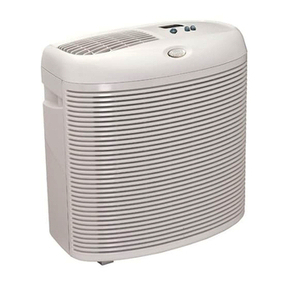
EnviroTech Group Plug In Plus User manual

Plug In Plus
Air Purification System
New Advanced Environmental Air Treatment System
Thank you for purchasing the
Plug In Plus
Advanced Oxidation System
We are confident this system will provide you with years of
Fresh, Clean and Odor-Free Air!!!
NOTE: Please take time to read the attached assembly instructions. All instructions and
precautions should be adhered to while operating this system.
6956 121st Ave. Fennville, Mi 49408
Tel: (269) 543-4692 •(800) 646-1179 •Fax: (269) 543 –4716
E-mail: pureair@accn.org
Copyright 2003

PIP Manual Page 3
The PHI CELL
The PHI CELL Advanced Oxidation Systems is designed to help eliminate sick building
syndrome risks by reducing odors, air pollutants, and cold and virus causing germs
through a patent pending Photohydroionization® (PHI) process. The PHI Cells are
contained within the APS unit. When the APS system is in operation, the PHI Cell uses
an Advanced Oxidation Process to reduce airborne contaminants.
Why use Photohydroionization?
Germicidal UV light rays have been
used for decades by the medical
industry as a method for destroying
micro-organisms (germs, viruses,
bacteria). Germicidal UV light is
effective in reducing airborne micro-
organisms that pass through the light
rays. However, germicidal UV light has
little to no effect on gases, vapors or
odors.
Ozone, on the other hand, is very
effective on gases, vapors and odors.
However, too much ozone can be a
health hazard, and traditional methods
of producing ozone (i.e., corona
discharge) have maintenance problems
and create nitric acid and nitric oxides.
The combination of ozone (O3) and UV
light, in the presence of the PHI catalyst,
creates the Advanced Oxidation
reaction. This patent pending reaction
chamber creates ozone gas and
destroys it within the same chamber.
This process, in combination with the
catalytic target surface of the cell,
produces not only an atmosphere in
which germicidal light can kill micro-
organisms, it also produces super oxide
ions and hydro-peroxides. These
products of Advanced Oxidation further
attack the micro-organisms as well as
significantly reducing odors and VOC’s.
The PHI reaction cell has the added
benefit of producing safe, low levels of
ozone as a by-product of the PHI cell.
This low level ozone further cleanses
the air as it travels through the
ductwork. By engineering the proper
light wavelength and a dual function, no
maintenance PHI Cell, the manufacturer
has effectively designed a system that
will not exceed the recommended
Federal Safety Limits for ozone (0.04
ppm) in an occupied room.
With the PHI CELL, most gases and
odors are abated while micro-organisms
can be reduced by as much as 90%,
and the room will have safe, low ozone
levels no greater than forest air, or air
after a thunderstorm, which gives the
room fresh, clean and odor-free air.

PIP Manual Page 5
INSTALLATION INSTRUCTIONS
DANGER: For outlet installation only, never connect to an extension cord or other
type of power source. Improper installation could result in electrical shock or short.
1. Find a convenient wall outlet. Plug the unit into the outlet. Note: It is not
recommended to place the PIP unit into an outlet equipped with a GFCI (Ground
Fault Circuit Interrupter) device. If the GFCI is tripped, it will not be possible to reset
the outlet GFCI device (unless the PIP is physically removed from the outlet). In
installations requiring a GFCI circuit, it is recommended that the breaker box be
equipped with a GFCI breaker to protect the outlet circuit.
2. Turn off power at the breaker panel for the outlet (restore when installation is
complete).
3. Remove the PIP cover and install anti-theft screws (Note: as the wall material will
vary from installation to installation, the wall mounting security screws are not
provided). Please use the appropriate type of fasteners for the substrate
encountered in each installation location (2-1/2” long fasteners are recommended).
4. Fasten the security screws into the provided holes going through the back of the
unit. In wall installations with wood or metal studs you will need to locate which side
the stud is positioned on, and then use the corresponding holes in the unit (two
holes located to the left of center, or two holes located to the right of center).
5. Note: A light duty mounting option is included with the unit. This is for low traffic
areas such as storage rooms and similar areas that do not require an anti-theft type
of mounting.
• Locate the appropriate outlet and disconnect power to it at the breaker box.
• Remove the center screw from the outlet plate cover.
• Plug unit into the outlet (be sure outlet cover is still in place), and secure unit and
outlet plate to outlet using provided 6-32 X2” machine screw.
Mountin
g
Holes
(
2
)
Remove Cover Screws
(
2
)
Center Mountin
g
Holes
(
1
)
Mounting holes

PIP Manual Page 7
OPERATION
After completing the installation, you can now operate the unit. Operation is controlled
via a switch, located on the side of the unit.
Low-Off-High Switch

PIP Manual Page 9
LAMP REPLACEMENT PROCEDURE
Caution: Before attempting to service the Plug-In unit, be sure the power is off to the
unit/outlet.
DANGER: NEVER LOOK DIRECTLY AT UV LIGHT.
UV LIGHT WILL BURN YOUR EYES.
Figure 1
Figure 2
1. Remove cover
(ensure power is off
to outlet before
removing)
2. Pull out PHI Cell from
chassis.
Replace with new PHI
Cell.
3. Replace cover.
Restore power.

PIP Manual Page 11
REPLACEMENT PART NUMBERS
Component Cell
PHI Cell PHIC-5A

PIP Manual Page 13
LIMITED WARRANTY
This warranty supersedes and replaces any warranty statements made orally by the Sales
Person, Distributor, or Dealer, or contained within the written instructions or other brochures or
informational documents related to this product.
Manufacturer warrants the new PHI CELL equipment to be free from defects in material and
workmanship under normal use and service when operated and maintained in strict accordance
with manufacturer’s instructions for a period of thirty six (36) months from the date of receipt of
equipment.
Manufacturer’s obligation under this warranty is limited to repairing or replacing any part found
to its satisfaction to be so defective. This warranty does not cover parts damaged by
decomposition from chemical action or wear caused by abrasive materials, nor does it cover
damage resulting from misuse, abuse, or any use other than the intended use, accident,
neglect, or from improper operation, maintenance, installation, modification or adjustments.
Manufacturer assumes no liability for any harm that may occur as a result of the use of
this equipment and shall not be liable for consequential or any other damages, whether
or not caused by manufacturer’s negligence or resulting from any express or implied
warranty or breach thereof. Consequential damages for the purpose of this warranty
shall include, but not be limited to, loss of use, income, profit, or damages to property,
or injury or death to persons or animals occasioned by or arising out of operation, use,
installation, repair or replacement of the equipment or otherwise.
THERE ARE NO WARRANTIES WHICH EXTEND BEYOND THE DESCRIPTION ON THE FACE
HEREOF.
To obtain warranty service or warranty return authorization number, contact the factory.
Manufacturer: RGF Environmental Group, Inc.
Include a copy of your Bill of Sale, Invoice or Receipt of Purchase, with an explanation of the
problem or defect.
Hg- LAMP CONTAINS MERCURY Manage in accord with disposal laws See: www.lamprecycle.org

PIP Manual Page 14
WARRANTY REQUEST FORM
RETURN AUTHORIZATION NO. __________________________
CUSTOMER: NAME _______________________________________________________
ADDRESS _______________________________________________________
CONTACT _______________________________________________________
DISTRIBUTOR: NAME ________________________________________________________
ADDRESS _______________________________________________________
CONTACT _______________________________________________________
UNIT: MODEL _______________________________________________________
SERIAL ________________________________________________________
DATE OF PURCHASE _____________________________________________
ITEM(S) SUBMITTED FOR WARRANTY:
1) __________________________________________________________________________
2) __________________________________________________________________________
COMMENTS:
____________________________________________________________________________
____________________________________________________________________________
____________________________________________________________________________
(FOR MANUFACTURER USE ONLY)
DATE ITEM(S) RECEIVED: _____________________________________________________________
RECEIVED BY: _______________________________________________________________________
REPLACEMENT UNIT OR PART SENT
COMMENTS: ________________________________________________________________________
NOTE: THIS COMPLETED FORM MUST ACCOMPANY ALL RETURNED ITEMS.
Table of contents
