enware DFSA121-CBF User manual

I00442_Dec21
Installation and Maintenance Instructions
Freestanding Water Chiller with
Bubbler and Heavy Duty Bottle Filler
DFSA121-CBF
enware.com.au

2 Call 1300 369 273 www.enware.com.au
937
245
295
320
320
360
805 -810 MAX
160
75
160
½” WATER
INLET
40mm DRAIN
CONNECTION
BACK FACE OF WATER CHILLER
product description
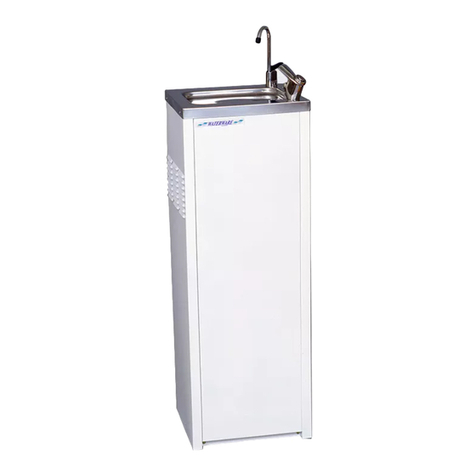
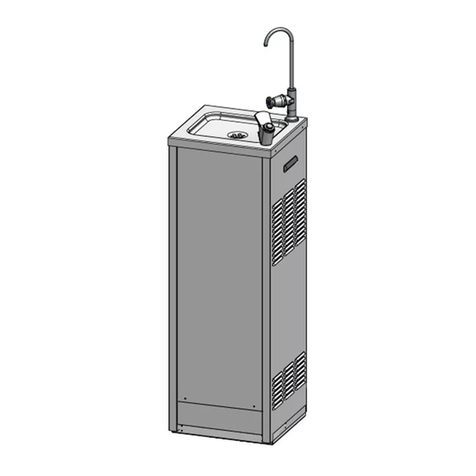
Enware water chillers supply chilled water on demand. Supplied with heavy duty bottle ller
with capstan handle. Drinking bubbler can be removed, to optimise hygiene, with supplied
deletion kit. Suitable for public areas such as gyms and building sites and ofce buildings.
KEY FEATURES
• Flow rate of up to 18 litres/hour of chilled water
• 4 Litre storage tank
• Heavy Duty Bottle Filler with capstan handle
• Hygienic, polished stainless steel tops designed for rapid draining
• Adjustable levelling feet
• Stainless steel storage tank
• FDA approved internal pipework
• Environmentally friendly R134A refrigerant
• Side carry handles and removable front access panel for easy installation
• Includes internal waste trap
• Supplied with bottle ller ready to t and including delete kit for bubbler if it is not
required
BOTTLE FILLLER
BUBBLER
WA
TER CHILLER
All measurements are in millimetres.
937
245
295
320
320
360
805 -810 MAX
160
75
160
½” WATER
INLET
40mm DRAIN
CONNECTION
BACK FACE OF WATER CHILLER

www.enware.com.au Call 1300 369 27 3
IMPORTANT - This must be read before proceeding with installation
1. Enware products are to be installed in accordance with the Plumbing Code of Australia
(PCA) and AS/NZS3500. Installations not complying with PCA and AS/NZS 3500 may
void the product and performance warranty provisions. Reference should also be made
to the ABCB and Local Government regulations when considering the choice of, and the
installation of these products.
2. Electrical installation must be in accordance with AS/NZS3000-2018.
3. Water connection to the water cooler should be made through an approved Non-Return
Isolating Valve/ Stop Tap and installed in an accessible position.
* Note: Non-Return Isolating Valves/Stop Taps are not supplied with this product.
4. Water supply pressure must not exceed 500kPa. It is recommended that an approved
500kPa Pressure Reduction Valve be installed with all water chillers to safe-guard against
pressure surges that may occur in the supply lines, especially at night.
5. For use with potable water only.
NOTE: Enware Australia advises:
1. Due to ongoing Research and Development, specifications may change without notice.
2. Component specifications may change on some export models.
installation compliance
technical data
Chilled Water Production up to 18 Litres/hour
Recommended Water
Supply Pressure
50-500 kPa
(Use of pressure reduction valve is recommended if inlet pressure
may exceed 500 kPa)
Power Supply 240V / 50 Hz
Power Connection 3 pin 10 A plug with 2m lead
IP Rating IP23
Water Inlet Connection 1/2” BSP male
Water Drain Connection 40mm DWV PVC
Storage Tank 4 Litres
Compressor Size 362 W
Condensor Wire tube
Refrigerant R134A
Climate Condition SN.N *
Net Weight 30kg
Bottle Filler Flow Rate 2 L/min - 7 L/min
adjustable
* Suitable for use in ambient temperatures of 10°C to 32°C

4 Call 1300 369 273 www.enware.com.au
WARNING:
• Enware water chillers are not suitable for outdoor use. The appliance must not be exposed
to rain.
• Stainless steel panel (non-powder coated) chillers are not designed or recommended for
use in corrosive environments such as enclosed chlorinated pool areas.
• Consideration must also be made at the time of installation to adverse environmental/
atmospheric conditions such as, but not limited to, dust, corrosion, or freezing. These
conditions may void the warranty.
• Do not operate this appliance at ambient temperatures below 0°C, as it may cause the
water inside the water chiller to freeze and damage internal components.
• The appliance is not suitable for installation in an area where a water jet could be used.
• This appliance is not intended for use by persons (including children) with reduced
physical, sensory or mental capabilities, or lack of experience and knowledge, unless they
have been given supervision or instruction concerning use of the appliance by a person
responsible for their safety. Children should be supervised to ensure that they do not play
with the appliance.
CAUTION:
• Mains Power Electrical Components. For the purpose of safety and hygiene, access to
the internal components of this appliance is restricted to persons having knowledge and
practical experience of the appliance.
• Ensure the electrical supply is turned off, before taking the front panel off to access internal
components.
• If the power supply cord is damaged, it must be replaced by the manufacturer, its service
agent or a qualified electrician in order to avoid a hazard.
• In order to avoid a hazard due to inadvertent resetting of the thermal cutout, this appliance
must not be supplied through an external switching device, such as a timer, or connected
to a circuit that is regularly switched on and off by the utility.
• Do not damage the refrigerant circuit. Care should be taken not to puncture refrigeration
system lines. Some lines contain gas under high pressure.
• Keep ventilation openings, in the appliance enclosure or in the built-in structure, clear of
obstruction.
• Do not use mechanical devices or other means to accelerate the defrosting process, other
than those recommended by the manufacturer.
• If freezing occurs, do not operate the appliance, until ambient temperatures is again above
0°C and frozen unit has completely thawed.

www.enware.com.au Call 1300 369 27 5
FRONT
PANEL
FIXING
SCREWS
installation
DFSA121-CBF water chiller is ready for final assembly on
site.
Remove water chiller and bottle filler from the packaging.
Remove the front panel of the chiller unit by unscrewing
the two fixing screws. Pull panel forward and slide down to
remove the front panel. SEE IMAGE 1
IMPORTANT - Ensure chiller unit is disconnected from
power supply before accessing the inside of the chiller
unit.
INSTALLING BOTTLE FILLER
1. Fit bottle filler to the basin top of the water chiller,
ensuring the location pin fits into the pre-drilled hole.
Fit spacer washer and backnut from underneath, and
tighten the backnut with a spanner to secure the bottle
filler assembly. SEE IMAGE 2
2. Screw the tube adaptor to the 1/2” bottle filler thread,
ensuring that the rubber seal is in place in the adaptor -
tighten firmly, but do not overtighten. SEE IMAGE 2
3. Push the 1/4” tube firmly into the adaptor socket until
it bottoms out - pull back gently to check that the tube
has locked. SEE IMAGE 3
IMAGE 1
IMAGE 2
Push tube in to connect. Pull back gently on the tube
to check it is locked.
To disconnect, ensure the system
is depressurized, push the collet
square against the tting.
With the collet held in this position
the tube can be removed.
IMAGE 3

6 Call 1300 369 273 www.enware.com.au
REMOVING BUBBLER (OPTIONAL)
The Water chiller is supplied with parts to allow the drinking
bubbler to be deleted or temporarily removed if not required.
1. Loosen and remove the back nut from under the bubbler.
2. Disconnect the 1/4'” tube by removing the small
compression fitting.
3. The bubbler can be removed and the rubber blanking
plug pushed into place. SEE IMAGE 4
4. Trace the 1/4” tube back to the tee-piece, then
disconnect all the tubes from the tee piece by holding the
collet at the joint in place and pulling the tube free from
the fitting. SEE IMAGE 3
5. Replace the tee-piece with elbow provided, connecting
the supply tube to the bottle filler. SEE IMAGE 5
IMAGE 4
IMAGE 5
CONNECT
TO 40MM
WASTE
BOTTLE
TRAP
WATER
INLET
IMAGE 6
WATER CHILLER INSTALLATION
1. Place water chiller in desired position and adjust levelling
feet so that the water chiller is stable and sitting level.
Note: This appliance must be placed in a horizontal
position. Ensure there is at least 50mm of gap between
the back of the unit and any wall for fan ventilation.
2. From inside of the chiller unit, connect the 40mm bottle
trap (supplied) to the waste connection located on the
underside of the top tray. Connect DN40 DWV PVC
drain pipe to the bottle trap. SEE IMAGE 6
3. (Optional) Install a carbon filter (DFS002F- sold
separately) inside the chiller unit.
Cut or disconnect the 1/4” tube that feeds the bottle filler
(&/or bubbler) and install the carbon filter in the line.
4. Install a non-return isolating valve or a stop tap (not
supplied) at the water supply as required. Flush all
foreign matter from the water supply line, then connect
water supply to the 1/2” BSP male inlet fitting located at
the rear of unit. SEE IMAGE 5

www.enware.com.au Call 1300 369 27 7
5. Turn the water supply on and purge the air from the
stainless steel chilling tank by pressing the push button
on the bubbler or turning on the bottle filler. Water may
spit from the outlets during this procedure and care
should be taken not to let water splash on walls and
furniture. Allow the water to flow for 5 minutes, starting
and stopping it frequently.
6. Check all plumbing for leaks. Check the bottle trap and
drain pipe connections for water-tightness.
7. Replace the front panel to the chiller unit.
8. Connect power cable to an electrical outlet.
(Electrical connection: a flexible 2m service lead, 3 pin
10 AMP plug supplied to connect the chiller to a 240V
50Hz AC supply.)
Turn power on. The refrigeration unit and the fans should
start to activate.
9. Once water is cooled and chiller function is checked,
turn off the power and disconnect the power cable.
Open the front panel and check all plumbing for leaks
once again.
IMPORTANT - Chiller unit must be disconnected
from power supply before accessing the inside of
the chiller unit.
10. Replace front panel of the water chiller and secure
the panel using screws provided.
Connect power cable and turn power back on.
Remove protective film from stainless steel panels.

8 Call 1300 369 273 www.enware.com.au
operation
ON
ON
OFF
BOTTLE FILLER
To turn on water flow, turn handle and hold.
To turn off water flow, let go of handle.
Water flow stops automatically.
(Handle can be turned either way until it
reaches a stop.)
PUSH
BUBBLER
To turn on water flow, push button down.
To turn off water flow, let go of button.
Water flow stops automatically.

www.enware.com.au Call 1300 369 27 9
flow adjustment
BOTTLE FILLER
Adjusting water flow rate (2 L/min - 7 L/min):
1. Unscrew and remove the regulator screw
cover cap using a slotted screw driver.
(Note this is only a cover - the regulator
screw is inside once the cover is removed.)
2. Locate the regulator screw inside. Turn the
spring action handle on full and adjust the
screw - tighten to reduce the flow or loosen
to increase the flow.
3. Once the desired water flow is achieved, put
the cover cap back on.
-
+
Regulator
screw
inside
Cover cap
Regulator Screw
Location
BUBBLER
Adjusting water stream height:
1. Unscrew hex cover nut from bubbler
body using a spanner (while water is
on). The nut and push button can be
removed to reveal the top of the spring
cartridge and the cartridge locking ring.
2. Locate the flow adjustment screw in
the top of the cartridge. While pressing
the cartridge to fully on position, using
a small slotted screwdriver, screw the
adjustment screw in to reduce stream
height, or out to increase stream height.
3. Replace the push button and hex cover
nut and tighten.
4. Re-test bubbler fountain for correct
operation.
HEX DRESS NUT
(892537)
PUSH BUTTON
CARTRIDGE
RETAINING NUT
CARTRIDGE
(BUB294)
SPOUT
BODY
T
YPE 61 SPANNER FOR CARTRIDGE RETAINING NUT (892530)
INLET SCREEN MESH (892531)
FLOW ADJUSTMEN
T
SCREW

10 Call 1300 369 273 www.enware.com.au
Grub
Screw
Spindle
Dome
Handle Insert
Circlip
SBA
HandleHandle
(BUB260C)
Colour Indicator Button
PART ENWARE
SALES CODE
Cam action top assembly BUB261
Cam action SBA BUB260C
Spring action SBA service kit
Includes 2x piston o-rings, 1x
spring, 1x light spring, 1x ball
bearing, 1x ball seating washer, 1x
seat o-ring, 1x red fibre washer
BUB289
Cam action dome
(with grub screw)
BUB221C
Grub screw 10-24 UNC x 3/16 SS 672455
Cam action handle (incl. circlip,
handle insert, blue colour indicator,
Anti-Vandal handle key)
VP378
Colour indicator button
(specify cold, warm or hot) MIS595
PART ENWARE
SALES CODE
Anti-vandal handle key MIS590
Spout O-ring 672357
Regulator O-ring BS008 672345
Backnut (brass) MIS517
Spacer 672473
Allen key 3/32” MIS592
Backnut
Spacer
Cam Action
Top Assembly
(BUB261)
Anti-Vandal
Handle Key
Cover Cap
Regulator
O-ring
Regulator Screw
Anti-Rotation
Pin
Spout
Spout O-ring
1/2” BSP x
1/4” tube
adaptor
components & spare parts
Cam Action Top Assembly (BUB261)
BOTTLE FILLER

www.enware.com.au Call 1300 369 27 11
BUBBLER
WATER CHILLER
REFRIGERATION SYSTEM - The entire refrigeration system is hermetically sealed. Should
the system fail to operate, contact the manufacturer immediately.
Note: tampering with the refrigeration system in any way may void warranty.
WATER TEMPERATURE CONTROL SCREW - Located internally on the shelf, has been
factory set to provide chilled water at approx. 5°C to 10°C .
PART ENWARE SALES CODE
Bottle trap 40mm white adjustable height DFSAS202
Carbon inline water filter DFS002F
Thermostat DFSAS200
PRV 1/4" DFSAS201
PART ENWARE SALES CODE
Cartridge BUB294
Bubbler complete BUB290
HEX DRESS NUT
(892537)
PUSH BUTTON
CARTRIDGE
RETAINING NUT
CARTRIDGE
(BUB294)
SPOUT
BODY
T
YPE 61 SPANNER FOR CARTRIDGE RETAINING NUT (892530)
INLET SCREEN MESH (892531)
FLOW ADJUSTMEN
T
SCREW

12 Call 1300 369 273 www.enware.com.au
Every 6 months or periodically as required, the appliance and its surrounding area should be
inspected for water leaks, the bottle filler and bubbler should be tested for correct operation
and external panels should be given a light wipedown.
Filters if used should be replaced, depending on usage. Water storage tank should be purged
by running the tap for 5 minutes, before installing a new filter.
Every 12 months or as required, the bubbler stream height should be re-adjusted. If the
bubbler or bottle filler is leaking, the cartridge or bottle filler SBA should be replaced or
serviced.
The internal condenser and fans should be kept free of dust/ lint. It should be checked
periodically and cleaned with a brush or vacuum cleaner. Water cooler must be disconnected
from the power supply before following this procedure.
service & maintenance

www.enware.com.au Call 1300 369 27 13
BOTTLE FILLER - DOME ADJUSTMENT
Adjust the position of the dome if:
- there is play on the handle that needs to be adjusted;
- if the tap is not shutting off completely / water constantly running; or
- if there is no water flow
Adjust the dome by carrying out the
following steps:
1. Using a 3/32” or 2.5mm Allen key, undo
the grub screw located on the side of the
dome cover near the hex.
2. Unscrew the dome from the SBA slowly.
The water flow should stop.
3. Now this time, screw the dome into the
SBA. Water should begin to flow from the
outlet.
4. At this point, unscrew the dome just
slightly by approx. 1/4 to 1/2 a turn - the
water should stop flowing from the outlet.
This is the ideal position of the dome.
If the dome is screwed in too far, the handle will push the SBA piston down and let water
through constantly. If the dome is wound too far out, the handle will have too much play
and will feel loose.
5. Once the correct dome position is achieved, install the grub screw ensuring it is tightened
square against one of the SBA flats underneath to maximize vandal resistance.
6. Re-test the tap for correct operation.
7. If problems persist, refer to TROUBLESHOOTING.

14 Call 1300 369 273 www.enware.com.au
BOTTLER FILLER - SERVICING SPRING ACTION SBA
It is recommended that the spring action be periodically serviced. As a guide, every 6 months
the spindle should be cleaned and re-greased, and the handle insert and other components
checked for tightness. The servicing interval will vary depending on the frequency of use of
the product, water quality and the general environment.
On Cam Action product it is recommended to periodically check that the handle insert is
secure, by tightening with the Anti vandal handle spanner.
If the components inside the SBA are worn or damaged, replace the SBA or use the service
kit to replace components.
REMOVING THE TOP ASSEMBLY TO ACCESS SBA, CLEANING & REFITTING
1. Using a 3/32” or 2.5mm Allen key undo the grub screw located near the hex of the dome.
2. Unscrew the dome from the SBA.
3. Remove any grease or scale build up in the dome and the top assembly components. Use
a diluted solution of CLR for cleaning if necessary.
CLEANING AND LUBRICATING THE SPINDLE
The spring action can be maintained by simply cleaning and lubricating the spindle (piston)
using a silicon-based lubricant approved for potable water. This can be done without turning
off the water supply.
1. Pull out the piston (the top part) of the SBA and wipe off any excess grease. SEE IMAGE
NEXT PAGE
2. Clean the two small o-rings. Replace them if necessary, and re-grease them.
3. Push the piston back into the SBA.
REPLACING THE SBA
1. Shut off water supply and remove the top assembly.
2. Use a suitable spanner (26mm) and unscrew the SBA from the tap body. Make sure the
seal o-ring is not left on the seat of the body and the old red fibre washer is also removed.
3. Replace with a new SBA.
4. Turn on water supply.
5. Depress the piston to start water flow. Release the piston to stop the flow and check for
leakage. If a leak is present refer to Troubleshooting to identify cause of leakage and rectify
before proceeding.

www.enware.com.au Call 1300 369 27 15
SERVICING THE SBA WITH SERVICE KIT
1. Pull the piston assembly out from the SBA and
remove the 2 piston o-rings.
2. Use a spanner to unscrew bottom inlet port,
remove spring and stainless steel ball in the port.
3. Insert a small screw driver in centre hole of the
ball seating washer and remove the ball seating
washer by levering it out.
4. Clean all brass and chrome components.
Remove any debris or scale, especially on the
piston, spindle and in the dome. Use a diluted
solution of CLR for cleaning if necessary. Check
all brass components for wear or damage.
5. Lightly grease the two small piston o-rings
with a silicon based, potable water approved grease (e.g. Hydroseal Tap Lubricant or
Molykote111) and fit the two o-rings to the piston.
6. Now reassemble the SBA with new components from Service Kit. Place the ball seating
washer, ball and spring back in the bottom inlet port, and tighten up the bottom inlet port
to the SBA. Refit the seat o-ring and seating washer. Push the piston into the SBA.
RE-FITTING THE TOP ASSEMBLY
1. Grease the inside of the dome around spindle mechanism
2. Fit the dome and handle assembly.
3. Adjust the position of dome. SEE DOME ADJUSTMENT
SBA SPRING
STAINLESS STEEL BALL
BALL SEATING WASHER
PISTON O-RINGS
PISTON
HANDLE
If the handle feels loose, check that the handle
insert is fitted, and tighten with the Anti Vandal
Handle Key.
To take off handle, use the Anti-Vandal Handle Key
to loosen the insert. Handle pulls off the spindle.

16 Call 1300 369 273 www.enware.com.au
Enware product should be cleaned with a soft damp cloth using only mild liquid detergent
or soap and water. Do not use cleaning agents containing a corrosive acid, scouring
agent or solvent chemicals.
Do not use cream cleaners, as they are abrasive. Epoxy coated surfaces should only
be cleaned with a cloth and clear water or mild detergent. Use of unsuitable cleaning
agents may damage the surface. Any damage caused in this way will not be covered by
warranty.
If re-greasing spring action SBA spindles, always use a silicon-based potable water
approved lubricant such as Hydroseal ‘O’ Ring Lubricant or Molykote 111 silicone based
grease.
cleaning

www.enware.com.au Call 1300 369 27 17
troubleshooting
WATER CHILLER
PROBLEM CAUSE RECTIFICATION
No water at outlets Water not connected or turned
off
Connect and turn on water supply
Water frozen Adjust water temperature control on
thermostat to higher setting. Do not
operate the appliance, until ambient
temperature is again above 0°C and
frozen unit has completely thawed.
Water not cooled Power is not connected Turn power supply on
Fan ventilation not adequate Ensure there is gap behind back of
chiller to allow air flow from vents
Temperature setting too high Adjust water temperature control on
thermostat to lower setting
Poor water flow at outlets Bubbler stream is not adjusted Adjust bubbler stream
Carafe filler handle is too loose Adjust carafe filler adjusting nut and
handle
Carbon filter is blocked Replace carbon filter
Water leaks at outlets Bubbler cartridge is damaged Replace bubbler cartridge. Ensure
water pressure is below 500kPa
Carafe filler handle is too tight Adjust carafe filler nut and handle
Water tastes foul Carbon filter has been
contaminated
Replace carbon filter
Water in tank is stale Purge water in tank by running the
bubbler for 5 minutes
BUBBLER
PROBLEM CAUSE RECTIFICATION
Water runs constantly
from
bubbler outlet
Debris in cartridge Replace cartridge BUB294
Cartridge has been damaged Replace cartridge BUB294
Seating washer damaged or
spring broken
Install a pressure reduction valve.
Replace cartridge BUB294
No flow from bubbler
outlet
Water supply turned off Turn water on
Debris fouling inlet or outlet
ports of cartridge
Remove blockage
Rubbish/debris fouling outlet Remove blockage
Water discharge from top
of bubbler
Cartridge is damaged Replace cartridge BUB294

18 Call 1300 369 273 www.enware.com.au
troubleshooting
PROBLEM CAUSE RECTIFICATION
Water runs constantly from
outlet
Dome screwed in too far Adjust dome. See DOME
ADJUSTMENT
Dome incorrectly adjusted Adjust dome. See DOME
ADJUSTMENT
Debris fouling ball seating
washer or stainless steel ball
Dismantle SBA and clean
SBA ball seating washer is
damaged or spring is broken
Replace SBA components using SBA
service kit BUB289,or replace SBA
No flow from outlet Water supply turned off Turn water on
Debris fouling inlet or outlet
ports of SBA
Remove SBA and remove blockage
Rubbish/debris fouling outlet Remove blockage from outlet
Dome incorrectly adjusted Adjust dome. See DOME
ADJUSTMENT
Handle feels too loose Dome screwed out too far
Dome incorrectly adjusted
Adjust dome. See DOME
ADJUSTMENT
Handle insert is loose Tighten handle insert with Anti-Vandal
Handle Key
Spring action does not
move
Piston in SBA is seized Clean piston and piston o-rings,
and re-grease. Use SBA service
kit BUB289. (See service and
maintenance)
Water discharge from top of
dome/ SBA
Piston O-rings are worn Replace O-rings using SBA service
kit BUB289. Re-grease piston (See
service and maintenance)
BOTTLE FILLER

www.enware.com.au Call 1300 369 27 19
product warranty for Australia Eecve 27 September 2021
Enware Australia Pty Limited (ACN 003 988 314)
(“we” or “us”) warrants that this product (also referred
to as “our goods”) will be free from all defects in
materials and workmanship for 12 months* from the
date of purchase. Our liability under this warranty is
limited at our opon to the repair or replacement of
the defecve product or part, the cost of repair of the
defecve product or part or the supply of an equivalent
product or part, in each case if we are sased the
loss or damage was due to a defect in the materials or
workmanship of the product or part. All products must
be installed in accordance with the manufacturer’s
instrucons, the PCA, and AS/NZS3500 including any
other applicable regulatory requirements.
exceptions
This warranty does not apply in respect of any damage or
loss due to or arising from:
a) Failure by you or any other person to follow any
instrucons for use (including instrucons and direcons
relang to the handling, storage, installaon, ng,
connecon, adjustment or repair of the product)
published or provided by us;
b) Failure by you or any other person responsible for the
ng, installaon or other work on the product to follow
or conform to applicable laws, standards and codes
(including the AS/NZ 3500 set of Standards, all applicable
State and Territory Plumbing Codes, the Plumbing Code
of Australia and direcons and requirements of local and
other statutory authories); or
c) Any act or circumstance beyond our control including
faulty installaon or connecon, accident, abnormal use,
acts of God, damage to buildings, other structures or
infrastructure and loss or damage during product transit
or transportaon.
making a claim
To make a claim under this warranty you must
nofy us in wring within 7 days of any alleged defect
in the product coming to your aenon and provide
us with proof of your purchase of the product and
completed the Online Product Service and Warranty
Form available on website www.enware.com.au/
warranty-service-form.
All nocaons and accompanying forms must be sent to
us marked for the aenon of the Enware Australia Pty
Limited, 9 Endeavour Road, Caringbah NSW 2229. We
can also be contacted by telephone (1300 369 273) or by
email (info@enware.com.au).
Your costs in making a claim under this warranty,
including all freight, collecon and delivery costs, are
to be borne and paid by you. We also reserve the right
at our cost to inspect any alleged defect in the product
wherever it is located or installed or on our premises.
* Condional Warranty:
Water chiller: 12 months parts and labour
Boler ller: 10 years (2 years parts and labour, then 8
years parts only warranty)
other conditions
Except as provided or referred to in this document, we
accept no other or further liability for any damages
or loss (including indirect, consequenal or economic
loss) and whether arising in contract, tort or otherwise.
Any benets available to you under this warranty are in
addion to any non-excludable rights or remedies you
may have under applicable legislaon, including as a
“consumer” under the Australian Consumer Law. To that
extent you need to be aware that: Our goods come with
guarantees that cannot be excluded under the Australian
Consumer Law. You are entled to a replacement or
refund for a major failure and for compensaon for any
other reasonably foreseeable loss or damage. You are
also entled to have the goods repaired or replaced if
the goods fail to be of acceptable quality and the failure
does not amount to a major failure.

ADDRESS: 9 Endeavour Rd Caringbah NSW 2229 Australia
POSTAL ADDRESS: P.O. Box 2545, Taren Point NSW 2229 Australia
1300 369 273 (AUS) WWW.ENWARE.COM.AU INFO@ENWARE.COM.AU
ABN 23 003 988 314
Table of contents
Other enware Chiller manuals
Popular Chiller manuals by other brands

Carrier
Carrier AquaForce 30XAV 500 Installation, operation and maintenance instructions
CIAT
CIAT LX User brochure
AIREDALE
AIREDALE TurboChill TCC11R04G-01 Technical manual

Parker Hiross
Parker Hiross Hyperchill ICE007 user manual
Nordcap
Nordcap SF 12/7-CW CRIO CHILL manual
Mueller
Mueller CP2-10 Installation and operation manual
