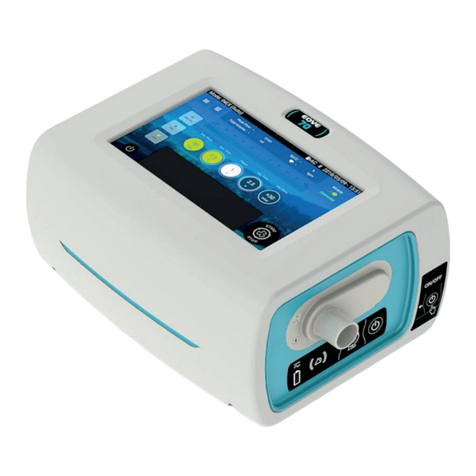
eove EO-70 User manual

Applies from S/N EO0700520050 102-36 revDB 12/2020
EO-70
Secretion Management Device
User Guide

2

3
Contents
................................................................................................................................................................ 1
Introduction ............................................................................................................................................ 6
Indications for use ............................................................................................................................... 6
Contraindications ................................................................................................................................ 6
Adverse Effects ................................................................................................................................... 6
Definitions ........................................................................................................................................... 6
General warnings and cautions .......................................................................................................... 7
Chapter 1 – Description of the EO-70 device .......................................................................................... 8
Front Panel .......................................................................................................................................... 8
Rear Panel ........................................................................................................................................... 8
Rear view of device without housing .................................................................................................. 9
Keyboard ............................................................................................................................................. 9
Symbols Table ................................................................................................................................... 10
Chapter 2 – Operating Instructions for the EO-70 device .................................................................... 12
Set Up Test ........................................................................................................................................ 12
Turning on the device ....................................................................................................................... 13
Turning off the device ....................................................................................................................... 13
Device Auto Power off on batteries .................................................................................................. 14
End of batteries beeps ...................................................................................................................... 14
Starting and Stopping treatment ...................................................................................................... 14
Turning on and off the docking station ............................................................................................. 15
Using the SMD module outside of the docking station (click and go) .............................................. 15
The Home Screen .............................................................................................................................. 17
Using the Touch Pad ......................................................................................................................... 18
Navigating the Preferences Menu .................................................................................................... 19
Accessing the settings menu ............................................................................................................. 20
Presets ............................................................................................................................................... 21
Presets Configuration Access ............................................................................................................ 21
Changing preset mode from Home screen ....................................................................................... 22
Changing treatment mode ................................................................................................................ 22
Changing settings .............................................................................................................................. 23
Enabling the coaching function ......................................................................................................... 23
Choose the Coaching function screen. ............................................................................................. 23

4
Changing preset mode from Coaching screen .................................................................................. 24
The INEX Coaching Screen ................................................................................................................ 25
Performing an INEX treatment with Coaching function ................................................................... 25
The IPPB Coaching Screen ................................................................................................................. 27
Chapter 3 - Patient circuit, power supplies and accessories configurations ........................................ 29
Patient Circuit installation ................................................................................................................. 29
Patient circuit calibration .................................................................................................................. 31
Accessories Compatible with EO-70 ................................................................................................. 33
Attaching a pulse oximeter ............................................................................................................... 34
Attaching a control pedal .................................................................................................................. 35
Upright Bracket installation for a vertical position of the device ..................................................... 35
Power Connections ........................................................................................................................... 37
Connecting to mains power .............................................................................................................. 37
Complete assembly with accessories ............................................................................................... 37
Running the EO-70 on internal battery ............................................................................................. 38
Battery run time ................................................................................................................................ 38
Storing and recharging ...................................................................................................................... 39
Prepare the battery for long-term storage ....................................................................................... 39
Travelling with EO-70 ........................................................................................................................ 39
Chapter 4 – Alarms indicator ................................................................................................................ 39
Chapter 5 - Routine Cleaning and Maintenance ................................................................................... 40
Instructions for hygienic reprocessing at patient change ................................................................. 41
Servicing ............................................................................................................................................ 42
Maintenance Timetable .................................................................................................................... 42
Essential performances ..................................................................................................................... 43
Chapter 6 - Device information ............................................................................................................. 44
Timing Operation .............................................................................................................................. 44
Physical Specifications ...................................................................................................................... 44
Functional Specifications .................................................................................................................. 44
Accuracy of settings .......................................................................................................................... 46
Monitored Parameter Specifications ................................................................................................ 46
Accuracy of monitoring data ............................................................................................................. 46
Power specifications ......................................................................................................................... 47
Environmental Specifications............................................................................................................ 47

5
Software versions.............................................................................................................................. 47
Guidance and Manufacturer’s Declaration Electromagnetic Emissions & Immunity....................... 48
Standards compliance ....................................................................................................................... 52
Cybersecurity contact ....................................................................................................................... 52
Training and support ......................................................................................................................... 53
Limited warranty ............................................................................................................................... 53

6
Introduction
The EO-70 (ref EO70) Secretion Management Device (SMD) provides treatment for patients not able
to manage their secretions on their own. It provides Insufflation – Exsufflation (INEX) and
Intermittent Positive Pressure Breathing (IPPB) modes for adult and pediatric patients as prescribed
by an attending doctor.
Indications for use
The EO-70 Secretion Management Device provides treatment support for pediatric and adult
patients weighting at least 5 kg (11 lbs) who requires secretion management support. The EO-70
device is intended to be used in home, institution, hospital for both invasive and non-invasive
interface. This device is transportable but not intended for use during transport.
The EO-70 device may be used either with a mask, mouthpiece or tracheostomy tube.
WARNING
E0VE 70 is not for use with anaesthetic gases.
E0VE 70 is not for use in an oxygen enriched environment.
Do not use EO-70 device in an MRI equipment or in a barotherapy equipment
Contraindications
Barotrauma
Pneumothorax
Pneumomediastinum
Bullous emphysema
Adverse Effects
Dry nose or mouth
Eye irritation
Bloating
Gastric distension
Skin wound
Sinus discomfort
Definitions
WARNING
Indicates
a condition that may endanger the patient or the device operator
CAUTION
Indicates a condition that may damage the device or equipment
NOTE
:
Advice that makes operation of the device more
convenient or efficient

7
General warnings and cautions
WARNING
The user and/or the patient must inform its service provider of any serious incident
occurred with the device. This information would be notified to EOVE and to competent
local authorities if necessary.
Read and understand the entire manual b
efore using the
EO
-
70
device
The
EO
-
70
device is a restricted medical device intended for use by qualified trained
personnel, under the direction of a doctor.
Use the
EO
-
70
device only as directed by a doctor or healthcare provide
r.
Information in this manual does not supersede instructions given by the prescribing
doctor.
Install and configure the
EO
-
70
device in accordance with the instructions given in this
guide. Non-specialist operators or institutions encountering problems with set-up,
operation or maintenance should immediately contact their EOVE representative.
Handle the
EO
-
70
device and AC power supply with care during and after use especially i
f
ambient temperatures are high as some surfaces may become hot. Do not leave the EO-70
device in direct contact with the patient for extended periods of time.
The
EO
-
70
should be kept out of reach of children and domestic animals to ensure their
safety and the safety of the patient and to avoid damage to the device and the accessories.
The battery and all machine parts of the device should be disposed of appropriately,
following correct regulations for waste management in order to minimize the risk for the
environment. They should not be disposed of in household waste.
Keep the device, and accessories away from water and all other liquids not specified in this
document.
CAUTION
The
EO
-
70
device is transportable but not intended for use during transport.
Do not expose the
EO
-
70
device to excessive force, do not shake or drop.
If the device or its power supply are dropped or mishandled, imme
diately discontinue use
and contact your EOVE representative.
Repairs and servicing should only be carried out by an authorized EOV
E service
representative or a qualified and certified Service representative.
The airflow for breathing produced by
the device can be higher than the temperature of the
room by up to 6°C. It should not be used if the ambient air in the room exceeds 35ºC.
The
EO
-
70
SMD
device is not a ventilator and should not be
used for other purpose than
punctual secretion management.

8
Chapter 1 – Description of the EO-70 device
Front Panel
1.
Display screen
3. EO device h
ousing unit
2.
SMD module
4. Circuit Port
5.
Keyboard
Rear Panel
1. Air inlet / outlet filters cover
5
.
USB
-
1 port
2. DC Power connector
6
. SpO
2
connector
3.
Power button
7
. Remote Control connecto
r
4.
USB
-
2 port
(Maintenance
only)
1
2
3
4
5
2
1
3
4
5
6
7

9
Rear view of device without housing
1.
USB port
2.
DC Power connector
3.
Connection to outer housing
Keyboard
1. Power source indicator
2. Alarm indicators
3. Treatment start / stop button
4. Power on/off button
5. Battery level
indicator
1
2
3
1 2 3 4
5

10
Symbols Table
The following symbols may appear either on your product or its packaging.
Keypad indicators / buttons
Alarm indicator
Battery level indicator AC/DC power indicator
On/Off button Treatment start / stop button
Touch interface symbols
Treatment start Treatment stopping
Menu access button Settings menu access button
Return to Home Screen Battery charging
Touch interface unlocked
Touch interface locked
Battery charging but not enough charged to
supply the device Battery power indicator
Power off button Calibration screen access
User manual access Settings information
Alarms screen access Maintenance menu access
Preferences screen access
Coaching screen access
Export Data screen access Skip the current serie
Adds one breath to the current serie Leak Indicator (inactive)
Leak Indicator (excessive interface leaks)
Leak Indicator (acceptable interface leaks)
Breath triggering on touch pad (IPPB)
INEX Manual mode actions: Slide Right = inspiration /
Slide Left = Exhalation / Release = Pause
Circuit without leak needed (INEX mode) Circuit with leak needed (IPPB mode)
Device / packaging symbols
Inspiratory Port (to patient)
Connection port Connection ports

11
USB connector Warning
Remote control connector
Applied part BF type
Consult operating instructions
Battery replacement warning: Only
trained personnel can replace batteries
DC power inlet
International Protection Marking, IEC standard
60529. Protection against ingress of water and foreign
objects.
Date of manufacture This side up
Complies with European legal requirements
Manufacturer
High and low temperature limitations Serial number
Should not be disposed of in household waste Product reference number
Keep dry Recyclable
Danger of fire if damaged Copyright
Fragile. Handle with care. Class II device
Storage and transport humidity range Medical device

12
Chapter 2 – Operating Instructions for the EO-70 device
WARNING
Blocking the air inlet could lead
to patient injury.
Keep machines clear of blankets, soft toys, and dust. Keep out of direct
sunlight.
CAUTION
To prevent possible damage to the device always place it on a flat, dry
and stable surface. To
protect the device during transportation, always ensure that the EO-70 device is transported
using the EOVE Transport bag.
Always protect the device from water if transported outdoors.
Set Up Test
Before using the EO-70 device, perform the following Set Up test.
WARNING
If
an alarm triggers during the Set Up test, do not use the device.
CAUTION
Contact your healthcare provider or EOVE for assistance if any of the checks in the
set
-
up
test
fail.
If the
EO
-
70
has been returned after servicing, ensure it is clear
ly labelled as disinfected
before starting the set-up test or installing.
To perform a Set Up Test
During a first patient installation, it is recommended to check the correct operating status of the
device:
1.
Connect the device to the AC power source and
check the ACDC Symbol is active.
2.
Check the condition of the device and accessories, and the condition of the patient’s circuit.
3.
Turn on the device (see next page). The device should sound, and
the display screen should turn
on correctly.
4.
Start treatment
and verify air is coming in and out of the device outlet
WARNING
If any of these steps fails, do not use the
EO
-
70
device. Contact your healthcare provider or
your Eove representative for a device checking.

13
Turning on the device
Ensure the device has been charged prior to use or connect to AC power or DC connector inlet.
1.
Insert AC connector into power inlet.
2.
Turn the screw lock clockwise to secure.
3. Device will turn on automatically. If starting on battery, press on front panel keyboard to
power on the device.
Turning off the device
From the touch interface - Main proceedings
1. From the Home screen or from the coaching screen of the touch interface, press and hold
until the circle becomes red.
2.
A confirmation message is
displayed. Validate.
3.
The device turns OFF.
CAUTION
The
EO
-
70
device cannot be powered off during treatment
Unplugging from mains power does not power off the device. It will continue to run on the
internal battery.
The device must be turn
ed off manually before disconnecting from AC power for any
extended period of time. Failure to do so may result in battery depletion.

14
From the SMD module - Secondary proceedings
1.
Press and hold
for three seconds.
2.
The SMD turns OFF.
Device Auto Power off on batteries
To keep the internal battery with the maximum autonomy, the device will automatically turn off
after 15 min of inactivity.
After 14 minutes, the device will emit two beep sounds and a message will be displayed to user. It
will allow the user to plug back the mains or Cancel this power off for the following minute.
End of batteries beeps
At 20% battery autonomy remaining the device will sound two beeps, then below 10%, the two
beeps will sound every minute.
Starting and Stopping treatment
Treatment can be started and stopped from either the touch screen or from the keyboard. Various
preset treatments may be installed on the device by your clinician to ensure the best therapy. Use
these presets according to the instructions provided by the clinician.
To START treatment using the keyboard:
1. Press on the Keyboard
2.
Treatment starts.
To START treatment using the Touch Screen:
1. Press on the touch screen
2.
Treatment starts.
To STOP treatment using the Keyboard:
1. Press on the keyboard
2.
Treatment
stops.
To STOP treatment using the Touch Screen:
1. Press on the touch screen
2. Treatment stops.
CAUTION

15
The
EO
-
70
device cannot be powered off during treatment
Unplugging from mains power does not power off
the
device. It will continue to run on the
internal battery.
The device must be turned off manually before disconnecting from AC power for any
extended period of time. Failure to do so may result in battery depletion.
Turning on and off the docking station
During a storage period or a long period of non-use without power supply, the docking station
should be switched off.
To switch on and off the docking station and the touch screen when the SMD module is outside,
press the Power button for a few seconds.
Using the SMD module outside of the docking station (click and go)
The SMD module can be used outside of the docking station.
To remove the module from the docking station:
1. Turn off the device and unplug from the mains
2. Remove the screw at the bottom of the station (see below).
3. Push on the back of the module while maintaining the docking station with the other hand
POWER
button

16
4. Pull the module while maintaining the docking station with the other hand
5. To use the SMD module on standalone configuration, turn on the module and press on
the keypad to start and stop treatment according to the previously set parameters.
6. To charge the module, plug it back in the docking station and restore the mains connection.
WARNING
The SMD module extractio
n from the station must not be performed by the patient. Only
trained persons are allowed to perform this operation.
To
avoid contact with connectors, do not put the hands in the docking station while the
module is out. Do not touch the inside of the station and the patient at the same time.

17
The Home Screen
On the home screen, there is important information about the settings, the pressure of treatment,
the preset modes set up by clinician. The Home Screen is accessible from all other screens by
pressing
1. Treatment mode indicator: Choose from
INEX, IPPB in the settings menu
2. Settings button: Allow access to settings
menu.
3. Leak necessity indicator.
4. Treatment monitoring: display the live value
for the displayed monitoring during
treatment.
5. Battery life indicators: Indicates the level of
charge left in the battery or whether the
battery is charging.
6. Power source indicator: Indicates whether
the device is operating on mains power (AC)
or DC power and battery life.
7. Date: indicates the date on YYYY/MM/DD
format. This can be set up and changed from
Preferences menu.
8. Time: Indicates the time on 24hr clock. This
can be set up and changed from the
Preferences menu.
9. Airway pressure indicator: Indicates the
pressure in the circuit. All inhalations are
colored in blue, all exhalations are colored in
green, all pause time are colored in white.
10. Main settings bar: Displays the main settings
associated to the current mode. (can be
adjusted when unlocked)
11. Start/Stop button: starts or stops treatment.
12. Settings information.
13. Treatment Start/Stop Button.
14. Touch pad: in INEX mode, permit to
manually manage the treatment. All tactile
actions with right movement trigger an
inhalation, all actions with left movement
trigger an exhalation.
In IPPB mode, starts a breath, a click triggers
an inspiration phase.
15. Power off button.
16. Preset mode menu (1-3): Presets installed
by the clinician and accessible to the patient
when needed.
17. Menu button: Allows access to patient
screen and clinical menus.
1 2 4 6 7 8
5
3
9
10
11
13
14
12
15
16
17

18
Using the Touch Pad
The Touch Pad is activated in INEX mode when set to MANUAL or in IPPB mode.
INEX mode Manual operation
In INEX mode, the operation must start in the Touch Pad black area but then the full screen surface
can be used if the finger keeps the contact with the screen.
1. Start the treatment. While the Touch Pad is not used, the device is in pause state
controlling PEEP pressure.
2. Press the Touch Pad and slide to the right. The device is starting an inspiration
phase.
3. Keep a finger on the pad to hold the inspiration
4. Without removing the finger from the Pad, slide to the left. The device is starting an
exhalation.
5. Keep a finger on the pad to hold the exhalation
6. Release the Touch Pad. The device comes back to a pause phase.
IPPB mode operation
In IPPB mode, a simple touch on the Touch Pad will trigger an inspiration.

19
Navigating the Preferences Menu
From this screen the patient can change preferences.
From the Home Screen, choose to access the Preferences and Maintenance menus.
Press on Preferences to choose the Preferences Screen. (see below)
From this screen the patient can adjust the following settings for the device.
Rotation of screen
Allows the screen to be rotated 180°. Press the small circle to rotate the
screen.
Settings as list
Select the display mode of the settings menu. To
display the settings as
list, press the small circle. The circle and the bar will become blue.
Luminosity
Adjusts screen luminosity.
Transition beep
Activates beeps at transitions from exhalation to inspiration (INEX and
IPPB modes) and from inspiration to exhalation (INEX mode only).
Current Date
Sets the current day, month
and year. To set the date, click on the
wheel and choose the date from the calendar. Press ok when
completed.
Current Time
Sets the current time on 24h clock. To set the time,
click on the wheel at
the end of the line and choose the time from the dial. Press ok when
completed.
In the preferences menu, the user can also access traceability and connection information.

20
Accessing the settings menu
NOTE: Do not access settings menu (unlocked mode ) unless directed by a physician.
To access the settings Menu
1. Choose and hold down the lock button, until it becomes red. A confirmation
message is displayed. Validate.
2. The settings button on the home screen is now available (no lock . on it)
3. Click on the home page settings for adjustment of the main settings or access the settings
menu to adjust any setting.
Table of contents
Other eove Medical Equipment manuals
Popular Medical Equipment manuals by other brands

Weinmann
Weinmann RESCUE PACK Device Description and Instructions for Use

KaVo
KaVo INTRAsurg 300 Instructions for use

Zeiss
Zeiss DuraMax Installation

Stryker
Stryker Secure Connect Operation & maintenance manual

LINET
LINET GRACIELLA User manual and technical description

Olympus
Olympus EMPOWER EMP-H35S Quick reference guide