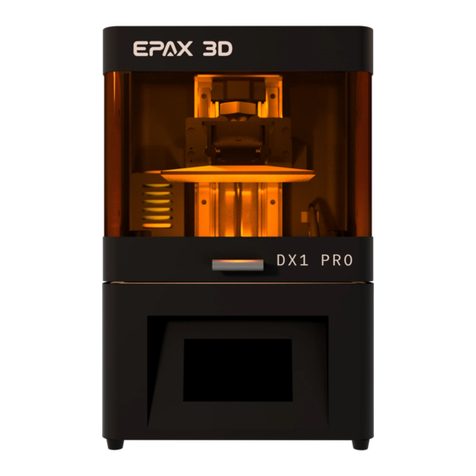
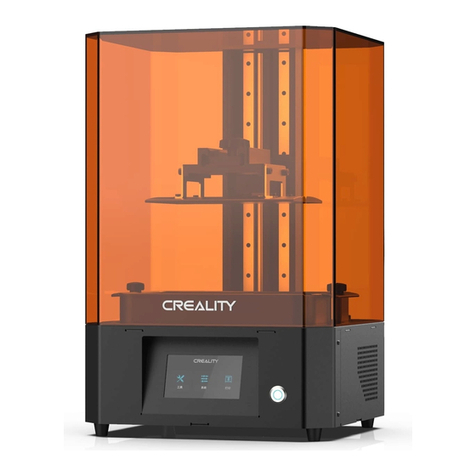
EPAX X1 User manual

Read the User Manual before operating the product, and keep it at a convenient place near the printer.

www.epax3d.com
It is strongly recommended that you watch our tutorial videos before
operating your printer for the first time.
For additional instructions, videos, and resources, please visit www.epax3d.com and visit the
Support section.
Contents
Technical Specifications…………………………………………………………………………
Touchscreen Menu Structure…………………………………………………………………...
Slicing Software - ChiTuBox…………………………………………………………………….
Machine Settings…………………………………………………………………………
Print Settings……………………………………………………………………………..
Slicer Operations………………………………………………………………………....
First Printing……………………………………………………………………………………....
Post-Printing Treatment………………………………………………………………………….
Troubleshooting………………………………………………………………………………….
Warnings…………………………………………………………………………………………..
2
3
4
5
11
12
15
17
18
19
1

www.epax3d.com
1. Technical Specifications
2

www.epax3d.com
2. Touchscreen Menu Structure
3

www.epax3d.com
3. Slicing Software - ChiTuBox
Installation
For the latest slicer download, please visit: https://www.chitubox.com/download.html
Slicer Settings
The settings for your printer can be found online at:
https://epax3d.com/pages/slicer-settings-chitubox
Latest ChiTuBox also has settings pre-configured for some models. See below example.
The settings include the Machine Settings (machine volume size, resolution, etc.) as well as basic Print
Settings (print layer height, bottom layers, bottom exposure time and regular exposure time, etc.) for
resin under average printing conditions. If your model is not shown up in ChiTuBox’s presets, you
can create a generic profile and enter the values yourself. Below are the settings for your
reference.
4

www.epax3d.com
Machine Settings
X1/X1-N and X1-DJ/X1-N-DJ with 5.5” 2K COLOR:
X1-K with 6” 2K MONO:
X10-2Kcolor with 10.1” 2K COLOR:
5

www.epax3d.com
X10-4Kmono with 8.9” 4K MONO:
X133-4Kmono with 13.3” 4K MONO:
X156-4Kcolor with 15.6” 4K Color:
6

www.epax3d.com
X156-4Kmono-14 with 14” Mono:
X156 with 13.3” Mono:
Please use X133’s settings for this scenario.
Resin settings are very different between color screen and mono screen. In general, a mono
screen only needs 1/4th of a color screen’s normal exposure time. Below are settings for EPAX
hard resin.
EPAX hard resin settings for EPAX X1/X1-N/X1-DJ/X1-N-DJ color screen:
7

www.epax3d.com
EPAX hard resin settings for EPAX X1-K 2K mono screen:
EPAX hard resin settings for EPAX X10 2K color screen:
8

www.epax3d.com
EPAX hard resin settings for EPAX X10 4K mono screen:
EPAX hard resin settings for EPAX X133 4K mono screen:
9

www.epax3d.com
EPAX hard resin settings for EPAX X156 4K color screen:
EPAX hard resin settings for EPAX X156 with 4K 13.3” mono or 14” mono screen:
Please use X133’s 4K mono screen resin settings.
As you can see, the major difference between different sizes of printers and color/mono screens are:
Normal Exposure Time -- Usually mono screen requires only 1/4th of color screen value
Bottom Exposure Time -- Mono screen value can be similar to color screen value
Bottom Lift Distance -- Larger printer requires higher lifting distance
Lifting Distance -- Larger printer requires higher lifting distance
EPAX hard resin is specially formulated for large printers. The resin can absorb more
background light without being cured prematurely. It is our default recommended resin for
printers large or small.
10

www.epax3d.com
EPAX Resins
EPAX developed below resins for our customers. They have been printed continuously in our factory
for our printer R&D and testing needs.
Print Settings
The correct Print Settings are critical for successful and detailed prints, but there is an acceptable
range for most types of resin. Some resins are also impacted by the temperature in the printing
environment and you will need to adjust your settings accordingly.
You can find the most up-to-date resin settings for a number of popular resins here:
https://epax3d.com/pages/resin-settings
For additional instructions and recommended support settings etc. you may also visit:
https://epax3d.com/pages/slicer-settings-chitubox
11

www.epax3d.com
For live help any time please visit our Facebook group. Many of our users are very active and give
advice on the page, including slicer settings for specific resins. Request to join at the link below:
https://www.facebook.com/groups/epax3d
We also answer questions during our business hours Monday through Friday, 9am to 5pm EST USA.
Slicer Operations
There are many useful operations in the ChiTuBox slicer. If you need additional assistance, remember
that our Facebook page is a great resource. You can also email or phone EPAX directly and we will be
glad to help. Here is more information about the most important setting recommendations/ranges:
1. Print Settings
Layer Height: 0.05mm is recommended (range: 0.01- 0.2mm).
- The thicker the layer height, the longer the exposure time per layer needed.
Exposure Time: For color screen, 6s -15s depending upon resin used and layer thickness.
- If using mono LCD screen, the time can be as low as 1.5 seconds.
Bottom Exposure Time: Setting range: 35s - 60s based on resin and printing environment.
- The longer the bottom exposure time, the better the bottom layer will stick to the
plate. Longer exposure times decrease the lifespan of your film and LCD screen.
- If using mono LCD screen, the bottom exposure can be as low as 20 seconds.
Bottom Layer Count: 4s - 8s, depending on the model
Lifting Speed/Bottom Lift Speed: 60 for best performance for most resins, 120 for fast printing
Retraction Speed: 120-150
2. Supports
Many complex designs/models will need additional posts while printing. (All
parts of your design will need to connect with the foundation for success.
You can always remove them from your final product.)
The Supports menu is located on the top right beside the Settings
icon. The types of support that can be configured are Light, Medium, Heavy
12

www.epax3d.com
and Raft. Each choice has corresponding parameter settings.
Light: Contact area between the support and model is small, easy to remove the support.
Heavy: Support contact with the model area is large, solid.
- It is recommended to try “medium” first, and use the default settings.
Raft: Adding the raft will make the bottom stick better to the build platform
- The parameters can be changed according to your own unique model needs.
3. Slicing and Saving the files
Slicing the file will create the .cbddlp file or .CTB file, which you can then save to the USB stick and it is
ready for printing. Here are some tips:
- Make sure not to remove the USB until your file is completely exported. If ejected before
being 100% saved, your model will be incomplete when printed.
- If you are printing the EPAX test file provided on the USB, you do not need to slice it first.
It is ready to print.
4. Ethernet/Network Printing
To set this up, first install the latest firmware located here:
https://epax3d.com/pages/firmware
1. Plug the Ethernet cable into your printer and the other end into the router/switch.
2. Using the front panel control, enter the network setup area by pressing System>Network:
Now toggle the network type. (While WiFi is shown as an option, there is no WiFi
hardware inside the printer, so you must use an ethernet cable.) Push the switch in the
upper left of the touch-screen to enable the ethernet connection. If you see an IP address
13

www.epax3d.com
fill in, it is working. A green LED should now be illuminated where the cable is plugged in.
3. Load the latest version of ChiTuBox, and slice a file.
You will be presented with the option to save or send
the file to the network. Select “Network Sending,” and
you should see all of the EPAX printers that are
connected to your network. If this is your first time,
you may need to select the refresh icon.
* Note that you can click on the pencil icon and rename what each IP address is called.
Now press the send button. You should see it showing the progress where it says “Send file to the
printer…”
4. When the sending is complete, it will ask if you would like to print the file. If you select
“OK” it will start printing. If you hit “Cancel” it will not print. However the file will still be on
the printer’s SD USB memory card, where you will be able to manually start from the
printer’s touch screen.
14

www.epax3d.com
4. First Printing
Make sure your machine is placed on a stable, flat surface.
1. Install the Build Platform
Install the build platform into the Z-axis platform bracket. Make sure
you slide the platform plate right under the black screw knob (do not
unscrew it all the way off). The arrow should be facing towards the
printer. Turn the fasten knob in a clockwise rotation to secure the
platform.
Turn on the printer and complete an “Auto Home”. Go to Tools > Manual > Home icon.
Using the touch screen arrows, raise the platform to the middle of the Z-axis. At this point, you are
ready to add resin into your resin vat which is secured by screws on the left and right sides.
NOTE: our printers are pre-calibrated. You do not need to relevel the platform!
15

www.epax3d.com
2. Load Resin
You will notice three lines in the vat that are used for measurement purposes. Pour resin into the vat
slowly. We recommend starting with the least amount of resin possible for the test print - just above
the first measurement line is sufficient. The printer will not stop by itself if vat runs out of resin during a
print. If you need a test file for your model, you can visit www.epax3d.com support section.
WARNING: Always wear gloves and goggles and don’t touch resin by skin.
3. Choose file to be printed
Insert the USB into the printer. Select a test file (The file should end with .cbddlp or .CTB). If no
test file in your USB, you can download a test file for your model from our website and start
printing by pressing the Play button. During the printing process, you must close the top cover to
avoid light affecting the curing process.
It is highly recommended to print a test file as the first file printed with your new printer. The
file was already sliced and ready to print. Doing so will establish a good baseline for future
support needs and will let you know if you need to make adjustments to your slicer settings.
If you find the resin is not enough to finish a model during the
printing process, do not panic. Click Pause, wait for the build
plate to rise up automatically, then slowly add extra resin to the
vat as needed. Click Play to resume printing.
16

www.epax3d.com
For the first print/new model, it is a good idea to pause the printing after around 30 minutes to
confirm that the first layers stuck to the build platform.
- Resume printing if it looks good,
- If the print does not stick to build platform, then you need to modify your design by
adding more support, changing orientation, or adjusting the first several layers’
exposure time. Typically first several layers require at least 35 seconds each more
depending on resin and room temperature.
5. Post Printing Treatment
When the printing is done, wait until no more
residual resin drips from the platform before
removing it. Twist the black knob
counterclockwise and take off the build
platform.
Remove the print by shoveling it off the plate
with the metal scraper tool, then clean it by
soaking it in 95% isopropyl alcohol (IPA) for
at least three minutes. If your IPA is 91% then soak for 5 minutes. Swirling while soaking will help
clean the residual resin residue. You can purchase IPA from any drug store.
After your model is clean, put it in a cool, dry, well-ventilated area. To cure it, you may use a UV light
machine or expose it directly to sunlight. After a few hours in the sun (or 20-30 minutes under a
machine), the print will become fully dry and solid.
17

www.epax3d.com
6. Troubleshooting
There are many troubleshoot resources available online. You can find a list of error codes and tips
here: https://epax3d.com/pages/troubleshooting
You can also join our Facebook Group to get help from other users, especially if you need help
tuning slicer settings. There are many inputs from various users with all kinds of different resins
used. Each different resin might need different settings. Each layer height needs different settings
too. Each particular model might need special support thickness and positions. These are the
experience related questions which we rely on our community to help each other. Most of them are
just tuning of slicing settings for the particular scenario. Please don’t hesitate to ask questions in the
Facebook group:
www.facebook.com/groups/epax3d
If you need printer support you can contact us via Facebook messengers (You can use the chat
window on epax3d.com page) or email us directly at [email protected]. We provide support
Monday-Friday 9am to 5pm EST.
18

www.epax3d.com
7. Warnings
1. When you find that a print has failed or there is solid residue in the resin vat, you must filter the
resin in order to protect the LCD curing screen. Clean the resin in the resin vat by filtering
out the solid residue using one of the provided filters or a paint filter from your local hardware
store. If there is solid residue in the resin vat, when the build plate dips into the vat, the force of
the plate may crush residues, puncture the film and damage the LCD curing screen. This is the
costliest mistake.
2. If there is residual resin in the resin vat or on the build plate’s outer surface, please clean with a
tissue dabbed in IPA to avoid it dropping into the machine and curing inside.
3. Always wear gloves, a respirator mask and protective goggles!
4. Print in a well-ventilated area. It is strongly recommended to use a vent fan drawing air
around the printer to the building outside.
It is strongly recommended that you watch our tutorial videos before
operating your printer for the first time.
●For printer instructions, videos, firmware updates, and more please visit www.epax3d.com.
●You can also search “EPAX 3D” on Youtube.
●Customer Support Email: [email protected]
●Warranty: 1 year US warranty for the printer and parts, except the LCD curing screen, film,
vat, build plate and resin.
●For printer replacement parts, supplies and a variety of resin options, visit
www.epax3d.com.
Join us on our Facebook group for active discussions and knowledge-sharing:
https://www.facebook.com/groups/epax3d/
19
Other manuals for X1
1
This manual suits for next models
4
Table of contents
Other EPAX 3D Printer manuals
