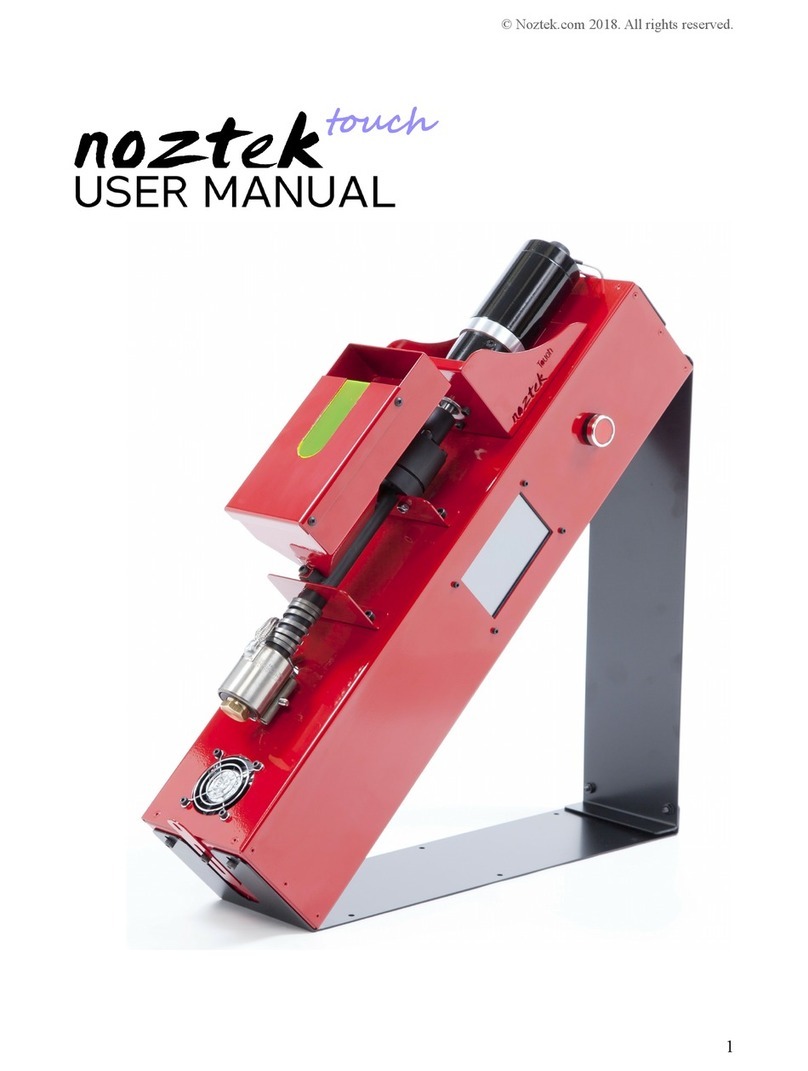
Noztek Xcalibur User manual

© Noztek.com 2018. All rights reserved.
1

© Noztek.com 2018. All rights reserved.
Warranty / Safety 3
Diagram 4
Main Features 5
Power Switch & Start-up Gui e 6
User Interface 7
Connecting Xcalibur to your computer 11
Changing the nozzle/Colour mixing/Maintenance/Lubrica-
tion/Barrel Jam 12
WARRANTY
2

© Noztek.com 2018. All rights reserved.
• Equipment manufacture by Noztek carries the stan ar machine tool guarantee of
free om from efects in workmanship an material for one year from ate of ship-
ment.
• TO INSURE THAT YOUR WARRANTY IS HELD IN EFFECT, PROPER OPERATION PROCE-
DURES MUST BE OBSERVED.
• NOTE: READ THE SAFETY PRECAUTIONS BEFORE OPERATING THIS MACHINE.
SAFETY
1. Know your equipment
2. Carefully rea the instruction manual.
3. Learn the proper, safe use an limitations of the equipment.
4. DO NOT operate or use this equipment for any purpose other than its inten e
use.
5. DO NOT mo ify this equipment.
6.
7. DO NOT perform a justments or maintenance while system is operating or en-
ergize
8. DO NOT clean the equipment with flammable solvents.
9. DO NOT wash own the equipment with water. This coul cause an electrical
hazar .
10.DO NOT probe into extru er vent with the machine running. Never Use a metal
probe in the vent area. The screw may shear the probe, causing extensive
amage to the barrel an screw. A woo en probe is recommen e .
11.DO wear a face shiel , insulate gloves when operating an when in close
proximity to the extru er uring operation. These protective items must also
be worn when a justing the ie, cleaning the screw, etc. The extru er temper-
atures are extremely hot an failing to protect yourself may cause serious in-
jury.
12.The fee hopper MUST be installe on the extru er fee section at all times
when in operation
13.NEVER put han s in the fee section or vent to remove material.
14.DO NOT switch on the motor until the recommen e temperature has been
reache .
3

© Noztek.com 2018. All rights reserved.
4

© Noztek.com 2018. All rights reserved.
5

© Noztek.com 2018. All rights reserved.
MAIN FEATURES
7-inch Touch screen HMI Capacitive Touch Display
Timer Enables you to shut own the running session by eac-
tivating the heatban s an motor.
Programme Memory The last use target temperature an spee will be re-
membere after a restart. Last use timer settings will
also be kept.
PID The Xcalibur uses PID for greater temperature an
spee control.
Computer connection The Xcalibur Controller enables you to take control of
the machine via USB connection.
Warm-Up Designe to allow the barrel to fully heat after 10 min-
utes so unmelte materials o not block the motor.
This avoi s amaging to motor or machine.
Emergency shutdown The ability to quickly, electrically shut own the Xcal-
ibur in any urgent event.
Motor bloc ing management If the motor cannot run for any reason, a message will
be prompte an the motor will be stoppe .
Sensor malfunction detection If the temperature rea ings are incorrect a message
will be prompte .
6

© Noztek.com 2018. All rights reserved.
POWER SWITCH AND START UP GUIDE
The Noztek Xcalibur features an illuminate on/off switch an an emergency shut-
own. In an emergency simply hit the button an the Noztek Xcalibur will completely
switch off. To restart, simply untwist the button.
First attach the hopper; the bolts are locate in the bolt holes in the barrel. Then at-
tach the 45 egree bracket (if using). There are six bolts, two for either en an two
which connect the bracket together.
Once powere up, the Xcalibur will take a short perio to boot before presenting the
control screen/User Interface.
.
7

© Noztek.com 2018. All rights reserved.
USER INTERFACE
Control Screen
This screen shows the current temperature of each heating ban an the spee of the
motor (top row), their set temperature an spee (secon row), activation/status
switches (thir row) an access to the Menu screen (bottom).
To activate the heating ban s, touch any of the temperature activation/status switch -
es. Upon activating the heating ban s, the Xcalibur isplay will switch to the “warm
up” screen ( fig.4). The Xcalibur will not exit this screen until the heating ban s are at
the set temperature, or the user aborts the heating process. The motor switch will ac -
tivate the warm-up to allow the motor to run safely after it.
Warm-upScreen
This screen is isplaye when you heat for the first time or when the temperature
roppe un er the target. This warm up is to ensure that the barrel has reache a
certain temperature before being able to run the motor safely.
8

© Noztek.com 2018. All rights reserved.
TIME LEFT: sets a timer for automatically shutting own the DC motor rive an heat -
ing ban s.
MenuScreen
The menu screen ( fig. 5) gives the user access to all of the Xcalibur's settings an a i-
tional functionality.
SET TEMP: sets the esire temperature of the in ivi ual heating ban s.
SET SPEED: sets the esire revolutions per minute (rpm) for the D.C. motor rive.
FAN: ON/OFF: activates or eactivates the fan.
TIME LEFT: sets a timer for automatically shutting own the DC motor rive an heat-
ing ban s.
9

© Noztek.com 2018. All rights reserved.
Setting Temperature
This screen enables the user to set the temperature for each heat ban . To o this the
user can either use the sli ers or the “+” an “-” buttons an then press the “SET”
button. If you want to cancel your mo ifications press “BACK”
Setting Speed
This screen enables the user to set the spee for the motor. To o this the user can ei -
ther use the sli ers or the “+” an “-” buttons an then press the “SET” button. If you
want to cancel your mo ifications press “BACK”.
10

© Noztek.com 2018. All rights reserved.
Setting Timer
This screen allows the user to set the timer to shut own the current session. This will
not power off the Xcalibur entirely, but will stop the heating an the motor. Do this us -
ing the “+” an “-” buttons an then press the “SET” button. To cancel your mo ifica -
tions press “BACK”
11

© Noztek.com 2018. All rights reserved.
CONNECTING XCALIBUR TO A COMPUTER
The Xcalibur Controller software enables you to control the Xcalibur an collect ata
using a USB connection. The ata can then be save to a “.csv” file in or er to be
opene in a sprea sheet software. You will also be able to see the ata on a graph.
To visualize the ata on a graph, go to Display > Display ata on graph.
To export you ata just click on “Export ata to .csv” on the bottom right of the win-
ow.
To change temperature or the motor settings. enter the value you want in the rele-
vant fiel using the keyboar an then press “Set”. To activate or eactivate the fan
just press the “ON/OFF” button next to “Fan state”.
Note: For safety reasons, the warm-up cannot yet be launche via controller.
CHANGING THE NOZZLE
12

© Noztek.com 2018. All rights reserved.
Before attempting this operation please use insulate gloves. To switch between noz-
zle sizes to heat up the unit to175c. Unscrew the nozzle, clean off any excess plastic
from the internal threa s, then screw on new nozzle.
COLOUR MIXING
A ing colours is simple. Mix the natural an the colorant at the given ratio, then
pour it into the hopper. It will take 10-20 minutes to see changes in the colour. It is
also possible to mix colorants to create new colours. For example, mix blue an yel-
low make green.
MAINTENTANCE
Regular cleaning of your plastic extrusion tooling uring the isassembly process
lengthens tooling life, helps re uce waste an helps maintain tighter tolerances for
your final pro uct. Use a wire brush an fine metal pick to clean the threa s an the
screw assembly
LUBRICATION
The thrust bearing assembly will require occasional lubrication; this is a relatively sim-
ple operation, simply unscrew the brass grease nipple an squirt a 2 secon burst of
a lubricant like WD40 Lithium Grease. For optimal performance we recommen this
proce ure is carrie out every 100 hours of operation.
BARREL JAM
Depen ing on what type of resin you are using, you may experience a barrel jam. If at
any time uring extrusion the motor starts to labour an slow right own then you
shoul switch off the motor imme iately. A goo way to free the jam is to turn the
temperature up to aroun 230-240c an leave this for 15 – 20 minutes, then switch
on the motor again; this shoul allow the screw to rotate again. Also using a blow
torch to heat the barrel just past the hopper will usually release any soli ifie plastic
an free the screw.
MOTOR BLOCK
pWhen the motor blocks, it's likely that the fuse has blown. Check insi e the casing,
you'll see it fuse fixe to the bottom, Replace with a 15amp fuse.
13

© Noztek.com 2018. All rights reserved.
CONTACT NOZTEK
Please see our FAQ help section on our website at www.noztek.com for further trou-
bleshooting. If the answer to your quey is not foun here, please contact the Noztek
expert team irectly.
Noztek Lt
Unit C3 Dolphin In ustrial Estate Evershe Way, Shoreham by Sea
West Sussex
BN43 6QB ENGLAND
44 (0) 203 384 6208
www.noztek.com
14
Other manuals for Xcalibur
1
Table of contents
Other Noztek 3D Printer manuals