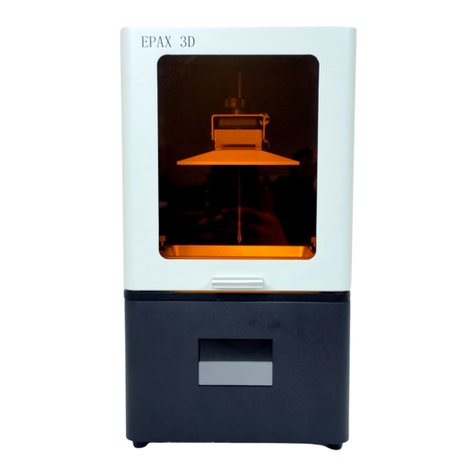
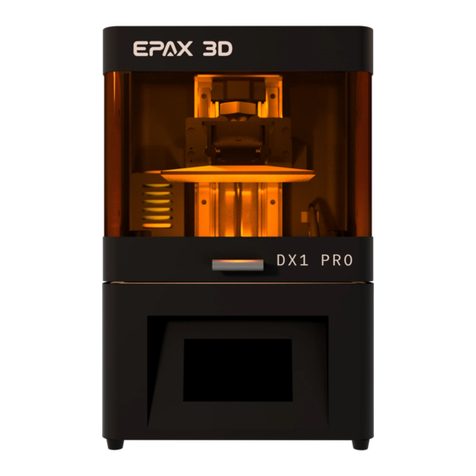
EPAX E6 Series User manual

Read the User Manual before operating the product

www.epax3d.com
It is strongly recommended that you watch our tutorial videos before
operating your printer for the first time.
For additional instructions, videos, and resources, please visit www.epax3d.com and visit the
Support section.
Table of Contents
Section I. Technical Specifications…………………..………………….……………………………..
Section II. Touchscreen Menu Structure…………………………….…….…………………………..
Section III. EPAX Resins………………………………………………………………………………...
Section IV. Slicing Software - ChiTuBox……...………………………….……………………….…...
Installation…………………...…………………………………….……………………….……..
Slicer Settings……………………...………………………………………………………….....
Print Settings……………………...………………………………………………………….…..
Slicer Operations………………..……………………………………………………….……....
Section V. The Printing Process.……………………………………………………………….……....
Post-Processing…………….…………..……………………………………………….……….
Section VII. Troubleshooting…….…………………………………………………………….…….….
Section VII. Warnings…………………………………….……………………………………….……..
Warranty and Return Information……………………………………………………………………....
2
5
6
7
7
7
9
11
14
16
17
18
19
1

www.epax3d.com
Section I. Technical Specifications
E6/E10 SERIES
Model Name
EPAX E6 UV LCD 3D Printer
EPAX E10 4K UV LCD 3D
PRINTER
EPAX E10 5K UV LCD 3D
PRINTER
Build Volume
(L*W*H)
128mm*81mm*155mm
192mm*120mm*250mm
221.4mm*129.6mm*250mm
Printing Technology
Monochrome LCD
Monochrome LCD
Monochrome LCD
Material
Resin
Resin
Resin
Resolution
2560*1620 (2K)
3840*2400 (4K)
4920*2880 (5K)
Layer Thickness
0.02 ~ 0.1 mm
0.02 ~ 0.1 mm
0.02~0.1mm
Connectivity
USB Flash Drive, Ethernet
USB Flash Drive, Ethernet
USB Flash Drive, Ethernet
Wi-Fi
No
No
No
Product Size
(W*D*H)
9 x 8 x 15 inches
13 x 12.25 x 21.25 inches
13 x 12.25 x 21.25 inches
Product Weight
20lbs
40lbs
40lbs
Platform
Molded Body with Soft Aluminum
Face
Molded Body with Soft Aluminum
Face
Molded Body with Soft Aluminum
Face
Preferred Slicer
ChiTuBox
ChiTuBox
ChiTuBox
Light Source
Parallel Light Matrix
Parallel Light Matrix
Parallel Light Matrix
Film
nFEP Film
nFEP Film
nFEP Film
Touch Screen
3.5 inch Color TFT
3.5 inch Color TFT
3.5 inch Color TFT
File Type
.ctb
.ctb
.ctb
Max Resin Volume
300mL (With Platform)
700mL (With Platform)
700mL (With Platform)
2

www.epax3d.com
X1 Series
Model Name
EPAX X1-N UV LCD 3D
Printer
EPAX X1-N-DJ UV LCD
3D Printer
EPAX X1K 6” UV LCD
3D Printer
EPAX X1-4K UV LCD 3D
Printer
Build Volume
(L*W*H)
115mm*65mm*155mm
115mm*65mm*155mm
130.56mm * 82.62mm *
155mm
120.96mm*68.04mm*15
5mm
Printing Technology
Color LCD
Color LCD
Monochrome LCD
Monochrome LCD
Material
Resin
Resin
Resin
Resin
Resolution
1440*2560 (2K)
1440*2560 (2K)
1620*2560 (2K)
2160*3840 (4K)
Layer Thickness
0.02 ~ 0.1 mm
0.02 ~ 0.1 mm
0.02~0.1mm
0.02~0.1mm
Connectivity
USB Flash Drive,
Ethernet
USB Flash Drive,
Ethernet
USB Flash Drive,
Ethernet
USB Flash Drive,
Ethernet
Wi-Fi
No
No
No
No
Product Size
(W*D*H)
9.5 x 10 x 17 Inches
9.5 x 10 x 17 Inches
9.5 x 10 x 17 Inches
9.5 x 10 x 17 Inches
Product Weight
25lbs
25lbs
25lbs
25lbs
Platform/Vat
Soft Aluminum Angled
Platform and Vat
Soft Aluminum Angled
Platform and Vat
Soft Aluminum Angled
Platform and Vat
Soft Aluminum Angled
Platform and Vat
Preferred Slicer
ChiTuBox
ChiTuBox
ChiTuBox
ChiTuBox
Light Source
40W 5 x 10 LED Array
Parallel Light Matrix
Parallel Light Matrix
Parallel Light Matrix
Film
nFEP Film
nFEP Film
nFEP Film
nFEP Film
Touch Screen
3.5 inch Color TFT
3.5 inch Color TFT
3.5 inch Color TFT
3.5 inch Color TFT
File Type
.ctb
.ctb
.ctb
.ctb
Max Resin Volume
300mL (With Platform)
300mL (With Platform)
300mL (With Platform)
300mL (With Platform)
3

www.epax3d.com
X10 series and X133/X156
Model Name
EPAX X10 4K UV LCD
3D Printer
EPAX X10 5K UV LCD
3D Printer
EPAX X133 UV LCD 3D
Printer
EPAX X156 UV LCD 3D
Printer
Build Volume
(L*W*H)
192mm*120mm*250mm
221.4mm*129.6mm*250
mm
292mm * 165mm *
400mm
345mm * 194mm *
400mm
Printing Technology
Monochrome LCD
Color or Mono LCD
Monochrome LCD
Color LCD
Material
Resin
Resin
Resin
Resin
Resolution
3840*2400 (4K)
1440*2560 (2K Color) or
4920*2880 (5K Mono)
3840x2160 (4K)
3840x2160 (4K)
Layer Thickness
0.02 ~ 0.1 mm
0.02 ~ 0.1 mm
0.05~0.1mm
0.05~0.1mm
Connectivity
USB Flash Drive,
Ethernet
USB Flash Drive,
Ethernet
USB Flash Drive,
Ethernet
USB Flash Drive,
Ethernet
Wi-Fi
No
No
No
No
Product Size
(W*D*H)
14.5 x 15 x 21 Inches
14.5 x 15 x 21 Inches
18 x 15 x 31 Inches
20 x 17 x 31 Inches
Product Weight
50lbs
50lbs
115lbs
125lbs
Platform
Soft Aluminum Angled
Platform and Vat
Soft Aluminum Angled
Platform and Vat
Hard Aluminum Angled
Platform and Vat
Hard Aluminum Angled
Platform and Vat
Preferred Slicer
ChiTuBox
ChiTuBox
ChiTuBox
ChiTuBox
Light Source
Parallel Light Matrix
Parallel Light Matrix (5K
only)
LED Matrix
LED Matrix
Film
nFEP Film
nFEP Film
nFEP Film
nFEP Film
Touch Screen
3.5 inch Color TFT
3.5 inch Color TFT
4.9 inch Color TFT
4.9 inch Color TFT
File Type
.ctb
.cbddlp (2K only)
.ctb(5K only)
.ctb
.cbddlp
.ctb
.cbddlp
Max Resin Volume
900mL (With Platform)
900mL (With Platform)
1700mL (With Platform)
2300mL (With Platform)
4

www.epax3d.com
Section II. Touchscreen Menus
New UI
5

www.epax3d.com
Section III. EPAX Resins
EPAX Resins
EPAX developed the resins below for our customers. They have been printed continuously in our
factory for our printer R&D and testing needs.
6

www.epax3d.com
Section IV. Slicing Software - ChiTuBox
Installation
For the latest slicer download, please visit: https://www.chitubox.com/download.html
Slicer Settings
You can find the most up-to-date resin settings for EPAX and eSUN resins here:
https://epax3d.com/pages/resin-settings
For additional machine settings and print settings. you may also visit:
https://epax3d.com/pages/slicer-settings-chitubox
The latest version of ChiTuBox also has settings preloaded for most models. See below for where to
find the printers.
7

www.epax3d.com
The settings include the Machine Settings (machine volume size, resolution, etc.) as well as basic
Print Settings (print layer height, bottom layers, bottom exposure time and regular exposure time, etc.)
for our resins under average printing conditions. If your model does not show up in ChiTuBox’s
presets, or the predefined profile does not match your machine, you can create a generic profile
and enter the values yourself. See below for where to find the generic profile.
If you are using a resin that is not EPAX or eSUN, we recommend talking to the resin
manufacturer about settings. We can try to get you a starting point, but we do not test many other
resins on our machines.
For assistance at any time please visit our Facebook group. Many of our users are very active
and give advice on the page, including slicer settings for specific resins. Request to join at the link
below:
https://www.facebook.com/groups/epax3d
We also answer questions during our business hours Monday through Friday, 9am to 5pm EST USA.
8

www.epax3d.com
Print Settings
The correct Print Settings are critical for successful and detailed prints, but there is an
acceptable range for most types of resin. Some resins are also impacted by the temperature in the
printing environment and you will need to adjust your settings accordingly. Generally resins prefer warm
temperatures, and many do well between 25°C and 30°C (~77°F and 85°F) .
●Layer Height: 0.05mm is recommended (range: 0.02- 0.1mm (0.05-0.1mm on X156/X133)). The
thicker the layer height, the longer the exposure time per layer needed.
●Exposure Time: Varies depending on resin. Usually between 6-15s on a color screen and 1.5-3s
on a mono screen.
●Bottom Exposure Time: Varies depending on resin. Usually between 35-60s on a color screen
and 20-35 on a mono screen.
○The longer the bottom exposure time, the better the bottom layer will stick to the plate.
Longer exposure times decrease the lifespan of your film and LCD screen because it
essentially bakes them.
○X156 bottom exposure can go as high as 90s for large/heavier prints.
●Bottom Layer Count: 4 - 8, depending on the model.
●Light Delay: Not needed so it can be set to 0
●Lift Distance/Bottom Lift Distance: Varies depending on printer. Preset fairly conservatively on
ChiTuBox
●Lifting Speed/Bottom Lift Speed: 40-60 mm/min is optimal to work on all of our printers and
print jobs
●Retract Speed: 150mm/min is optimal to work on all of our printers and print jobs
9

www.epax3d.com
There are some major differences in settings depending on the size of the printer and which type of
LCD screen it is using (Color vs Mono):
Normal Exposure Time - The General rule of thumb is that mono screens require approximately ⅓to
¼of color screens’ values. The exact time will vary based on the resin being used.
Bottom Exposure Time - Another general rule is that the mono screen value is usually about ½ of
color screens. Again exact time will vary based on resin being used.
Bottom Lift Distance - Larger printers require higher lifting distances
Lifting Distance - Larger printers requires higher lifting distances
Some settings can be adjusted to increase the speed of a print. These settings require experimentation
on the end user to adjust to reliable settings and also have consequences if not carefully monitored:
Layer Height - Increasing the layer height will lower the overall amount of time needed to print. The
consequence will be some increased exposure times. For example at 0.1mm vs 0.05mm, you would
essentially cut the print time in half. How much to increase exposure time depends on the resin. Printing
at 0.1mm instead of 0.05 does not mean to double the exposure time.
Lifting Speed - Increasing this will speed up how fast the build plate lifts the print off of the film.
WARNING: Going too fast could result in failed prints or torn film meaning wasted resin and potential
damage to the screen/machine. Do not increase too much. This is a setting that you progressively
increase the more comfortable you feel with the print job being able to handle the speed.
Retract Speed - Increasing this will speed up the build plate lowering back down after lifting.
WARNING: Going too fast could result in prints prematurely lowering before resin fills in gaps in the vat.
This will result in missing layers and potentially broken or failed prints. This is a setting that you
progressively increase the more comfortable you feel with the print job being able to handle the speed.
Lifting Distance/ Bottom Lift Distance: The Larger the printer means that values increase. The preset
values we have on our website, and in ChiTuBox can be decreased depending on the print job and
layer height to save a little extra time. It won’t save much though, and can be a bit harder to get right.
WARNING: Lowering too far can result in the print not fully peeling off of the film. Can result in missing
layers, failed prints, and broken nFEP in special cases.
10

www.epax3d.com
Slicer Operations
There are many useful operations in the ChiTuBox slicer. If you need additional assistance,
remember that our Facebook group is a great resource. You can also email
EPAX directly and we will be glad to help. Here is more information about
the options in your slicer.
1. Supports
Many complex designs/models will need additional supports while
printing. (All supports will need to connect with the foundation or stable part
of the print for success. You can always remove them from your final product.)
The Supports menu is located on the top right beside the Settings icon. The types of support that can
be configured are Light, Medium, and Heavy. Each choice has default settings that can be adjusted via
the top, middle, bottom, and raft areas. Learning how to use supports properly stems from experience.
●Light: Small Contact area. Best for small prints and in detailed areas.
●Medium: Larger contact area, and stronger than light supports.
●Heavy: Largest contact area and are the strongest support settings.
●Raft: Base the support sits on. Best used for prints where no part of it is touching the build
platform i.e. the print is suspended. Can be edited for stronger adhesion to the build platform.
2. Hollowing
If you would like to save on resin, or your printing a very
large and heavy piece, you may want to
consider hollowing the print. When using the hollowing
feature, make sure to create vent holes near the bottom of
the print (closest to the build plate) and drainage holes
near the top of the print (closest to vat). Ventilation holes are necessary to avoid a vacuum effect
causing failed prints or torn nFEP film. Drainage holes are necessary to drain out liquid resin that could
be present in the print. Liquid resin inside will eventually cause damage to the outer areas of the print.
11

www.epax3d.com
3. Slicing and Saving the files
Once you are done setting up the file and getting the settings correct in your slicer, you should
now Slice the file. Slicing the file will create a .ctb or .cbddlp file, which you can then save to the USB
stick and it is ready for printing. This is the process that creates the individual layers on a print. If you
attempt to slice a file that is already sliced, you may end up with a non-working file. Note that most of
our printers use the .ctb file format exclusively. If you are unsure of which file format you should use,
please refer to the tables in Section I.
Here are some tips:
- Make sure not to remove the USB until your file is completely exported. If ejected before
being 100% saved, your model will be incomplete when printed.
- We have test prints available on our website if you would like to run one before trying your
own models. https://epax3d.com/pages/slicer-settings-chitubox
4. Ethernet/Network Printing
If you find that utilizing the USB
stick to print is too inconvenient, you may
also opt to remotely send prints via the
network feature. To set this up, connect
your printer with an ethernet cable to your wireless router. Now go to network and toggle on ethernet.
Wi-Fi shows up as an option, but there is no Wi-Fi adapter in the printer. An IP address will then fill in
and a green LED should now be illuminated where the cable is plugged in. Plug in the USB as you will
need the storage for the prints to be received by the printer.
Load the latest version of ChiTuBox, and slice a file. You will be
presented with the option to save or send the file to the network. Select
“Network Sending,” and you should see all of the EPAX printers that are
connected to your network. If this is your first time, you may need to
select the refresh icon.
12

www.epax3d.com
* Note that you can click on the pencil icon and rename
what each IP address is called.
Now press the send button. You should see it showing the
progress where it says “Send file to the printer…”
When the sending is complete, it will ask if you would like to print the file. If you select “OK” it will start
printing. If you hit “Cancel” it will not print. However the file will still be on the printer’s USB memory
card, where you will be able to manually start from the printer’s touch screen.
**Note** Sending a print via network requires a good amount of bandwidth to be available. We
recommend not sending a .cbddlp file over the network as they are very large in comparison to the .ctb
file format which is more compressed. If you find that you are running into issues where the network is
timing out quite a bit, you may not have enough bandwidth to support network sending.
13

www.epax3d.com
Section V. The Printing Process
Make sure your machine is placed on a stable, flat surface.
1. Install the Build Platform and Resin Vat
Insert the build platform into the Z-axis build arm. Make sure you
slide the platform plate onto the arm. You should have a black knob
screw to secure the build platform onto the arm. It is very important
that you have slid the platform into the correct position fully, and
secured it well.
Turn on the printer and complete an “Auto Home”. Go to Tools > Manual > Home icon.
Once homed, you may use the touch screen arrows to raise the platform to the middle of the Z-axis.
Now you may insert the resin vat into the platform. On X series the vat slides in, and on the E series the
vat is slotted in from above. Make sure the vat is placed in the correct direction. X series vats will have
a drainage groove in the front right of the vat, and E series vats will have slots for a handle in the front.
Secure the vat using the provided screws or knobs, and then you are ready to add resin into the vat.
NOTE: Our printers are pre-leveled from the factory. You do not need to relevel the platform!
14

www.epax3d.com
2. Load Resin
Each resin vat has a maximum capacity with and without the
build plate. You may refer to tables in section 1 for the max capacity
of the vat with the platform in it. It is highly recommended to only fill
to about ⅓ of this capacity when first starting the print so that you do
not risk resin overflow. Unless you are utilizing the full build volume,
you will rarely ever need to fill the vat to max capacity.
!EXTREME CAUTION! Always wear gloves, goggles, and a mask for your protection. If liquid
resin gets on your skin, immediately wash the afflicted area with soap and hot water.
3. Starting the print
Insert the USB into the printer. Select a file with the
correct format. You may download a test file for your model from
our website or slice your own. Press the play button to start the
print. During the printing process, you must close the top cover
to avoid light affecting the curing process and seal in the fumes
generated by the warming resin.
It is recommended to print a test file as the first file printed with your new printer. The file
was already tested and works. Doing so will establish a good baseline for future support
needs and if you need to make adjustments to your slicer settings.
If you find that you are running low on resin in the vat
during a print, don’t worry. Press Pause, wait for the build plate
to rise up, then pour in more resin slowly and onto the angled
platform so that the resin drips into the vat.
WARNING: Pouring room temp. resin directly into resin warmed by printing may induce a temp.
shock to the resin. This could cause some roughness, or failures in layers of the print.
15

www.epax3d.com
For the first print, it is a good idea to check on the print after around 30 minutes to confirm that the
first layers stuck to the build platform. If it looks good, then resume printing.
- If the print does not stick to the build platform, then you need to modify your design
by adding more support, changing orientation, or adjusting the first several layers’
exposure time. Typically the first several layers require at least 35 seconds each
more depending on resin and room temperature.
5. Post-Processing
When the printing is done, wait until no more residual resin drips from the platform and wear
gloves before removing it. You can wipe off any residual resin as well. Twist the knob screw
counterclockwise and take off the build platform.
An effective way to remove a print is to
use the metal spatula to dig between the base
and the platform, and then use the plastic
spatula as a wedge to release the print. Soak
the print in at least 91% IPA (Isopropyl alcohol)
for about 5-10 minutes. This helps to clean off
residual liquid resin on the print. Substitute water if you are using a Water Washable resin.
After your model is clean, put it in a cool, dry, well-ventilated area until it dries. Please make
sure to still be wearing gloves during this time. To cure it, you may use a UV light machine for a few
minutes or expose it directly to sunlight. If using sunlight, we recommend submerging the print in
water (unless using WW resin) and putting it in direct sunlight for a few hours.
16

www.epax3d.com
Section VI. Troubleshooting
There are many resources available online to help you troubleshoot problems. You can find a
list of error codes and tips here: https://epax3d.com/pages/troubleshooting
You can also join our Facebook Group to get help from other users, especially if you
need help tuning slicer settings. Since we don’t typically test third party resins, we can only give a
general idea of where to start. There are many users who have used a variety of resins and can help
the best when it comes to dialing in settings. Each particular model might need special support
thickness and positions. These are the experience related questions which we rely on our
community to help each other. Most of them are just fine tuning your slicer settings for the particular
scenario. Please don’t hesitate to ask any questions you may have in our facebook group:
www.facebook.com/groups/epax3d
If you need additional support you may contact us via Facebook messenger (You can use the
technical support Monday-Friday 9am to 5pm EST. Any questions related to your order may be
directed to our sales team at [email protected].
17

www.epax3d.com
Section VII. Warnings
1. When you find that a print has failed or there is solid residue in the resin vat, you must
filter the resin in order to protect the LCD. Clean the resin in the resin vat by filtering out the
solid residue using one of the provided filters or a paint filter which can be found online or at
your local hardware store. If ignored, when the build plate dips into the vat, the force of the
plate may crush residues, puncture the film and damage the LCD. This is a costly mistake.
2. If there is residual resin in the resin vat or on the build plate’s outer surface, please clean with
a soft tissue soaked in IPA to avoid it dropping into the machine and curing inside.
3. Always wear gloves, a respirator mask and protective goggles when handling liquid
resin or a print before the post-processing. Only touch the print without gloves after it’s
been fully cleaned and cured!
4. Print in a well-ventilated area. It is strongly recommended to use a vent fan drawing air
around the printer to outside the building. Resin fumes can cause lung irritation!
It is strongly recommended that you watch our tutorial videos before
operating your printer for the first time.
●For printer instructions, videos, firmware updates, and more please visit www.epax3d.com.
●You can also search “EPAX 3D” on Youtube.
●Customer Support Email: [email protected]
●For printer replacement parts, supplies and a variety of resin options, visit
www.epax3d.com.
Join us on our Facebook group for active discussions and knowledge-sharing:
https://www.facebook.com/groups/epax3d/
18

www.epax3d.com
Warranty Information
Our printers have a 1-year warranty that begins from the date you receive your printer.
Please note: The LCD screen, film, pre-cut tape, filters and resin are consumable technology which are NOT covered
by this warranty. The warranty is also NOT valid for international (non-USA) orders due to high shipping costs. If
you are outside of the USA, please consider purchasing from our distributors with warranty.
All other components of the printer are covered by the warranty. In the event of a defect, we will ship you
replacement parts free of charge. It does not void the warranty if you open your printer and perform maintenance.
Our printers were designed to be user-friendly both inside and out.
Warranty does not cover user related damages and tears, due to accidents, normal wear and tear, improper care and
mis-use.
If you need parts for repair or to perform maintenance on your printer for you, we are happy to send them. We will
provide parts and labor, but you must cover the round trip shipping costs and any price of parts not under warranty.
You may use your preferred carrier.
Returns and Refunds
If for some reason you decide our printer is not for you, simply contact us within 30 days from the date of your
purchase. You must cover the return shipping back to the warehouse, but you will receive a full refund if the printer
is unopened when returned to us.
For opened/used printers there is a 15% restocking fee and if any parts/accessories are missing you will not be
refunded for those items.
19
This manual suits for next models
8
Table of contents
Other EPAX 3D Printer manuals
