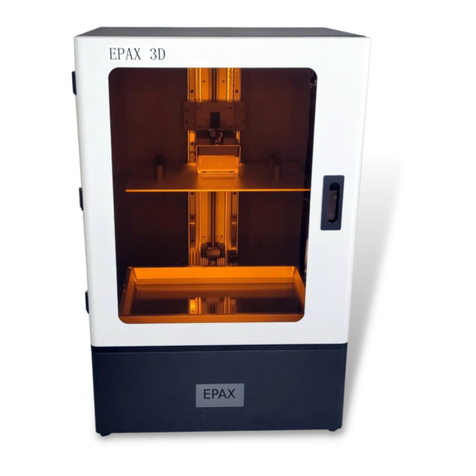
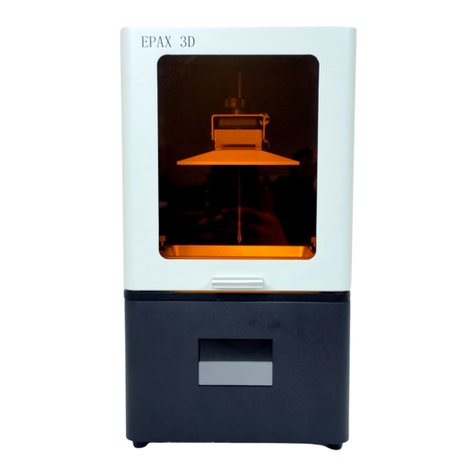
EPAX DX1 Pro User manual

DENTAL
USER
MANUAL

SECTION I
02
SECTION II
Touchscreen Menu
03
SECTION III
Dental Resins
04
SECTION IV
Slicing Software - ChiTu Box
SECTION V
The Printing Process
SECTION VI
Trouble Shooting
SECTION VII
Warnings
SECTION VIII
Warranty and Return Information
TABLE OF
CONTENTS
DX Series Specifications
05
08
11
12
13
1

DX SERIES
SPECIFICATIONS
Section I
.
Model EPAX DX1 Pro EPAX DX10 Pro EPAX DX Cure Pro
Build Volume
(L*W*H)
143.43mm*89.66mm*
120mm
221.4mm*129.6mm*
120mm
Printing Technology Monochrome LCD Monochrome LCD UV Curing Box
Material Resin Resin Washed Resin Prints
Resolution 4098*2560 (4K) 4920*2880 (5K)
Layer Thickness 0.02 ~ 0.1 mm 0.02 ~ 0.1 mm
Connection USB Flash Drive,
Ethernet
USB Flash Drive,
Ethernet
Wi-Fi No No No
Build Platform Soft Aluminum with Steel
FBS
Soft Aluminum with Steel
FBS
Clear Acrylic Turntable
Resin Vat Hard Aluminum Hard Aluminum
Heated Vat Yes Yes
Max Resin Volume 300mL (With Platform) 700mL (With Platform)
Air Purifier Yes Yes
Light Source Parallel Light LED Matrix Parallel Light LED Matrix Lensed UV LEDs
Film nFEP Film nFEP Film
Touch screen 4.3-inch Color TFT 4.3-inch Color TFT No
File Type .stl .ctb .stl .ctb N/A
Slicer ChiTuBox ChiTuBox N/A
Product Size
(W*D*H)
9.5 x 9.5 x 14.5 inches
11.75 x 12.5 x 15.25
inches
11.75 x 11.75 x 8.5 inches
Product Weight 20lbs 35lbs 12lbs
2
https://epaxdental.com

The system page
contains product
information, contact info,
network info, and a
touchscreen calibration
figure.
SYSTEM PAGE PRINT PAGE TOOL PAGE
The tool page contains
manual z-axis controls,
exposure tests, and a
cleaning feature. You
mat also rest the Z=0
(logical position) here.
The manual page, also
allows you to manually
move the printer to the
home (physical zero)
position.
Exposure/Clean, on the
page above set the
amount of time you
want the screen to run
with these features.
Exposure tests are
for ensuring the
screen is working as
intended.
The cleaning
feature allows you
to check the screen
for dead pixels and
clean the vat.
The information screen
above informs which
firmware you are
running and what
resolution your screen is
displaying.
The print page displays
the select files to print
from your USB drive. This
is also where you can
perform updates as well.
From the print screen
you can choose to print
or delete the file from
the USB
You may also edit your
bottom layer count and
exposure settings mid-
print if needed.
TOUCHSCREEN
MENU
3
Section II
.
INFORMATION
PAGE
https://epaxdental.com

Porcelain-Like Resin Model 48052 Veriguide OS
Alongside our own Dental Model resins and all other EPAX
resins
,
we
’
ve verified compatibility with mainstream
3
rd
party resins listed above
.
Model 48213
Model Align
DENTAL
RESIN LIST
We have tested and validated a
wide range of dental resins for
you to utilize with the DX series of
printers and have more coming
as we grow.
If you are using a resin that is not listed in
the tested resins, we recommend talking
to the resin manufacturer about settings.
Many dental resins can differ greatly
despite being for the same purpose, so
while we may be able to give general
guidance, we won’t have concrete
settings.
For assistance at any time please visit our
ever-growing Facebook Dental group.
Many of our users are very active and give
advice on the page, including slicer
settings for specific resins that we may not
have tested yet. Request to join at the link
below:
http://www.facebook.com/groups/epaxdental
EPAX Dentona Optiprint Keystone Whipmix
Dental Model Resin Guide 385nm and 405nm KeyModel Ultra Verimodel OS Ivory
Bio-Based Soy Resin Gingiva 385nm KeySplint Hard Vericast OS
All other EPAX resins are
compatible and verified
Model 48053
Hard Resin IBT 385nm KeySplint Soft Verimodel OS White
Section III
.
4
https://epaxdental.com

SLICING
SOFTWARE
Section IV
.
For the latest slicer download, please visit:
https://epaxdental.com/pages/software
Slicer Settings
The latest version of ChiTuBox also has settings preloaded for most resins
including dental resins. After you open the ChiTuBox slicer for the first
time, you will need to add your printer in. Click the "Settings" button on
the right bottom side. Then click the "+" button on the top left side of the
"Settings" window. Then in the pop-up window select "EPAX" and then
select printer model. "DX1 PRO" and "DX10 PRO" are our dental printers.
Make sure you do this before your first print. Displayed below is how
everything should look once you select your printer.
5
https://epaxdental.com

THE CORRECT PRINT SETTINGS ARE CRITICAL FOR SUCCESSFUL
AND ACCURATE PRINTS, BUT THERE IS AN ACCEPTABLE RANGE
FOR MOST TYPES OF RESIN. SOME RESINS ARE ALSO IMPACTED
BY THE TEMPERATURE IN THE PRINTING ENVIRONMENT, AND
YOU WILL NEED TO ADJUST YOUR SETTINGS ACCORDINGLY.
GENERALLY, RESINS PREFER WARM TEMPERATURES, AND MANY
DO WELL BETWEEN 25°C AND 30°C (~77°F AND 85°F) .
BRIEF EXPLANATION
OF STANDARD PRINT
SETTINGS
Layer Height: 0.05mm is recommended (range: 0.02- 0.1mm) The
thicker the layer height, the longer the exposure time per layer needed,
but the shorter the print time. Models may be less accurate with thicker
layer height.
Exposure Time: Amount of time it takes to cure each layer of the print
and varies depending on resin.
Bottom Exposure Time: Amount of time it takes to cure the bottom
layers of the model to adhere to the and varies depending on resin. The
longer the bottom exposure time, the better the bottom layer will stick
to the plate. Don’t go too long, or you’ll end up needing to chisel the
print off.
Bottom Layer Count: More bottom layers will allow for stronger
adhesion. We recommend sticking with 4.
Rest Time/Light off Delay: For resins requiring exposure times higher
than 4s, we recommend adding rest time or light of delay to allow heat
to disperse between layers. This will increase print times, but the print
will better retain its intended properties and accuracy.
Lift Distance/Bottom Lift Distance: How much the platform lifts
between layers.
Lifting Speed/Bottom Lift Speed: How fast the platform lifts after
finishing layers.
Retract Speed: How fast the platform lowers to the next layer.
Section IV
.
6
https://epaxdental.com

Lifting Speed - Increasing this will speed up how fast the build plate
lifts the print off of the film. WARNING: Going too fast could result in
failed prints or torn film meaning wasted resin and potential damage
to the screen/machine. Do not increase too much.
Retract Speed - Increasing this will speed up the build plate lowering
back down after lifting. WARNING: Going too fast could result in prints
prematurely lowering before resin fills in gaps in the vat. This will result
in missing layers and potentially broken or failed prints.
Lifting Distance/ Bottom Lift Distance: The preset values we have on
our website, and in ChiTuBox can be decreased depending on the print
job and layer height to save slightly more time. WARNING: Lowering
too far can result in the print not fully peeling off the film. Can result in
missing layers, failed prints, and broken nFEP in worst cases.
NOTES ON SPEEDS AND DISTANCES
BRIEF EXPLANATION
OF STANDARD PRINT
SETTINGS
(
CONT
.)
Section IV
.
Light: Small Contact area. Best for small prints and in detailed areas.
Medium: Larger contact area, and stronger than light supports.
Heavy: Largest contact area and are the strongest support settings.
Models that cannot sit flat on the platform (Guides, Splint, etc.) will need
additional supports while printing. (All supports will need to connect with
the foundation or stable part of the print for success. You can always
remove them from your final product.)
There are 3 default support options:
Rafts are recommended for prints that aren’t touching the platform at all
i.e. the print is suspended. Can be edited for stronger adhesion to the build
platform.
SUPPORTS
7
https://epaxdental.com

Install Build Platform
Move the platform arm a bit higher than the
printer’s Home position. Goto Tools→ Manual,
select the 10mm increment, then hit up a few
times so that you can move the z axis a bit
above Home position. Then put platform on and
ensure platform fits into this location and secure
its screw.
Install Resin Vat
Move Z axis about 100mm up so that you have
room to put the vat on. Make sure there is no
paper or plastic wrap between the screen and
the vat. On the DX series the back of the vat will
have a wire running out the back right for the
heating feature. The vat slots on the two screws
on each side and you can use the knob screws
to secure it in place. Once this step is complete,
we can move onto to the first print. The vat also
has a heating feature and can be plugged in on
the back right . For now, we only recommend its
use for our EPAX line of resins. For use with our
other compatible dental resins, leave
unplugged.
All the accessories are packed inside the printer.
Be careful when you remove the foams. Remove
each foam layer starting from the top. You should
find:
Metal vat and build plate, metal and plastic
spatulas, 2.5 and 3mm Allen Keys, USB, Power
Supply, Vat Knobs, and Build Platform Knob Screw.
Check the Light Source and LCD Functionality
After turning on the printer, you should check the
light source and LCD by pressing Tools→ Exposure→
Next. It will turn on UV light and a rectangle shape
will be displayed that will match the image on the
touchscreen. Press the return button to stop the
testing. Do this after every time you replace the
LCD to test its functionality.
Check the Z-axis Movement
Test the Z-axis movement by pressing Tools→
Manual→Auto Home. It will move the build platform
arm to the Home position. You can also press the
Up button to move the Z-axis up. Do not try to
move the Z-axis down below the home position.
DX PRO PRINTER QUICK
SETUP
DX PRINTER
AND CURE PRO
SETUP
The DX cure pro is a very simple setup. Most of the
machine is already put together, the only part
you’ll need to put on is the acrylic turntable. The
acrylic turntable slots right into the middle post.
Please ensure that you remove any protective
paper on the acrylic turntable before installation
to provide best performance when post-curing.
Before post-curing a print, make sure it is fully dry
from its wash so it doesn’t come out tacky after
the post-cure. Go ahead and test the machine by
pressing the play button to make sure the
turntable is rotating, and the lights are coming
on.
DX CURE PRO
Our Quick Start guide
goes through the setup of
the printer as well
.
We
’
ll
go over the cure pro and
the printer setup here so
you can reference either
.
Section V
.
8
https://epaxdental.com

https://epaxdental.com
THE PRINTING
PROCESS
:
DENTAL MODEL
MAKE SURE YOUR MACHINE IS PLACED ON A STABLE, FLAT
SURFACE. BY THIS POINT YOU SHOULD HAVE CHITUBOX
INSTALLED, AND THE PRINTER’S CONFIG LOADED ONTO THE
SETTINGS (REF: SECTION IV)
Section V
.
Open up Chitubox and start with a basic dental arch model and place it flat on the platform. If
your dental model doesn’t have a flat base, you can lower its z-height a couple of mm using
the move tool on the left-hand side of the slicer. Dental models are best printed flat to the
plate, but you can use supports if needed. Once the dental model is set up, slice the model.
After the software has finished slicing you may save the file directly to the USB.
If you’re printer is connected via ethernet to a router, you can opt to send the print via the
network send feature instead. When doing this, make sure the USB is plugged into the
machine. You can select your printer from the Dropdown menu on Chitubox. Once sent, you’ll
be prompted if you want to go ahead and start the print as well. If you choose to do so later,
you can start the print manually from the printer as the print is now on the USB.
1: SLICE YOUR PRINT
Each resin vat has a maximum capacity with and without the build plate. There are tick marks
indicating fill lines. It’s recommended to only fill to the first tick mark when starting a print.
Unless you are utilizing the full build volume, you will rarely ever need to fill the vat to max
capacity. Please make sure for whichever resin you are using, you shake the bottle well, or swirl
if the manufacturer says otherwise because resin can settle and may need a bit of mixing
before usage.
!EXTREME CAUTION! Always wear gloves, goggles, and a mask for your protection when
handling liquid resin. If liquid resin gets on your skin, immediately wash the afflicted area with
soap and hot water.
2: LOAD RESIN
Insert the USB onto the printer and tap the print button on the main menu. Find your file, tap
it, and hit the play button to start the print.
For the first print, it is a good idea to check on the print after around 30 minutes to confirm
that the first layers stuck to the build platform. If the print does not stick to the build platform,
then either the bottom exposure time is too low, or the platform is not leveled properly. In
which case, contact EPAX 3D to provide you guidance.
3: STARTING YOUR FIRST PRINT
9

THE PRINTING
PROCESS
:
DENTAL MODEL
Section V
.
When the printing is done, wait until no more residual resin drips from the platform and wear
gloves before removing it. You can wipe off any residual resin as well.
Our DX series comes with a Flexible Build System. Using the metal tab sticking out from the
platform, you can remove the Flex plate from the brown magnetic base. To remove the print,
simply flex the plate to pop the print off. It’s best to pop the print off directly into the IPA bath
to avoid the print popping off onto the floor or table. Soak the print in at least 91% IPA
(Isopropyl alcohol) for about 10-15 minutes. For some dental resins you may need to leave it in
for longer or agitate the IPA so that the residual liquid resin can be cleaned off.
After your model is clean, put it in a cool, dry, well-ventilated area until it dries, or dry it up with
a air blower. Please make sure to still be wearing gloves during this time. To cure it, you can
insert the model into our DX Cure Pro machine. Set the timer for 180s, and at the end the print
should be good to be used. The print should feel like plastic. If it still feels tacky, or not dry you
may not have let the print dry for long enough, or the environment may be too humid to dry
properly. In this case, consider utilizing a fan to blow on the print while drying.
4: POST-PROCESSING
10
https://epaxdental.com

Email us directly at [email protected].
We provide technical support Monday-Friday 9am to 5pm
EST. In certain cases, we may even provide video
conferences to provide solutions or direct troubleshooting.
Any questions related to your order may be directed to our
sales team at [email protected].
IF YOU ARE HAVING ISSUES:
TROUBLESHOOTING
Section VI
.
You can also join our Facebook Group to get help from
other users, especially if you need help tuning slicer
settings. There are too many resins out there for us to
cover every single one, but many experienced users
who have used a variety of resins and can help the
best when it comes to dialing in settings. Each
particular model might need different support
methods and positioning. These are the experience
related questions which we rely on our community to
help each other. Most of them are just fine tuning
your slicer settings for the particular scenario. Please
don’t hesitate to ask any questions you may have in
our Facebook group:
http://www.facebook.com/groups/epaxdental
FOR ADDITIONAL SUPPORT:
11
https://epaxdental.com

When you find that a print has failed or there is solid residue in
the resin vat, you must filter the resin in order to protect the LCD.
Clean the resin in the resin vat by filtering out the solid residue
using one of the provided filters or a paint filter which can be
found online or at your local hardware store. If ignored, when
the build plate dips into the vat, the force of the plate may crush
residues, puncture the film and damage the LCD. This is a costly
mistake.
If there is residual resin in the resin vat or on the build plate’s
outer surface, please clean with a soft tissue soaked in IPA to
avoid it dropping into the machine and curing inside.
Always wear gloves, a respirator mask and protective goggles
when handling liquid resin or a print before the post-processing.
Only touch the print without gloves after it’s been fully cleaned
and cured!
Print in a well-ventilated area. It is strongly recommended to use
a vent fan drawing air around the printer to outside the building.
Resin fumes can cause lung irritation!
PLEASE READ:
For printer instructions, videos, firmware updates, parts, supplies,
resins, and more please visit http://www.epaxdental.com/.
Customer Support Email: [email protected]
Join us on our Facebook group for active discussions and
knowledge-sharing:
https://www.facebook.com/groups/epaxdental/
IT IS STRONGLY RECOMMENDED THAT YOU WATCH OUR
TUTORIAL VIDEOS BEFORE OPERATING YOUR PRINTER FOR
THE FIRST TIME.
WARNINGS
Section VII
.
12
https://epaxdental.com

WARRANTY INFOMATION
New printers have a 1-year USA
warranty that begins from the date you
receive your printer. Our refurbished
printers are backed by a 3-month
warranty that begins from the date you
receive your printer.
Please note: The LCD screen, film,
precut tape, filters, and resin are
consumable technology which are
NOT covered by this warranty. The
warranty is also NOT valid for
international (non-USA) orders due to
high shipping costs. If you are outside
USA, please consider purchasing from
our distributors with warranty.
All other components of the printer are
covered by the warranty. In the event
of defect, we will ship you replacement
parts free of charge. It does not void
the warranty for you to open your
printer and perform maintenance. Our
printers were designed to be user-
friendly both inside and out.
Warranty does not cover willful
damages, tears and damages due to
accident, normal wear and tear,
improper care and misuse.
If you wish to have us repair or perform
maintenance on your printer for you,
we are happy to do so. We will provide
parts and labor, but you must cover the
round-trip shipping costs from your
location to our office in North Carolina,
USA. You must also cover any parts
not under warranty. You may use your
preferred carrier.
WARRANT
AND
RETURNS
RETURNS AND REFUNDS
If for some reason you decide our
printer is not for you, simply contact us
within 30 days from the date of your
purchase. Return shipping must be
covered by the customer. We can print
a label for you, however, the cost of the
label will be deducted from the refund.
For unopened products, a 5%
processing fee will be deducted from
your refund to help cover a portion of
our transaction and shipping costs.
For opened/used products there is a
15% restocking/processing fee and if
any parts/accessories are missing, the
cost for those items will be deducted
as well. Customer is responsible for
ensuring a clean product is shipped
back to us. Products that are shipped
in poor condition (e.g. resin on a printer
or still on the vat/platform) will have an
additional 5% deducted from their
refund.
You may opt to receive your refund in
the form of store credit. In the case of
unopened products, the 5% processing
fee will not be applied. In the case of
opened products, the 15%
restocking/processing fee will still be
applied. Refunds are only given out
once one of our technicians finishes
inspection on the product.
Section VIII
.
13
https://epaxdental.com

Visit our website at
:
www
.
epaxdental
.
com
This manual suits for next models
2
Table of contents
Other EPAX 3D Printer manuals
