manuals.online logo
Brands
  1. Home
  2. •
  3. Brands
  4. •
  5. Episode
  6. •
  7. Speakers
  8. •
  9. Episode ES-600C-IC-5 User manual

Episode ES-600C-IC-5 User manual

OWNER’S MANUAL >> COMMERCIAL SPEAKERS
ES-600C-IC-5 • ES-600C-IC-6
Welcome to Episode®. We appreciate your purchase and are committed to providing
the highest quality products possible.
The Episode®in-ceiling commercial models are a superb choice for 70V/100V music
distributed-line systems. They have been designed with advanced technological
components that allow for high performance and a lifetime of enjoyment.
Complies with UL 1480 and UL 2043 listings.
WARRANTY
Limited Lifetime Warranty
Episode commercial Speakers have a Lifetime Limited Warranty. This warranty includes parts and labor
repairs on all components found to be defective in material or workmanship under normal conditions of use.
This warranty shall not apply to products which have been abused, modied or disassembled. Products to
be repaired under this warranty must be returned to SnapAV or a designated service center with prior
notication and an assigned return authorization number (RA).
Lifetime
SETTINGS
• After the speaker is installed, set the switch on the
front of the speaker to the desired loudness for each
location. Note 70V and 100V settings.
• In a non 70V or 100V system, set the switch to
16Ω (ohm) setting.
CAUTION: Do not set it to 16Ω in a 70V or 100V system, as it will damage the speaker.
GRILL INSTALLATION
Insert the grill into the speaker. Make sure it is secure and ush with the speaker frame.
OPTIONS
PIVOTING TWEETER ASSEMBLY
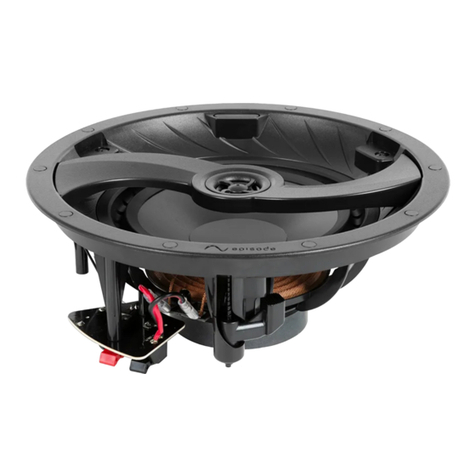
• The pivoting tweeter assembly can be directed to focus the sound where desired.
• Two common options are:
- Point it directly at the listening area for a more pointed sound source.
- Reect if off hard surfaces for a more diffused sound eld.
PAINTING
The grill and frame can be painted to match the ceiling color. Only paint the grill when it has been
removed from the speaker. The grill should be painted with great care taken not to clog the ne holes
with paint. Options of painting are:
• Spray paint (‘dust’) several thin layers instead of a few thick layers.
• Use a ‘dry’ brush or roller to minimize the amount of paint applied in each layer.
TROUBLESHOOTING
Episode® speakers are designed to function trouble-free. Most problems that occur are due to simple
issues. If you have trouble, please check the list of simple xes below. If the problem persists, contact
Episode Customer Service at 1.866.838.5052.
NO SOUND
• Verify that there is audio coming from the source selected. Select another source if necessary.
• Ensure that any power ampliers are turned on and connected properly.
• Check any connections at other devices, such as a volume control. Temporarily bypass
the control if needed.
• Check wire connections at each speaker not producing sound for good contact to bare
wire, not wire insulation.
ES-600C-IC-6ES-600C-IC-5
IMPORTANT INSTRUCTIONS AND CONSIDERATIONS
• Read and understand all instructions.
• Before beginning installation, carefully plan locations accounting for potential electrical,
plumbing or other obstacles.
• Contact a suitable contractor if you are unsure of how to best install.
GENERAL GUIDELINES
• Keep speakers about 2 feet away from corners and other surfaces that might interfere
with or reect sound, such as tall furniture.
• Tile bridge is included for installation in suspended ceilings.
DATE CODE
The serial number on the speaker indicates the date code which reects time of manufacturing.
INSTALLATION
EXISTING CONSTRUCTION
• Choose a location for each speaker that is free of obstructions created by joists,
HVAC ductwork, electrical wire runs, plumbing or anything else that might not allow
for the depth of the speaker or create interference or noise.
• Once you have determined your locations, mark the hole to cut out for the speaker
using the supplied template. Don’t forget to allow for the size of the speaker bezel
if you are choosing to install the speaker near a side wall or other item that could
become an obstacle.
• If you are unsure of potential obstacles, carefully cut a small hole at an angle to the inside of
the template line as illustrated. This will allow you to ‘plug’ the hole easily if needed. If the area
is clear and is a good location for the speaker, go ahead and cut the edges of the opening at 90
degrees to accommodate the speaker diameter.
TILE BRIDGE
The included two piece tile bridge is used for
installation in suspended ceilings or where
reinforcement of the ceiling is needed. The tile
bridge is universal for both ES-600C-IC-5 and
ES-600C-IC-6. Place one piece on top of the
ceiling tile on each side of the mounting hole
as shown.
WIRING
In a 70V or 100V system, a speaker wire is run from the amplier location to the rst speaker
location. A “loop out” is run from the rst speaker to the second speaker, the second speaker
to the third speaker, etc. If installing with a standard receiver/amplier (not 70V or 100V
system), a separate speaker wire must be run from the amplier to each speaker location.
The recommended methods should be in accordance with the applicable section of the
National Electrical Code, ANSI/NFPA 70, and/or the National Fire Alarm Code, ANSI/NFPA 72,
as applicable. The wiring method and compartment should not interfere with the
operation of the speaker.
• Remove the rear cover for access to the terminals.
The cover will accept a standard conduit clamp
(not included). A knock-out accepting a second
conduit clamp is available for loop out.
• Strip the insulation on each conductor approximately ¼”
and insert into the locking screw connector. The connector
can be unplugged for easier wiring. Ensure that there
are no stray strands of wire protruding from the connector.
Connect to one of the + and one of the – terminals. Observe
proper polarity (+ to + and – to – for each speaker and at the amplier).
• Connect loop out speaker wire to the second + and – terminals and connect to next speaker in line.
• Continue connecting speakers in line as shown below.
• Insert the speakers into the ceiling and tighten each of the four screws for the speakers ‘dog’
legs enough to clamp the speaker against the ceiling or tile bridge if used.
CAUTION: Do not over tighten screws. This could result in speaker damage, ceiling damage or both.
SECURITY EYELET
Use the security eyelet on the back of the speaker to install a support wire. Connect the wire to a
secure point in the ceiling. Check the construction codes in your area.
SIDE VIEW OF CEILING
First Cut
45°
90°
Second Cut
+ + - -
+--
+
From Amplier
or Previous Speaker
To next Speaker
Amplier
+ + - - + + - - + + - - + + - -
+-
+
-
This manual suits for next models

1

Other Episode Speakers manuals

Episode ES-ROCK-6 User manual

Episode

Episode ES-ROCK-6 User manual

Episode ES-300-SNDBAR-30 User manual

Episode

Episode ES-300-SNDBAR-30 User manual

Episode ES-300 User manual

Episode

Episode ES-300 User manual

Episode ES-TERRAIN-SYS-4.1 User manual

Episode

Episode ES-TERRAIN-SYS-4.1 User manual

Episode ES-150-IC-6 User manual

Episode

Episode ES-150-IC-6 User manual

Episode HT Series User manual

Episode

Episode HT Series User manual

Episode ES-500-SNDBAR-40 User manual

Episode

Episode ES-500-SNDBAR-40 User manual

Episode ES-TERRAIN-SYS-4.1 User manual

Episode

Episode ES-TERRAIN-SYS-4.1 User manual

Episode ECS-800-IC-4 User manual

Episode

Episode ECS-800-IC-4 User manual

Episode CORE 3 Series User manual

Episode

Episode CORE 3 Series User manual

Episode ECS-AW70V User manual

Episode

Episode ECS-AW70V User manual

Episode IC-6 User manual

Episode

Episode IC-6 User manual

Episode ES-700-MON-6 User manual

Episode

Episode ES-700-MON-6 User manual

Episode ES-500-SAT-4 User manual

Episode

Episode ES-500-SAT-4 User manual

Episode ECS-200-70V-2x2-TR User manual

Episode

Episode ECS-200-70V-2x2-TR User manual

Episode ES-LS-SAT-4 User manual

Episode

Episode ES-LS-SAT-4 User manual

Episode ES-500-ICSURR-6 User manual

Episode

Episode ES-500-ICSURR-6 User manual

Episode ES-350-OWLCR-M User manual

Episode

Episode ES-350-OWLCR-M User manual

Episode ES-350-OWLCR-M User manual

Episode

Episode ES-350-OWLCR-M User manual

Episode IC-6 User manual

Episode

Episode IC-6 User manual

Episode ES-SUB-IW-DUAL8 User manual

Episode

Episode ES-SUB-IW-DUAL8 User manual

Episode ES-AW-SNDBAR-S-BLK User manual

Episode

Episode ES-AW-SNDBAR-S-BLK User manual

Episode radiance User manual

Episode

Episode radiance User manual

Episode KIT-ECS-650-IC-4 User manual

Episode

Episode KIT-ECS-650-IC-4 User manual

Popular Speakers manuals by other brands

BASSFACE IndyM6/4 instruction manual

BASSFACE

BASSFACE IndyM6/4 instruction manual

VOGELS VLB 500 - PACKAGING BACK manual

VOGELS

VOGELS VLB 500 - PACKAGING BACK manual

Klip Xtreme Aristos KSB-150 manual

Klip Xtreme

Klip Xtreme Aristos KSB-150 manual

RockJam RJPS150 user guide

RockJam

RockJam RJPS150 user guide

MB QUART DISCUS Series DSD 213  DSD213 DSD213 installation instructions

MB QUART

MB QUART DISCUS Series DSD 213 DSD213 DSD213 installation instructions

AperionAudio Clearus owner's guide

AperionAudio

AperionAudio Clearus owner's guide

Silvercrest SLB 10 A1 operating instructions

Silvercrest

Silvercrest SLB 10 A1 operating instructions

Connect IT BOOMBOX BS1000 user manual

Connect IT

Connect IT BOOMBOX BS1000 user manual

BLACK DECKER BDCSP18 manual

BLACK DECKER

BLACK DECKER BDCSP18 manual

WorkPro IC 4 PRO user manual

WorkPro

WorkPro IC 4 PRO user manual

TW Audio B15 operating manual

TW Audio

TW Audio B15 operating manual

Sound Tube SM52-EZ-BK Install instructions

Sound Tube

Sound Tube SM52-EZ-BK Install instructions

Power House BTS-639 instruction manual

Power House

Power House BTS-639 instruction manual

dB Technologies LVX XM15 Quick start user manual

dB Technologies

dB Technologies LVX XM15 Quick start user manual

Speed Link AMPARO Quick install guide

Speed Link

Speed Link AMPARO Quick install guide

MC Crypt WL-250BT operating instructions

MC Crypt

MC Crypt WL-250BT operating instructions

Q Acoustics E120 user guide

Q Acoustics

Q Acoustics E120 user guide

Power bass L-60Cx Application guide

Power bass

Power bass L-60Cx Application guide

manuals.online logo
manuals.online logoBrands
  • About & Mission
  • Contact us
  • Privacy Policy
  • Terms and Conditions

Copyright 2025 Manuals.Online. All Rights Reserved.