manuals.online logo
Brands
  1. Home
  2. •
  3. Brands
  4. •
  5. Epson
  6. •
  7. Printer
  8. •
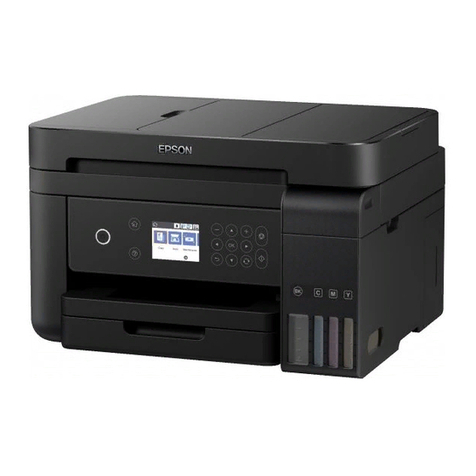
  9. Epson L3250 Instruction Manual

Epson L3250 Instruction Manual

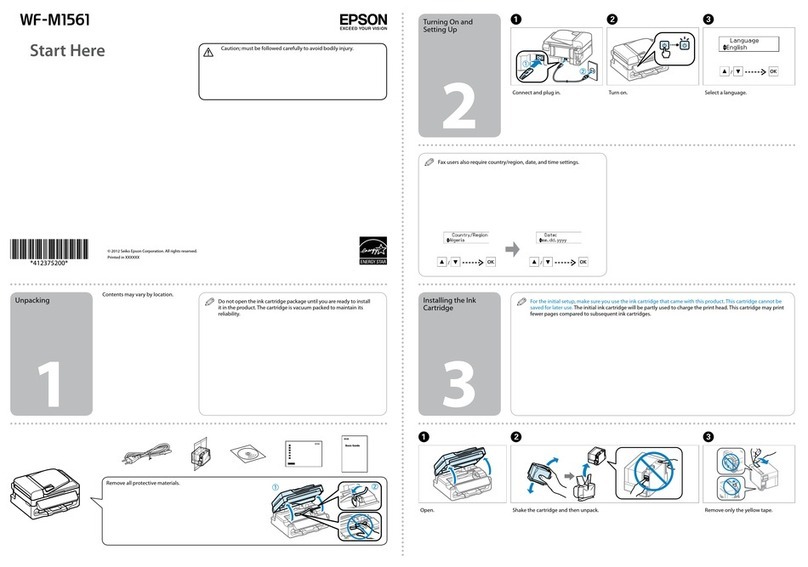
Start Here
8 Close the ink tank cover.
9 Press the power button to turn on the product, then
wait for the power and the ink lights to stay on. The
Wi-Fi light ashes alternately.
10 Press and hold the stop button for 5 seconds until the
power light starts to ash and ink charging begins. Ink
charging takes about 11 minutes.
Note: When the power light stops ashing, ink charging is
complete. Once initial setup of the printer is complete, you can
top o the ink tanks with any remaining ink. See the online User’s
Guide for instructions.
Caution: Do not unplug or turn o the product, or open the front
cover while the product is charging or you’ll waste ink.
Note: After some ink is used for charging, the rest is available
for printing.
Caution: After setup, periodically inspect the ink levels to ensure they
do not fall below the lowest lines on the tanks. Prolonged use when
any level is below the lowest line could damage the product. See the
online User’s Guide for relling instructions.
IMPORTANT: Before using this product, make sure you read
these instructions and the safety instructions in the online User’s
Guide.
The illustrations show the L3250, but the steps are the same for
the L3251, unless otherwise specied.
Note: Not all products are available in all regions.
1Unpack
Note: Do not open the ink bottles until you are ready to ll the ink
tanks. The ink bottles are vacuum packed to maintain reliability.
1 Remove all protective materials from the product.
2 Connect the power cord to the back of the product and to
an electrical outlet.
Caution: Do not connect to your computer yet.
2Choose a setup method
The Epson Smart Panel®app can help you set up your printer
through an interactive, step-by-step process using your
smartphone or tablet.
If you do not want to
use a mobile device for
setup, skip to the “Fill ink
tanks” section below.
To use your mobile device
for setup, continue to
step 1.
or
1 Download the Epson Smart Panel app
from your device’s app store. Do not
launch the app yet.
2 Press the power button to turn on the product.
Note: Do not connect your product to your computer yet.
3 Launch the app and follow its instructions to set up your
product.
For information on connecting your product to a computer,
using voice-activated printing, solving problems, or for details
on reaching Epson support, see the sections on the back of
this sheet.
3Fill ink tanks
Warning: Keep the ink bottles out of the reach of children and do not
drink the ink.
Caution: This product requires careful handling of ink. If ink spills,
wipe it o immediately with a damp towel to avoid permanent stains.
If ink gets on your clothes or belongings, it may not come o.
Note:
• Epson cannot guarantee the quality or reliability of third-party ink.
• Use the ink bottles included with the printer to set up the product.
Part of the ink will be used to charge the print head. These bottles
will print fewer pages compared with replacement ink bottles.
• Epson strongly recommends the use of genuine ink to ensure
optimal print quality and performance.
1 Open the ink tank
cover, then open
the cap for the
black (BK) ink tank.
Note: Refer to the
color-coded sticker
on the ink tank unit to
identify the color of
each tank.
2 Unpack the black (BK) ink bottle. Hold the ink bottle
upright and slowly turn the bottle cap to remove it.
Caution: Do not shake or squeeze the ink bottle. Do not touch
the top of the ink bottle after its cap is removed.
3 Insert the ink bottle into the lling port.
Note: Do not force the bottle into position; each bottle is keyed
for each color.
4 Wait for the ink to ll the tank.
Do not squeeze the bottle or
allow it to contact any other
surface.
Note: Ink ows into the tank and
stops automatically when the ink
tank is lled to the upper line. If ink
does not ow from the bottle, lift and
reinsert the bottle.
5 When the ink tank is full, remove the ink bottle and
securely close it with the bottle cap. If any ink remains in
the bottle, store the bottle upright for later use.
Note: Do not leave the ink bottle inserted; otherwise the bottle
may be damaged or ink may leak.
6 Securely close the black ink tank cap.
7 Repeat the previous steps for the other colors.
L3250/L3251
5 Pull out the output tray, then raise the paper stopper.
5Install software
Note:
• If you are using a Mac or your computer does not have a
CD/DVD drive, an Internet connection is required to obtain the
product software.
• To print from a Chromebook™, go to
www.latin.epson.com/support/chromebookprint for instructions.
1 Make sure the product is NOT CONNECTED to your
computer.
Windows®: If you see a Found New Hardware screen, click
Cancel and disconnect the USB cable.
2 Insert the product CD (Windows only) or download and
run your product’s software package. For the latest
software, visit:
L3250
www.latin.epson.com/support/L3250
L3251
www.latin.epson.com/support/L3251
3 Follow the instructions on the computer screen to run the
setup program.
4 When you see the Select Your Connection screen, select
one of the following and follow the on-screen instructions:
• Wireless connection
In most cases, the software installer automatically
attempts to set up your wireless connection. If setup
is unsuccessful, you may need to enter your network
name (SSID) and password.
• Direct USB connection
Make sure you have the USB cable ready.
EPSON is a registered trademark and EPSON Exceed Your Vision is a registered logomark of
Seiko Epson Corporation.
EPSON and Epson Smart Panel are registered trademarks, EPSON Exceed Your Vision is a
registered logomark, and Epson Connect is a trademark of Seiko Epson Corporation.
Designed for Excellence is a trademark of Epson America, Inc.
Windows is a registered trademark of Microsoft Corporation in the United States and/or other
countries.
Mac is a trademark of Apple Inc., registered in the U.S. and other countries.
Android, Chromebook, and Google Play are trademarks of Google LLC.
General Notice: Other product names used herein are for identication purposes only and may
be trademarks of their respective owners. Epson disclaims any and all rights in those marks.
This information is subject to change withut notice.
© 2021 Epson America, Inc., 2/21
Printed in XXXXXX CPD-60060
4Load paper
See the online User’s Guide for information about loading
capacity, available paper types and sizes, and loading
envelopes.
1 Make sure the product is done charging the ink. Then ip
the feeder guard forward, raise the paper support, and tilt
it backwards slightly.
2 Slide the edge guides all the way out.
3 Load A4- or letter-size paper, glossy or printable side up
and short edge rst, in the middle of the rear paper feeder.
4 Slide the edge guides against the paper, but not too
tightly.
Mobile and voice-activated
printing
• Print directly from your Android™ (v4.4 or later) device*.
Simply connect your printer and device to the same network
and tap the menu icon to select the print option.
• Turn your mobile device into an intuitive, easy-to-use
printing and scanning control center with Epson Smart
Panel. Download the app from your mobile device’s app
store.
• Print from wherever you are, next to your printer or
remotely, with Epson Connect™. Learn more at
www.latin.epson.com/connect.
• Use voice-activated assistants to print a variety of
creative and everyday items from your Epson®product.
Simply add your product to an Epson Connect account,
then link the account to a voice-activated assistant. See
www.latin.epson.com/support/voice for more information.
* May require the Epson Print Enabler or Mopria Print Service app from
Google Play™.
Any problems?
Network setup was unsuccessful.
• M ake sure you select the right network name (SSID).
• Restart your router (turn it o and then on), then try to
connect to it again.
• The printer can only connect to a network that supports
2.4 GHz connections. If your router oers both 2.4 GHz
and 5 GHz connections, make sure 2.4 GHz is enabled.
• If you see a rewall alert message, click Unblock or Allow
to let setup continue.
• Print a network connection report to identify network
problems and solutions. See your online User’s Guide for
instructions.
There are lines or incorrect colors in my printouts.
Run a nozzle check to see if there are gaps in the printout.
Then clean the print head, if necessary. See the online User’s
Guide for more information.
Setup is unable to find my product after connecting it
with a USB cable.
Make sure the product is on and the USB cable is securely
connected.
Any questions?
User’s Guide
Windows: Click the icon on your desktop or Apps screen to
access the online User’s Guide.
Mac: Click the icon in Applications/Epson Software/Guide
to access the online User’s Guide.
If you don’t have a User’s Guide icon, go to the Epson website,
as described in “Technical support.”
Technical support
Visit www.latin.epson.com/support and search for your
product to download drivers, view manuals, get FAQs, or
contact Epson.
You can also speak to a service technician by calling one of
these numbers:
Argentina (54 11) 5167-0300 Guatemala* 1-800-835-0358
0800-288-37766 Mexico 01-800-087-1080
Bolivia* 800-100-116 Mexico City (52 55) 1323-2052
Chile (56 2) 2484-3400 Nicaragua* 00-1-800-226-0368
Colombia 018000-915235 Panama* 00-800-052-1376
Bogota (57 1) 523-5000 Paraguay 009-800-521-0019
Costa Rica 800-377-6627 Peru 0800-10126
Dominican Lima (51 1) 418-0210
Republic* 1-888-760-0068 Uruguay 00040-5210067
Ecuador* 1-800-000-044 Venezuela (58 212) 240-1111
El Salvador* 800-6570
* Contact your local phone company to call this toll-free number from a mobile
phone.
If your country does not appear on the list, contact your
nearest Epson sales oce. Toll or long distance charges
may apply.
Need paper and ink?
Ensure brilliant results with Epson specialty
and plain papers, engineered specically for
Epson printers. You can purchase them
from an Epson authorized reseller. To nd
the nearest one, visit www.latin.epson.com
or contact Epson as described in “Any
questions?” on this sheet.
L3250/L3251 replacement inks
Color Part number
Black T544120-AL
Cyan T544220-AL
Magenta T544320-AL
Yellow T544420-AL
5 Pull out the output tray, then raise the paper stopper.
5Install software
Note:
• If you are using a Mac or your computer does not have a
CD/DVD drive, an Internet connection is required to obtain the
product software.
• To print from a Chromebook™, go to
www.latin.epson.com/support/chromebookprint for instructions.
1 Make sure the product is NOT CONNECTED to your
computer.
Windows®: If you see a Found New Hardware screen, click
Cancel and disconnect the USB cable.
2 Insert the product CD (Windows only) or download and
run your product’s software package. For the latest
software, visit:
L3250
www.latin.epson.com/support/L3250
L3251
www.latin.epson.com/support/L3251
3 Follow the instructions on the computer screen to run the
setup program.
4 When you see the Select Your Connection screen, select
one of the following and follow the on-screen instructions:
• Wireless connection
In most cases, the software installer automatically
attempts to set up your wireless connection. If setup
is unsuccessful, you may need to enter your network
name (SSID) and password.
• Direct USB connection
Make sure you have the USB cable ready.
EPSON is a registered trademark and EPSON Exceed Your Vision is a registered logomark of
Seiko Epson Corporation.
EPSON and Epson Smart Panel are registered trademarks, EPSON Exceed Your Vision is a
registered logomark, and Epson Connect is a trademark of Seiko Epson Corporation.
Designed for Excellence is a trademark of Epson America, Inc.
Windows is a registered trademark of Microsoft Corporation in the United States and/or other
countries.
Mac is a trademark of Apple Inc., registered in the U.S. and other countries.
Android, Chromebook, and Google Play are trademarks of Google LLC.
General Notice: Other product names used herein are for identication purposes only and may
be trademarks of their respective owners. Epson disclaims any and all rights in those marks.
This information is subject to change withut notice.
© 2021 Epson America, Inc., 2/21
Printed in XXXXXX CPD-60060
4Load paper
See the online User’s Guide for information about loading
capacity, available paper types and sizes, and loading
envelopes.
1 Make sure the product is done charging the ink. Then ip
the feeder guard forward, raise the paper support, and tilt
it backwards slightly.
2 Slide the edge guides all the way out.
3 Load A4- or letter-size paper, glossy or printable side up
and short edge rst, in the middle of the rear paper feeder.
4 Slide the edge guides against the paper, but not too
tightly.
Mobile and voice-activated
printing
•Print directly from your Android™ (v4.4 or later) device*.
Simply connect your printer and device to the same network
and tap the menu icon to select the print option.
•Turn your mobile device into an intuitive, easy-to-use
printing and scanning control center with Epson Smart
Panel. Download the app from your mobile device’s app
store.
•Print from wherever you are, next to your printer or
remotely, with Epson Connect™. Learn more at
www.latin.epson.com/connect.
•Use voice-activated assistants to print a variety of
creative and everyday items from your Epson®product.
Simply add your product to an Epson Connect account,
then link the account to a voice-activated assistant. See
www.latin.epson.com/support/voice for more information.
* May require the Epson Print Enabler or Mopria Print Service app from
Google Play™.
Any problems?
Network setup was unsuccessful.
• M ake sure you select the right network name (SSID).
• Restart your router (turn it o and then on), then try to
connect to it again.
•The printer can only connect to a network that supports
2.4 GHz connections. If your router oers both 2.4 GHz
and 5 GHz connections, make sure 2.4 GHz is enabled.
• If you see a rewall alert message, click Unblock or Allow
to let setup continue.
•Print a network connection report to identify network
problems and solutions. See your online User’s Guide for
instructions.
There are lines or incorrect colors in my printouts.
Run a nozzle check to see if there are gaps in the printout.
Then clean the print head, if necessary. See the online User’s
Guide for more information.
Setup is unable to find my product after connecting it
with a USB cable.
Make sure the product is on and the USB cable is securely
connected.
Any questions?
User’s Guide
Windows: Click the icon on your desktop or Apps screen to
access the online User’s Guide.
Mac: Click the icon in Applications/Epson Software/Guide
to access the online User’s Guide.
If you don’t have a User’s Guide icon, go to the Epson website,
as described in “Technical support.”
Technical support
Visit www.latin.epson.com/support and search for your
product to download drivers, view manuals, get FAQs, or
contact Epson.
You can also speak to a service technician by calling one of
these numbers:
Argentina (54 11) 5167-0300 Guatemala* 1-800-835-0358
0800-288-37766 Mexico 01-800-087-1080
Bolivia* 800-100-116 Mexico City (52 55) 1323-2052
Chile (56 2) 2484-3400 Nicaragua* 00-1-800-226-0368
Colombia 018000-915235 Panama* 00-800-052-1376
Bogota (57 1) 523-5000 Paraguay 009-800-521-0019
Costa Rica 800-377-6627 Peru 0800-10126
Dominican Lima (51 1) 418-0210
Republic* 1-888-760-0068 Uruguay 00040-5210067
Ecuador* 1-800-000-044 Venezuela (58 212) 240-1111
El Salvador* 800-6570
* Contact your local phone company to call this toll-free number from a mobile
phone.
If your country does not appear on the list, contact your
nearest Epson sales oce. Toll or long distance charges
may apply.
Need paper and ink?
Ensure brilliant results with Epson specialty
and plain papers, engineered specically for
Epson printers. You can purchase them
from an Epson authorized reseller. To nd
the nearest one, visit www.latin.epson.com
or contact Epson as described in “Any
questions?” on this sheet.
L3250/L3251 replacement inks
Color Part number
Black T544120-AL
Cyan T544220-AL
Magenta T544320-AL
Yellow T544420-AL

Other manuals for L3250

1

This manual suits for next models

1

Other Epson Printer manuals

Epson Stylus SX210 Series Instruction Manual

Epson

Epson Stylus SX210 Series Instruction Manual

Epson Stylus Photo 895 User manual

Epson

Epson Stylus Photo 895 User manual

Epson U325 - TM B/W Dot-matrix Printer User manual

Epson

Epson U325 - TM B/W Dot-matrix Printer User manual

Epson U295 - TM B/W Dot-matrix Printer User manual

Epson

Epson U295 - TM B/W Dot-matrix Printer User manual

Epson LQ-2180 User manual

Epson

Epson LQ-2180 User manual

Epson TM-J8000 User manual

Epson

Epson TM-J8000 User manual

Epson Stylus Photo 925 Manual

Epson

Epson Stylus Photo 925 Manual

Epson Stylus 300 - Ink Jet Printer User manual

Epson

Epson Stylus 300 - Ink Jet Printer User manual

Epson Stylus Photo 1270 User manual

Epson

Epson Stylus Photo 1270 User manual

Epson Stylus Photo PX660 Instruction Manual

Epson

Epson Stylus Photo PX660 Instruction Manual

Epson SureColor F9200 User manual

Epson

Epson SureColor F9200 User manual

Epson Artisan 810 Series User manual

Epson

Epson Artisan 810 Series User manual

Epson STYLUS COLOR 580 Manual

Epson

Epson STYLUS COLOR 580 Manual

Epson XP-430 User manual

Epson

Epson XP-430 User manual

Epson Stylus COLOR 900G User manual

Epson

Epson Stylus COLOR 900G User manual

Epson WorkForce Pro WF-6090 Series Instruction Manual

Epson

Epson WorkForce Pro WF-6090 Series Instruction Manual

Epson Stylus Pro 10600 - UltraChrome Ink - Stylus Pro 10600 Print... User manual

Epson

Epson Stylus Pro 10600 - UltraChrome Ink - Stylus Pro 10600 Print... User manual

Epson WF-2930 User manual

Epson

Epson WF-2930 User manual

Epson EcoTank M2140 User manual

Epson

Epson EcoTank M2140 User manual

Epson EPL N2700 User manual

Epson

Epson EPL N2700 User manual

Epson TM-H6000IV-DT Instruction Manual

Epson

Epson TM-H6000IV-DT Instruction Manual

Epson CX7000F - Stylus Color Inkjet User manual

Epson

Epson CX7000F - Stylus Color Inkjet User manual

Epson Stylus Photo Printer PX800FW Instruction Manual

Epson

Epson Stylus Photo Printer PX800FW Instruction Manual

Epson U950 - TM B/W Dot-matrix Printer User manual

Epson

Epson U950 - TM B/W Dot-matrix Printer User manual

Popular Printer manuals by other brands

Tally T8106 user guide

Tally

Tally T8106 user guide

TransAct POSJET 1500 Spare parts

TransAct

TransAct POSJET 1500 Spare parts

Emaar EP-360 user manual

Emaar

Emaar EP-360 user manual

Canon i250 Series specification

Canon

Canon i250 Series specification

Sony UP-890CE Service manual

Sony

Sony UP-890CE Service manual

ASTRO ASTROJET IMAGE BLASTER Installation and operating manual

ASTRO

ASTRO ASTROJET IMAGE BLASTER Installation and operating manual

NSR Marine NPT-100 user manual

NSR Marine

NSR Marine NPT-100 user manual

Philips CRYSTAL 660 - NETWORK Installation guidelines

Philips

Philips CRYSTAL 660 - NETWORK Installation guidelines

IBM 102 user guide

IBM

IBM 102 user guide

Polaroid MD100I user guide

Polaroid

Polaroid MD100I user guide

Aisino RCK-600 user guide

Aisino

Aisino RCK-600 user guide

FutureLogic GEN2 Cleaning guide

FutureLogic

FutureLogic GEN2 Cleaning guide

Rimage Desktop 360i Replacement guide

Rimage

Rimage Desktop 360i Replacement guide

Toshiba TEC B-850 Series Key Operation Specification

Toshiba

Toshiba TEC B-850 Series Key Operation Specification

Kyocera ECOSYS P3050dn Operation guide

Kyocera

Kyocera ECOSYS P3050dn Operation guide

MIMAKI JV3-250 SP Operation manual

MIMAKI

MIMAKI JV3-250 SP Operation manual

Canon Oce VarioPrint 110 manual

Canon

Canon Oce VarioPrint 110 manual

Magtek ExpressCard 500 user guide

Magtek

Magtek ExpressCard 500 user guide

manuals.online logo
manuals.online logoBrands
  • About & Mission
  • Contact us
  • Privacy Policy
  • Terms and Conditions

Copyright 2025 Manuals.Online. All Rights Reserved.