1
2
© 2010 Seiko Epson Corporation. All rights reserved.
Printed in XXXXXX
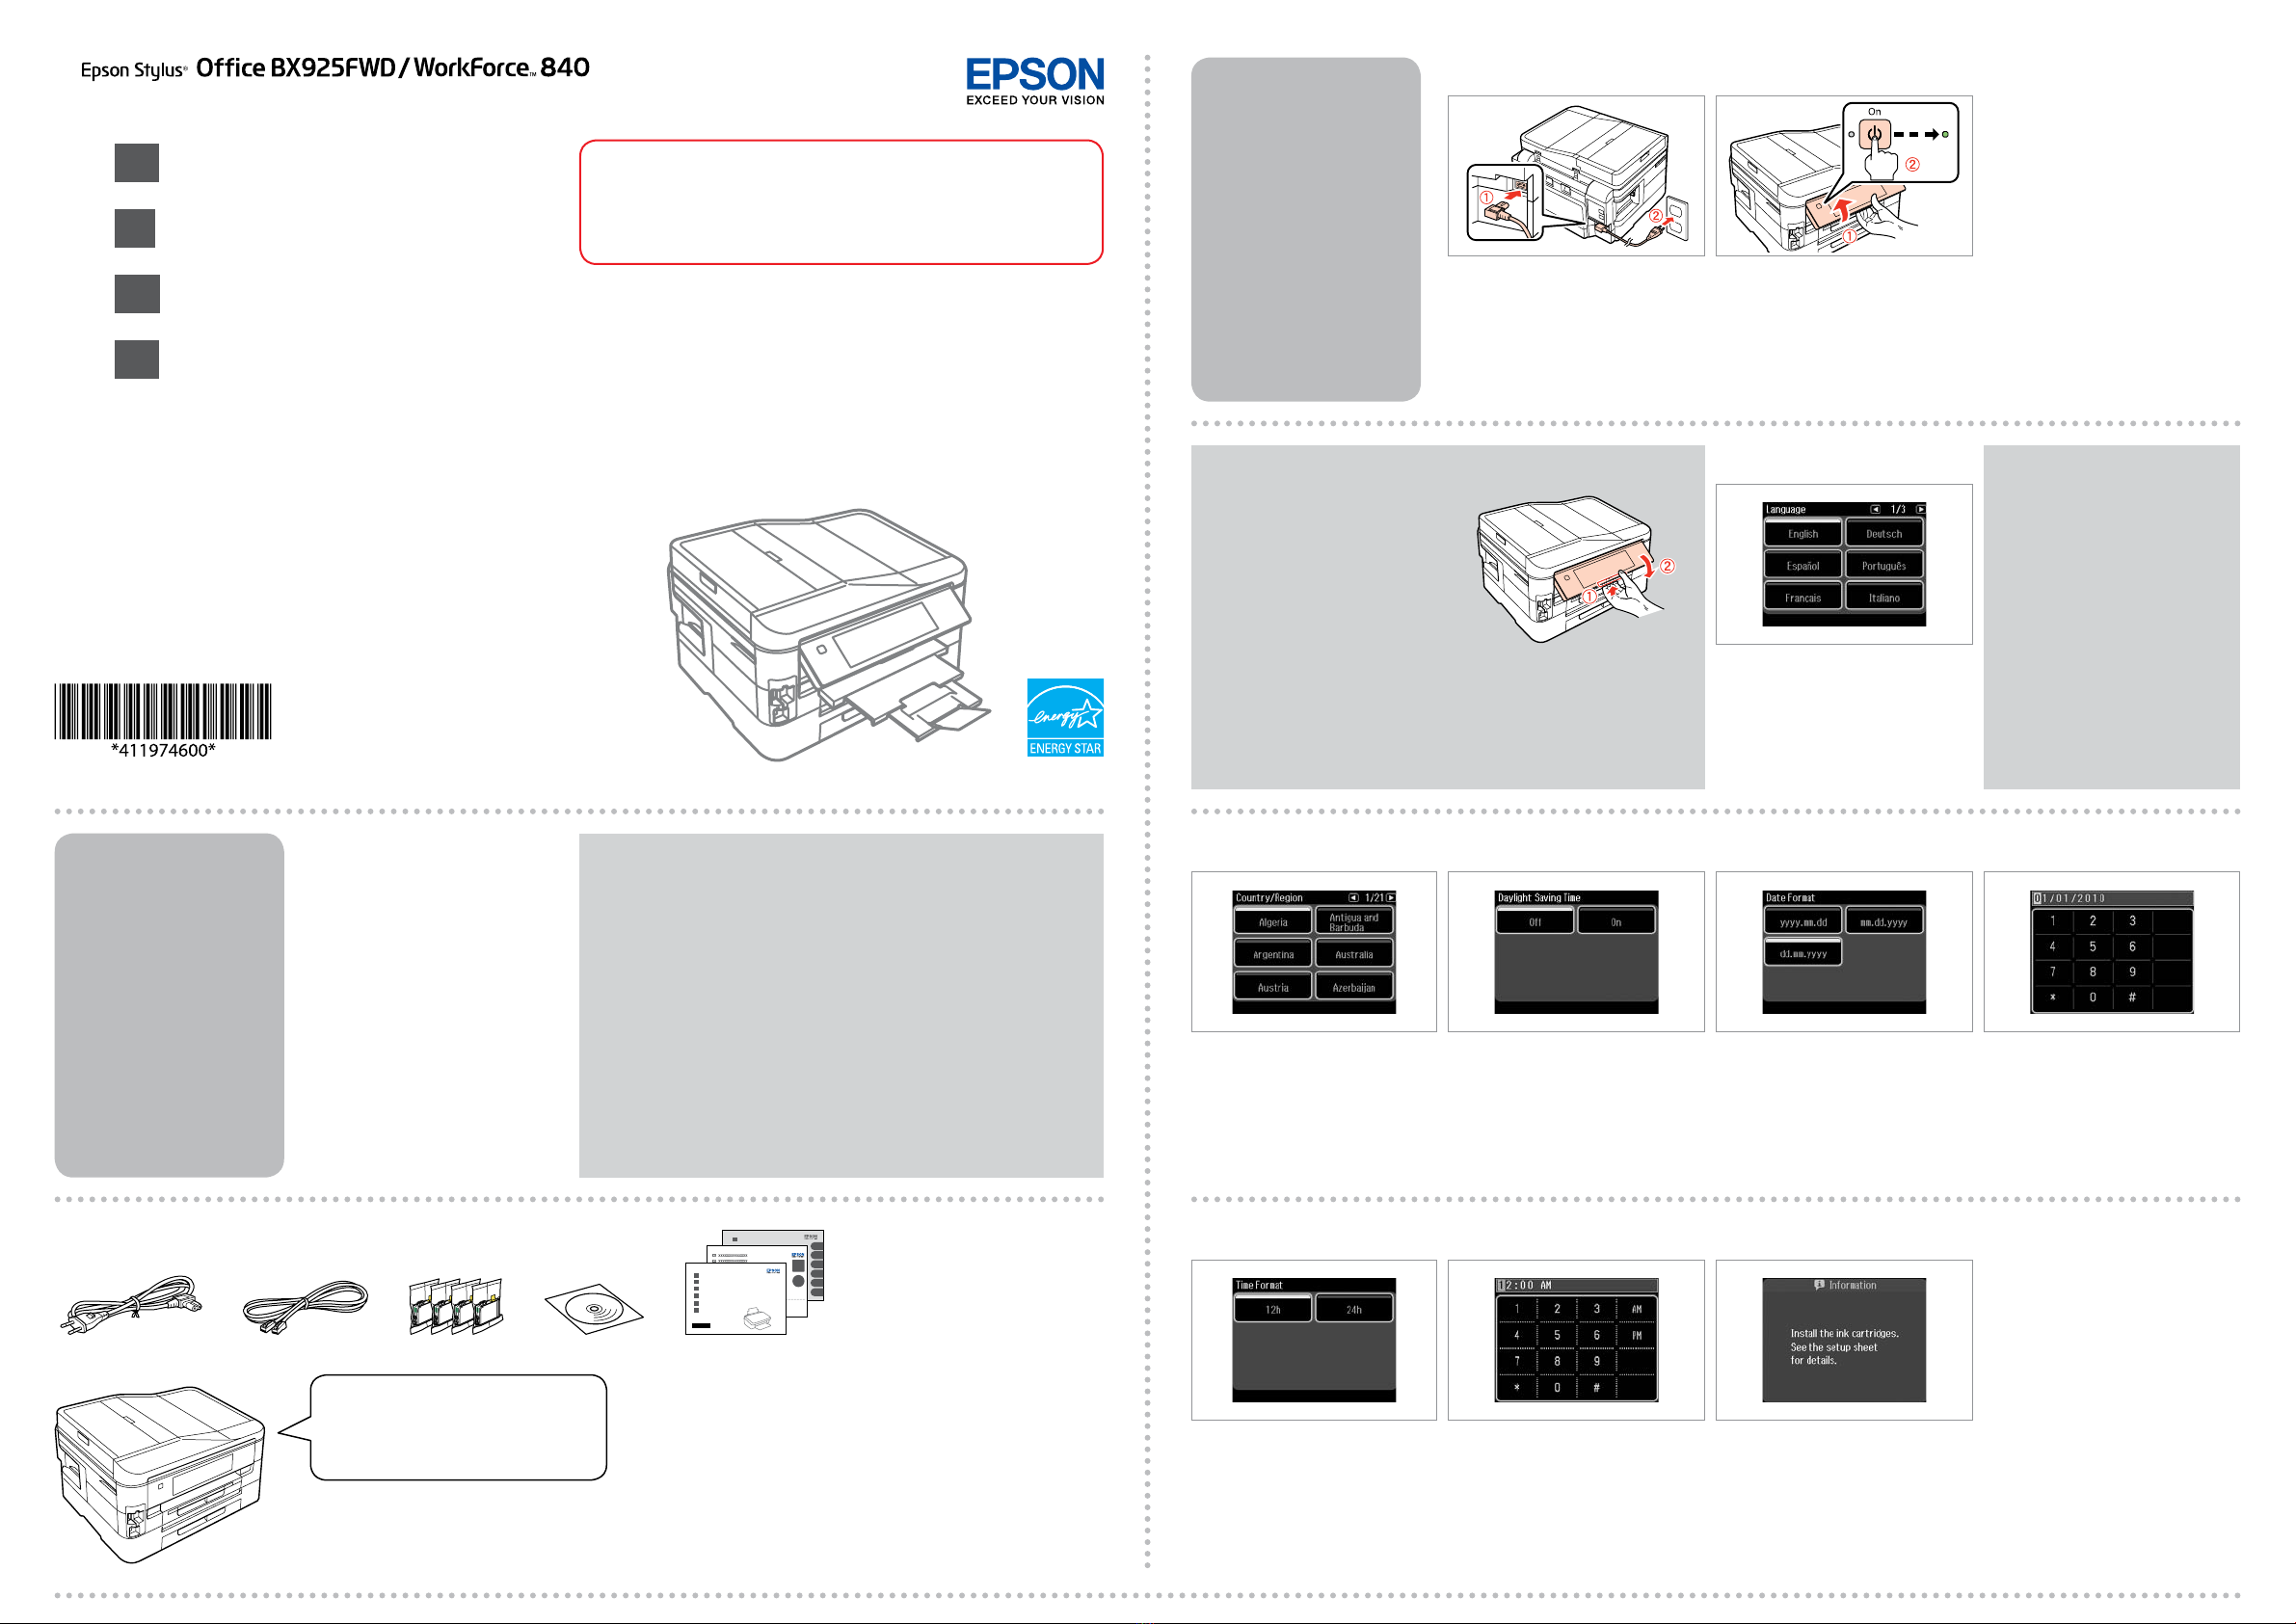
Select a language.
Sélectionnez une langue.
Sprache auswählen.
Taal selecteren.
C�
Do not open the ink cartridge package until you are ready to install it in the
printer. The cartridge is vacuum packed to maintain its reliability.
N’ouvrez pas l’emballage contenant la cartouche tant que vous n’êtes pas prêt
à l’installer dans l’imprimante. La cartouche est conditionnée sous vide an de
garantir sa qualité.
Önen Sie die Tintenpatronenpackung erst, wenn die Tintenpatrone im
Drucker installiert werden kann. Um eine gleichbleibende Zuverlässigkeit zu
gewährleisten, ist die Tintenpatrone vakuumverpackt.
Open de verpakking van de cartridge pas op het moment waarop u de cartridge
wilt installeren. De cartridge is vacuümverpakt om de betrouwbaarheid te
waarborgen.
Contents may vary by location.
Le contenu peut varier d’un pays à
l’autre.
Inhalt kann je nach Auslieferungsort
variieren.
Inhoud kan per land verschillen.
EN Start Here
FR Démarrez ici
DE Hier starten
NL Hier beginnen
wWarnings must be followed carefully to avoid bodily injury.
Avertissement à suivre à la lettre pour éviter des blessures corporelles.
Warnungen sind genau einzuhalten, sonst droht Verletzungsgefahr.
Waarschuwingen moet u zorgvuldig opvolgen om letsel te
voorkomen.
Unpacking
Déballage
Auspacken
Uitpakken
Remove all protective materials.
Retirez tous les matériaux de protection.
Alle Schutzmaterialien entfernen.
Beschermmateriaal verwijderen.
Connect and plug in.
Connectez et branchez.
Anschließen und einstecken.
Aansluiten en stekker in stopcontact.
A�
Lift and turn on.
Soulevez et mettez sous tension.
Anheben und einschalten.
Optillen en aanzetten.
B�
Turning On and
Setting Up
Mise sous tension et
conguration
Einschalten und
Kongurieren
Het toestel
inschakelen en
instellen
Select.
Sélectionnez.
Wählen.
De gewenste instelling selecteren.
D� E�
Select.
Sélectionnez.
Wählen.
De gewenste instelling selecteren.
Select date format.
Sélectionnez le format de la date.
Datumsformat wählen.
Datumnotatie selecteren.
F� G�
Select time format.
Sélectionnez le format de l’heure.
Zeitformat wählen.
Tijdnotatie selecteren.
H� I�
Enter the time, then press OK.
Saisissez l’heure et appuyez sur OK.
Zeit eingeben, dann OK drücken.
Tijd invoeren en op OK drukken.
Go to the next section.
Passez à la section suivante.
Mit nächstem Abschnitt fortfahren.
Naar volgend gedeelte.
J�
To lower, pull lever on rear of control
panel, and then lower.
Pour abaisser, tirez le levier situé à
l’arrière du panneau de contrôle,
puis abaissez.
Zum Absenken den Hebel hinter
dem Bedienfeld ziehen und dann
absenken.
Laten zakken door aan hendel
achter bedieningspaneel te trekken.
Nu kan het paneel omlaag.
Maschinenlärminformations-Verordnung 3. GPSGV: Der höchste Schalldruckpegel beträgt 70 dB(A) oder
weniger gemäss EN ISO 7779.
Das Gerät ist nicht für die Benutzung im unmittelbaren Gesichtsfeld am Bildschirmarbeitsplatz vorgesehen.
Um störende Reexionen am Bildschirmarbeitsplatz zu vermeiden, darf dieses Produkt nicht im
unmittelbaren Gesichtsfeld platziert werden.
EEE Yönetmeliğine Uygundur.
Информация об изготовителе
Seiko Epson Corporation (Япония)
Юридический адрес: 4-1, Ниси-Синздюку, 2-Чоме, Синздюку-ку, Токио, Япония
Срок службы: 3 года
Enter the date, then press OK.
Saisissez la date et appuyez sur OK.
Datum eingeben, dann OK drücken.
Datum invoeren en op OK drukken.
In steps Cand D, press lor runtil
the item you want is displayed.
Aux étapes Cet D, appuyez sur l
ou rjusqu’à apparition de l’élément
voulu.
In den Schritten Cund Dloder r
drücken, bis der gewünschte Eintrag
angezeigt wird.
Druk in stap Cen Dop lof
rtot het gewenste item wordt
weergegeven.


