Equalizer RAPTOR F22 User manual

User Guide
Part Numbers: F22 • F22KIT
™
WARRANTY INFORMATION
Equalizer®Raptor™is warranted for three years to be free of factory defects from the date of
purchase. Warranty does not apply to abuse, misuse, normal wear and tear, or to accessories or
damage caused where repairs have been made or attempted by unauthorized persons. Using
wire and/or cord other than the authorized and recommended Equalizer®wire and/or cord will
automatically void warranty. Equalizer®will repair or replace, at our option, any defective part.
Tools are repaired and sent back the same day they are received.
Equalizer®Serial Number
KEEP THIS FOR YOUR RECORDS
If you feel your tool is covered under warranty or need to
send it in for repair, send the entire tool (including ratchet and charger) to:
Equalizer®
Attention: Repair Department
2611 Oakmont Drive
Round Rock, TX 78665
Equalizer®reserves the right to refuse repair, at our expense, any tool which has not
been properly maintained as specied in the User Guide.
If you have any questions about your tool call us at 512.388.7715,
fax us at 512.388.4188, or email sales@equalizer.com.
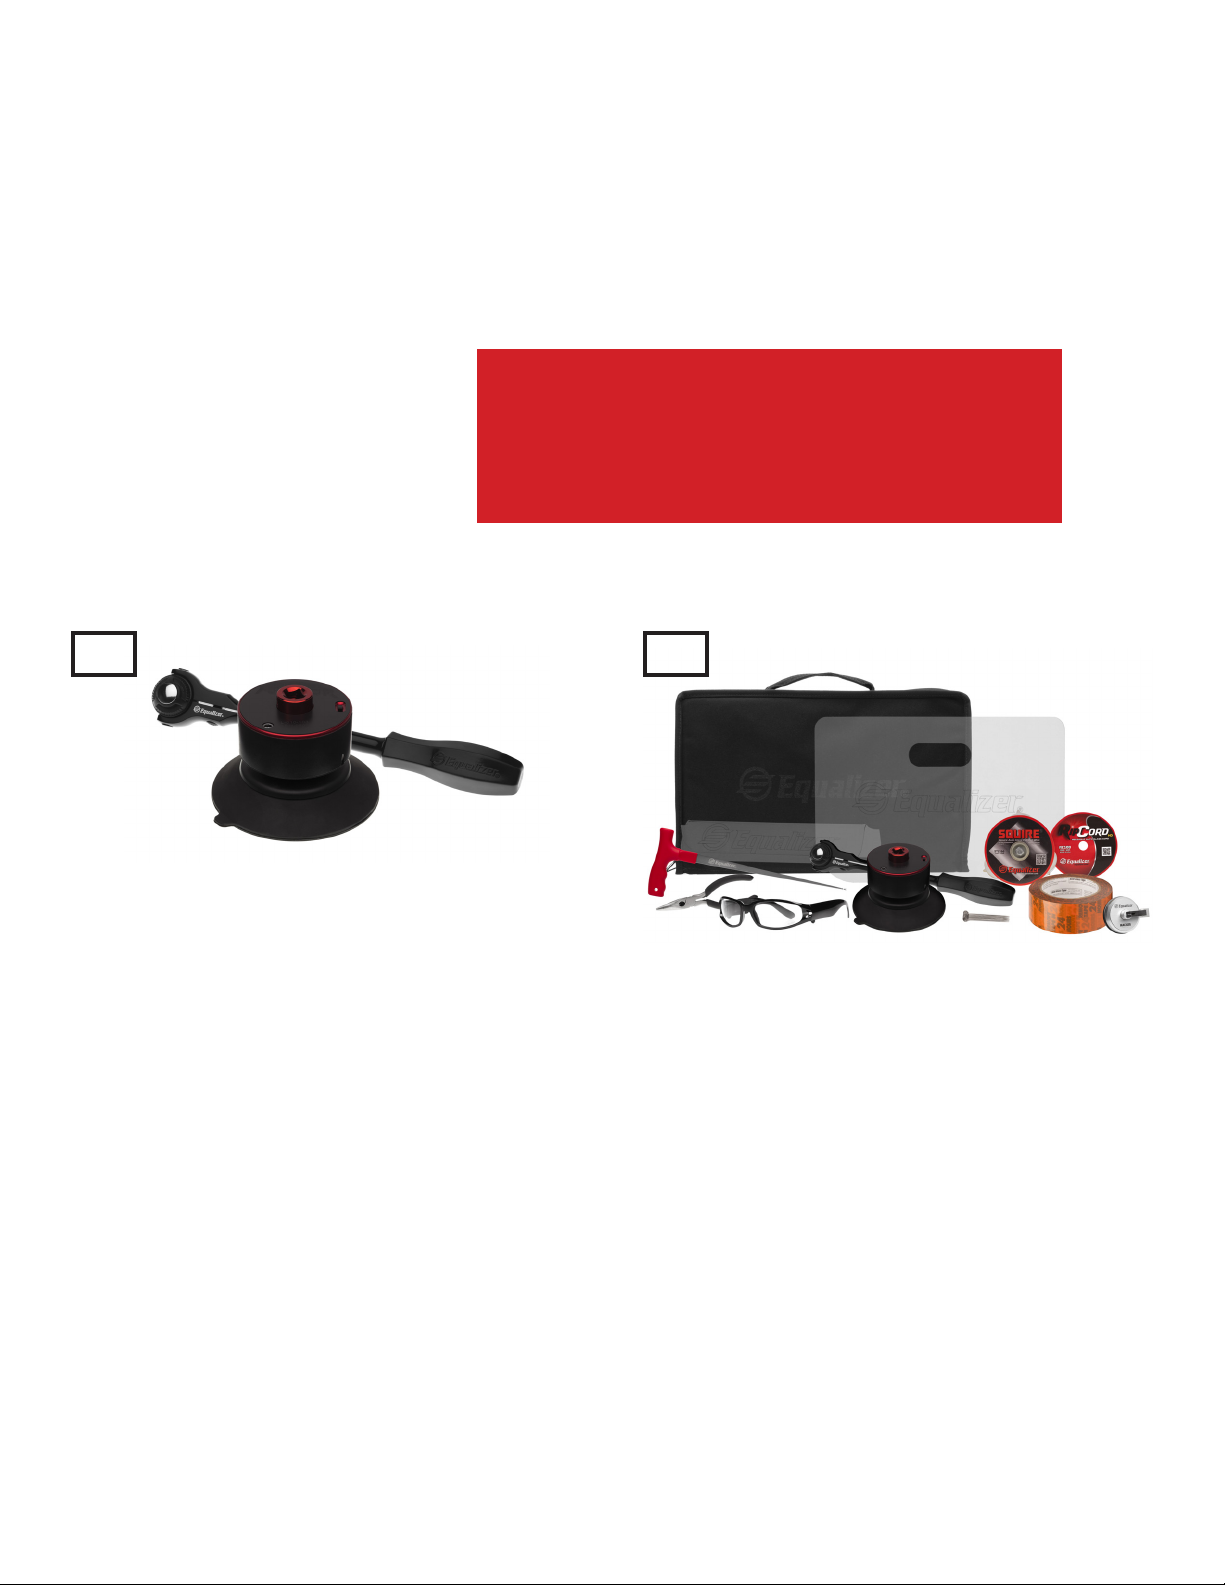
F22 • Tool Only (shown above)
F22KIT • Kit (shown to right)

Do not use with a power
drill or impact wrench as this
can damage the Raptor™
and void your warranty!
Use included ratchet ONLY.
Always wear safety gloves
and safety glasses when
using Equalizer®products.
Useful Tips for Raptor™:
• Leave the tool powered on when cutting out glass.
• To reposition, simply lift the tab on the cup and move to the desired location.
• Charge Raptor™after 10+ hours of use.
• When battery is fully drained, full charge time takes 2 to 3 hours.
• You cannot use the tool while plugged into the charger.
• You will hear a change in tone when vacuum is complete indicating the Raptor™is ready to be used.
Thank you for your purchase of the Equalizer®Raptor™.
Equalizer®is committed to manufacturing quality tools. Equalizer®has tested and demonstrated
the Equalizer®Raptor™on various makes and models of vehicles throughout the world. This guide
is meant to give basic procedures on the use of the tool.
There may be times when you have to position or adjust the tool for a specic application other
than what this guide provides. For technical support and tips please contact us for assistance at
512-388-7715.
To watch Instructional Videos go to equalizer.com/videos or scan the QR code below:
PREVENTATIVE MAINTENANCE:
• Hold the tool in the upright position to clean the cup with a new damp towel to remove any residue or debris from
the cup and then dry with a clean towel.
• Keep protective cup cover on the Raptor™when not in use and keep the entire tool stored
in its case to prevent possible damage to tool.
• Replace the lter once the lter gets too dirty. Additional lters are provided. (Part # I-0025)
Do NOT remove the white
lter, or use compressed air
to clean the Raptor™!
Using wire/cord other
than the authorized and
recommended Equalizer®
wire/cord will automatically
void warranty!

Windshield Removal with Raptor™
Vehicle Prep:
• Remove wipers and cowling to give proper access to the bottom of the windshield
• Remove the rearview mirror
• Identify any clips or stops
• Clean inside and outside of glass
It is recommended to use the Snake Eyes™boroscope unit (SE545) prior
to removal to help locate problem areas such as clips, stops and thick
accumulations of urethane. You can then mark these as a reminder to be
prepared when you get to that point in the removal.
The Snake Eyes™can also be used to diagnose rust on the pinchweld. If
your shop will repair the rusted areas, and help you with your up front
estimates. If you don’t do rust repairs you will know ahead of time and
can refer the customer to a body shop.
Inserting The Wire Starter:
Starting from the area that you feel will best suit you (either the driver side or the passenger side) push the
wire starter tool from inside the vehicle through the urethane to expose the hole on the wire starter on the
outside.
Note: To avoid damage to the paint, it is recommended to place a piece of tape
on the exterior of the pinchweld when using a wire starter.
Starting The Wire/Cord:
Insert the end of the wire/cord through the eye of the wire starter and pull the wire/cord into the vehicle,
allowing enough slack to wrap the wire/cord around the Raptor™approximately three times. If you are using
wire, insert the end of the wire in the hole located in the center of the spool (as seen in Fig. 1). If you are
using cord, insert it through the hole on the outside casing of the tool (as seen in Fig. 2). Turn the Raptor™
on and attach to the glass as low as possible towards the dashboard allowing enough room to attach the
ratchet.
3
Fig. 1 Fig. 2
Tip:
To determine the direction you need to wrap the wire/cord on the Raptor™from inside the car looking
through the windshield determine which direction you want to cut. In this case we are working on the
windshield cutting from passenger to driver side in a clockwise direction therefore wrap the wire/cord onto
the Raptor™counter clockwise.
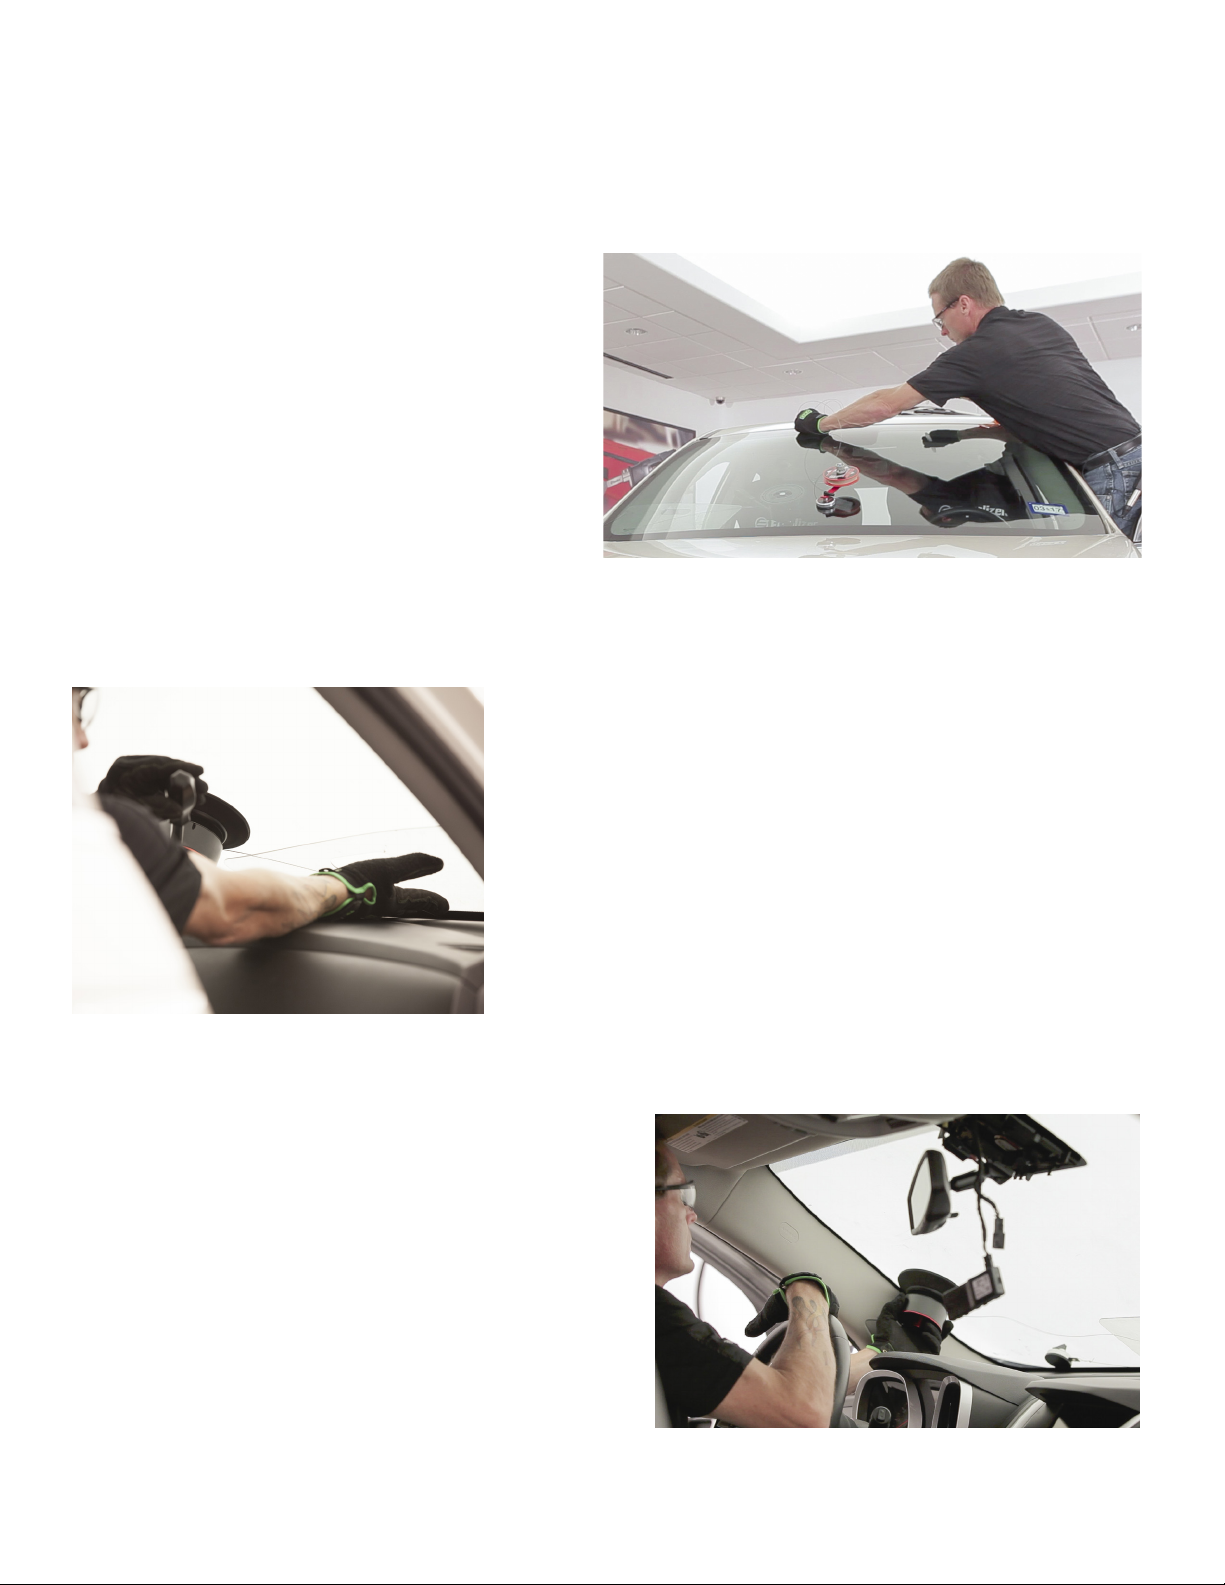
Placement Of Wire/Cord Around the Windshield:
From the outside of the vehicle, start to lace the
wire/cord under the edge of the glass. Move toward
the driver side continuing up the A-pillar and across
the roof. Then come down the passenger side
A-pillar and go past where you initially started along
the bottom moving back towards the driver side. At
this point, you can leave the wire/cord attached to
the Venom or anchor on the outside of the vehicle.
(If your windshield has moulding around the glass,
and you wish to save it, simply use an Installation
Stick (IS742) or Hook Tool (HTS923) to lift up the
moulding and lace wire/cord underneath).
Note: In some cases you might need to place tape over the moulding so that the wire/cord does not come out.
Windshield Removal Process:
Insert the dash protector (CU1077) between the dash and the
windshield and push down as far as it will go making sure the
wire/cord is between the protector and glass.
To begin to cut start the ratcheting action slowly and apply slight
pressure, with one hand, on the dash protector against the glass
where the wire/cord is coming through.
Cut along the bottom of the windshield and reposition the
Raptor™as needed to create the best cutting angle. Repositioning
is simple with the Raptor™simply lift release tab, on the vacuum
cup and place it in the desired spot and let the cup draw down to
a complete suction then begin to ratchet again.
Approaching the A-pillar -
If you prefer to remove the A-pillar trim panels do so at
this time. If you choose to leave the panels in place then
use the headliner protector (HP564). Slip it into place and
make sure that when cutting, the wire/cord is between
the glass and the protector at all times.
About halfway up the A-pillar you will need to reposition
the Raptor™in order to complete the cut up the A-pillar
and to start across the top.
Once you reach the top corner, you most likely will
encounter the clip/setting pin. At this point, you will use
one of the two methods listed below to cut the clip/
setting pin.
4

Windshield Setting Pins:
Be aware that most vehicles have setting pins installed from the factory (up in each corner) to allow the
installer or robot to place the glass in the perfect spot during construction of the vehicle.
There are two methods to cut behind the setting posts:
1. Apply pressure to the wire/cord where it is closest to the urethane
and while using the Raptor™, cut behind the setting pin where it is
attached to the windshield.
2. Use a blade such as the BFE1401, to cut the bond between the
setting pin and the windshield prior to continuing the removal with the
Raptor™.
Once the clip/setting pin is cut, you can then continue cutting across
the top of the windshield. Be sure to take special care not to get
hungup on the wiring harness for the rearview mirror.
When you begin to notice the wire/cord start to feed
from the Venom™Wire Dispenser (WDD167), this
means that there is not enough tension being created
to cut through the urethane.
At this point, you will switch the wire/cord from the
Venom™to the mini anchor (MAC1125).
To do this, rst pull enough wire/cord from the
Venom™and cut at desired length that will be sure
to reach inside the vehicle, then insert the wire/cord
under the windshield through the already cut area.
In some applications you may be able to leave the
anchor on the outside of the glass.
When nearing the end of the removal it is important to
remember to reposition the mini anchor and the Raptor™
so that the wire/cord from the mini anchor is now under the
wire/cord from the Raptor™.
Continue cutting down the A-pillar until the wire/cord crosses
making the nal cut and the wire/cord simply reels back into
the vehicle. The removal is complete. You can now remove the
mini anchor, turn off and remove the Raptor™and proceed to
lift out the windshield and prep for replacement.
You can see there’s no damage to the body, and an
added benet is that the urethane is trimmed down to
the proper height.
5

Quarter Glass Removal With Raptor™
Vehicle Prep:
• Remove all trim panels surrounding the work area
• Identify any clips/setting pins
Clean the glass and place the Venom™Wire Dispenser
(WDD167) on the outside of the quarter glass.
Many vehicles will have an encapsulation around the
quarter glass which will make it impossible to insert the
wire starter from inside the vehicle (as many technicians
are used to) without damaging the encapsulation.
Most Quarter windows can be accessed by opening the
door and inserting at the B or C-Pillar, (for most 2 & 4 door
vehicles). To do so, insert the wire starter under the lip of
the encapsulation and push through the urethane.
If you are using RipCord™HD: lay the cord into the notched
end of the wire starter making sure to add roughly 12-14
inches, then insert under the encapsulation making sure to
hold both the cord and wire starter until the wire starter is
clearly visible from the inside, let go of the cord and remove
the wire starter. Pull enough cord in to wrap around the
Raptor™at least 3 times.
If you are using the wire: Make a small bend in the wire and insert
into the hole on the wire starter. Now push the wire starter under
the encapsulation until the wire starter is clearly visible from the
inside, then take your pliers (BNP516) and remove the wire from the
wire starter then remove the wire starter now you can pull enough
wire in to wrap around the Raptor™at least 3 times.
Once you have your cord/wire attached to the Raptor™turn on the
Raptor™and attach to the glass in the desired location.
Tip:
To determine the direction you need to wrap the wire/cord on the
Raptor™from inside the car looking through the window you are
removing determine which direction you want to cut (clockwise
or counterclockwise) then wrap the wire/cord in the opposite
direction.
Placement Of Wire/Cord Around Quarter Glass:
Pull excess wire/cord from the Venom™Wire Dispenser and begin threading the wire/cord underneath the
moulding around the outside of the quarter
glass in the direction you want to cut.
Place moulding tape at the exit point of the
wire on the moulding for added protection
while pulling. Also, apply tape on the glass and
body as well so that when the last cut is made,
the glass will stay in place.
6

To begin cutting, start the ratcheting action slowly and apply slight
pressure, with one hand, on the dash protector against the glass where
the wire/cord is coming through.
Reposition the Raptor™as needed to create the best cutting angle.
Repositioning is simple with the Raptor™. Simply lift release tab on
vacuum cup and place the Raptor™in desired spot and let the cup
draw down complete suction then begin ratcheting again.
When you encounter the clips, make sure that the wire/cord stays
between the clip and the body of the vehicle.
When you begin to notice the wire starting to feed from the
Venom™, this means that there is not enough tension being
created to cut through the urethane.
At this point, you will switch the wire from the Venom™to the
mini anchor (MAC1125). To do this, rst pull enough wire/cord
from the Venom™so that when you cut the wire/cord you have
enough wire to reach into the vehicle. Cut the wire/cord, then
push out slightly on the cut area of the glass and feed the wire
to the inside of the vehicle. Attach the wire/cord to the mini
anchor making sure that the tab is pointed toward the wire/
cord.
As you begin cutting again, keep in mind that the glass is now loose, so slow and easy movements are
required. If not, you could pop the glass out too soon causing damage to the glass and or body of the
vehicle. Be sure to keep an 80° or less angle at all times from the Raptor™through the urethane to the mini
anchor cup. The lower degree of angle increases cutting action and makes cutting easier. Toward the end of
the removal, the mini anchor may move slightly due to the torque being produced by the Raptor™- this is
normal.
Continue cutting until wire/cord crosses making the nal cut and the wire/cord simply reels back into the
vehicle. The removal is complete. You can now remove the mini anchor and Raptor™and proceed to lift out
the quarter glass and prep for replacement.
7
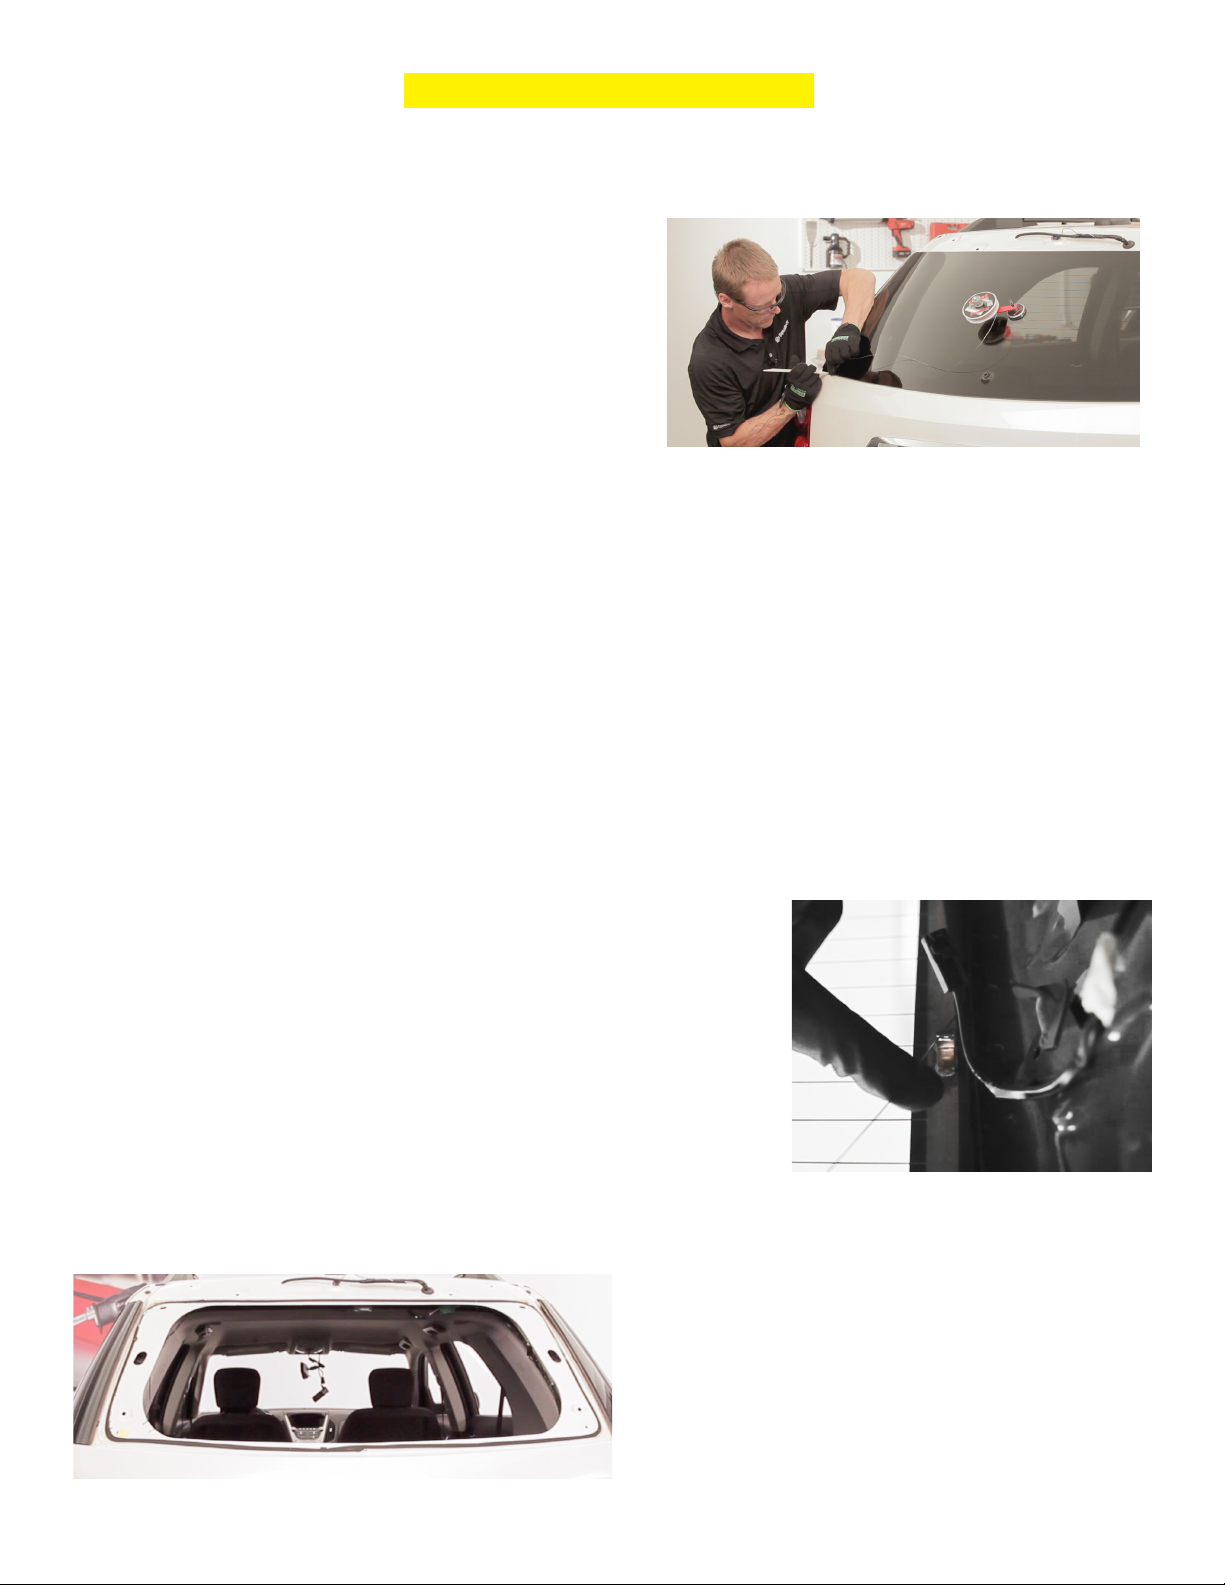
Back Glass Removal With Raptor™
Vehicle Prep:
• Remove interior trim and remove wiper assembly if applicable.
• Remove exterior trim, spoilers, etc. if applicable in order to gain access to the glass.
To get started, place the Venom™Wire Dispenser
(WDD167) on outside of the glass and choose which
direction you want to cut from inside the vehicle. Next
choose where you want to start the wire/cord. Place a
piece of tape on the body where you will be inserting
the wire starter to protect the paint. Then push the wire
starter from the inside through the urethane until you
expose the hole on the wire starter.
Attach the wire/cord to the hole of the wire starter then pull wire starter in and bring enough wire/cord to
wrap it on the Raptor™at least three times. Turn on the Raptor™and attach to the glass.
Place the wire/cord under the edge of the glass in the direction you will be cutting continuing past where
you initially started. When removing back glass you can leave the wire/cord attached to the Venom™ or
anchor the wire/cord to the outside of the glass using the mini anchor (MAC1125) making sure the anchor
tab is facing the direction the wire/cord is coming from.
Similar to the windshield and quarter glass removals, make sure to position the Raptor™on the glass so that
it has the best cutting angle.
Windshield Setting Pins:
Some vehicles have placement pins that may not be visible. Locate the hidden placement pins by using
the Snake Eyes™(SE545). To cut through placement pins with the wire/cord, use the headliner protector
(HP564), and apply gentle pressure while ratcheting making sure the wire/cord is between the protector and
the glass. You may need to ratchet then relax until you are able to cut through the placement pins.
Defroster Tabs:
When approaching the defroster tabs allow the wire/cord to come
into slight contact with the tab then lift the wire/cord over the tab and
continue cutting.
Continue this process moving the Raptor™to achieve proper cutting
angles, until you are through all placement pins and passed all
defroster tabs.
If you are working on a hatch back it is recommended to apply a few
pieces of tape on the outside of the glass to hold it to the body when
making the nal cut.
Tip: In this case we left the anchor on the outside of
the glass, but on some vehicles it might be necessary
to bring the anchor in the inside.
Continue cutting until wire/cord crosses making the
nal cut and the wire/cord simply reels back into
the vehicle. The removal is complete. You can now
remove the mini anchor and Raptor™and proceed to
lift out the backglass.
8

9
PREVENTATIVE MAINTENANCE:
• Hold the tool in the upright position to clean the cup with a new damp towel
to remove any residue or debris from the cup and then dry with a clean towel.
• Keep protective cup cover on the Raptor™when not in use and
keep the entire tool stored in its case to prevent possible damage to tool.
• Replace lter once the lter gets too dirty. Additional lters provided. (Part # I-0025)
To replace the lter:
Apply a small drop of super glue on the bottom edge of the lter hole and do the
same on the other edge directly across, making sure that when you push the lter in, it
does not spill into the small vacuum hole. DO NOT apply glue inside the small vacuum
hole. A gel-like glue is recommended, to prevent the glue from running into the small
vacuum hole and damaging the plunger valve.
Loctite Ultra Gel Control Super Glue is recommended.
Using your Raptor™ without a lter allows dirt and residue inside the cup which can prevent the apper
valves from closing, causing loss of suction. Once the motor is damaged from residue build up, the motor
will have to be completely replaced.
Using your Raptor™ with a dirty lter can cause lack of suction, or weaken the suction, which increases the
possibility of sliding and/or vacuum cup failure.

WARRANTY REGISTRATION
TOOL TYPE: F22 F22KIT
DATE YOU PURCHASED THIS TOOL______________________________
YOUR COMPANY__________________________________________________________
ADDRESS________________________________________________________________
CITY________________________________STATE______________ZIP CODE_____________
TELEPHONE NUMBER (________)____________________________________
YOUR NAME______________________________________________________
PURCHASED FROM________________________________________________
THEIR ADDRESS___________________________________________________
CITY, STATE, ZIP___________________________________________________
PRINT clearly and ll in all of the blanks.
Remove this page and place
in envelope and mail to:
Equalizer®
Attn: Tool Registration
2611 OAKMONT DRIVE
ROUND ROCK, TEXAS 78665
You may also send in via fax to 512.388.4188, email to sales@equalizer.com,
or register online at www.equalizer.com under the Support drop down menu.
™
Scan QR code to register online

2611 Oakmont Drive • Round Rock, TX 78665
800.334.1334 • 512.388.7715 • 512.388.4188 Fax
sales@equalizer.com • www.equalizer.com
™
Rev. 2/6/19b
This manual suits for next models
1
Table of contents
Other Equalizer Automobile Accessories manuals


