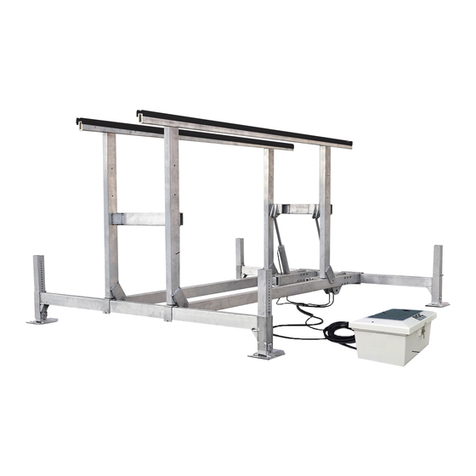
Equiptec Monkey MX21 User manual

:
MX21 Assembly Manual
www.equiptec.co

Assembly Instructions for your new Equiptec Monkey MX21
If any instruction is unclear, DO NOT
proceed, contact Equiptec for advice
w. www.equiptec.co
p. +64 6 842 0222
Fastenings Note: Some applications
which may include special washers or
washer configurations have details
shown on the illustrations. If no details
are shown, ensure washers in the
appropriate fastening list are fitted
immediately under the bolt head and
also under the nut in every case.
www.equiptec.co April 2022
Monkey Assembly Instructions MX21 - SB 1.0 1
Section Unit / Accessory Kit Page
1Monkey MX21 Base Unit 3
2 Monkey MX 21 Go-Base 18
3 Monkey MX21 All Terrain Kit 26
4 Monkey MX21 4 Step Sub Chassis 36
5 Monkey MX21 Extended Cantilever 53
6 Monkey MX21 Hydraulic Kit 72
7 Contact Details 86

www.equiptec.co April 2022
Monkey Assembly Instructions MX21 - SB 1.0 2
Configuration Options
Assemblies Section Assemblies Section
MX21 Base Unit
MX21 Go-Base
1
2
MX21 Base Unit
MX21 4 Step Sub Chassis
MX21 Go-Base
1
4
2
MX21 Base Unit
MX21 Go-Base
MX21 Hydraulic Kit
1
2
6
MX21 Base Unit
MX21 4 Step Sub Chassis
MX21 Go-Base
MX21 Hydraulic Kit
1
4
2
6
MX21 Base Unit
MX21 Go-Base
MX21 Hydraulic Kit
MX21 Extended Cantilever Kit
1
2
6
5
MX21 Base Unit
MX21 4 Step Sub Chassis
MX21 Go-Base
MX21 Hydraulic Kit
MX21 Extended Cantilever Kit
1
4
2
6
5
MX21 Base Unit
MX21 All Terrain Kit
1
3
MX21 Base Unit
MX21 4 Step Sub Chassis
MX21 All Terrain Kit
1
4
3
MX21 Base Unit
MX21 All Terrain Kit
MX21 Hydraulic Kit
1
3
6
MX21 Base Unit
MX21 4 Step Sub Chassis
MX21 All Terrain Kit
MX21 Hydraulic Kit
1
4
3
6

Section 1 - Equiptec Monkey MX21 Base Unit
www.equiptec.co April 2022
Monkey Assembly Instructions MX21 - SB 1.0 3
WARNING: The upper unit is under
spring tension and these brackets
must not be removed until steps 9
and 10.
Monkey MX21 Base unit as shipped, with packaging and seperate parts removed
1

Step 1 - Unpack and Identify Parts
1. Take out all parts and check them off
parts as per list below
2. Identify Handrail Assembly
Description Qty
Height Adjusting Handle 1
Front Gate + Hinge Post Assembly 1
Striker Post Assembly 1
Platform Mid Rail 2
Platform Handrail LH 1
Platform Handrail RH 1
Toeboard 2
Platform Rear Gate 1
www.equiptec.co April 2022
Monkey Assembly Instructions MX21 - SB 1.0 4
Height Adjusting
Handle
Front Gate + Hinge
Post Assembly
Striker Post
Assembly
Platform Mid Rail
Platform Handrail
LH (MX21 043L)
Platform Handrail
RH (MX21 043R)
Toeboard Platform Rear Gate
1

Step 2 - Base Handrail Installation
1. Loosen all M8 x 50mm Cap Screws +
M8 Nyloc Nuts and reposition Handrail
as shown
2. Once Handrails are in place, ensure all
fastenings and handrail spacers are
correctly inserted before tightening
Fastening List
4 x M8 x 50mm Cap Screw
6 x M8 x 60mm Bolt
10 x M8 Nyloc Nut
4 x M8 Flat Washer 16mm (fit inside)
4 x M8 Flat Washer 22mm (fit outside)
www.equiptec.co April 2022
Monkey Assembly Instructions MX21 - SB 1.0 5
Handrail
Spacer
M8 x
60mm
Bolt
DO NOT OVERTIGHTEN
Max tighting torque
10Nm (7.5 ft/lbs)
1

WARNING: DO NOT stand or place
any weight on the deck until an
Equiptec MX21 base system has
been fully and correctly installed
1. Cut strap and rotate Deck down into
position
2. Hold Deck in position and insert
Bolts in to holes shown. Ensure
bolt heads are on the outside
Fastening List
4 x M8 x 25mm Bolt
4 x M8 Nyloc Nut
8 x M8 Flat Washer
Step 3 - Deck Installation
Rotate Deck down into position
www.equiptec.co April 2022
Monkey Assembly Instructions MX21 - SB 1.0 6
1

Step 4 - Sawtooth Bracket Installation
1. Remove M8 x 30mm Bolts (5 of) on
each Sawtooth Bracket
2. Rotate sawtooth bracket into position
shown
3. Reinsert M8 x 30mm Bolts with
Washers + Spring Washers as shown
and tighten
M8 Spring
Washer
www.equiptec.co April 2022
Monkey Assembly Instructions MX21 - SB 1.0 7
M8 Flat
Washer
M8 x
30mm
Bolt
1
WARNING: DO NOT stand or place
any weight on the deck until a
Equiptec MX21 base system has
been fully and correctly installed

Step 5 - Fit Height Adjusting Handle
1. Align handle so that the Crush Tube
and Bolt can be inserted as shown in
detail A on both sides
2. Tighten to a maximum of 10Nm
(7.5 ft/lbs) torque
3. Install locking pins as shown in
detail B
Fastening List
2 x M8 x 65mm Bolt
2 x M8 Nyloc Nut
4 x M8 Flat Washer
M8 Crush Tube
DO NOT OVERTIGHTEN
10Nm (7.5 ft/lbs) maximum
www.equiptec.co April 2022
Monkey Assembly Instructions MX21 - SB 1.0 8
1
A
B
WARNING: DO NOT stand or place
any weight on the deck until a
Equiptec MX21 base system has
been fully and correctly installed

Step 6 - Fitting Front Gate + Hinge Post
1. Insert Gate + Post assembly with Bolts
(bolt heads to the outside) as shown.
Do not fully tighten at this stage
Fastening List
3 x M8 x 65mm Bolt
3 x M8 Nyloc Nut
6 x M8 Flat Washer
www.equiptec.co April 2022
Monkey Assembly Instructions MX21 - SB 1.0 9
DO NOT FULLY TIGHTEN
AT THIS STAGE
1
WARNING: DO NOT stand or place
any weight on the deck until a
Equiptec MX21 base system has
been fully and correctly installed

Step 7 - Fitting Striker Post
1. Insert Striker Post with Bolts (bolt
heads to the outside) as shown. Do not
fully tighten at this stage
Fastening List
3 x M8 x 65mm Bolt
3 x M8 Nyloc Nut
6 x M8 Flat Washer
www.equiptec.co April 2022
Monkey Assembly Instructions MX21 - SB 1.0 10
DO NOT FULLY TIGHTEN
AT THIS STAGE
1
WARNING: DO NOT stand or place
any weight on the deck until a
Equiptec MX21 base system has
been fully and correctly installed

Step 8 - Fitting Mid Rails
1. Fit Mid Rails to both sides and insert
Bolts as shown. Do not fully tighten at
this stage
Fastening List
4 x M8 x 35mm Cap Screw
4 x M8 Nyloc Nut
www.equiptec.co April 2022
Monkey Assembly Instructions MX21 - SB 1.0 11
DO NOT FULLY TIGHTEN
AT THIS STAGE
1
WARNING: DO NOT stand or place
any weight on the deck until a
Equiptec MX21 base system has
been fully and correctly installed

Step 9 - Fitting Left Handrail
1. Remove packing ‘L’ bracket as shown
2. Fit Left Handrail (MX21 043L) and
insert Bolts as shown. Do not fully
tighten at this stage
Fastening List
2 x M8 x 35mm Cap Screw
2 x M8 Nyloc Nut
www.equiptec.co April 2022
Monkey Assembly Instructions MX21 - SB 1.0 12
DO NOT FULLY TIGHTEN
AT THIS STAGE
1
WARNING: DO NOT stand or place
any weight on the deck until a
Equiptec MX21 base system has
been fully and correctly installed

Step 10 - Fitting Right Handrail
1. Remove packing ‘L’ bracket and packer
as shown
2. Fit Right Handrail (MX21 043L) and
insert Bolts as shown. Do not fully
tighten at this stage
3. Ensure gate clearances are even and all
handrails + mid rails are aligned
4. Tighten all bolts from steps 6 thru
till 10. DO NOT OVERTIGHTEN the
corner post fastenings, maximum of
15Nm (11 ft/lbs)
Fastening List
2 x M8 x 35mm Cap Screw
2 x M8 Nyloc Nut
www.equiptec.co April 2022
Monkey Assembly Instructions MX21 - SB 1.0 13
1
WARNING: DO NOT stand or place
any weight on the deck until a
Equiptec MX21 base system has
been fully and correctly installed

Step 11 - Insert Toeboards
1. Insert Toeboards into place as shown
www.equiptec.co April 2022
Monkey Assembly Instructions MX21 - SB 1.0 14
Toeboard
1
WARNING: DO NOT stand or place
any weight on the deck until a
Equiptec MX21 base system has
been fully and correctly installed

Step 12 - Fitting Rear Gate
1. Fit Rear Gate and insert Bolts as shown,
tighten to a maximum of 10Nm
(7.5 ft/lbs) torque
Fastening List
1 x M6 x 65mm Bolt
1 x M6 Nyloc Nut
2 x M6 Flat Washer
www.equiptec.co April 2022
Monkey Assembly Instructions MX21 - SB 1.0 15
M6 Crush Tube
DO NOT OVERTIGHTEN
10Nm (7.5 ft/lbs)
maximum
1
WARNING: DO NOT stand or place
any weight on the deck until a
Equiptec MX21 base system has
been fully and correctly installed

www.equiptec.co April 2022
Monkey Assembly Instructions MX21 - SB 1.0 16
Step 13 - Tighten Deck Pivot Bolts
1. Raise the Deck to the highest position
and secure into the sawtooth bracket
2. Ensure the deck pivot bolt (as shown)
on both sides is tightened to 40Nm
(29.5 ft/lbs) on both sides
1
WARNING: DO NOT stand or place
any weight on the deck until a
Equiptec MX21 base system has
been fully and correctly installed

Your New Equiptec Monkey MX21 Base unit is now assembled...
It is ready for the customers specified
base and accessories to be fitted
www.equiptec.co April 2022
Monkey Assembly Instructions MX21 - SB 1.0 17
1
WARNING: DO NOT stand or place
any weight on the deck until a
Equiptec MX21 base system has
been fully and correctly installed

Section 2 - Equiptec Monkey MX21 Go-Base
www.equiptec.co April 2022
Monkey Assembly Instructions MX21 - SB 1.0 18
2

Step 1 - Unpack and Identify Parts
1. Take out all parts and check them off
parts as per list below
2. Locate assembled MX21 Base unit the
Go-Base is to be fitted to
Description Qty
Go-Base Front Section 1
Go-Base Rear Section 1
Actuating Arm 2
Actuating Arms
Go-Base Rear
Section
Go-Base Front
Section
www.equiptec.co April 2022
Monkey Assembly Instructions MX21 - SB 1.0 19
2
Other manuals for Monkey MX21
1
Table of contents
Other Equiptec Lifting System manuals
Popular Lifting System manuals by other brands
Modulift
Modulift CMOD 6 User instructions
progressive automations
progressive automations flt-02 Assembly instructions
morse
morse 400AM-72-114 Operator's manual
Terex
Terex Genie SX-105 XC Operator's manual

Servonaut
Servonaut AMO manual
twin busch
twin busch TW M-04 Installation, operation and maintenance manual
