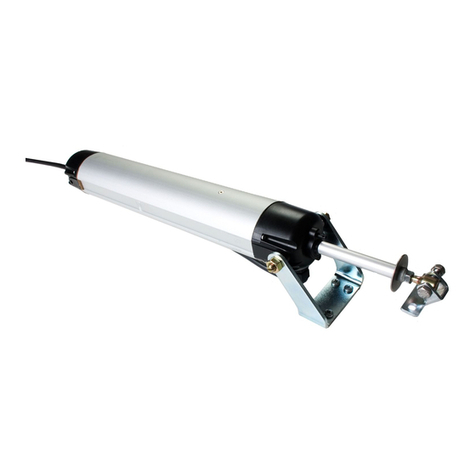
UCS AV 3012 User manual

Doc. 82082-Z Rev. 04/07/07 1 / 8 Dis. 17088/l
ULTRAFLEX CONTROL SYSTEMS s.r.l.
!
Via XXV Aprile 45 - 16012 BUSALLA (GE) - ITALY
Vendite Italia: Tel. +39 010 9768234 - Fax +39 010 9768233
Export: Tel. (+39 010) 9768232 - Fax (+39 010) 9768233
http://www.ultraflexgroup.it/ucs e-mail: [email protected]!
!
MANUALE D’USO
USER MANUAL
MANUEL POUR L’EMPLOI
Dati tecnici Specifications Données
techniques AV 3012
Part No
40671C
A
V 3024
Part No
40672E
A
V 4512
Part No
40582D
A
V 4524
Part No
40583F
AV 6012
Part No
40584H
A
V 6024
Part No
40585K
Alimentazione Voltage supply Alimentation 12 Vdc
–10%+30%
24 Vdc
–10%+30%
12 Vdc
–10%+30%
24 Vdc
–10%+30%
12 Vdc
–10%+30%
24 Vdc
–10%+30%
Assorbimento
nominale
Nominal current
absorption
Courant
absorbe 10 A 5 A 10 A 5 A 10 A 5 A
Corsa Stroke Course 300 mm (12”) 300 mm (12”) 450 mm (18”) 450 mm (18”) 600 mm (24”) 600 mm (24”)
Forza in spinta Force in push
action
Force en
poussée
1200 N
(265 lbs)
1200 N
(265 lbs)
1200 N
(265 lbs)
1200 N
(265 lbs)
1200 N
(265 lbs)
1200 N
(265 lbs)
Grado di
protezione Protection class Protection IP 65 IP 65 IP 65 IP 65 IP 65 IP 65
Velocità con
carico Speed with load Vitesse avec
charge 17 mm/sec 17 mm/sec 17 mm/sec 17 mm/sec 17 mm/sec 17 mm/sec
Lunghezza (X) Length (X) Longueur (X) 677 mm
(26.6”)
677 mm
(26.6”)
827 mm
(35.5”)
827 mm
(35.5”)
977 mm
(38.4”)
977 mm
(38.4”)
Fine corsa
elettronici
Electronic
end-stroke
Fin de course
électroniques " " " " " "
Protezione
elettronica
Electronic
protection
Protection
électronique " " " " " "
ATT UAT OR E EL ET TR OM EC CAN IC O LINEARE
EL EC TR OM EC HAN IC AL HATCH LIFTING SYSTEM
V
ER IN E LE CT RO ME CH ANI QU E PO UR S ABO RD
A
V
GB
I
F
DATI TECNICI
SPECIFICATIONS
DONNES TECHNIQUES
GB
I
F
I GB F
X
fig. 1

Doc. 82082-Z Rev. 04/07/07 2 / 8 Dis. 17088/l
"! Leggere attentamente queste istruzioni prima di procedere al montaggio.
"! Un’applicazione scorretta o un improprio montaggio possono causare la perdita della funzionalità del sistema con
conseguenti danni a cose e/o persone.
"! Per i particolari non forniti, si raccomanda comunque di seguire le caratteristiche tecniche consigliate.
"! La Società produttrice, UCS - Ultraflex Control Systems srl, non accetta alcuna responsabilità per le installazioni in cui non vengano
seguite le istruzioni di montaggio o siano state utilizzate parti di ricambio non originali.
DESCRIZIONE PRODOTTO ED USO RACCOMANDATO
"! Gli attuatori elettromeccanici lineari AV sono stati appositamente progettati per l’utilizzo nella nautica da diporto per l’apertura e la
chiusura anche parziale dei portelloni del vano motore, dei gavoni, dei boccaporti, ecc.
"! ANTIDEFLAGRANZA: gli attuatori AV 3012, AV 4512 e AV 6012 sono conformi alle normative UL 1500 e UNI EN ISO 28846 /
ISO 8846 (protezione contro l’accensione gas infiammabili nell’ambiente circostante).
"! Gli attuatori elettromeccanici lineari AV sono resistenti alle infiltrazioni d’acqua ma non sono stati prodotti per lavorare immersi.
"! L’attuatore AV è progettato per installazione singola e doppia.
"! Il modello di attuatore con stelo telescopico (AV):
- agisce in spinta con carico max di 1200 N (2400 N per applicazione doppia);
- in caso di mancanza di alimentazione elettrica è dotato di un dispositivo di emergenza che permette l’eventuale apertura manuale
del portellone.
Attenzione: Impedire la caduta libera del portellone.
NOTE SULL’ATTUATORE
1. Attuatore:
- diametro esterno: 48 mm
- lunghezza (X) in posizione di chiusura: (377 + corsa) [mm]
- n° 2 staffe di fissaggio complete di n° 2 perni e di n° 2 coppiglie
- il brandeggio massimo consentito all’attuatore è di 125°
2. Cavo elettrico dell’ attuatore:
- l’attuatore viene fornito con 1,5 metri di cavo a quattro poli: 2 poli da 1,5 mm² di sezione (per l’alimentazione RIF. 2) e 2 poli da
0,5 mm² di sezione (per la logica di comando RIF. 8).
Avvertenza: qualora si rendesse necessario prolungare i 2 poli dell’alimentazione (RIF. 2) effettuare una giunzione utilizzando
cavo avente le caratteristiche riportate in tabella A.
3. Pulsante unipolare (o commutatore) a molla con zero centrale: (non fornito).
Attenzione: non usare pulsanti che permettano di aprire/chiudere l’attuatore senza la pressione costante del pulsante stesso.
4. Cavo di alimentazione batteria (non fornito): vedere tabella A.
Attenzione: la lunghezza dei cavi di alimentazione (2 + 4 rif. figg. 4-5) non deve eccedere 15 m (50 ft).
5. Fusibile (non fornito):
per l’installazione di un singolo attuatore si consiglia di proteggere la linea di alimentazione con fusibile ritardato da 10A per 24V
o 15A per 12V;
per l’installazione doppia si consiglia di proteggere la linea di alimentazione con fusibile ritardato da 15A per 24V o 30A per 12V;
6-7. Alimentazione (batteria o alimentatore) e comando:
- Per attuatori singoli a 12V: 12 VDC –10% +30% 10A minimo.
- Per attuatori singoli a 24V: 24V DC –10% +30% 5A minimo.
- Per attuatori doppi a 12V: 12 VDC –10% +30% 20A minimo.
- Per attuatori doppi a 24V: 24V DC –10% +30% 10A minimo.
Attenzione: i relé indicati in fig. 1-1a devono avere contatti da 20A (non forniti).
La sezione dei cavi per la logica di comando descritta in figg. 4-5 (RIF. 7) deve essere 1,5 mm2(non forniti).
INSTALLAZIONE (tabella B e figg. 2-3)
"! Utilizzare la relazione in tabella B per calcolare la forza massima (Fmax) richiesta all’attuatore, in relazione alle caratteristiche
dell’elemento mobile (portellone) e alle posizioni di fissaggio dell’attuatore stesso:
Attenzione: Carico max di lavoro (Fmax) per attuatore con stelo telescopico: 1200 N in spinta (2400 N per la applicazione doppia).
"! Fissare le staffe all’elemento mobile (portellone) e a un punto fisso di reazione (ad es. parete del vano motore).
"! Fissare l’attuatore alle staffe con i perni e le coppiglie fornite.
Attenzione: Per garantire la totale chiusura del portellone maggiorare la quota X di circa 10 mm (figg. 2-3).
Curare con particolare attenzione l’allineamento delle due staffe di fissaggio per evitare carichi trasversali.
Verificare che l’oscilllazione dell’attuatore rientri nei valori consentiti (max 125°).
Queste istruzioni contengono informazioni importanti per la sicurezza e devono essere
conse
g
nate al proprietario dell’imbarcazione
I
INFORMAZIONI GENERALI
GENERAL INFORMATION
INFORMATIONS GENERALES
GB
I
F
I n f o r m a z i o n i
I n f o r m a t i o n
I n f o r m a t i o n s
A
t t e n z i o n e
W a r n i n g
A t t e n t i o n
P e r i c o l o d i d a n n e g g i a m e n t o a t t u a t o r e / f i n e s t r a
D a n g e r o f d a m a g i n g o f a c t u a t o r / w i n d o w
D a n g e r d ' e n d o m m a g e r d u a c t i o n n e u r / f e n e t r e
P e r i c o l o d i d a n n o a l l e p e r s o n e c a u s a t o d a e l e t t r i c i t à
D a n g e r t o p e r s o n s d u e t o e l e c t r i c i t y
D a n g e r a u x p e r s o n n e s d u e s à l ' é l e c t r i c i t é
P e r i c o l o d i d a n n o a l l e p e r s o n e ( u r t o , s c h i a c c i a m e n t o … )
D a n g e r t o p e r s o n s ( i m p a c t , c r u s h i n g … )
D a n g e r a u x p e r s o n n e s ( h e u r t , é c r a s e m e n t … )

Doc. 82082-Z Rev. 04/07/07 3 / 8 Dis. 17088/l
AVVERTENZE PER LA SICUREZZA
"! Gli attuatori devono essere installati da personale qualificato.
"! Prima di procedere all’installazione verificare che:
-le prestazioni dell’attuatore siano adeguate all’applicazione prevista
-i profili e gli accessori del portellone siano adeguatamente dimensionati per le sollecitazioni prodotte dell’attuatore
-gli impianti elettrici esistenti siano conformi alle norme vigenti
- l’alimentazione elettrica abbia le caratteristiche indicate nei dati tecnici dell’attuatore
"! Verificare che il cavo di alimentazione non sia sollecitato durante il funzionamento.
"! Durante le operazioni di montaggio e smontaggio dell’attuatore adottare opportuni accorgimenti per prevenire chiusure accidentali
del portellone che possono determinare lesioni alle persone (urto - schiacciamento - taglio - cesoiamento).
"! Controllare visivamente almeno una volta all’anno che il cavo di alimentazione non sia danneggiato e non siano presenti altri segni
di usura.
"! Non effettuare interventi sull’attuatore, non aprire o smontare parti dell’attuatore; in caso di anomalie o cavo danneggiato rivolgersi
a “UCS – Ultraflex Control Systems srl”.
COLLEGAMENTI ELETTRICI (figg. 4-5)
"! Effettuare i collegamenti elettrici secondo gli schemi di fig. 4 o di fig. 5.
Attenzione: Verificare la correttezza dei collegamenti elettrici.
"! Collegare l’alimentazione elettrica e verificarne il corretto funzionamento.
SOLUZIONE DEI PROBLEMI
Problema: L’attuatore si richiude lentamente dopo avere aperto il portellone.
Solutione: Il peso del portellone è eccessivo per l’attuatore nella posizione in cui è montato. Spostare l’attuatore rispetto alle
cerniere del portellone in modo da sfruttare al massimo la forza (vedere Tab. B).
Problema: L’attuatore non apre.
Solutione: Il cablaggio elettrico è errato?
L’alimentazione è insufficiente?
Il fusibile è saltato?
Il peso del portellone è eccessivo per l’attuatore nella posizione in cui è montato. Spostare l’attuatore rispetto alle
cerniere del portellone in modo da sfruttare al massimo la forza (vedere Tab. B).
NOTA: l’acqua ferma sul portellone può aggiungere un carico non indifferente al peso proprio del portellone e impedire
una apertura che in una altra occasione, senza il carico acqua, era avvenuta regolarmente.
CONDIZIONI DI GARANZIA
La Società Ultraflex Control Systems S.r.l. garantisce che i suoi prodotti sono costruiti a regola d'arte e che sono privi di difetti di
fabbricazione e di materiali.
Questa garanzia è valida per un periodo di due anni, decorrenti dalla data di fabbricazione dei prodotti ed è limitata alla sostituzione o
riparazione gratuita del pezzo che, entro il termine suddetto, ci sarà restituito in porto franco e che rileveremo essere effettivamente
difettoso nei materiali o/e nella fabbricazione.
E' escluso dalla garanzia ogni e qualsiasi altro danno diretto o indiretto.
In particolare è escluso dalla garanzia e da qualsiasi nostra responsabilità (tranne quella di sostituire o riparare, nei termini e alle
condizioni suddette, i pezzi difettosi) il malfunzionamento dei nostri prodotti qualora il loro mancato o difettoso funzionamento sia
attribuibile ad un'errata installazione o ad un uso negligente o improprio.
CORRETTO SMALTIMENTO DEL PRODOTTO
Il corretto smaltimento delle apparecchiature obsolete contribuisce a prevenire possibili conseguenze negative sull'ambiente.
"! Please read very carefully these instructions before installation.
"! Improper use or incorrect installation may cause faulty operation, which could result in subsequent damage to property and/or
injury to persons.
"! For “not supply object” we recommend anyway to follow advised technical particulars.
"! The Manufacturer, UCS – Ultraflex Control Systems srl, does not accept responsabilities for wrong applications and/or installations
where installation instruction have’t been followed or non-original spare parts have been used.
PRODUCT DESCRIPTION AND RECOMMENDED UTILIZATION
"! AV electromechanical hatch lifting systems have been especially designed for marine pleasure boats and allow opening and closing
of engine compartments, hatchways, etc.
"! ANTI-DEFLAGRANCE: the AV hatch lifting AV 3012, AV 4512 and AV 6012 are designed to be installed in a room where the
anti-deflagrance certification is required (in accordance with requirements of the Standard for Ignition-Protection Test for
Marine Products, UL 1500, and the Standard for Protection Against Ignition of Surrounding Flammable Gases, UNI EN ISO
28846 / ISO 8846).
"! AV electromechanical hatch lifting systems are water resistant, but are not intended to be submerged.
"! AV electromechanical hatch lifting system has been projected for single and dual application.
"! The AV models with a non-locking actuating ram
- pushes with a force of 1200 N (265 pounds); 2400 N (530 pounds) for dual application.
- allows the hatch to be manually open in case of power failure.
Warning: do not use the AV (non-locking) actuators on high performance boats or any other application where the hatch could be
blown open while underway. Doing so could cause serious damage to the boat and /or injury to persons.
"! The AVL models with a locking actuating ram
- pushes with a force of 1200 N (265 pounds); 2400 N (530 pounds) for dual application
- pull with a force of 650 N (143 pounds); 1300 N (286 pounds) for dual application
The following instructions contain important safety information and must be forwarded to the
owner of the boat
GB

Doc. 82082-Z Rev. 04/07/07 4 / 8 Dis. 17088/l
Warning: applications using the AVL model require an access plate or port to allow for a swift release of the actuator from the
mounting bracket in the event of a power failure or other emergency need to gain access to the engine room or area
confined by the use of the hatch actuator.
NOTES ON THE ACTUATOR
1. Actuator:
- Outside diameter: 48 mm
- Length (X) in closed position: (377 + stroke) [mm] (14.7/8” + stroke)
- n° 2 mounting brackets and pins.
- the rear bracket allows a 125° oscillation range of the actuator.
2. Actuator voltage supply cable:
- the actuator is supplied with 1,5 m (5 ft) of four-core cable: 2 poles with a section of 1,5 mm² (for voltage supply REF.2) and 2
poles with a section of 0,5 mm² (for scheme of connection REF. 8).
Warning: in case the 2 poles of the voltage supply cable (REF.2 ) need to be extended, do not substitute the existing harness.
Make a junction using a cable having the same features as shown in table A.
3. 3 position change-over centre off momentary 2 sides: (not supplied).
Warning: use a momentary switch only! Do not use a switch that allows the operator to lower or raise the hatch actuator
without constantly depressing the switch.
4. Battery voltage supply cable (not supplied): see table A.
Warning: the length of the voltage supply cables (2 + 4 referred to fig. 4 and 5) must not exceed 15 m (50 ft).
5. Delayed fuse (not supplied):
for the installation of single actuator is suggested to protect the wiring harness with a 10A delayed fuse for the 24V actuator
and 15A for the 12V; for dual installation it is suggested to protect the wiring harness with a 15A delayed fuse for the 24V or 30A
for 12V
6-7. Voltage supply (battery or power supply) and :
- For 12V single actuator: 12 VDC –10% +30% 10A minimum.
- For 24V single actuator: 24V DC –10% +30% 5A minimum.
- For 12V dual actuator: 12 VDC –10% +30% 20A minimum.
- For 24V dual actuator: 24V DC –10% +30% 10A minimum.
Warning: the relays contacts in fig. 4-5 must withstand 20A DC continuous current (not supplied).
The wire cross-section for the command electrical junction described in fig. 4 and 5 (REF. 7) must be 1,5 mm2(not
supplied).
INSTALLATION (table B and fig. 2-3)
"! The equation in table B identifies the maximum strength (in Newton) required to raise the hatch lifter, given the features of the
hatch and the position of the fixing brackets:
Warning: maximun load (Fmax) for actuator with the non-locking ram is: 1200 N (265 lbs) under thrust (2400 N, 530 lbs, for dual
installations).
Maximun load (Fmax) for actuator with the locking ram is: 1200 N (265 lbs) under thrust and 650 N (143 lbs.) under
traction (2400 N, 530 lbs, under thrust and 1300 N, 286 lbs, under traction, for dual installations).
"! Attach the connector and the rear joint respectively to the moving element (hatch) and to a fixed point of reaction (for example the
engine room wall).
"! Attach the Electromechanical hatch lifter to the brackets with the pins supplied.
Warning: to guarantee the total closing of the hatch increase the X length for about 10 mm (fig. 2-3).
Make sure the two fixing brackets are lined up to avoid transversal load.
Verify the oscillation range of the actuator is within the allowed values (max 125°).
SAFETY NOTICES
"! The actuator shall be installed by qualified technicians.
"! Prior to installation make sure that:
- the actuator performances comply with the estimated application
- hatch profiles and fittings are suitable to the stresses caused by the actuator
- the existing electric systems comply with the regulations in force
-power supply features are those indicated in the actuator specifications
"! When lowering the hatch actuator, particularly the AVL hatch actuator, make sure that there are no obstructions (power cords, etc.)
and that there is no one near the hatch that could be injured while the hatch is being closed.
"! When assembling and disassembling the actuator, take proper precautions to avoid accidental closing of the window which might
cause injuries to people (impact-squashing-cutting-shearing).
"! At least once a year check at sight for damages or wear in the supply cable.
"! When installing the AVL hatch lifter it is important that the actuator is at the bottom of its stroke when the hatch is fully closed. If not,
the actuator will continue to pull with a force of 143 pounds (or 286 pounds for dual application), which may cause damage to the
boat.
"! The AV and AVL hatch actuators are not intended for use on companionway doors or any other areas where persons may be
obstructed from a rapid evacuation from the vessel for any reason.
"! Do not carry out any intervention on the actuator, do not remove or disassemble parts of the actuator; in case of malfunction or
damaged cable contact “UCS Ultraflex Control Systems srl”.
ELECTRICAL CONNECTION (fig. 4- 5)
"! Connect the voltage supply following the diagrams on fig. 4-5.
Warning: Check the accuracy and solidity of all electrical connections.
"! Connect the power supply and check the operation.

Doc. 82082-Z Rev. 04/07/07 5 / 8 Dis. 17088/l
TROUBLE SHOOTING
Problem: Hatch actuator ram drifts down slowly after the hatch is opened.
Solution: Hatch exceeds the maximum lifting capacity of the hatch actuator. Reposition hatch actuator further away from hinge
point for more efficient installation (see Tab. B).
Problem: Hatch will not open.
Solution: Wiring connections are incorrect.
Power supply in insufficient?
In line fuse is blown.
Hatch exceeds lifting capacity of the hatch actuator. See the above solution.
Note: Water logged cushions add significant weight to the hatch and may stop the hatch actuator from opening a hatch
that opened previously.
GUARANTEE CONDITIONS AND EXCLUSIONS
Our products are guaranteed, for a period of two years from the manufacture date, against defects in material and workmanship.
Alleged defective products returned, freight prepaid, within the above said term, will be repaired or replaced at our option, free of
charge, if found effectively below our quality standards.
This guarantee does not cover other claims for direct or indirect damage.
In particular, we decline liability and exclude guarantee (except for what stated above) if improper installation or misuse should
result in the failure of our products.
This guarantee does not cover our products if they are used for racing purposes.
CORRECT DISPOSAL OF THIS PRODUCT
The correct disposal of your old appliance will help prevent potential negative consequences for the environment.
"! Lire attentivement ces instructions avant de procéder à l’installation.
"! Une application incorrecte ou une installation impropre peuvent empêcher le bon fonctionnement du système et provoquer ainsi des
dommages à des choses et/ou à des personnes.
"! Pour les objets “pas fournis” nous recommandons en tou cas de respectére les caractéristiques techniques conseillées.
"! La Société productrice, UCS – Ultraflex Control Systems srl, décline toute responsabilité concernant les installations dans
lesquelles ces instructions n’ont pas été respecté ou des pièces de rechange non originales auraient été utilisées.
DESCRIPTION DU PRODUIT ET UTILISATION RECOMMANDEE
"! Les vérins AV sont été conçus pour une utilisation dans la navigation de plaisance pour l’ouverture et la fermeture des sabords de
la salle moteur, des coquerons, des écoutilles, etc.
"! ANTIDEFLAGRANCE : les vérins AV 3012, AV 4512 et AV 6012 il sont conformes aux normatives UL 1500 et UNI EN ISO
28846 / ISO 8846 (protection contre l'allumage gaz inflammables dans le milieu environnant).
"! Les vérins AV sont résistants aux infiltrations d'eau mais ils n'ont pas été produits pour travailler immergés.
"! Le vérin AV est conçu pour installation singulière ou en couple.
"! Le modèle d’actionneur avec tige télescopique (AV)
- agit par poussée avec un charge max. de 1200 N (2400 N en cas d’installation en couple);
- il est équipé d’un dispositif de secours qui permet une éventuelle ouverture manuelle du sabord en cas de panne électrique.
Attention: empêcher le sabord de retomber librement.
"! Le modèle avec tige non télescopique (AV)
-agit par traction avec une charge max. de 650 N et par poussée avec une charge max. de 1200 N (1300 N par traction et 2400 par
poussée en cas d’application en couple).
Attention: pour le modèle avec tige non télescopique la présence d’une fente sur le sabord est nécessaire, afin de pouvoir décrocher
rapidement l’actionneur du sabord en cas d’urgence (panne électrique).
NOTES SUR L’ACTIONNEUR
1. Actionneur :
- Diamètre externe: 48 mm
- Longueur X (tige totalement à l’intérieur du vérin): (377 + corse du tige) [mm]
- n° 2 étriers de fixage (séparés de l’actionneur), ainsi que leurs chevilles et goupilles.
- l’angle max. de rotation que l’actionneur peut effectuer est de 125°.
2. Câble électrique de l’actionneur:
- le vérin est fourni avec 1,5 mètres de cable avec 4 conducteurs: 2 avec superficie de coupe de 1,5 mm² (pour l’alimentation
REF. 2) et 2 avec superficie de 0.5 mm² (pour le branchement en couple REF. 8).
Attention: dans le cas où il serait nécessaire allonger le câble, ne pas remplacer le câble existant mais effectuer une connexion sur
les deux conducteurs d’alimentation (REF. 2) en suivant les indications dont au tableau A.
3. Bouton ou commutateur unipolaire avec contact instantanéen et off centrale : (pas fourni).
Attention: utilisez seulement un bouton momentané! N'utilisez pas un bouton qui permet à l'opérateur de baisser ou élever
l'actionneur du sabord sans déprimer constamment le bouton.
4. Câble d’alimentation batterie : (pas fourni): voir tableau A.
Attention: la longueur des câbles d’alimentation (2 + 4 réf. fig. 4-5) ne doit pas dépasser 15 mètres (50 ft)
5. Fusible (pas fourni):
pour la mise en service d’un seul actionneur on conseille de protéger la ligne d’alimentation par un fusible retardé de 10 A (type
24 V) ou de 15 A (type 12 V); en cas d’installation en couple on conseille de protéger la ligne d’alimentation par un fusible retardé
de 15 A (type 24 V) ou de 30 A (type 12 V).
Ces instructions contiennent des informations importantes pour la sécurité et doivent être
remises au
p
ro
p
riétaire de l’embarcation.
F

Doc. 82082-Z Rev. 04/07/07 6 / 8 Dis. 17088/l
6-7. Alimentation (batterie ou alimentateur):
- En cas d’installation d’un seul actionneur 12 V: 12 Vdc -10% +30%; 10 A minimum.
- En cas d’installation d’un seul actionneur 24 V: 24 Vdc –10% +30%; 5 A minimum.
- En cas d’installation d’une couple d’actionneur 12 V: 12 Vdc -10% +30%; 20 A minimum.
- En cas d’installation d’une couple d’actionneur 24 V: 24 Vdc –10% +30%; 10 A minimum.
Attention: les contacts des relais (pas fournis) dont au schéma fig. 4-5 doivent être de 20 A.
La superficie de coupe des câbles (pas fournis) utilisés pour le branchement de commandement (REF. 7 fig. 4-5) doit être
1.5 mm2
INSTALLATION (tableau B et fig. 2-3)
"! Utiliser l’équation en tableau B au but de calculer l’effort maxime du vérin en rapport aux caracthéristiques du sabord et aux
positions de travail du vérin.
Attention: charge max. de travail pour actionneur avec tige télescopique: 1200 N en poussée (2400 N en cas d’installation en
couple).
Charge max. de travail pour actionneur avec tige non télescopique: 1200 N en poussée et 650 N en traction (2400 N en
poussée et 1300 N en traction en cas d’installation en couple).
"! Fixer les étriers au sabord et à un point fixe de réaction (par ex. le mur de la salle moteur).
"! Fixer l’actionneur aux étrieres avec les chevilles et goupilles livrées.
Attention: pour garantir la fermeture totale du sabord, ajouter 10 mm au chiffre X (fig.2 et 3).
Il faut avoir une attention particulière à l’alignement des deux étriers pour éviter tout charge transversal.
Vérifier que l’oscillation de l’actionneur rentre dans le cadre des valeurs consenties (max 125°).
AVERTISSEMENTS DE SÉCURITÉ
"! L’installation doit être faite par personnel qualifié.
"! Avant de procéder au montage, contrôler que:
- les performances de l’actionneur sont bien conformes à l’application prévue
- les profils et les accessoires du sabord sont correctement dimensionnés pour supporter les contraintes produites par l’actionneur
- les installations électriques existantes sont bien conformes aux normes en vigueur
- les caractéristiques de l’alimentation électrique correspondent à celles qui sont indiquées dans les données techniques de
l’actionneur.
"! Vérifier que le câble d'alimentation ne soit pas sollicité pendant le fonctionnement.
"! Lors des opérations de montage et démontage de l’actionneur, adopter des mesures adéquates pour prévenir toute fermeture
accidentelle du sabord pouvant provoquer des lésions aux personnes (heurt - écrasement - coupure - cisaillement).
"! Contrôler visuellement, au moins une fois par an, que le câble d’alimentation n’est pas endommagé et qu’il ne présente aucun autre
signe d’usure.
"! Ne pas intervenir sur l’actionneur ni l’ouvrir ou en démonter des parties; en cas d’anomalies ou câble endommagé, s’adresser à
«UCS – Ultraflex Control Systems srl».
CONNEXIONS ELECTRIQUES (fig. 4-5)
"! Effectuer le branchement électrique en suivant les schémas de fig. 4 ou de fig. 5.
Attention: vérifier que les connexions électriques sont correctement effectuées.
"! Brancher l’alimentation électrique et vérifier le fonctionnement.
SOLUTION DES PROBLÈMES
Problème: Le vérin se referme lentement après avoir ouvert le sabord.
Solution: Le poids du sabord est excessif pour le vérin dans la position dans laquelle il est monté. Déplacer le vérin respecte aux
charnières du sabord de façon à exploiter la force au maximum (voir Tab. B).
Problème: Le vérin n’ouvre pas.
Solution: Est-ce que le branchement électrique est erré?
Est-ce que l'alimentation électrique est insuffisante?
Est-ce que le fusible est sauté?
Le poids du sabord est excessif pour le vérin dans la position dans laquelle il est monté. Déplacer le vérin respecte aux
charnières du sabord de façon à exploiter la force au maximum (voir Tab. B).
NOTE: l'eau arrêté sur le sabord peut ajouter une charge pas indifférente au propre poids du sabord et empêcher une
ouverture que dans une autre occasion, sans la charge eau était régulièrement arrivée.
CONDITIONS DE GARANTIE
La Société Ultraflex Control Systems S.r.l. garantit que ses produits sont fabriqués dans les règles de l’art et qu’ils sont exempts de
vices de fabrication et de matériau. Cette garantie est valable pendant une période de deux ans à partir de la date de fabrication
des produits. Elle est limitée au remplacement ou à la réparation gratuite de la pièce défectueuse qui, dans le délai susmentionné,
doit nous être retournée franco de port pour la vérification de l’effective présence de vices de matériau ou/et de fabrication.
Tout autre dommage direct ou indirect est exclu de la garantie.
En particulier, la garantie ne s’applique pas, et nous déclinons toute responsabilité (sauf le remplacement ou la réparation, dans les
délais et aux conditions indiqués, des pièces défectueuses), en cas de fonctionnement incorrect de nos produits quand leur
fonctionnement manqué ou défectueux est attribuable à une installation incorrecte ou à une utilisation négligente ou incorrecte.
COMMENT ELIMINER CE PRODUIT
Une élimination conforme aux instructions aidera à réduire les conséquences négatives et risques éventuels pour l'environnement.

Doc. 82082-Z Rev. 04/07/07 7 / 8 Dis. 17088/l
10% di caduta di tensione massima – 10% max voltage drop – réduction de tension maxime du 10%
LUNGHEZZA DEI CONDUTTORI DALLA SORGENTE ALL’UTILIZZATORE E RITORNO.
CONDUCTORS LENGTH FROM SOURCE OF CURRENT TO DEVICE AND BACK TO SOURCE.
LONGUEUR DES CABLES DE LA SOURCE AU VERIN ET RETOUR.
3m 4.5m 6m 7.5m 9m 12m 15m 18m 21m 24m 27m 30m
CORRENTE TOTALE
NEL CIRCUITO.
CIRCUIT TOTAL
CURRENT.
COURANT TOTAL DE
CIRCUIT. 10ft 15ft 20ft 25ft 30ft 40ft 50ft 60ft 70ft 80ft 90 ft 100ft
10A (AV 12 Vdc) mm2/AWG 1.5/16 1.5/16 2.5/14 2.5/14 2.5/14 2.5/14 4.0/12 4.0/12 6.0/10 6.0/10 6.0/10 6.0/10
5A (AV 24 Vdc) mm2/AWG 1.5/16 1.5/16 1.5/16 1.5/16 2.5/14 2.5/14 2.5/14 2.5/14 4.0/12 4.0/12 4.0/12 4.0/12
Valori di K per rapporto c/a compreso tra 0 e 0.5 (per c/a > 0.5 utilizzare K=1)
Values of K if the ratio c/a is included between 0 and 0.5 ( if c/a > 0.5 use K=1)
Valeurs du coefficient K en cas de rapport c/a compris entre 0 et 0.5 (si c/a > 0.5 utiliser K=1)
b/d
0.1 0.15 0.2 0.3 0.4 0.5 1.0 2.0 3.0 4.0 5.0 6.0 7.0 8.0 9.0 10.0
0.0 1.09 1.14 1.17 1.24 1.30 1.34 1.41 1.34 1.26 1.21 1.17 1.15 1.13 1.11 1.10 1.09
0.1 1.00 1.01 1.04 1.09 1.13 1.16 1.23 1.16 1.10 1.06 1.04 1.02 1.01 1.00 1.00 1.00
0.2 1.00 1.00 1.00 1.03 1.06 1.10 1.16 1.10 1.04 1.01 1.00 1.00 1.00 1.00 1.00 1.00
0.3 1.00 1.00 1.00 1.00 1.03 1.06 1.12 1.06 1.01 1.00 1.00 1.00 1.00 1.00 1.00 1.00
0.4 1.00 1.00 1.00 1.00 1.00 1.03 1.10 1.03 1.00 1.00 1.00 1.00 1.00 1.00 1.00 1.00
c/a
0.5 1.00 1.00 1.00 1.00 1.00 1.01 1.08 1.01 1.00 1.00 1.00 1.00 1.00 1.00 1.00 1.00
Fmax = forza massima necessaria (in Newton)
Fmax = maximum strenght (in Newton)
Fmax = majeur force (en Newton)
P= peso del portellone (in Newton)
P= weight of the hatch (in Newton)
P= poids du sabord (en Newton)
TAB EL LA “A” : SEZIONE CONDUTTORI 2-4 (figg. 4-5)
TAB LE “A” : 2- 4 WIRE S IZ E (f ig . 4- 5)
TAB LE AU “A” : S UP ER FI CI E DE C OU PE P OR C ÂB LE 2 -4 ( fi g. 4 -5 )
GB
I
F
TAB EL LA “ B” : C ALC OL O D EL LA F OR ZA N EC ES SAR IA ( Fm ax )
TAB LE “ B”: CAL CU LAT IO N OF T HE N EC ES SAR Y ST RE NG HT ( Fm ax )
TAB LE AU “B”: CAL CU LE R LA FO RC E NÉ CE SS AIR E (F ma x)
GB
I
F
Kx
a
X
x
b
L
x
2
P
(N)Fmax #
fig. 2
fig. 3

Doc. 82082-Z Rev. 04/07/07 8 / 8 Dis. 17088/l
SCHEMA DI COLLEGAMENTO ELETTRICO CONSIGLIATO PER UN ATTUATORE
ELECTRICAL CONNECTION SUGGESTED FOR SINGLE HATCH LIFTING SYSTEM
BRANCHEMENT ELECTRIQUE CONSEILLÉ AVEC UN SEUL ACTIONNEUR
GB
I
F
SCHEMA DI COLLEGAMENTO ELETTRICO CONSIGLIATO PER DUE ATTUATORI
ELECTRICAL CONNECTION SUGGESTED FOR DUAL HATCH LIFTING SYSTEM
BRANCHEMENT ÉLECTRIQUE CONSEILLÉ AVEC UN COUPLE D’ACTIONNEUR
GB
I
F
QUESTI COLLEGAMENTI POSSONO
ESSERE ESEGUITI CON LA "RELE'
BOX UCS".
THESE CONNECTIONS CAN BE ALL
EXECUTED USING A "UCS RELAIS
BOX".
CES CONNEXIONS PEUVENT ÊTRE
EXÉCUTÉS PAR LA "RELE BOX
UCS".
RB12 - art. 40738Y
RB24 - art. 40742C
fig. 5
A
TTENZIONE:
SE NON IMPIEGATA LA RELE' BOX UCS:
COLLEGARE I FILI ROSSO E BLU COME
INDICATO.
SE IMPIEGATA LA RELE' BOX: VEDERE IL
MANUALE D'USO DELLA STESSA.
WARNING:
IF NOT EMPLOYED THE "UCS RELAIS BOX",
BLUE AND RED WIRES MUST BE CONNECTED
A
S SHOWN.
IF YOU EMPLOY THE RELAIS BOX: SEE THE
USER MANUAL OF THE SAME ONE.
A
TTENTION:
SI LA "RELE' BOX UCS" NE PAS EMPLOYÉE: LES
FILS BLEUS ET ROUGES DOIVENT ÊTRE RELIÉ
COMME MONTRÉS.
SI LA RELE BOX EST EMPLOYÉE:
VOIR LE MANUEL D'INSTRUCTION DE LA MÊME.
PULSANTE UNIPOLARE O COMMUTATORE A
MOLLA CON ZERO CENTRALE
3 POSITION CHANGE-OVER CENTRE OFF
MOMENTARY 2 SIDES
BOUTON OU COMMUTATEUR UNIPOLAIRE
A
VEC CONTACT INSTANTANÉ ET OFF
CENTRAL
PULSANTE UNIPOLARE O
COMMUTATORE A MOLLA CON ZERO
CENTRALE
3 POSITION CHANGE-OVER CENTRE
OFF MOMENTARY 2 SIDES
BOUTON OU COMMUTATEUR
UNIPOLAIRE AVEC CONTACT
INSTANTANÉ ET OFF CENTRAL
L'ATTUATORE VIENE FORNITO
CON I FILI ROSSO E BLU GIA'
COLLEGATI.
THE HATCH LIFTER IS
PROVIDED WITH RED AND BLUE
WIRES CONNECTED.
LES VERINS SERA FOURNI
A
VEC LES FILS ROUGE ET BLEU
DEJA RELIES ENTRE EUX.
QUESTI COLLEGAMENTI POSSONO
ESSERE ESEGUITI CON LA "RELE'
BOX UCS".
THESE CONNECTIONS CAN BE ALL
EXECUTED USING A "UCS RELAIS
BOX".
CES CONNEXIONS PEUVENT ÊTRE
EXÉCUTÉS PAR LA "RELE BOX UCS".
RB12 - art. 40738Y
RB24 - art. 40742C
fig. 4
This manual suits for next models
11
Table of contents
Languages:
Other UCS Lifting System manuals
Popular Lifting System manuals by other brands

Dhollandia
Dhollandia DH-RP.10 installation manual

Leviat
Leviat HALFEN KKT-A Assembly instructions

Sumake
Sumake SA-22090 Operation manual

LKDS
LKDS LU 7.2-R Operation manual

Mondial Designs Limited
Mondial Designs Limited GP-9 Installation, operation & maintenance manual

probst
probst KSZ-300-UNI operating instructions

Corghi
Corghi Erco X5000 CT LT PT2 FAST Operator's manual

EZ-ACCESS
EZ-ACCESS Hanging Partition instructions

Handicare
Handicare SystemRomedic RiseAtlas625M manual

RITE-HITE
RITE-HITE LRL installation manual

BraunAbility
BraunAbility GA Series Service manual

NOVACARE
NOVACARE ProLift Series Instructions for use