Erchonia EMERALD SHL Manual
Operation & Maintenance Manual
Read this entire booklet before using your Erchonia® EMERALD Laser

READ THIS FIRST
To ensure proper use, and to achieve your best results, it is important that you read and understand the instructions,
warnings, precautions and safety information in this booklet before using your Erchonia EMERALD Laser for the first
time.
This symbol appears next to information about possible safety risks.
Questions? Our Erchonia Customer Care representatives are available to help. Contact us at:
Erchonia Customer Care
Phone: 321-473-1251
Email: info@erchonia.com
Or visit erchonia.com
Erchonia Europe Customer Care
Phone: +44 (0)1491 821135
Email: info@erchoniaeurope.com
Or visit erchonia.com
ATTENTION: By purchasing this Erchonia device, you, the licensed health care professional, acknowledge that you are
solely responsibly to ensure: (i) that your use of this device is within the scope of your professional practice; and (ii) that
you use the device in accordance with all applicable laws, rules, and regulations, including without limitation, any
regulations promulgated by any state medical or professional board applicable to your practice.
We recommend you periodically contact Erchonia Corporation to determine if additional product information updates are
available.

Table of Contents
SECTION 1 GENERAL INFORMATION ...............................................................................................................................................1
ERCHONIA® EMERALD TECHNOLOGY BACKGROUND ..........................................................................................................1
WHAT IS ERCHONIA® EMERALD? ................................................................................................................................................1
HOW DOES ERCHONIA® EMERALD WORK? ..............................................................................................................................1
PACKAGE CONTENTS ...................................................................................................................................................................... 2
SYMBOLS USED ON THE EQUIPMENT .........................................................................................................................................3
SAFETY INFORMATION ...................................................................................................................................................................4
NOTIFICATION OF ADVERSE EVENTS ......................................................................................................................................... 6
EMERALD LASER INDICATIONS FOR USE ..................................................................................................................................6
EMERALD LASER SPECIFICATIONS.............................................................................................................................................. 6
TECHNICAL INFORMATION............................................................................................................................................................ 6
SERVICE AND REPAIR......................................................................................................................................................................7
SECTION 2 PRODUCT OVERVIEW......................................................................................................................................................8
NOMENCLATURE .............................................................................................................................................................................. 8
PROTECTIVE EYEWEAR ................................................................................................................................................................14
SECTION 3 ASSEMBLY .......................................................................................................................................................................15
SECTION 4 ERCHONIA® EMERALD OPERATION .........................................................................................................................18
WHEEL LOCKS ................................................................................................................................................................................. 18
EMERALD TOUCH SCREEN...........................................................................................................................................................20
INSTRUCTIONS FOR USE ...............................................................................................................................................................22
CREDIT & DEVICE INFORMATION SCREEN..............................................................................................................................24
CHANGE PASSCODE .......................................................................................................................................................................25
PROTOCOL AUDIO BEEP ...............................................................................................................................................................25
HOW DO CREDITS WORK? ............................................................................................................................................................ 26
TO ADD CREDITS ............................................................................................................................................................................26
LABELS USED ON DEVICE ............................................................................................................................................................27
SECTION 5 PROFESSIONAL USE INSTRUCTIONS .........................................................................................................................30
APPLICATION/ADMINISTRATION ...............................................................................................................................................30
ERCHONIA® EMERALD PROTOCOL ........................................................................................................................................... 30
ERCHONIA ® EMERALD PATIENT QUALIFICATION CHECKLIST ........................................................................................ 30
MEASUREMENT PROTOCOL.........................................................................................................................................................34
SECTION 6 MAINTENANCE & WARRANTY INFORMATION.......................................................................................................34
MAINTENANCE AND CLEANING................................................................................................................................................. 34
WARRANTY ......................................................................................................................................................................................36
CONTACT US ....................................................................................................................................................................................36
TROUBLESHOOTING...........................................................................................................................................................................37
GUIDANCE AND MANUFACTURER’S DECLARATION ELECTROMAGNETIC EMISSIONS & IMMUNITY.........................37
SPECIFICATIONS.................................................................................................................................................................................. 40

Page | 1
SECTION 1 GENERAL INFORMATION
This Erchonia® Emerald Operator's Guide is designed to take you through set-up and proper use of your Erchonia®
Emerald (Model# SHL) device. It will cover Assembly, Proper Placement of Diodes, Treatment Protocol, Cautions and
Warnings.
It is important that you read and understand all of the information contained in this operator’s guide before performing
any treatments with the Erchonia® Emerald device. Please thoroughly read the CAUTION and WARNING sections. If
you have any questions, contact our Erchonia Customer Care representatives.
ERCHONIA® EMERALD TECHNOLOGY BACKGROUND
WHAT IS ERCHONIA® EMERALD?
The Erchonia® Emerald (Model# SHL) is indicated for use as a non-invasive dermatological aesthetic treatment for the
reduction of body circumference in individuals with a Body Mass Index (BMI) of up to 40 kg/m².
The Erchonia® Emerald is a new non-invasive body slimming procedure designed to slim the body without surgery, pain
or needles. The Erchonia® Emerald allows patients to continue daily activity without interruption.
Clinical data on safety and effectiveness has only been generated for waist, hips, thighs, and upper abdomen from the
clinical trials conducted on the predicate device(s) with which substantial equivalence has been claimed (the Erchonia®
SHL Laser and the Erchonia® Zerona 2.0). Presently there does not exist clinical data on safety or effectiveness for other
parts of the body.
Laser devices are typically constructed to emit a “spot” of light. The Erchonia® Emerald utilizes internal mechanics that
collect the light emitted from the laser diode and process it through a proprietary patented lens, and then redirects the
beam with a line refractor. This process produces a line 7 mm wide with a length of approx. 152 mm at 6 in (15.2 cm)
away (rounded up to .0001 joules per cm² / second). With the treatment time being 30 minutes, the total fluence of all
lasers is 288J and the total treatment area of all lasers is 5161.28cm².
The Erchonia® Emerald is a floor model, electromechanical device. The device is designed for the physician to easily
maneuver and position the laser heads around the area with the greatest collection of fatty material. The laser head
assembly is attached to the main arm that is manually raised and lowered. The user interface is a touch screen which
communicates with the PCB to initiate, stop or pause the energy flow to the diodes. The diodes can only be on or off;
there is no user interface that allows the end user to alter the diode output. The protocol software is factory set and cannot
be altered by the end user.
HOW DOES ERCHONIA® EMERALD WORK?
The Erchonia® Emerald works by using a patented and clinically proven low-level laser technology. The Erchonia®
Emerald emulsifies fat within the adipose tissue which is then released into the interstitial space. The excess fat is then
passed through the body during its normal course of detoxification.

Page | 2
PACKAGE CONTENTS
Erchonia® EMERALD is shipped in one large packing box with:
•Erchonia® EMERALD device
-SHL device base
-SHL laser head assembly
Device Accessories (plastic bag)
-Laser safety glasses (1) Patient & (1) Operator
-Tape measure
-Manual
-Power cord
-Large Screws (2)
-1/8 (Large) Allen Driver
-Small Screws (4)
-1/16 (Small) Allen Driver
-Wire Cover Plate
-Arm Cover Overlay
When you receive the shipment, carefully inspect the container for damage. If the shipping container or cushion material
is damaged, keep it until the contents have been checked for completeness and the device has been checked for proper
function. If the contents are incomplete or if there is mechanical damage, contact Erchonia Corporation. If the shipping
container is damaged, also notify the carrier.
Page | 3
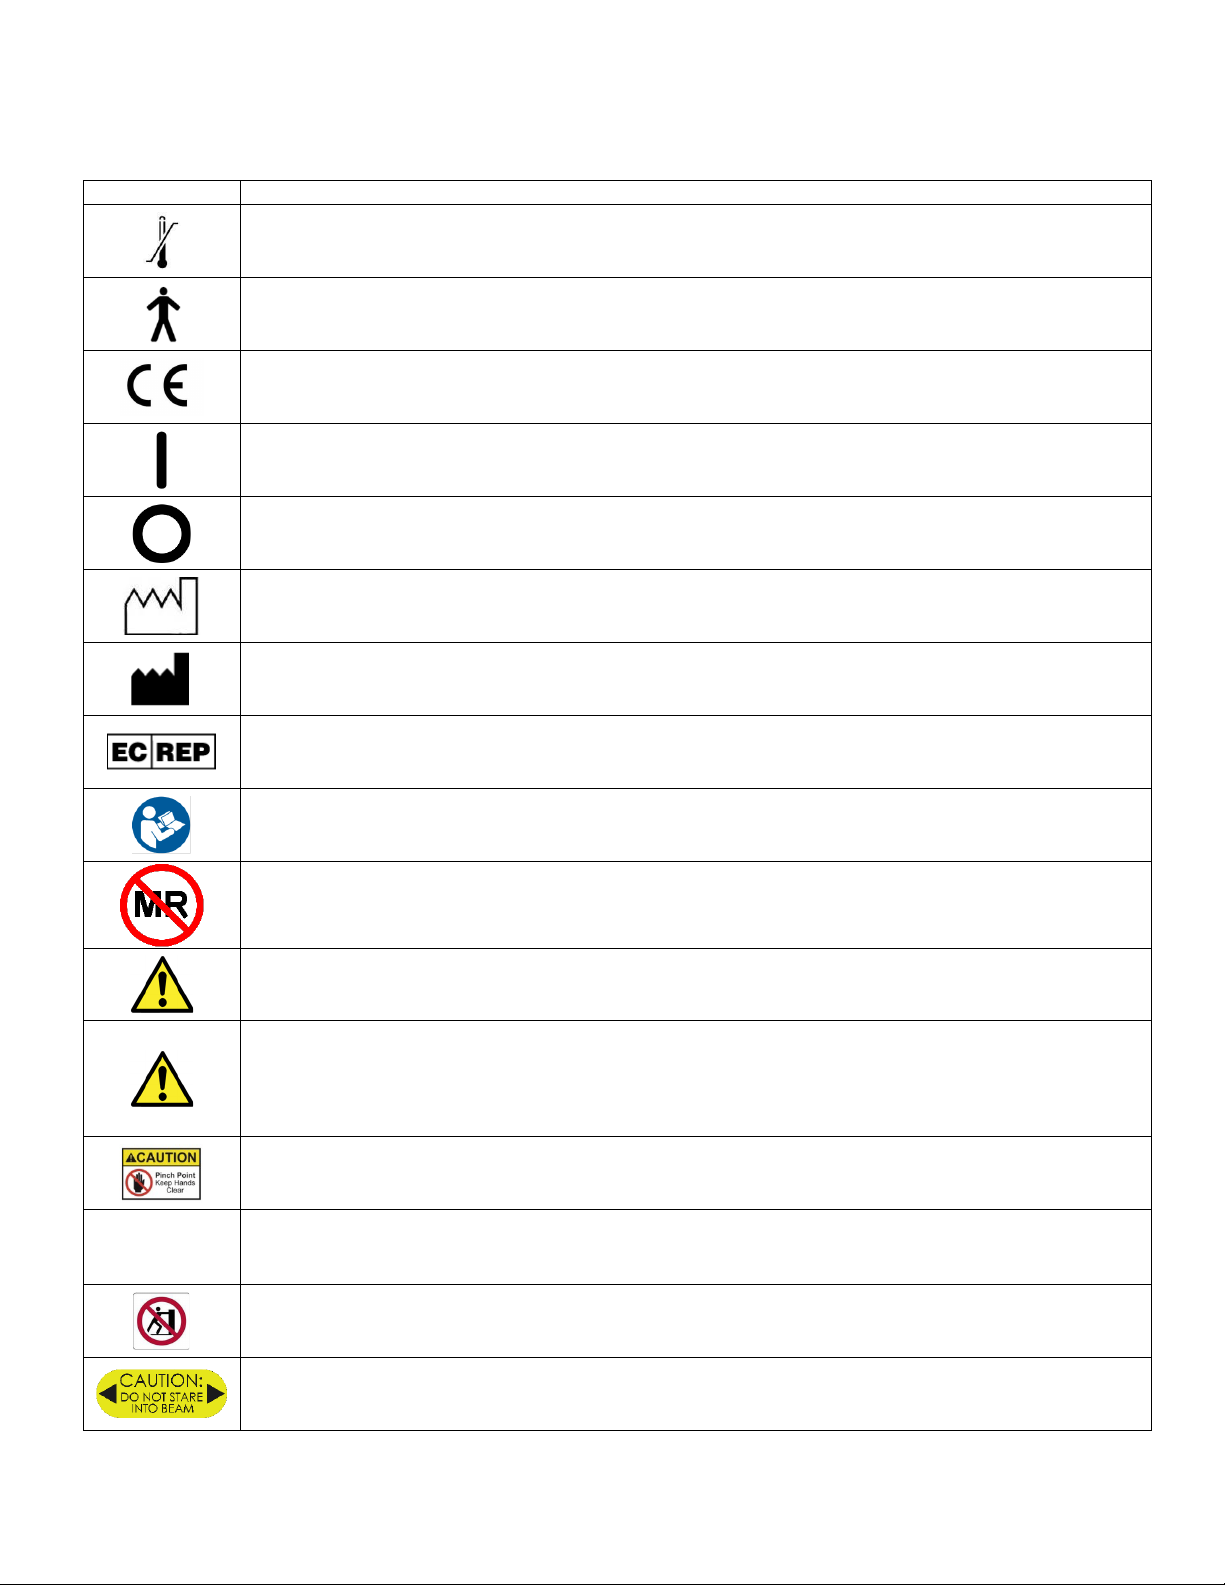
SYMBOLS USED ON THE EQUIPMENT
Any or all of the following symbols may be used in this manual or on this equipment:
SYMBOL
DESCRIPTION
Temperature Limitation
Type B patient connection - applied parts that are generally not conductive and can be immediately released
from the patient.
Conformité Européenne - Complies with EMC 2014/30/EU and LVD 2014/35/EU
Power ON
Power OFF
Date of Manufacture
Manufacturer
Authorized representative in the European Community.
Refer to Operating Instructions/ Follow Instructions for Use
Magnetic Resonance Unsafe – device should not enter an MRI scanner room
Warning alerts you about a situation which, if not avoided, could result in death or serious injury. It may also
describe potential serious adverse reactions and safety hazards.
Caution is used for the statement of a hazard alert that warns you of a potentially hazardous situation which, if
not avoided, may result in minor or moderate injury to the user or patient or damage to the equipment or other
property. It may also be used to alert against unsafe practices. This includes the special care necessary for the
safe and effective use of the device and the care necessary to avoid damage to a device that may occur as a
result of use or misuse.
Pinch point-keep hands clear
Rx
Only
Prescription only (In the US, Federal law restricts this device to sale by or on the order of a physician)
Do not Push-No pushing in this direction
Do not stare into laser beam
Page | 4
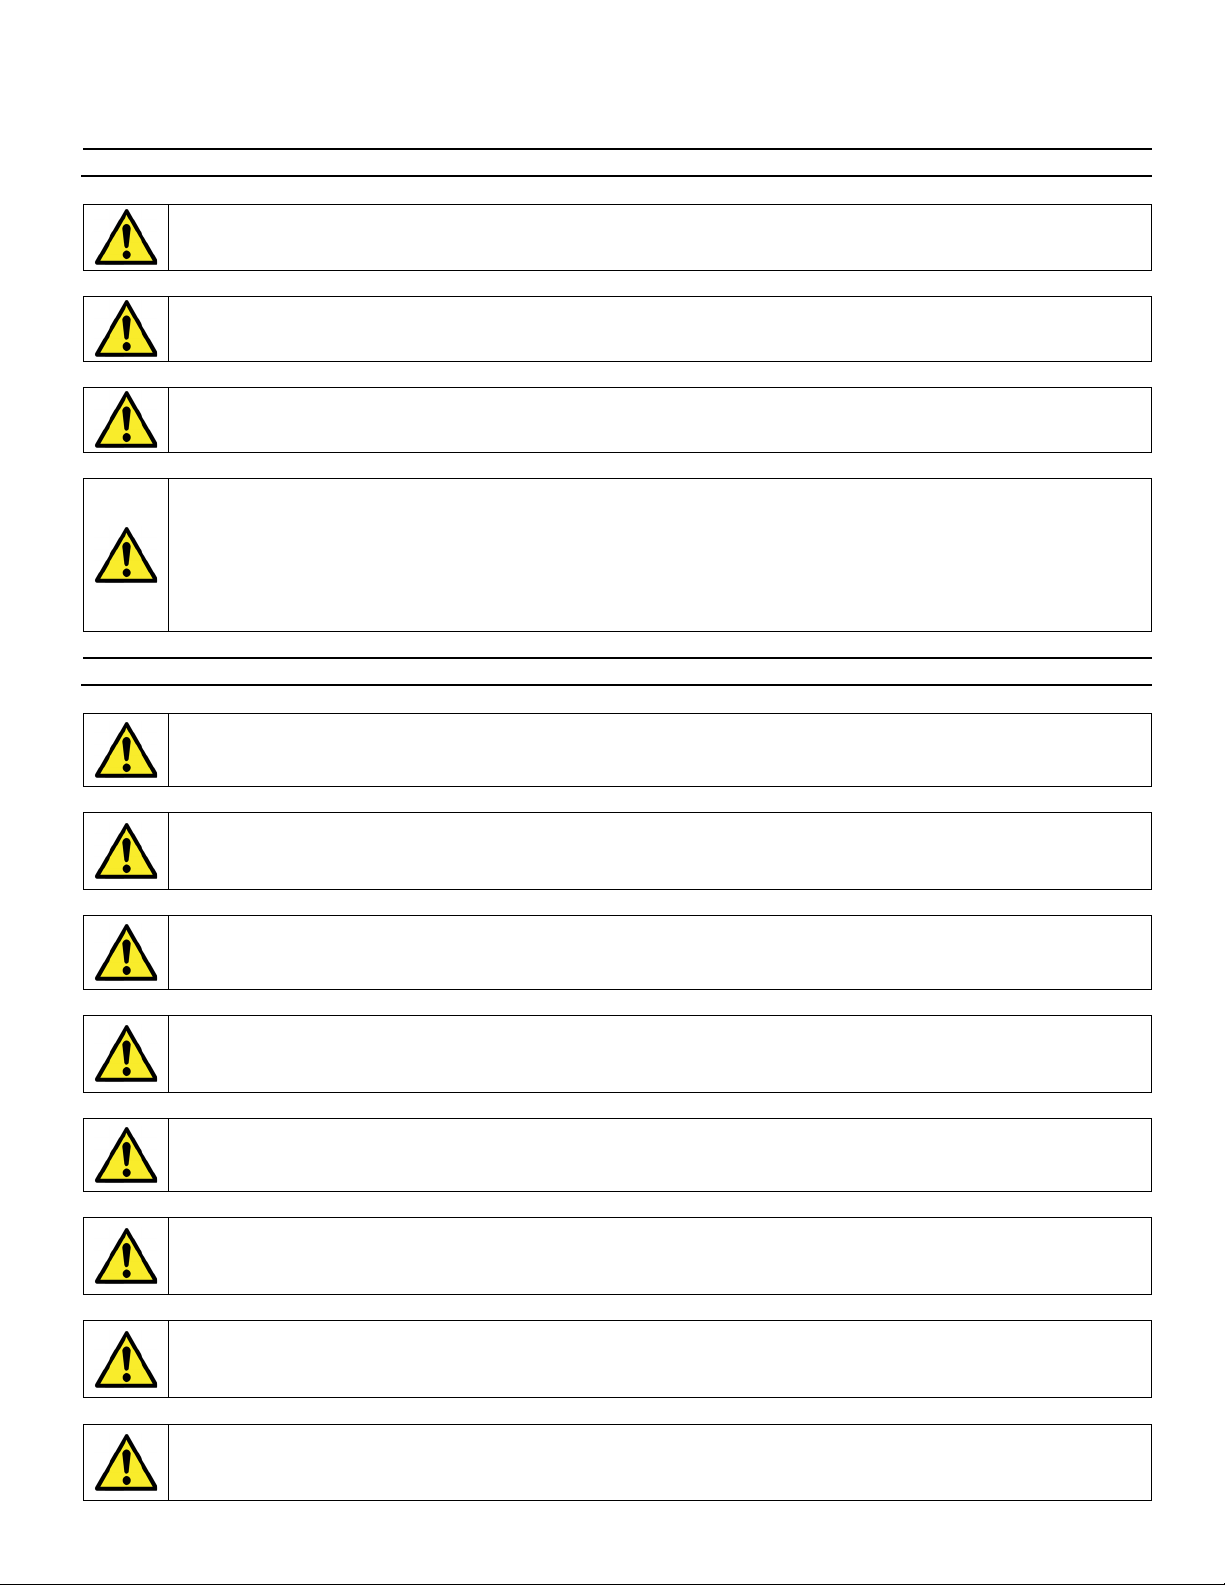
SAFETY INFORMATION
Read the following important safety information before using the Erchonia Emerald laser.
WHEN NOT TO USE (CONTRAINDICATION)
Laser treatment should not be applied over, or in proximity to (near), cancerous lesions as conclusive tests
have not been conducted.
Safety of non-thermal lasers for use over a pregnant uterus has not been established.
DO NOT treat the face, neck or breast
DO NOT use on patients who:
Have a personal or family history of cancer
Have a history of keloid or hypertrophic scar formation
Have a history of herpes simplex
Have active infections or a compromised immune system
Are taking photo-sensitizing drugs, anti-coagulants, or aspirin
WARNINGS
You must follow these Instructions for Use when using the Erchonia® Emerald Laser. Not following these
instructions may result in serious injury.
DO NOT permit any foreign materials or liquids to enter the device. Take care to prevent any foreign
materials including, but not limited to, inflammables, water, and metallic objects from entering the device.
These may cause device damage, malfunction, electrical shock, fire, or personal injury.
DO NOT disassemble, modify, or remodel the device or accessories. This may cause device damage,
malfunction, electrical shock, fire, or personal injury.
DO NOT submerge any part of the device in water. This could damage the device or cause an electric shock
that may lead to serious injury or death. Damage resulting from this condition is not covered under the
warranty.
Use of controls or adjustments or performance of procedures other than those specified herein may result in
hazardous radiation exposure.
This equipment/system may cause radio interference or may disrupt the operation of nearby equipment. It
may be necessary to re-orient or relocate the ME equipment or shield the location. The long-term effects of
prolonged use of non-thermal laser exposure are unknown.
Dispose of device in accordance with local and national regulations and codes. When spent and beyond
repair or functional use, the device can be sent back to the manufacture for disposal. This ensures the proper
separation and handling of all the internal parts and reduces any risk to the end user and the environment.
DO NOT use this device in an oxygen enrich environment. Avoid contact with flammable anesthetic with
air or with oxygen or nitrous oxide. This device is not intended and was not tested for use in this
environment.
Page | 5
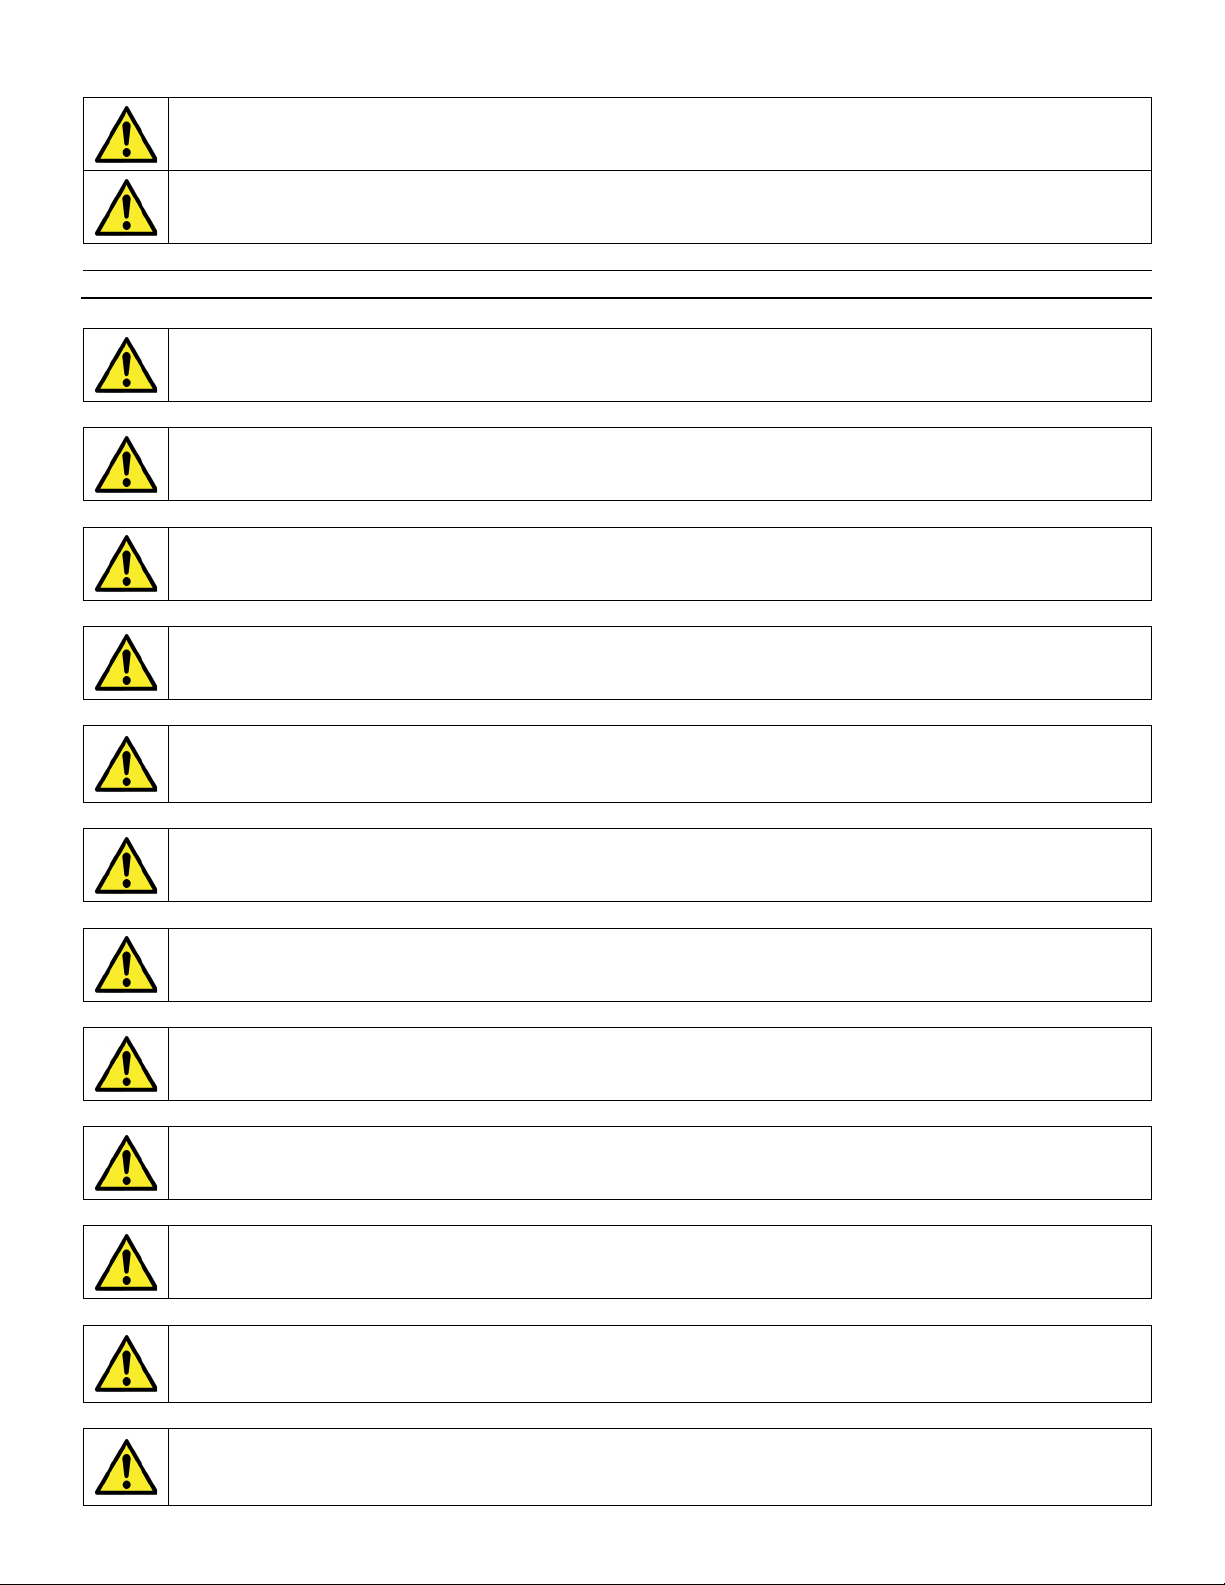
WARNING-The equipment will overbalance at 10°under normal operation. It shall not be operated at a
plane inclined angle of more than 5°.
DO NOT use this device in an MRI environment
CAUTIONS
In the US, Federal law restricts this device to sale by or on the order of a physician.
This device should only be used under the supervision of a suitably qualified and licensed healthcare
professional.
DO NOT use sharp objects such as a pencil point or ballpoint pen to operate the buttons on the touch screen
as damage may result.
DO NOT place/operate this device in close proximity (15 cm) to other devices that emit frequency.
Read, understand, and practice the precautionary and operating instructions. Know the limitations and
hazards associated with using any laser device. Observe the precautionary and operational decals placed on
the device.
Failure to use and maintain the Erchonia laser and its accessories in accordance with the instructions outlined
in this manual will void your warranty.
There are no user-serviceable parts inside the device. If a malfunction occurs, discontinue use immediately
and contact Erchonia Corporation for repair service.
If you have difficulty operating the device after carefully reviewing this user’s manual, contact Erchonia
Corporation for assistance.
Portable and mobile RF communications equipment can affect ME Equipment
Caution should be used over areas of skin that lack normal sensation
To avoid risk of electric shock, this device must only be connected to a supply mains with protective earth.
Make certain that the device is electrically grounded by connecting only to a grounded electrical service
receptacle conforming to the applicable national and local electrical codes.
Laser protective eyewear should be worn by the patient to block light energy from the eyes during treatment.
Pointing the laser beam directly into the eye and maintaining it there for an extended period of time could
prove to be damaging.

Page | 6
DO NOT position the equipment so that it is difficult to disconnect the power cord.
NOTIFICATION OF ADVERSE EVENTS
As a health care provider, you may have responsibilities under the Medical Device Reporting for User Facilities for
reporting to Erchonia ® Corporation, and possibly to the FDA, the occurrence of certain events. These events, described
in 21 CFR Part 803, include device-related death and serious injury or illness.
As part of our Quality Assurance Program, Erchonia® Corporation requests to be notified of device failures or
malfunctions. This information is required to ensure that Erchonia ® Corporation provides only the highest quality
products.
EMERALD LASER INDICATIONS FOR USE
The Erchonia® Emerald (Model#: SHL) is indicated for use as a non-invasive dermatological aesthetic treatment for the
reduction of body circumference in individuals with a Body Mass Index (BMI) of up to 40 kg/m².
EMERALD LASER SPECIFICATIONS
•Configuration: 10-Certified Class 2 Line Generated Laser Diode Modules
•Wavelength: 520-542nm
•Modulation: Constant Wave (CW)
•Display: Full Color TFT Touch Screen Control Center
•Adjustments:
oTwo Independent Adjustable Arms for Desired Laser Concentration
•Power Source: 100-240VAC, 50-60Hz, 1.5/0.5A
•Chassis:
oAnodized Metal Frame
o4 Anti-Static Casters (4 Locking)
•Housing: High strength, flame retardant Urethane Plastic
•Weight: 118.5 lbs. / 53.75 kg
TECHNICAL INFORMATION
Technical documentation required by the customer, in case of necessary reparations, will be provided by Erchonia ®
Corporation in the US and our EU agent, internationally. These documents will be supplied once the manufacturer makes
the determination that the requested documents do not constitute a disclosure of proprietary or patent protected
information and are a part of the documented technical file.

Page | 7
SERVICE AND REPAIR
If a device requires service, contact the Erchonia® Service and Repair Department at:
Telephone: 1-888-242-0571 (US only)
1-321-473-1251
When requesting service or repair, please provide the following information to the service representative:
•Device serial number (located on the back label)
•Description of the problem
•Name of the person to contact
RETURNING A DEVICE FOR SERVICE
•Before sending a device to the Erchonia® Service and Repair Department for repair, obtain a service order (SO)
number from the service representative.
•Pack the device in the original containers (if available) or equivalent packaging. Be sure the assigned service order
number appears on the package.
RETURN THE DEVICE TO:
Erchonia® Corporation
650 Atlantis Rd
Melbourne, FL. 32904
Attention: Service and Repair Department (SO Number)
NOTE: For international customers, PRIOR to sending a unit in for repair you must obtain from the Erchonia® Service
department an annually revised FDA Form 2877. The Radiation Control form (2877) will be sent to you partially
complete, containing regulatory information. To complete, fill in the unique information associated with your device and
the shipment thereof, such as serial number, port, etc. The completed form 2877 must accompany your shipment affixed
to the outside of the package. Failure to include the form in the shipment may result in customs delays and fines. Any
resulting fines are the responsibility of the customer.

Page | 8
SECTION 2 PRODUCT OVERVIEW
NOMENCLATURE
The Erchonia® Emerald is manufactured in accordance to the Good Manufacturing Procedures set forth by the FDA. Per
ISO and FDA standards the device and laser are classified as Class 2.
Each of these governing agencies requires specific labeling. All required labels are affixed according to the relevant
codes. Each label is pictured and described in this manual. Additionally, the placement of each label, on the Erchonia®
device, is communicated.
This section is included to familiarize you with the components of the device ensuring the remainder of this manual is
clearly communicated.
DEVICE
Weight: 118.5lbs / 53.75 kg
(Height x Depth x Width)
Size- Configuration 1 (standard treatment configuration): 52” x 56” x 36”/132.08cm x 142.24cm x 91.44cm
Size- Configuration 2 (max size configuration): 56” x 65” x 38”/142.24cm x 165.10cm x 96.52cm
Size- Configuration 3 (transportation configuration): 47.5” x 33” x 38”/120.65cm x 83.82cm x 96.52cm
Power cord [1] connects the device to mains power supply through power inlet [2].
1. Electrical Power Cord (not shown)
2. Power Inlet Module/Fuse Holder
w/ Power Switch
3. Touch Screen
4. Arm Control Switch
5. Laser Head Assembly Handle
6. Laser Head Assembly
7. Outside Laser Arms
8. Laser Output Head
9. Device Handle
10. Wheel Locks
Fig. 1
10
2
9
3
5
6
4
8
7
Page | 9
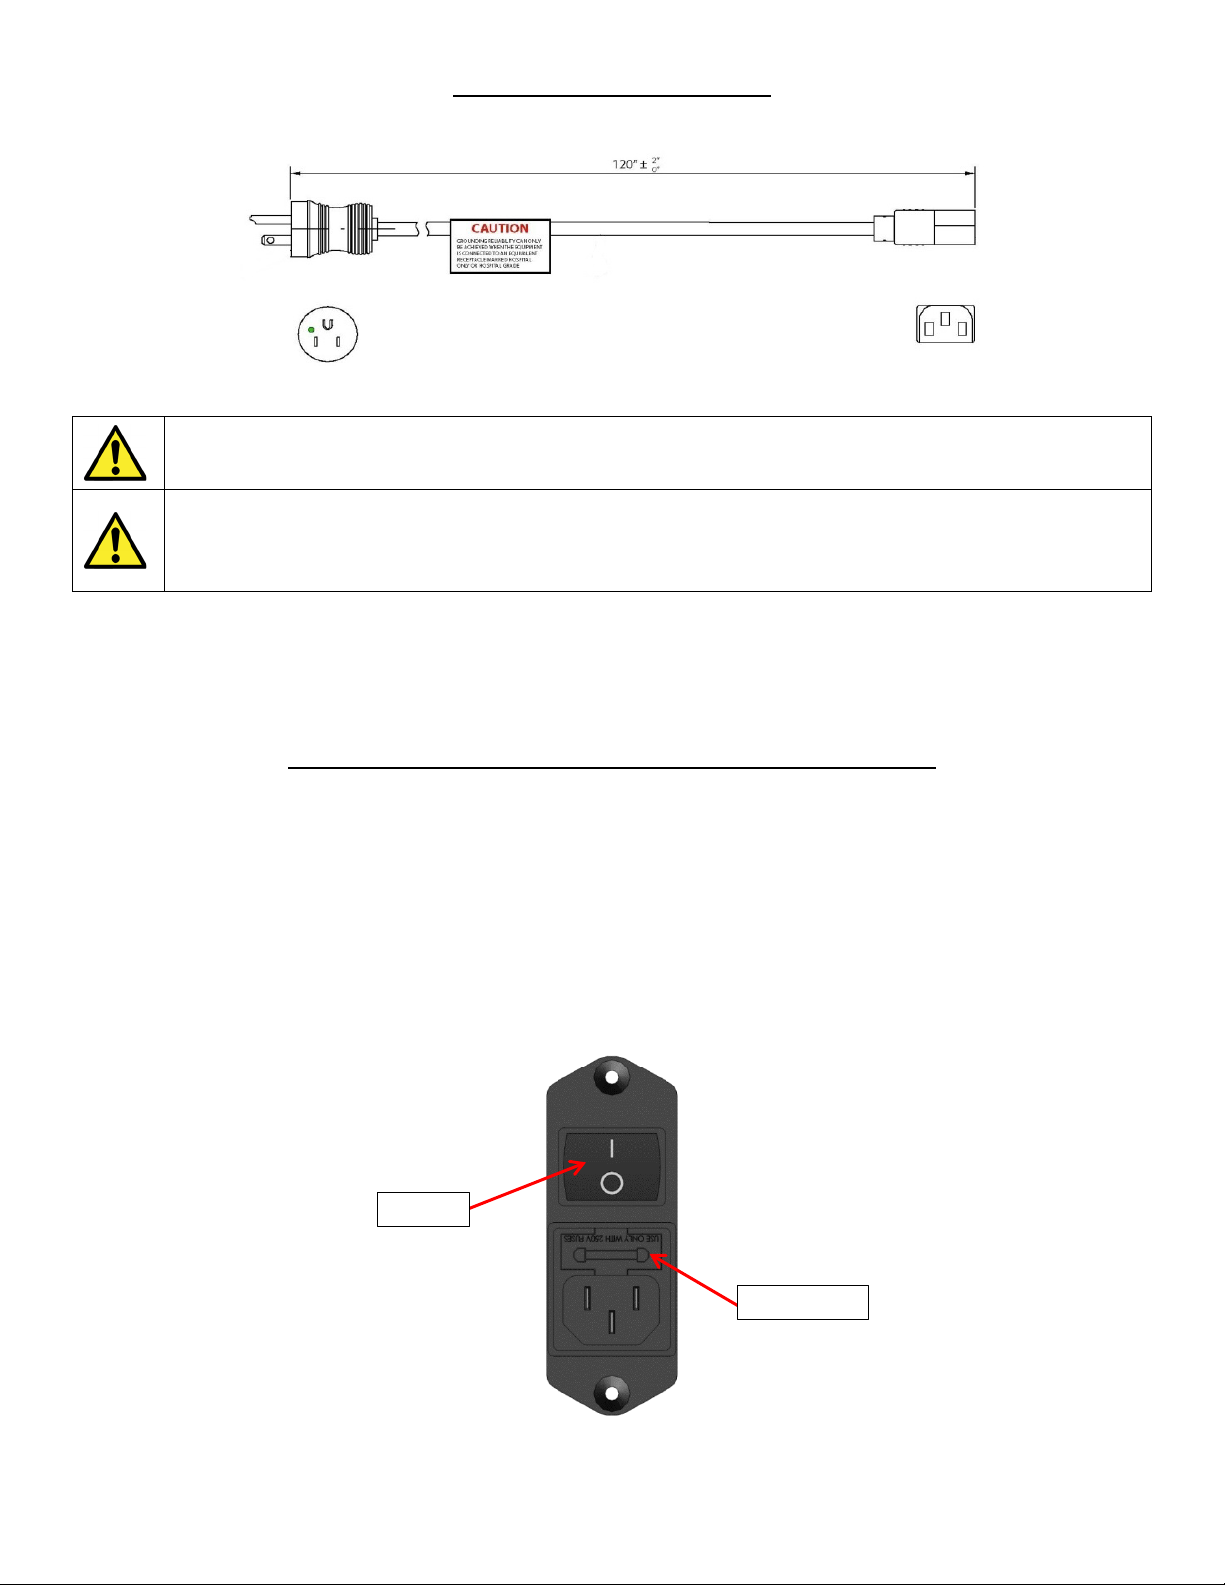
[1] ELECTRICAL POWER CORD
The device contains a hospital grade flexible detachable power cord. Plug the power cord into the Power Inlet Module [2]
prior to plugging the other end into a wall socket.
Fig. 2
DO NOT position the equipment so that it is difficult to disconnect the power cord.
WARNING-SHOCK HAZARD
This device must only be connected to an electric supply main with protective earth. Make certain that the
device is grounded by connecting only to a grounded 3 prong electrical socket conforming to the applicable
national and local electrical codes. Use T2AH 250V Fuses only.
The device includes a transformer which converts AC supply power (110 V – 240 V) to match the power output (i.e. 110
V or 240 V). Only a 3 prong power cord is required (Hospital Grade Only). Once the power cord connector is affixed to
the power inlet, plug into the wall socket. Input: 100 VAC / 240 VAC, 1.5 A/0.5 A, 50-60 Hz
[2] POWER INLET MODULE/FUSE HOLDER W/ POWER SWITCH
The device contains a medical type filtered power entry module with double fuse holder. This is the location on the device
where the power cord [1] is connected. NOTE: Make sure the power cord is connected into the device at this location
prior to plugging into a wall socket. The Power Inlet module also contains a fuse holder. Replacing the fuses is the only
service that can be conducted by the end-user. To replace the fuses, refer to Maintenance section of this manual.
Contained within the power inlet module is the power switch. The power switch allows the end user to turn the device ON
“|” or OFF “O”. To turn the device ON the power cord must first be connected into the device and then into a wall socket.
Once connected, the switch will need to be turned to the ON “|” position to power the device ON.
NOTE: The device takes approximately 15 seconds for the touchscreen to power ON.
Fig. 3
Switch
Fuse Holder
Page | 10
WARNING-SHOCK HAZARD
To avoid risk of electric shock, this device must only be connected to an electric supply mains with
protective earth. Make certain that the device is grounded by connecting only to a grounded 3 prong
electrical socket conforming to the applicable national and local electrical codes. Use T2AH 250V Fuses
only.
The device includes a transformer which converts 110 V or 240 V AC supply power to match the power output (i.e. 110 V
or 240 V). Only a 3-prong power cord is required (Hospital Grade Only). Once the power cord connector is affixed to the
power inlet, plug into the wall socket. Input: 100 VAC / 240 VAC, 1.5 A/0.5 A, 50-60 Hz
[3] TOUCH SCREEN
The touch screen functions as a display screen and an input panel, providing information to the user and a means to
operate the device by touching the appropriate icon.
CAUTION - DO NOT use sharp objects such as a pencil point or ballpoint pen to operate the icons on the
touch screen as damage may result. Avoid using abrasives (including paper towels) on the touch screen
display window.
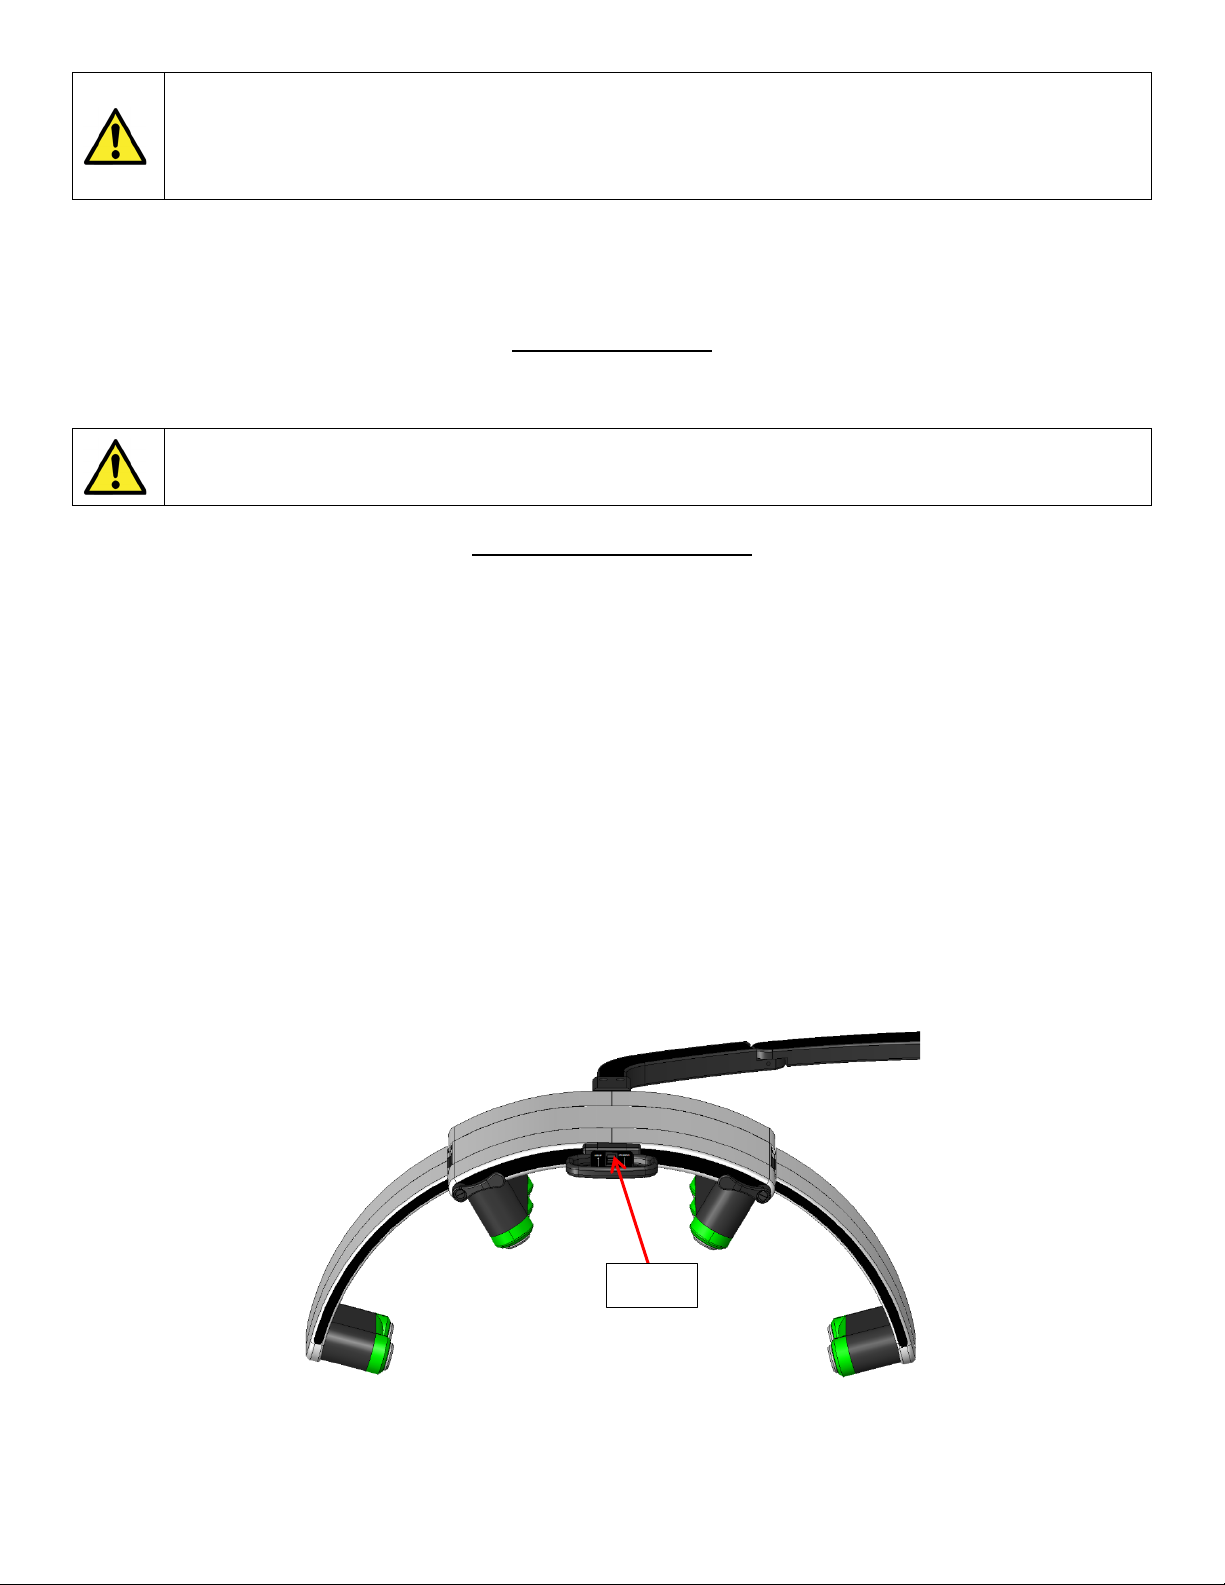
[4] ARM CONTROL SWITCH
The arm control switch allows the end user to raise or lower the Laser Head Assembly [6] for proper height placement of
lasers for treatment. To raise the head assembly, push the switch in the UP “⇧” position. To lower the head assembly,
push the switch in the DOWN “⇩” position.
NOTE: Ensure that the laser diodes are powered OFF when lowering or raising the Laser Head Assembly. Pushing the
Arm Control Switch in the opposite direction quickly while the laser diodes are powered ON may cause an electrical load
on the system, causing the device to power off and reboot back to the start-up screen. Refer to “SECTION 4
ERCHONIA® EMERALD OPERATION – INSTRUCTIONS FOR USE” and “SECTION 5 PROFESSIONAL USE
INSTRUCTIONS - ERCHONIA® EMERALD PROTOCOL” for proper set up of device prior to facilitating a treatment
on the patient.
NOTE: If the mast has been disengaged from the lift system it may require manual assistance by pushing the main arm
down to reengage onto the track, when done correctly the mast will raise and lower using the control switch.
NOTE: Once a protocol has ended the main arm will automatically raise up and away from the subject.
Fig. 4
Switch

Page | 11
Fig. 5
CAUTION: PINCH HAZARD
Keep hands and fingers clear from areas indicated
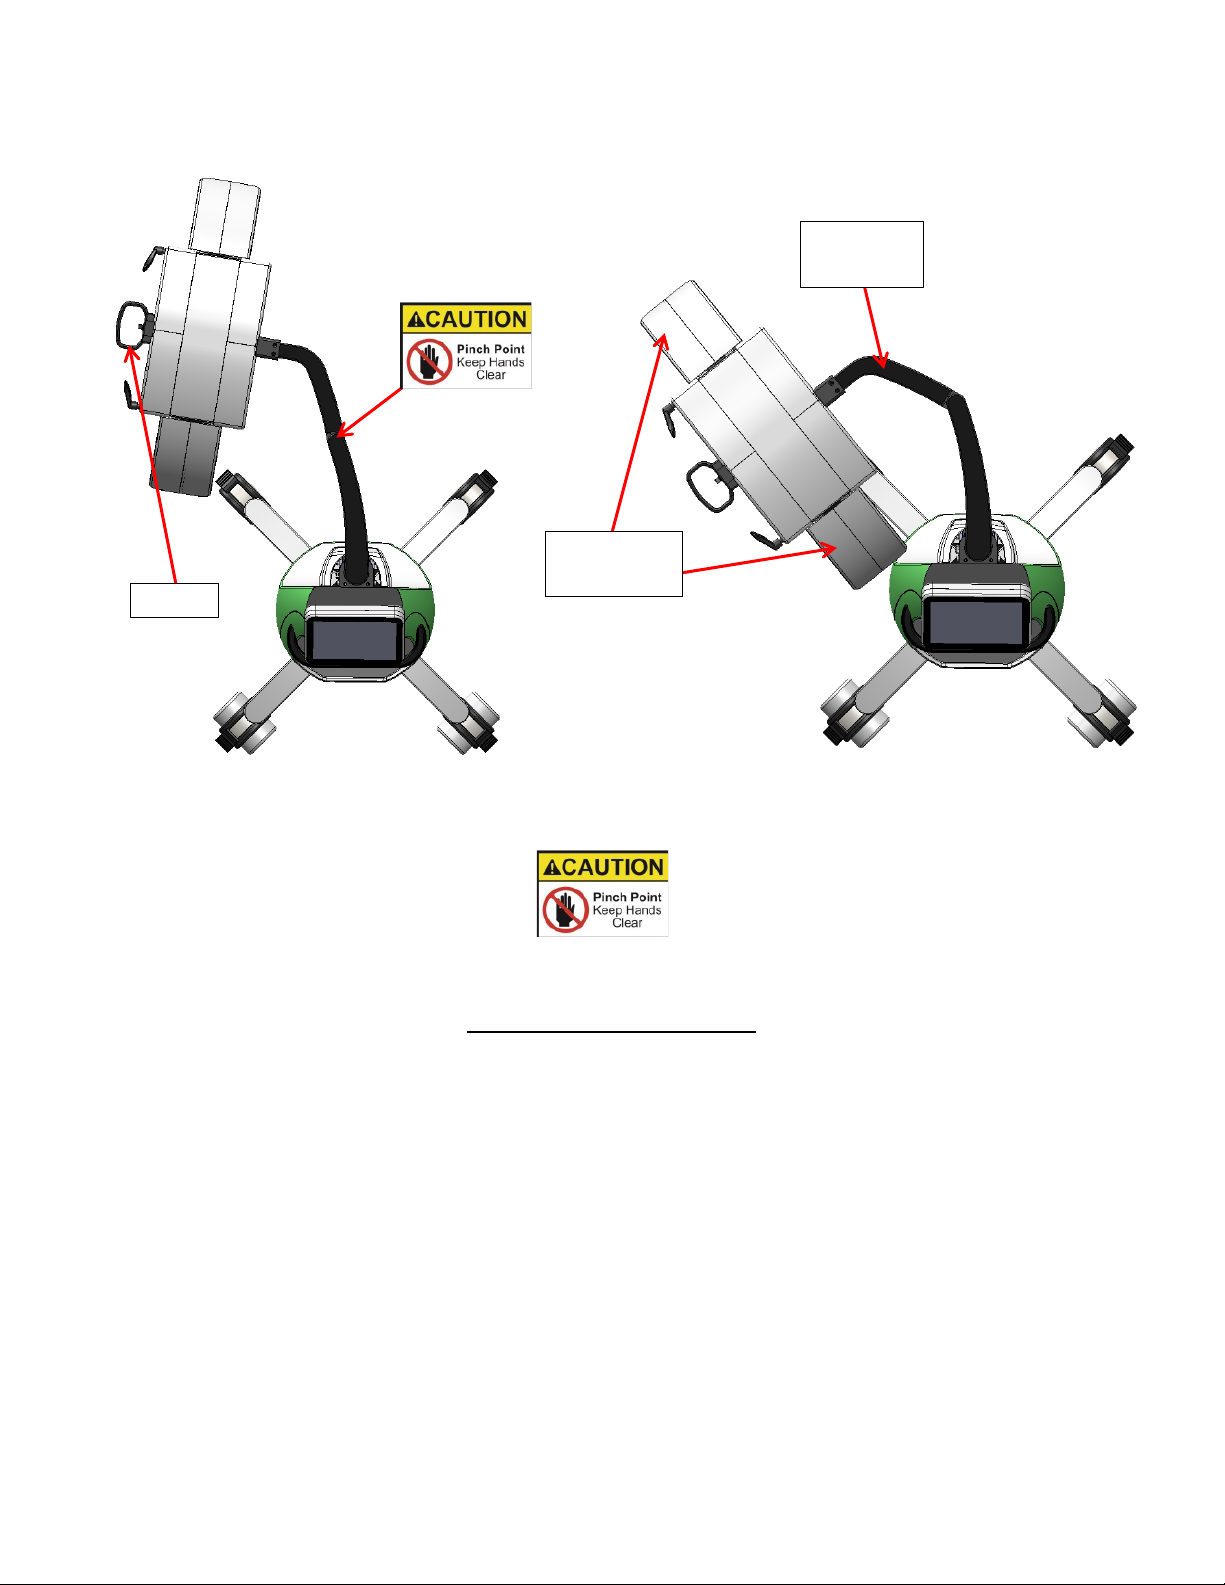
[5] LASER HEAD ASSEMBLY HANDLE
The laser head assembly handle serves to position the Laser Head Assembly [6] for proper placement to the subject for
treatment; the head assembly can be moved vertically (raise up or lower down) using the Arm Control Switch [4], and
horizontally (move from side to side) by intentional force from the end user. To move vertically, see “[4] ARM
CONTROL SWITCH”. To move horizontally grab the laser head assembly handle and move the head assembly left or
right to the required position. (See example figure below)
NOTE: When transporting device ensure that the main arm is in the fully lowered position using the arm control switch,
then swing the main arm section “A” in towards the device base (laser head assembly towards device), then condense the
outside laser arms [7] in towards the center of the head assembly.
Main Arm
Page | 12
Fig. 6 Fig. 7
CAUTION: PINCH HAZARD
Keep hands and fingers clear from areas indicated
[6] LASER HEAD ASSEMBLY
The laser head assembly located on the end of the main arm accommodates the Outside Laser Arms [7] and the ten Laser
Output Heads [8]. This assembly can be raised or lowered by means of the Arm Control Switch [4] and manually moved
side to side by means of the Laser Head Assembly Handle [5]. The outside laser arms can be moved in or out by manual
adjustment and locked in place by the lever lock for proper treatment distance and positioning.
.
Handle
Outside
Laser Arms
Main Arm
Section A
Page | 13
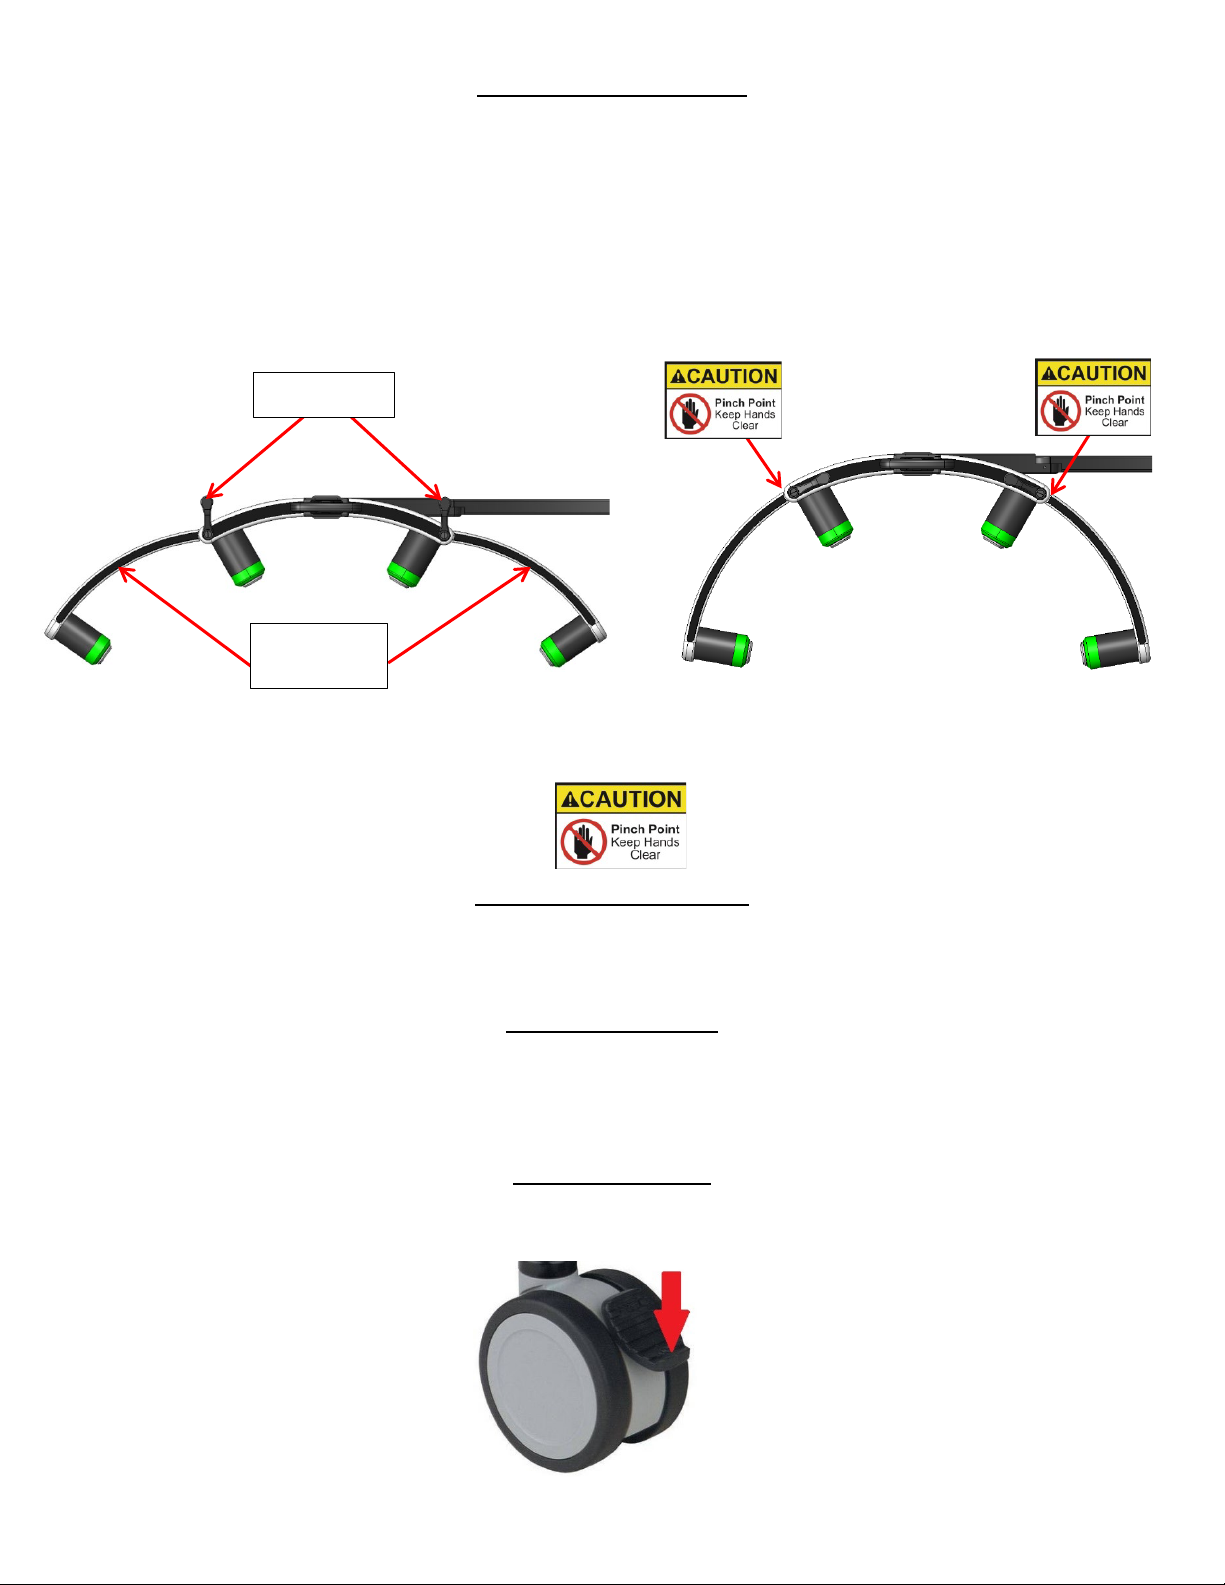
[7] OUTSIDE LASER ARMS
There are two outside laser arms on the device, each arm houses two Laser Output Heads [8]. It is designed to adjust by
intentional force from the end user. This allows the end user to angle these laser output heads in and out for proper
positioning to patient for accurate treatment distance. To angle the outside laser arm in or out, hold the outside laser arm
with one hand and loosen the lever lock by turning the lever lock counterclockwise with the other hand. Once the lever
lock is loose, move the outside laser arm to the proper treatment distance and position, hold outside laser arm in place and
then tighten the lever lock by turning the lever lock clockwise until the outside laser arm holds position.
NOTE: When transporting device ensure that the main arm is in the fully lowered position using the arm control switch,
then swing the main arm section “A” in towards the device base (laser head assembly towards device), then condense the
outside laser arms [7] in towards the center of the head assembly
Fig. 8
CAUTION: PINCH HAZARD
Keep hands and fingers clear from areas indicated
[8] LASER OUTPUT HEAD
There are ten laser output heads on device. These heads are housed in plastic and accommodate the lens, laser diodes,
motors, and their associated electronics. (for cleaning see maintenance section)
[9] DEVICE HANDLE
The device handle gives the user the ability to move the device for proper positioning to patient for accurate treatment
location as well as move the device for storage or relocate to a different room. When the device is moved it is required to
unlock the wheel locks [10]. NOTE: Hold the handle at all times during movement or relocation of the device.
[10] WHEEL LOCKS
The device includes four antistatic wheels that enable ease for maneuverability. Once the device is transported to the
desired location the wheel locks should be engaged to eliminate excessive movement of the device.
Fig. 9
Lever Locks
Outside
Laser Arms
Page | 14
WARNING-TIPPING HAZARD
When transporting the device (example: from one room to another) ensure that the main arm [5] position is
fully down and the outside arms [7] are in towards center of laser head assembly, Hold device handle and
take caution to ensure the device does not tip.
PROTECTIVE EYEWEAR
The Erchonia® Emerald is classified by the FDA/IEC as a Class 2 laser device. This designation represents a current
standard for use in order to ensure the safety of the patient. A Class 2 laser is determined to have a chronic viewing
hazard. Pointing the laser beam directly into the eye and maintaining it there for an extended period of time could prove
to be damaging. To ensure there is no possible instance of residual effect, we have included a pair of specialty patient
glasses for use by the patient during treatment.
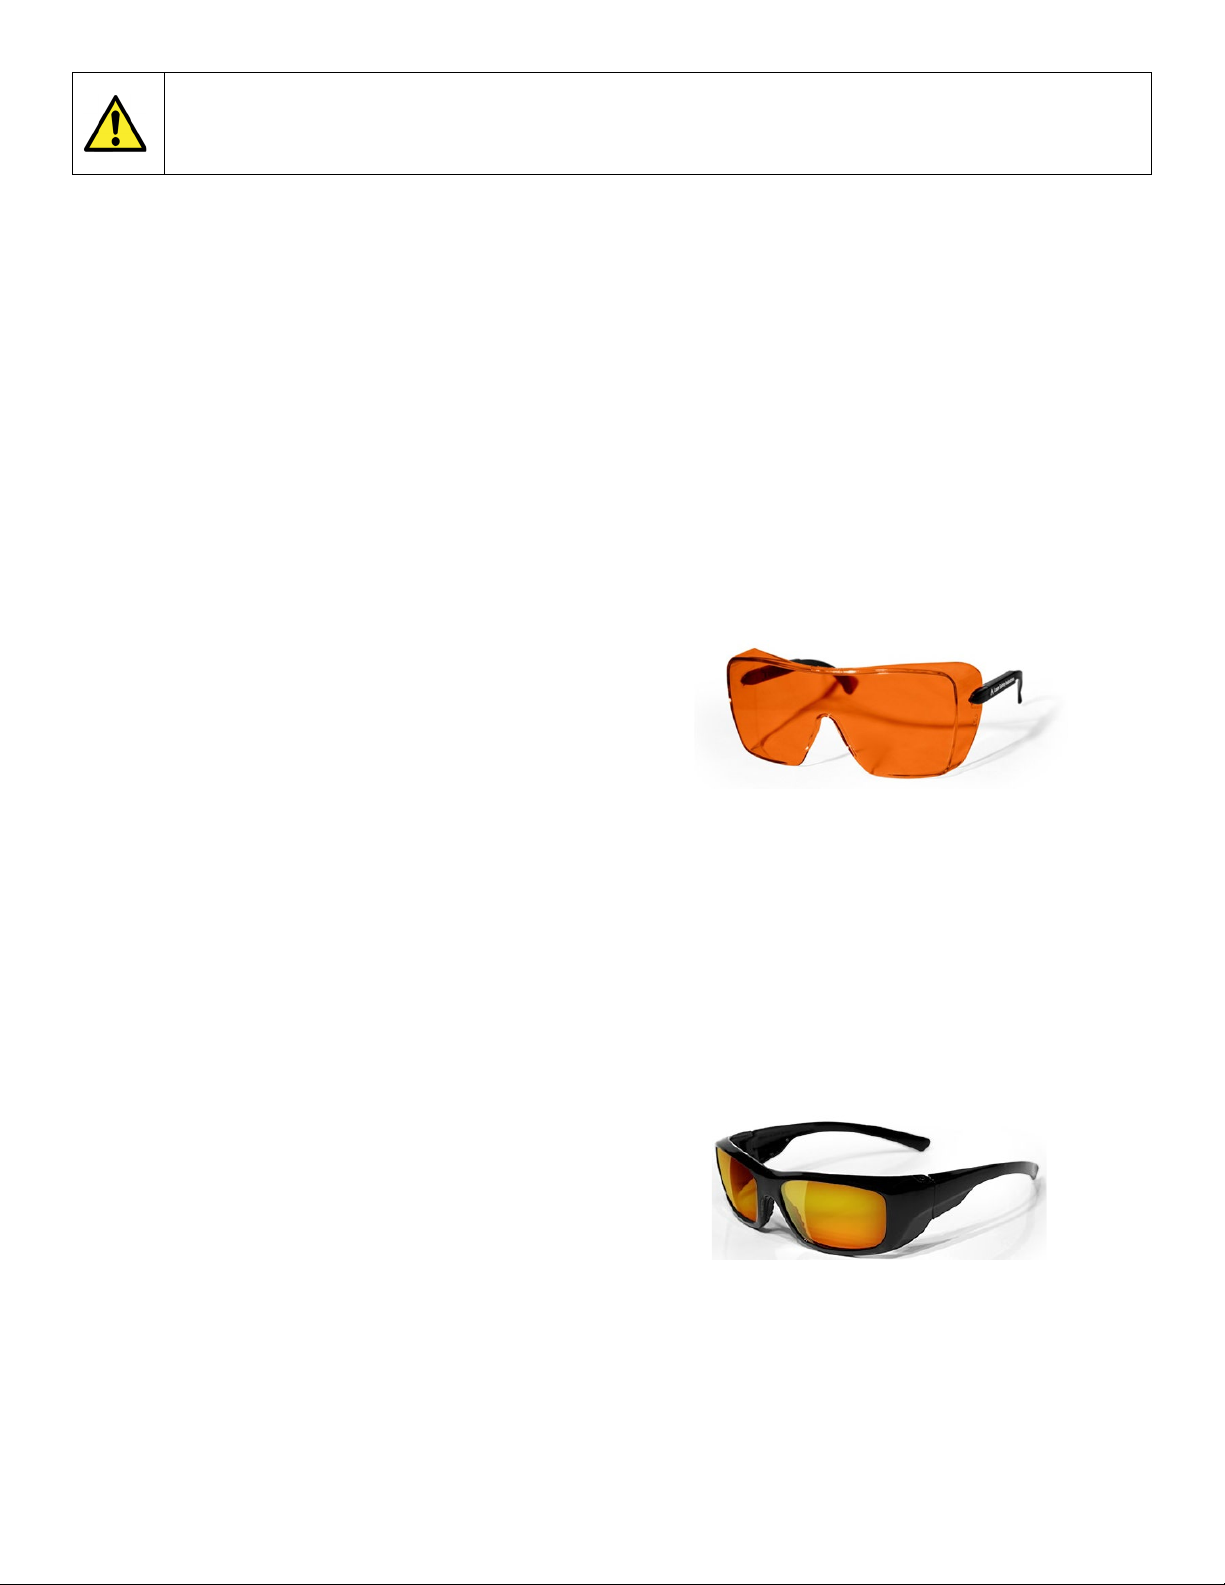
PATIENT GLASSES
The laser safety glasses are an ultra-light-weight comfortable frame with a double coated scratch-resistant polycarbonate
laser filter. The fit-over-prescription style frame offers universal fit with wide field of view. Lens has superior optical
clarity with virtually no distortion to reduce eye fatigue. It is ideal for use in most laser applications and comfortable for
long periods of wear. These safety glasses sufficiently and effectively block the laser light spectrum at OD 7+.
Height: 63.8 mm
Width: 155.3 mm
Length: 140-160 mm
Fig. 10
OPERATOR GLASSES
The laser safety glasses are a light-weight comfortable black sport-warp frame with a double coated scratch-resistant
polycarbonate laser filter. Lenses have superior optical clarity with virtually no distortion to reduce eye fatigue. It is ideal
for use in most laser applications and comfortable for long periods of wear. These safety glasses effectively block 50-
60% of the laser light spectrum at OD 2+.
Height: 40 mm
Width: 145 mm
Length: 165 mm
Fig. 11
Page | 15
SECTION 3 ASSEMBLY
The Erchonia® Emerald is shipped in two pieces and requires assembly for the device to be operational. This assembly
may require two people.
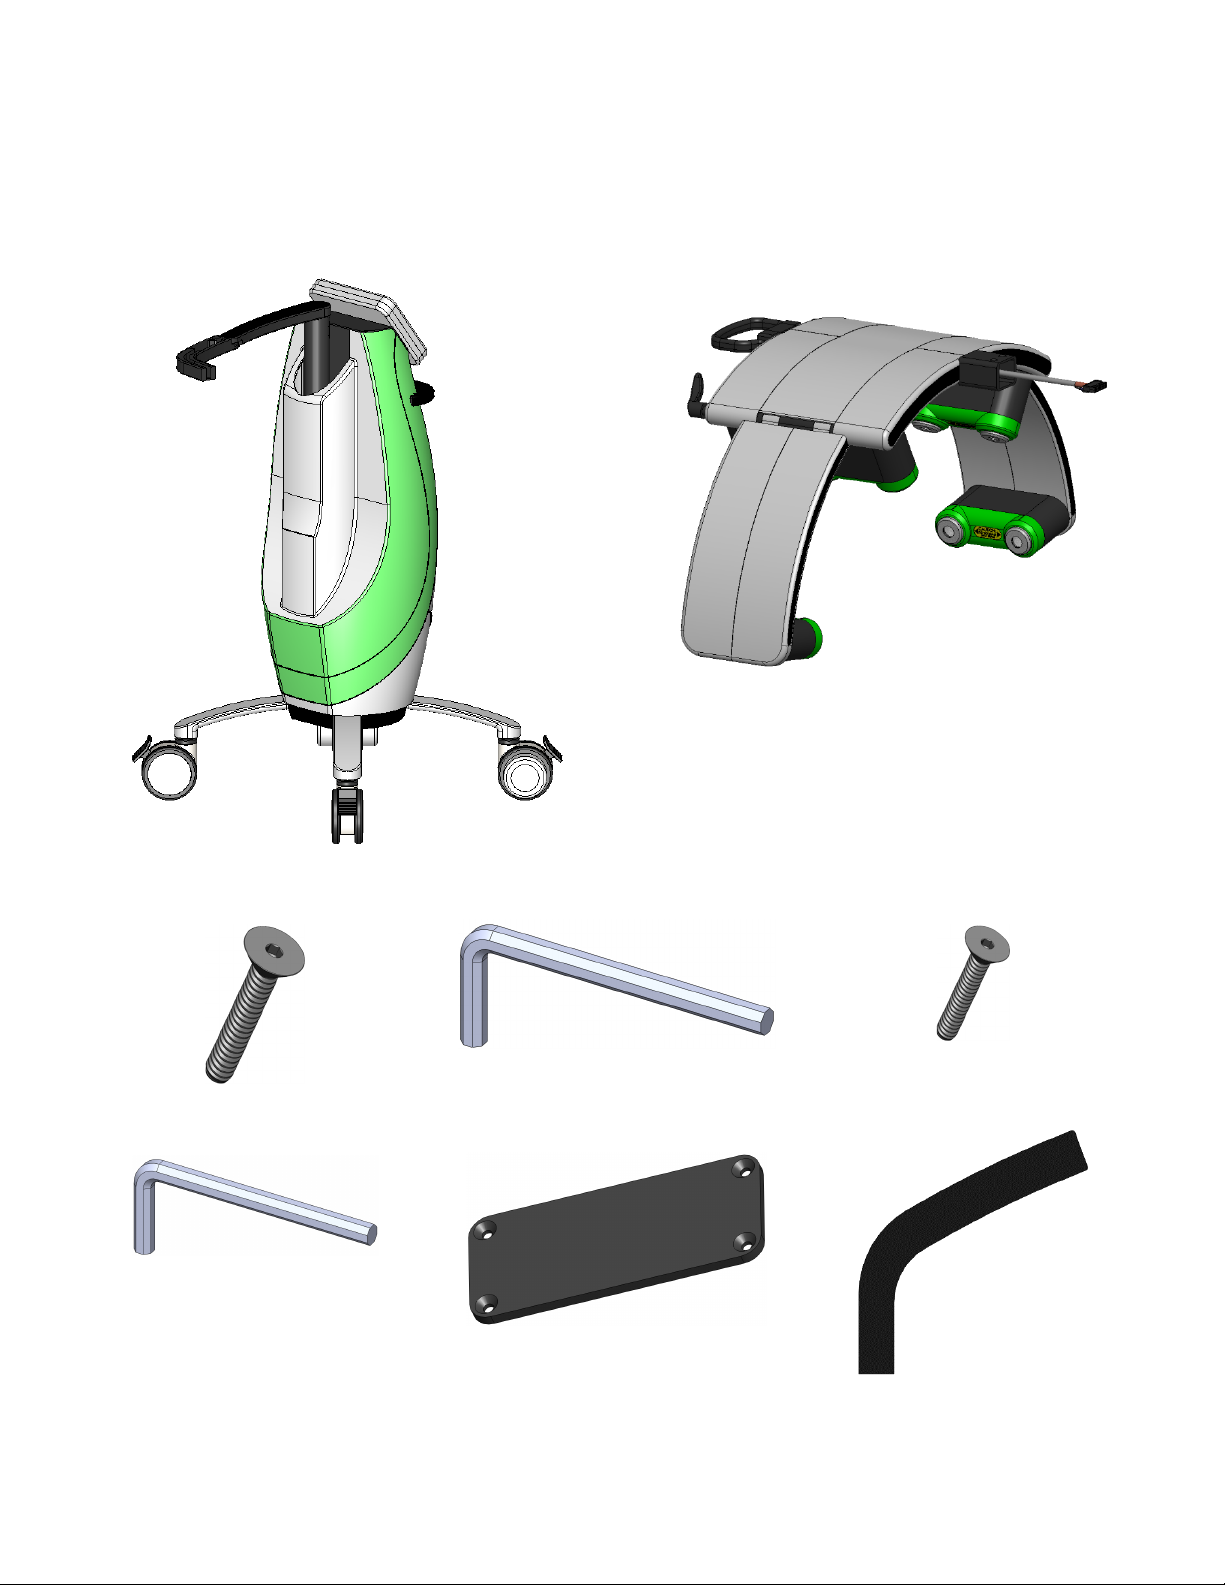
PROVIDED PARTS FOR ASSEMBLY:
Device base (Qty: 1)
Laser Head Assembly (Qty: 1)
Fig. 13
Fig. 12
Large Screws (Qty: 2)
1/8 (Large) Allen Driver (Qty: 1)
Small Screws (Qty: 4)
1/16 (Small) Allen Driver (Qty: 1)
Wire Cover (Qty: 1)
Fig. 14
Arm Cover (Qty: 1)

Page | 16
ASSEMBLY INSTRUCTIONS FOR THE ERCHONIA® EMERALD LASER
1. Lock all four wheels.
-a). Insert the Laser Head Assembly
onto the Main Arm on the Device
base as shown in fig. 15, carefully
feeding the cable from the Laser
Head Assembly into the cable
cutout in the Main Arm.
-b). Once fully seated the screw
holes on the Laser Head Assembly
will align with the threaded holes on
the Main Arm.
Fig. 15
2. Insert the provided Large Screws
(2) into the screw holes on the Laser
Head Assembly. Firmly tighten the
screws into place using the provided
1/8 (Large) Allen Driver
Fig. 16
Page | 17
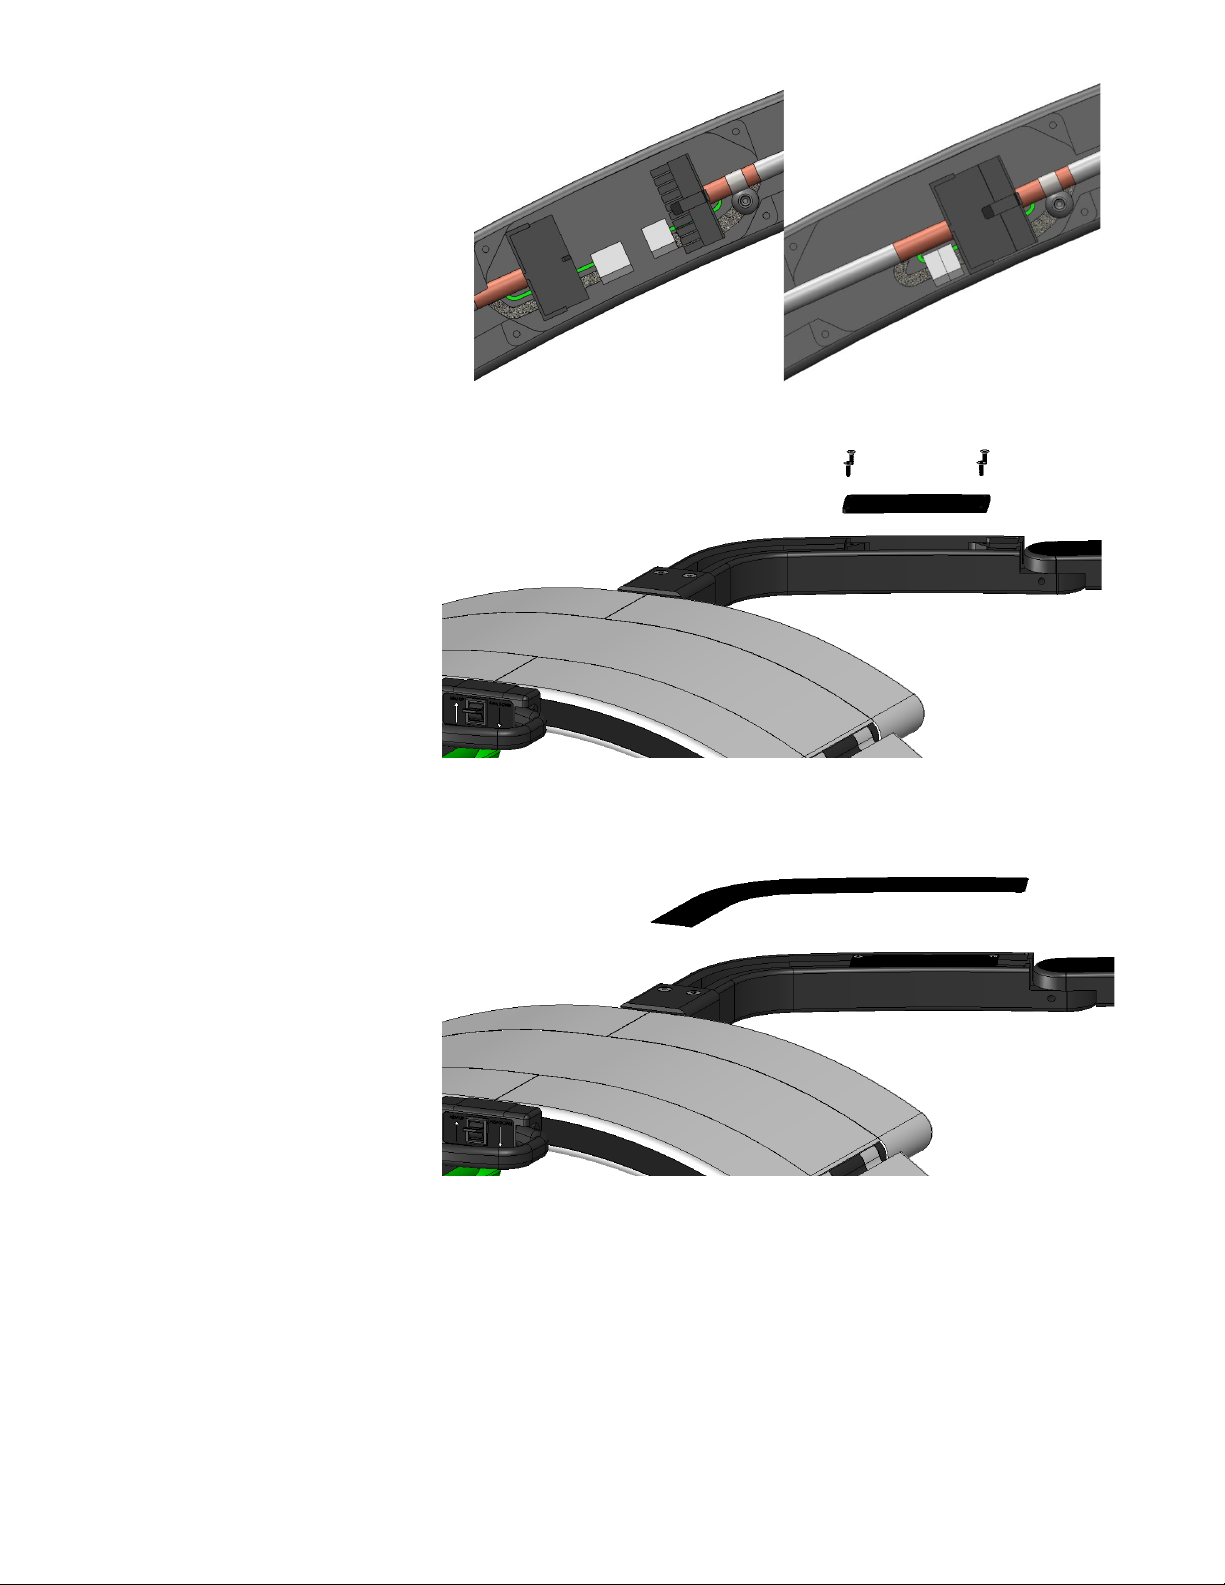
3. Plug both connectors from the Laser
Head Assembly into both
connectors from the Main Arm until
both locking tabs on the connectors
are locked in place as shown in fig.
17
IMPORTANT: Both connectors
must be fully seated to engage
the lock, you will hear a snap and
they will not pull apart.
Fig. 17
4. Place the provided Wire Cover Plate
(countersunk holes facing up) into
the wire cover pocket on Main Arm.
5. Insert the provided (4) Small
Screws into the screw holes on the
Wire Cover. Firmly tighten the
screws into place using the provided
1/16 (Small) Allen Driver
Fig. 18
6. Remove the adhesive liner from the
provided Arm Cover Overlay and
adhere the Arm Cover into the arm
cover pocket on the Main Arm.
Fig. 19
Table of contents
Other Erchonia Medical Equipment manuals

Popular Medical Equipment manuals by other brands


Getinge
Getinge Arjohuntleigh Nimbus 3 Professional Instructions for use

Mettler Electronics
Mettler Electronics Sonicator 730 Maintenance manual

Pressalit Care
Pressalit Care R1100 Mounting instruction

Denas MS
Denas MS DENAS-T operating manual

bort medical
bort medical ActiveColor quick guide

AccuVein
AccuVein AV400 user manual


