ERGONOMIC EHL User manual
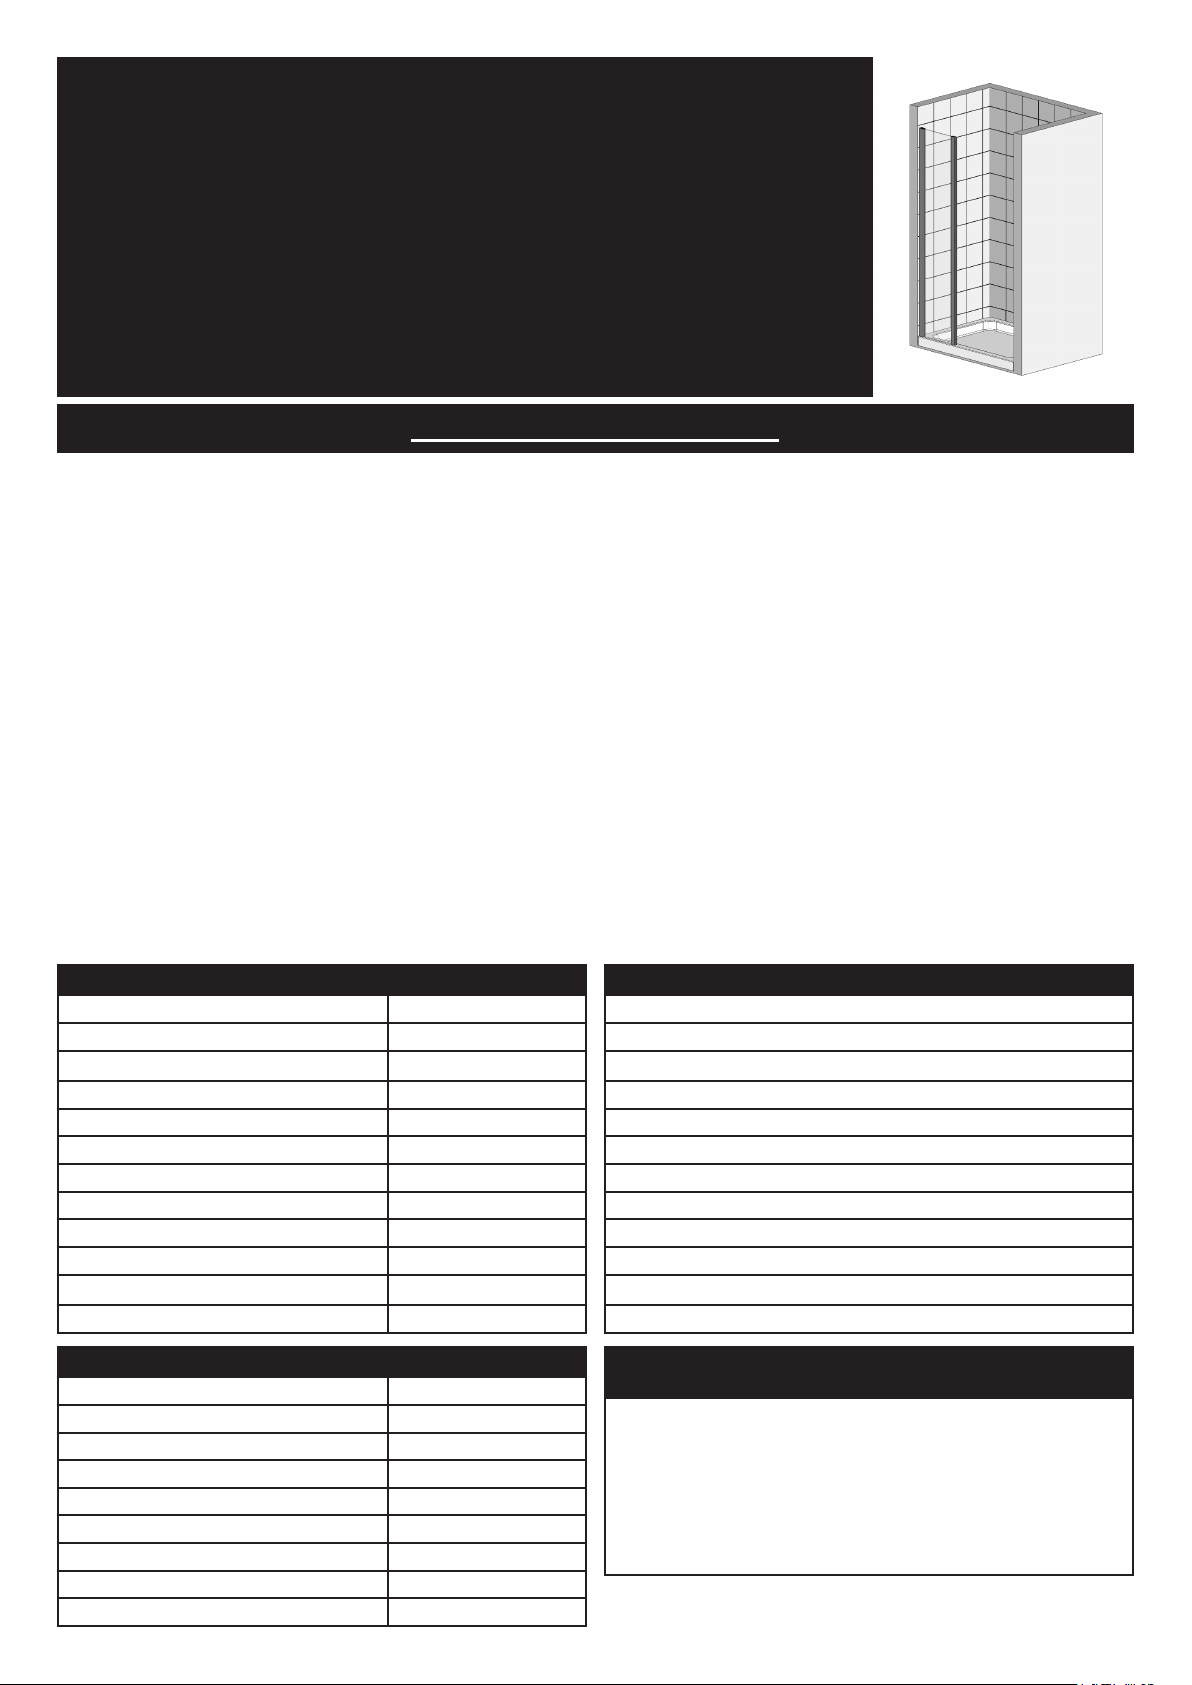
In-Line Panel
Instruction Manual
EHL
IMPORTANT INFORMATION
• Toughenedglassiscompletelysafeforuseinourshowerenclosuresandbathscreens;providingourproductsareinstalledaccordingtoour
guidelines.
• Itisimportanttonotethattheglassmustnotbemountedor‘pinched’insuchawaythatwouldcauseastresspointtodevelopintheglass.In
addition,itmustnotbesubjecttoanysharpimpactorseveretemperatureuctuationwhichmayalsocauseastresspointtodevelopintheglass.
• Toughenedglassisphysicallyandthermallysignicantlystrongerthanstandardglass.Duringthetougheningprocessthestressescontained
withinanyglassarebalancedsoifintheunlikelyeventsituationanyoftheaboveoccursandtheglassbreaks,theglasswillshattersafelyinto
smallthumbnailsizedbluntfragments.
Component Check List: Supplied
Description Quantity
EndCap 1
InlinePanel 1
LowLevelBracingAssembly 1
ScrewCoverTrim 1
Fixing Kit Components
Description Quantity
No4x1/4”PanHeadScrews 3
2.5mmDrillBit 1
BrandingBadge(ifapplicable) 1
5mmAllenKey 1
Equipment Check List: Not Supplied
Description
Electric/Batterydrill
6mmMasonryDrill
SpiritLevel
Screwdriver
PipeCutters
Hacksaw
Pliers
SealantGun
BathroomSealant
TapeMeasure
Pencil
Pleasemakesurethepurchaser/enduser
completesandreturnstheguaranteecard
whichisenclosedwiththisproduct.Failure
tovalidatetheGuaranteewillmeanonlythe1
YearStatutoryGuaranteewillapply.
CONSUMER GUARANTEE
PRE-INSTALLATION CHECKS
1. Checkyouhavethecorrectproduct.Pleaselookatthelabelsonthesideoftheproductpackaging.
2. Checkalltheproductcomponentsareintheboxandthexingkits.
3. Unpackyourproductandhandleitwithcare.
4. Pleasechecktheproductfordefectsordamage,oncetheinstallationhascommencedwecannotacceptresponsibilityforanydefectsordamage.
5. Pleasetaketimetoreadtheseinstructionspriortoinstallingyourproduct.
6. Beforeyoucommenceanydrillingchecktherearenohiddenelectricalcablesand/orwaterpipes.
7. Noattemptshouldbemadetore-workthetoughenedsafetyglass.
8. Theinstallationoftheproductshouldbeperformedbytwopersons.
9. Itisstronglyrecommendedthatthewallstheproductisgoingtobeinstalledonarevertical.
10. Itisstronglyrecommendedtheproductisttedonatiledsurfaceorsimilarwaterproofsurface.
11. Itisstronglyrecommendedthewallsaretiledandgroutedbeforetheproductisinstalled.
12. Ifthewallsand/orthetrayarenotlevelyouwillnotachievemaximumadjustmentoftheproduct.
13. Picturesusedareforillustrationpurposesonly,productdesignsmayalterslightlyasaresultofcontinuingproductdevelopment.
14. WedonotstipulatewheretheEuropeanStandardKiteMarkshouldbepositionedontheglasswhenbeingfactoryassembled.
15. Pleasenotethatsomenaturalmistingmayoccurwhenyouremovethisproductfromitspackaging,duetotheadditionoftheglassprotectionpre-
coating.Ifthisdoesoccurthiscaneasilyberemovedwithasoft,drycloth.
Ref:EHL-July2012
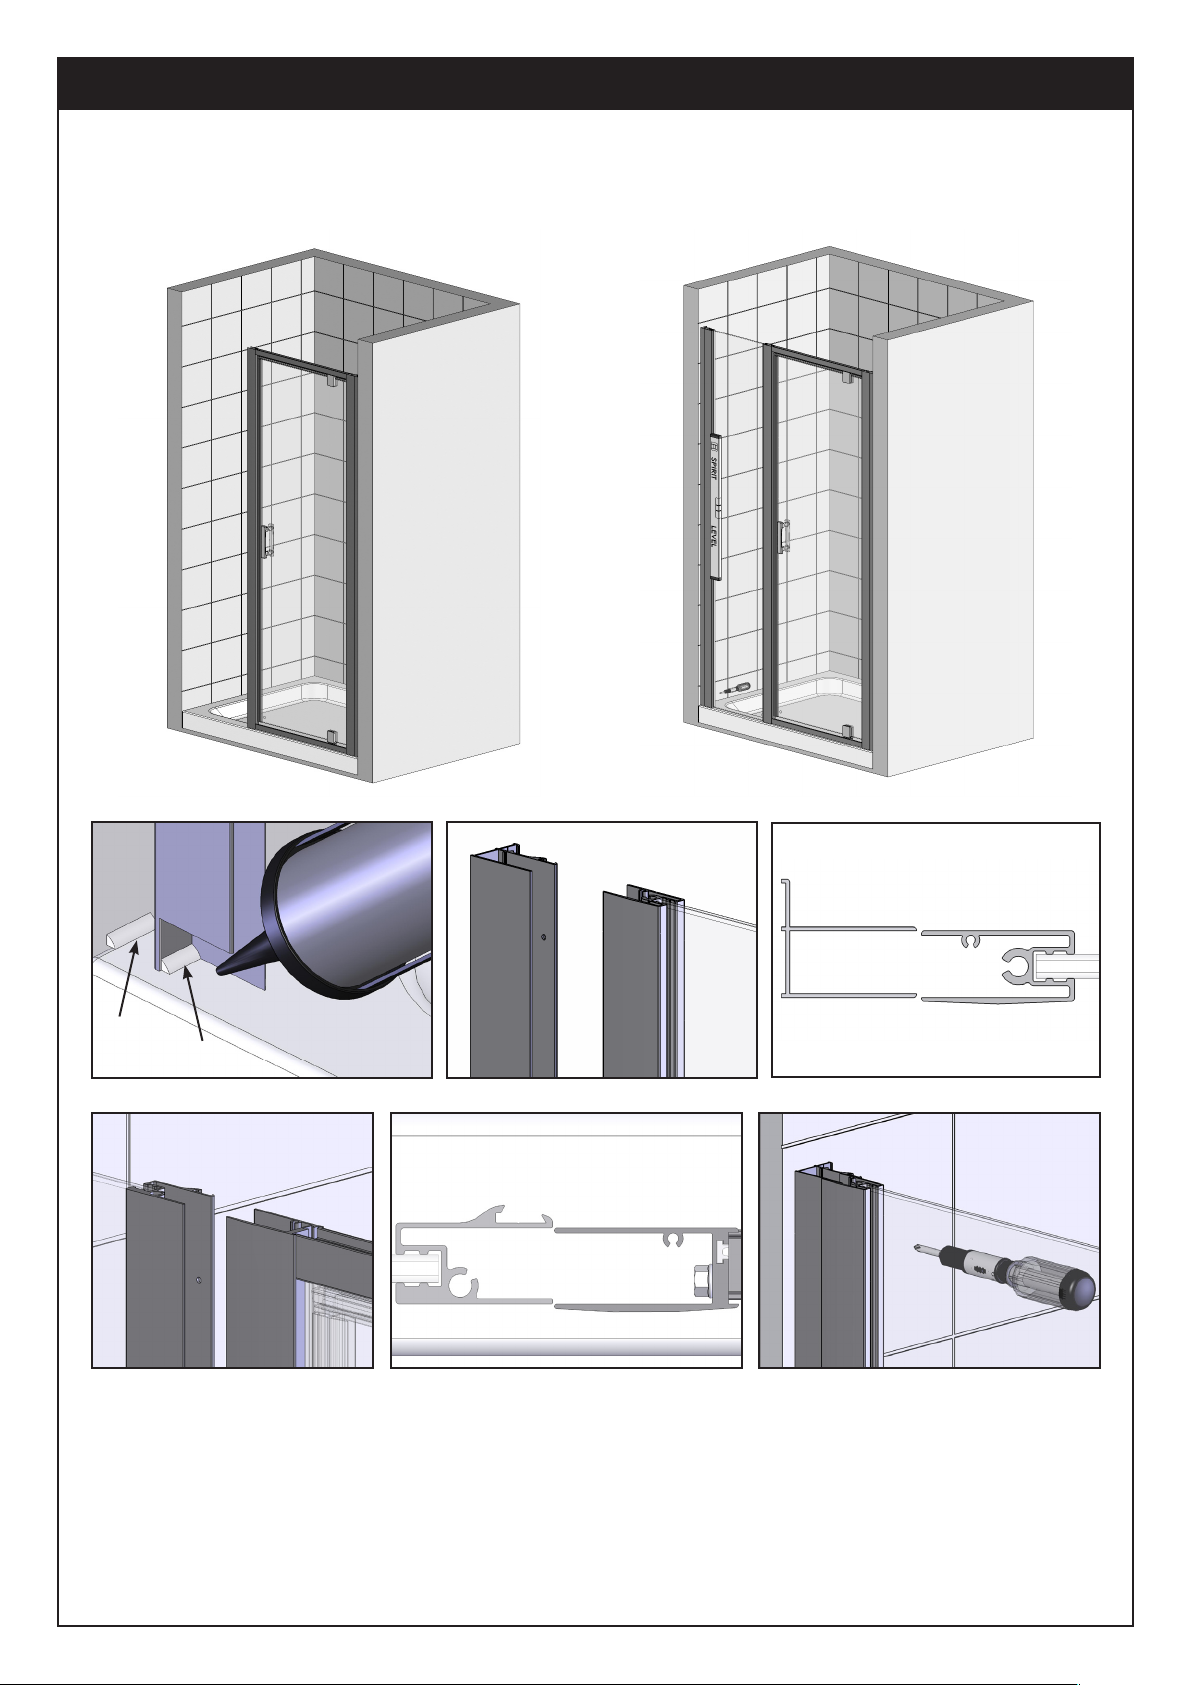
Step 1 - Inserting Door and Panel
1. LiftthedoorontothetrayandlocateintotheWallProle.
2. ApplyabeadofsealantthewidthoftheWallProlewherethe2ndprolewillmeetthetiledwallandtray.
3. Locatethe2ndWallProleontotheendoftheInlinePanel.
4. LifttheInlinePanelontothetrayandlocatefullyintotheverticalaluminiumofthedoor.
5. Screwxthe2ndWallProletothewall(makesuretheproleiscompletelyverticalusingaspiritlevel).
6. LifttheInlinePaneluptobeabletoaddabeadofsealanttotheinsideoftheWallProle
• You will need the assistance of someone when doing this procedure.
• Failure to carry out Stages 2 and 6 can result in serious water damage and will not be covered under the
terms of the guarantee.
IMPORTANT:Makesuresteps1to4oftheDoorInstallationGuidearecompletedbeforettingyourInline
Panel(Thedoorimageusedintheseinstructionsisanexampleonly).BesuretoremovetheblackTransit
Capsbeforeproceeding.
↓
①
②
③
④ ⑤
⑥
↓
③
↓
↓
④
⑥
↓

②
Step 2 - Fixing Panel and Door
1. MakesuretheDoorandInlinePanelprolesarelocatedcorrectlyandarelevelatthetopandbottom.
2. Drillthroughthepre-drilledholeswiththe2.5mmdrillbit(supplied).
3. ScrewttheDoorandInlinePaneltogetherusingtheNo4x1/4”screws.
②
③ ③

Step3-FixingPanelandDoortoWallProles
1. CentretheDoorandInlinepanelbetweentheWallProles.
• NOTE:Aminimumof10mmisrequiredbetweentheInlinePanel/DoorandWallProlesforxing.
2. MakesuretheInlinePanelandDoorarecompletelyverticalusingaspiritlevel.
• Prior to drilling/screwing the Inline Panel and Door refer to the Door installation guide to understand the
Doorttingandadjustmentrequirements.
3. DrillthroughtheWallProleintothePanelverticalwiththe2.5mmdrillbit(supplied),makesurethatthe
InlinePanelandDoorremaincompletelyverticalduringthisprocedure.
• You will need the assistance of someone when doing this procedure.
4. FitthebasesonthescrewsandfastentheWallProleandInlinePaneltogether,pushttheCoverCaps.
• ItmaybebenecialtoapplysomepressuretotheDoorandInlinePanelassemblyandcheckthedoor
operationpriortoxingthedoorside.
③
③
①
Equal Equal
10mm
minimum
④CoverCap
Screw
Base
⑥
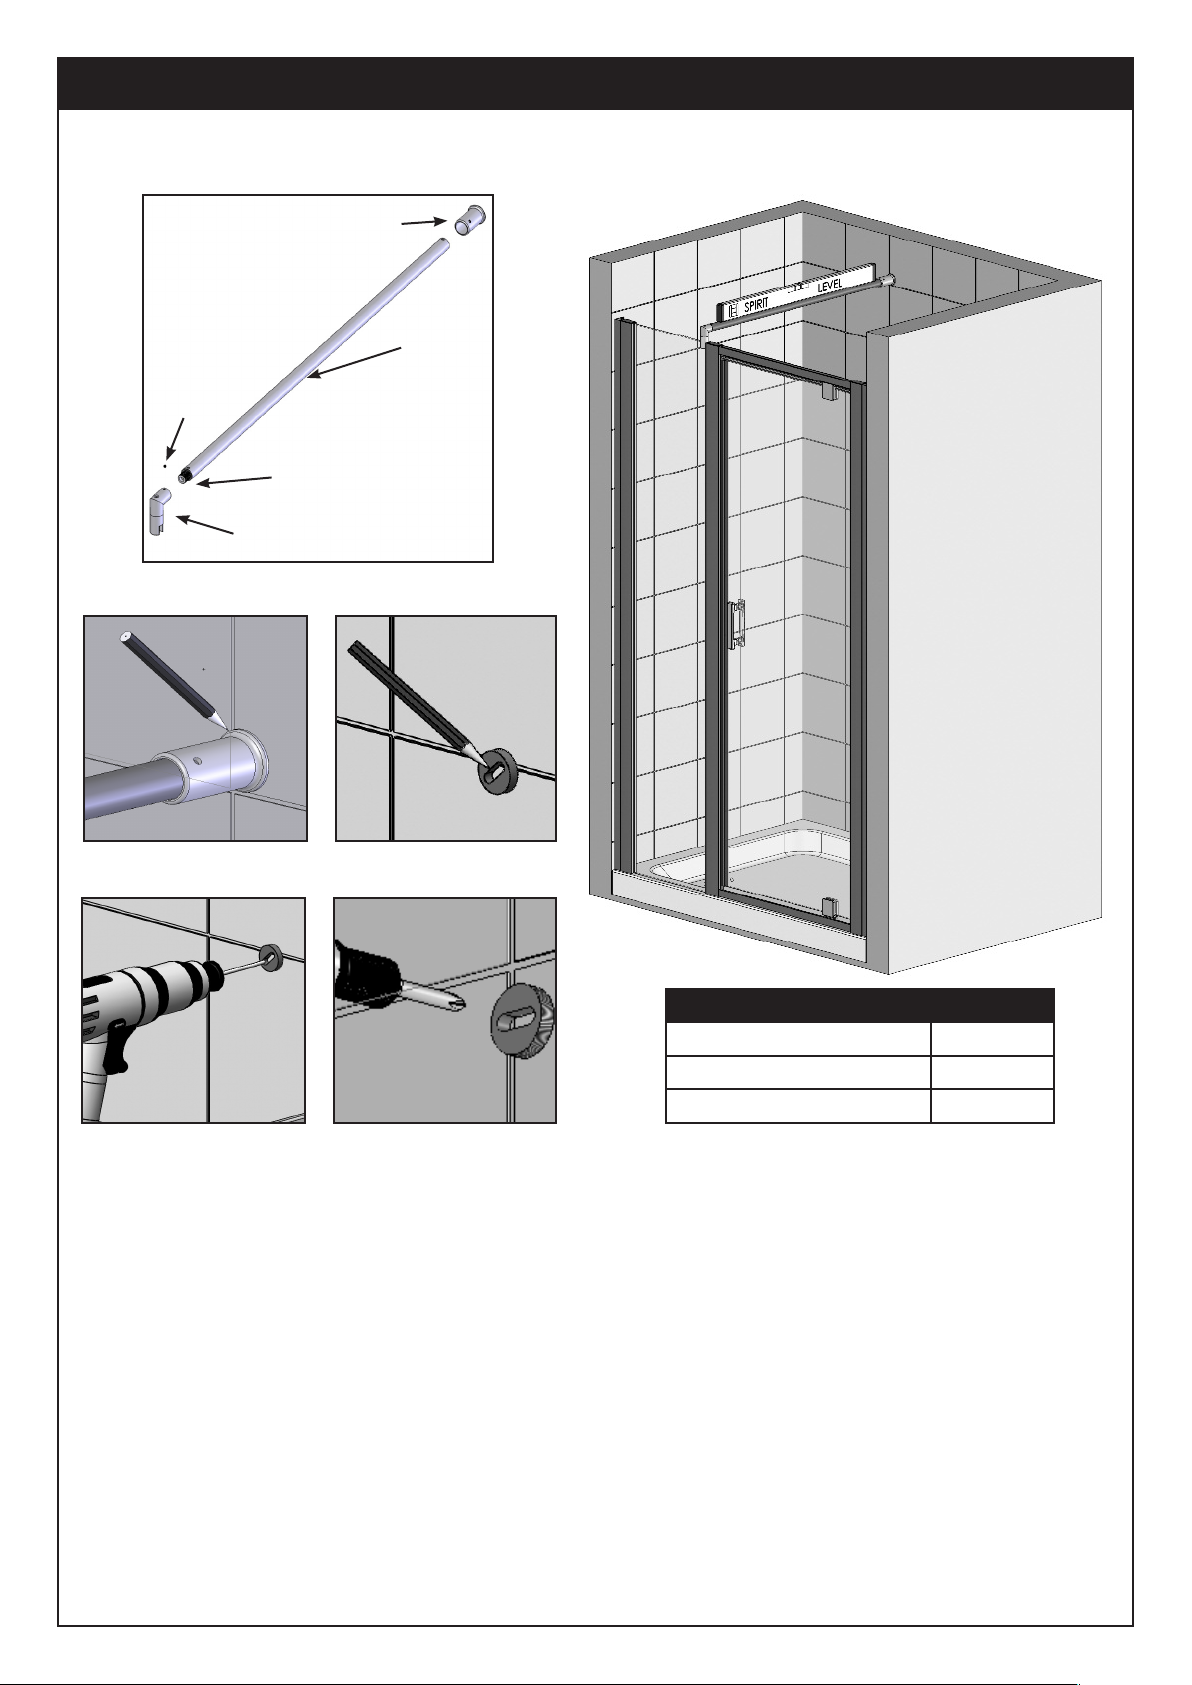
Step 4 - Bracing
1. MeasurethedistancefromthebackwalltotheoutsidefaceoftheInlinePanelGlass.
2. Deductthatmeasurementfrom1038mm,shortentheBraceBarbythenewamount(see*Exampleabove)
3. PlacetheserratedendofthestraightsectionintotheLowLevelbraceassemblyandfastentogetherby
tighteningtheSetScrew,slidetheWallCupontheoppositeendtocompletetheBraceBarassembly.
4. PositionthefullbracingassemblyontotheInlinePanelGlass,donotxatthisstage.LoosentheAllen
screwintheLowLevelbraceassemblysothatitcanbeturnedtoachievethecorrectangle.
• There should be no metal parts touching the glass, the spacers must be used.
5. SlidethewholeassemblyuptothetiledwalltodeterminethepositionoftheWallCup,markusingapencil.
6. UnscrewtheinsertfromtheWallCupandpositionitcentrallyonthepencilmark.Markthroughtheslotfor
thepositionofthescrewholethatistobedrilled.
7. Drilltheholeusinga6mmMasonryDrill(notsupplied)andttheWallPlug.
8. Fixtheinserttothewallusinga40mmscrew(supplied).ScrewtheWallCupontotheinsertuptothewall.
9. PlacetherestoftheBraceBarassemblyontothepanelandintotheWallCup,checkthateverythingis
placedcorrectly(includingspacersbeingtted)thentightenallthescrewswiththeAllenKeys(supplied).
• Thereis35mmofadjustmentintheBraceBarassemblytoallowforcorrectadjustment.
• The Brace Bar must be level, use a Spirit Level and ensure the bubble is in the middle of the two lines.
• Thepanelmustbeverticallylevel,useaSpiritLevelandadjustthebracingtoachievethis.
③
⑧ ⑦
LowLevelBrace
WallCup
SerratedEnd
Straight
Section
Set
Screw
⑤
NOTE:TheStraightSectionoftheBraceBarassemblymayneedshortening,ifsouseahacksaworsimilar.
ItisIMPORTANTthatitisshortenedattheWallCupend-besuretoremoveallburrsandsharpedges.
BraceBar(*Exampleonly)
GivenDimension 1038mm
Walltooutsideofglass *878mm
ReduceBraceBarby *160mm

②
Step 5 - Fitting Screw Cover, Caps and Sealing
1. FittheScrewCoverTrim(ifyouhaveroomthiscanbesliddownfromthetop).
• CuttheCovertrimsushwiththetopoftheverticalprolesusingaStanleyknifeorsimilar,pleasetake
care when cutting.
2. FittheTopCapstothetopoftheDoor/Panel.
• On the vertical between the Panel and Door it may be necessary to remove a front leg on the Panel side.
3. UsingagoodqualitysealantsealbothsidesoftheWallProlesverticallyinsideandoutsidewherethey
meetthetiledwalls.
4. Sealtheenclosurehorizontallythefulllengthtothetray/wetroomoorontheoutsideonly.
• IMPORTANT: Failure to follow Stages 3 and 4 may result in serious water damage and will not be covered
under the terms of the guarantee.
• Do not seal the inside of the enclosure horizontally.
• Please allow 24 hours for the sealant to fully cure before using the enclosure.
5. PlacetheBrandingBadge(ifapplicable)onaprominentnonemovingpartofaluminium..
②
↓
①
①
③

Spare Parts
Part No. Description Q’ty Part No. Description Q’ty Part No. Description Q’ty
1EndCap 111 21
2WallCupAssembly 112 22
325mmBraceBar 113 23
4ExpandableJoint 114 24
5LowLevelBracing 115 25
6InlinePanel 116
7ScrewCoverTrim 117
8 18
9 19
10 20
If you need to replace any damaged parts please see illustration below for parts list then
call Customer Relations on 01325 328033/328034

TROUBLE SHOOTING GUIDE
Problem Solution
Leaking 1. Checkthetrayhasbeensealedcorrectlypriortoinstallationoftheenclosure(Step1in
theDoorInstructions).
2. Checktheinsidegaphasbeensealedcorrectlybetweenthetrayandwallproles(Step
2intheDoorInstructionsandStep1intheseInstructions).
3. Checkthatthebaseoftheenclosureissealedtothetrayontheoutsideonly(Step5).
4. Checktoseeifbothwallproleshavebeensealedverticallyinsideandoutsidewhere
theymeetthetiledwall(Step5).
5. Checkthatthebaseoftheenclosurehasn’tbeensealedtothetopofthetrayonthe
insideofthecubicle.(Step5).
Important: This enclosure should be water tested conforming to BS EN 14428
Enclosure Alignment 1. Checkthattheenclosureisttedontoatiledwallorasimilarsealedsurface(Step1in
theDoorInstructions).
2. Checkthatthewallproleshavebeentted15mmfromthefrontoutsideedgeofthe
tray(Step2intheDoorInstructions).
3. Checkthatthewallproleshavebeenttedcompletelyvertical(thebubblemustbein
thecentreofthetwolinesonaspiritlevel-Step2intheDoorInstructions).
4. Checktheenclosureiscompletelyverticalandlevel(Step1intheDoorInstructions).
Door not Operating
Smoothly
1. Checkthatthetrayiscompletelylevel(thebubblemustbeinthecentreofthetwolines
onaspiritlevel).
2. Checkthatthewallproleshavebeenttedcompletelyvertical(thebubblemustbein
thecentreofthetwolinesonaspiritlevel).
Some important information to help you Maintain your product.
Thefollowinginformationisallyouneedtokeepyourproductlookingnew.
Cleanyourproductusingamilddetergentdilutedinwaterandthenpolishedoffusingasoftcloth.
Ifyouliveinahardwaterarea,periodicallycleanyourproductusinga50/50solutionofwhitevinegarandwater.The
solutionshouldbeleftontheenclosureforapproximately5minutesthenrinsedoffusingwarmwater.Thismethodof
cleaningshouldremovelimescaleresidue.
Simple Maintenance
Ourproductsaregenerallymaintenancefree,howeveritmaybenecessarytolubricatewheelassembliesandother
movingpartsfromtimetotime.
Itisstronglyrecommendedthataqualitysiliconesprayisused.
A list of Don’t’s:
1. Don’tuseacidicbasedproductswhichareunsuitableforcleaningenamelsurfaces.
2. Don’tuseabrasivecleanersorcleanersusingbleachorsolvents,theseproductswilladverselyaffectthenishof
thealuminiumproles.
3. Don’tusescouringpads,powderoranysharpinstrumentswhencleaningtheenclosure.
Shouldyouexperienceanyproblemsduringinstallationpleaserefertothe
TroubleShootingGuideorcontactCustomerRelationson:
+44 (0) 1325 328033/328034
Toenablecustomerrelationstoprovideyouwithanexcellentlevelofserviceitisimportantthatyou
quoteyourproductCodeandReferenceNumber-thesecanbefoundontheGuaranteecard.
Table of contents
Other ERGONOMIC Bathroom Fixture manuals

Popular Bathroom Fixture manuals by other brands

VADO
VADO WG-81389-C Installation & maintenance instructions

INR
INR LINC 20 installation instructions

Spectrum Brands
Spectrum Brands Pfister Kenzo 016-DF0 Quick installation guide

Triton
Triton Michelle TSHUMICH3 manual

Ronbow
Ronbow AMORA VANITY 054030 Installation and care guide

Purmo
Purmo Amirante E manual


Vaunn Medical
Vaunn Medical M725N-AAWH-CHVM user manual

Kohler
Kohler ENGLEFIELD EXCLUSIVE Series installation instructions

Kohler
Kohler NEW PURIST K-701574T installation instructions

Helvex
Helvex Vertika 16104 installation guide

Voda Plumbingware
Voda Plumbingware Olympia VOP63RBG quick start guide

Booth & Co
Booth & Co AXBRIDGE BC-AXB-183-CP installation guide