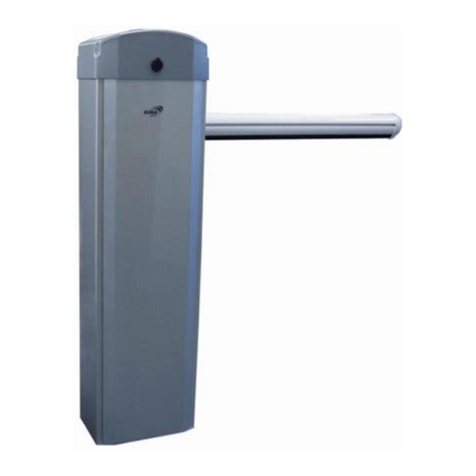
Erreka ULTRA Operating instructions

7
ULTRA
Quick installation and programming guide English
WARNING
This quick guide is a summary of the complete installation guide. The guide contains safety warnings and other
explanations that must be taken into account. The most recent versions of this guide and the installation manual
are available in the "Downloads" section on Erreka's website. http://www.erreka.com.
The options and functions described in this guide apply for the firmware version indicated on the circuit. The
firmware, as part of a process of continuous improvement, is subject to new functionalities or upgrades being
included as a result of new versions which are not necessarily compatible with previous ones. For this reason,
some options or functions may differ or be unavailable if your firmware is older than shown in this guide.
E289A
D289A
L
L
D289E
E
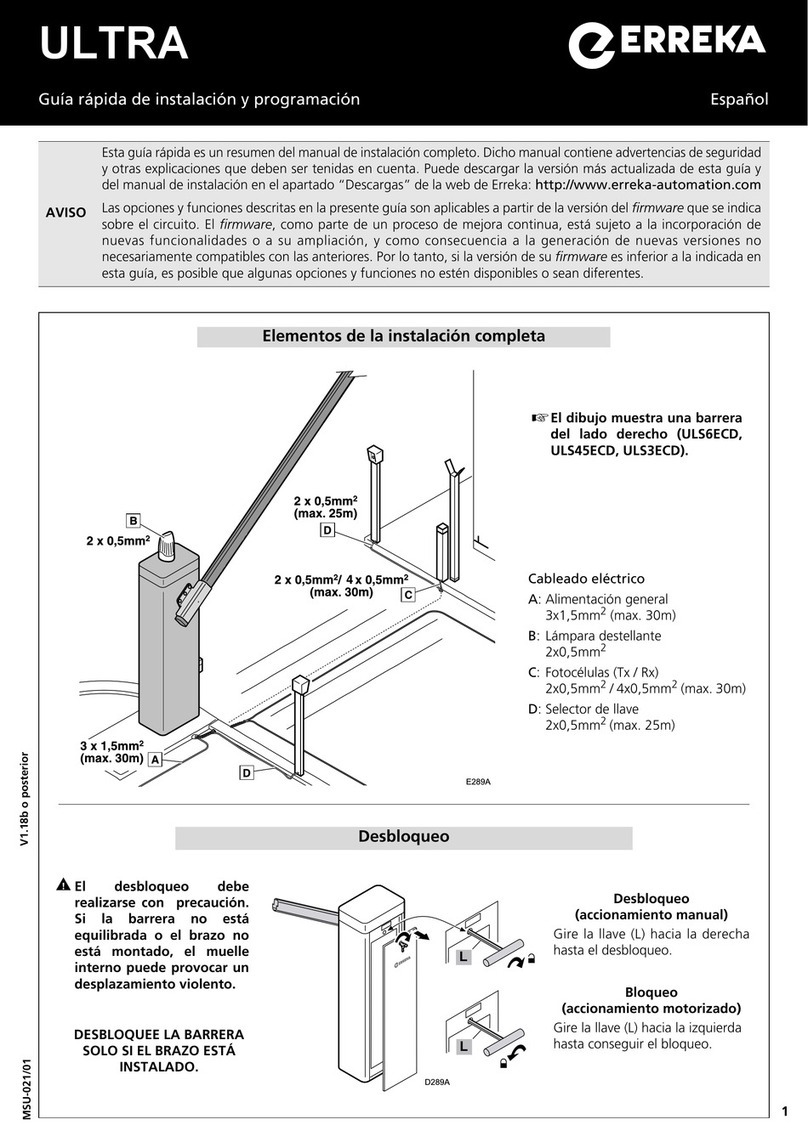
Electrical cables
A: Main power supply
3x1.5mm2(max. 30m)
B: Flashing light
2x0.5mm2
C: Photocells (Tx / Rx)
2x0.5mm2/ 4x0.5mm2(max. 30m)
D: Key switch
2x0.5mm2 (max. 25m)
Elements of the complete installation
Unlocking
Unlocking should be carried out with caution. The internal
spring may cause jolting if the barrier is not balanced or the
arm is not mounted.
Unlocking
(manual drive)
Turn the key (L) clockwise
until it is released.
Locking
(motorised drive)
Turn the key (L) anti-
clockwise until locked.
The drawing shows a right
side barrier (ULS6ECD,
ULS45ECD).
ONLY UNLOCK THE BARRIER IF THE ARM IS INSTALLED.
Locking in opening position
The bar (arm) can be moved and left locked
in opening or closing position.
•To do this, turn the bottom shaft (E) of the
geared motor so the arm is locked in
opening position.
MSU-021/03 – 2022-12-15 V1.18b or later

8
Choosing the spring and
anchoring hole
The balancing
spring and the hole
it is anchored in
depend on the
length of the barrier
arm, the type of
arm and the
accessories placed
on the arm (in short,
the weight of the
arm).
The barriers are supplied with one spring
mounted in the box (S) and one spring
removed:
•Spring removed: Ø5.5mm, blue
•Spring mounted:
ULS45EC: Ø6.5mm (yellow), mounted
in hole 2
ULS6EC: Ø6.5mm (yellow) x2,
mounted in hole 2
The table below shows the spring to be
used and the anchoring hole, as
appropriate. Using other accessories may
influence the choice of spring and orifice.
If the spring or anchoring hole must
be changed, do this before
installing the barrier and arm.
P289L
21
S
ULS45EC barrier with AUL13 arm (3m, 100x45mm), 10A001 flange
Springs / Hole bar only bar + LED bar + leg
bar + LED + leg
1x Ø6.5 / 1 x x x x
1x Ø6.5 / 2 x x 3 m 2.8 - 3 m
1x Ø5.5 / 2 3 m 2.6 - 3 m 2.5 - 3 m 2.5 - 2.8 m
ULS45EC barrier with AUL02 arm (4.5m, 100x45mm), 10A001 flange
Springs / Hole bar only bar + LED bar + leg
bar + LED + leg
1x Ø6.5 / 1 x 4.1 - 4.5 m 4 - 4.5 m 3.5 - 4.5 m
1x Ø6.5 / 2 3.8 - 4.5 m 3.4 - 4.1 m 3 - 4 m 2.8 - 3.5 m
1x Ø5.5 / 2 3 - 3.8 m 2.6 - 3.4 m 2.5 - 3 m 2.5 - 2.8 m
ULS45EC barrier with ANT09 arm (4.3m, Ø70), 10A072 flange
Springs / Hole bar only bar + LED bar + leg
bar + LED + leg
1x Ø6.5 / 1 3.9 - 4.3 m 3.7 - 4.3 m 3.3 - 4.3 m 3.2 - 4.3 m
1x Ø6.5 / 2 3.2 - 3.9 m 3 - 3.7 m 2.6 - 3.3 m 2.5 - 3.2 m
ULS6EC barrier with AUL01 arm (6m, 100x45mm), 10A001 flange
Springs / Hole bar only bar + LED bar + leg
bar + LED + leg
2x Ø6.5 / 1 x x x 5.3 - 6 m
2x Ø6.5 / 2 5 - 6 m 4.7 - 6 m 4.5 - 6 m 4.2 - 5.3 m
1x Ø6.5 / 1 4.5 - 5 m 4 - 4.7 m 4 - 4.5 m 4 - 4.2 m
1x Ø6.5 / 2 4 - 4.5 m x x x
ULS6EC barrier with ANT10 arm (3.5+2.8m + Ø70 joint), 10A072 flange
Springs / Hole bar only bar + LED bar + leg
bar + LED + leg
2x Ø6.5 / 1 5.6 - 6.3 m 5.2 - 6.3 m 5 - 6.3 m 4.8 - 6.3 m
2x Ø6.5 / 2 4.5 - 5.6 m 4.2 - 5.2m 4 - 5 m 4 - 4.8 m
More arms than those shown in this table can be mounted; see the complete manual for more information.
Changing the anchoring hole
+
–
P289J
M
1
2
S
V
1Put the barrier arm in
upright position.
2Turn the tensioning
handle (M) anti-
clockwise until the
spring is tensionless.
3Release the anchoring
bolt (1) and mount it in
the other hole.
4Balance the barrier as
described below.
Changing the spring
1Place the arm in upright position.
2Turn the tensioning handle (M) anti-clockwise until
the spring is tensionless.
3Release the anchoring bolt (1).
4Take down the spring box (S), releasing the pivot (V).
5Completely unscrew the tensioning handle, remove
the spring and put the new spring in place. Finally,
screw in the tensioning handle.
6Mount the spring box (S), inserting the pivot (V).
7Screw the anchoring bolt in the appropriate hole (1)
or (2).
8Balance the barrier as described below.
If the spring or anchoring hole must be changed, do this before installing the barrier and arm.
The illustrations and explanations refer to ULS45EC barriers, which have a single balancing spring.
The procedure for ULS6EC barriers is similar, bearing in mind that the spring and its adjacent
elements are duplicated.
9
420
340
166
178
P289B
Mounting on the ground
Prepare a firm
base and fasten
the barrier with
the elements
supplied:
•Expansion
bolts
•Flatbars
•Washers
•Spring
washers
•Nuts
P289C
Assembling the arm
Choose the barrier in accordance with assembly
side and arm length:
ULS6ECD: right, 100x45mm, 6m;
ULS45ECD: right, 100x45mm, 4.5m;
ULS6ECI: left, 100x45mm, 6m;
ULS45ECI: left, 100x45mm, 4.5m.
•Lock the operator and mount the arm.
P289G
+
–
Balancing the barrier
Unlock
THE BARRIER MUST BE BALANCED FOR PROPER OPERATION.
1Unlock the operator. The bar can be moved smoothly by hand
throughout the entire run if the barrier is balanced correctly.
2If the barrier is not balanced, turn the tensioning handle until it is.
The tensioning handle is only accessible with the arm in upright
position.
ULS6EC barriers have two springs and two knobs for
tensioning.
Balancing is done by acting equally on the two knobs, to ensure the
tensioning of both springs is approximately the same.
3The anchoring hole or spring must be changed if the barrier cannot
be balanced. See the table when choosing the spring and
anchoring hole.
P289H
A
B
Adjusting the stoppers
•Unlock the operator and move the barrier by hand to check its
position in the stoppers. If it is not correct, adjust the
associated stopper, (A) or (B).
•Lock the operator and check operation.
P289I
FCA
FCC
LA
LC
Adjusting the limit switches
Unlock the operator and move the barrier by hand to check the
adjustment of the LA and LC cams that drive the FCA and FCC limit
switches.
The limit switch has two LEDs to indicate whether it is enabled or not:
•The closing LED (FCC) is red (cam LC)
•The opening LED (FCA) is green (cam LA)
Ensure the cams are correctly adjusted, so they act before
reaching the stoppers.

10
NLV-V+
ST1
ST2
SG.A
N
L
230V/50Hz
125V/60Hz
FCA
FCC
P289Z
MGN
FA 24Vdc
BC
***
***
PWR LED 12Vdc
C.F.
LAMP
Cooling
Fan
FS
General connections
Opening photocells (SG.A):
place DIP6 in ON to enable testing.
Closing photocells (SG.C): place
DIP9 in ON to enable testing.
Photocell testing
Encoder
For correct operation of the
encoder, ensure DIP7 is in ON.
yellow
230V, max. 60W
F1 Motor fuse (5x20):
230 VAC: 2.5A
125 VAC: 6.3A
F2 Electronic fuse
(5x20; 230 VAC: 500mA)
F3 FT and AUX24V outputs fuse
(5x20; 500mA)
FS Resettable* fuse secondary
*automatically resets when
overload ends
DL1 Barrier open
DL2 Radio code programming
indicator / Receiving radio
code
DL3 Radio code or operation
programming
DL4 Opening relay enabled
DL5 Closing relay enabled
DL6 Opening limit switch contacts
closed
DL7 Closing limit switch contacts
closed
DL8 Opening safety device
contacts closed
DL9 Closing safety device contacts
closed
DL10 Closing device contacts (ST2)
closed
DL11 Full running device contacts
(ST1) closed
DL12 Radio key command
DL13 Encoder signal
Operator working: DL13
flashes, since the encoder
sends the signal in the form of
pulses.
Operator stopped: DL13 can
be on or off, indistinctly,
depending on the position of
the encoder (high pulse or
low pulse).
DL14 LED** resettable fuse FS
DL141 LED** fuse F3
** DL on: fuse closed; DL off:
fuse open
STOP button enabled (emergency stop): DL1 and DL3 flash
simultaneously every 0.5 seconds.
Opening or closing photocell testing error: DL1 and DL3 flash
simultaneously every 2 seconds.
green
red
red
brown (G2)
black (G1)
blue (COM)
blue
brown
red
black
black
red
brown
(see note)
***NOTE: if you install 24VDC powered accessories (photocells,
etc.), do not connect them to the control panel terminals, but to the
external BC-AUX(24Vdc) terminals, located on the DIN rail, which are
powered from the 24Vdc auxiliary power supply (FA 24Vdc).
(see note)
red
white

11
P309M
OK
Installing the LED strip
Use the bottom hole to insert the cable in the barrier
when using the arm with the LED strip (AUL11 for 6m
barriers, AUL12 for 4.5m barriers, AUL17 for 3m
barriers).
Connecting the LED strip
V+
COM
N
L
LED (AUL05 / AUL06)
PWR LED
(AUL05/AUL06)12Vdc
V
R
COM
A
P289Y
The LED strip is fitted in arms with rubber and LED strip
with the following specific codes:
•AUL11: for 6m barriers
•AUL12: for 4.5m barriers
•AUL17: for 3m barriers
The power supply system is available separately (reference
AUL10). It consists of:
•a traffic light card (SMF),
•a 12Vdc power supply (PWR LED 12Vdc),
•the required cables and cable glands.
V: black
R: brown
COM: green-yellow
A: blue (not used)
The LED strip must be powered with 12 Vdc, with the 12 Vdc power supply
(PWR LED 12Vdc). Do not power the LED strip with 24Vdc as this will damage it.
E289L
SW2 functions during programming (DIP1=ON)
DIP1=ON: programming enabled (DL3 lights up)
DIP1=ON and DIP4=ON: radio code programming
The barrier run does not need to be programmed, as
this is set at factory.
Programming the radio code (with RSD receiver only)
1 Connect the electrical power
supply and close the barrier by
keeping PUL1 pressed down.
2 Select the code in the transmitter. 3 Place the DIPs as shown in the
figure (DIP1=ON, DIP4=ON). DL3
lights up to show programming
mode enabled.
R289A R289C
R289B
4 Press the required channel button.
DL2 flashes when programming is
complete.
5 Place DIP1 and DIP4 in OFF.
DL3 remains off.
6 Disconnect and reconnect the
electrical power supply.
I
II
R289D
R289E
If a receiver other than RSD is used, see the relevant instructions.

12
DIP Modes and functions Option Effect
DIP1 OFF
DIP2 Operation warning
ON the flashing light comes on and the operation begins after a 3
second warning
OFF the flashing light comes on and the operation begins
immediately
DIP3 Key commands using ST1 and ST2 ON ST1: opening command; ST2: closing command
OFF ST1: opening and closing commands; ST2: no function
DIP4 Automatic or step-by-step mode
ON automatic mode (the barrier closes automatically at the end of
standby time, which is adjusted using T.E.)
OFF semi-automatic mode (the barrier only closes when receiving
the key command)
DIP5 Automatic mode optional
(only if DIP4 = ON)
ON during standby, the barrier obeys the key commands (can be
closed before standby time finishes)
OFF the barrier cannot be closed until standby time finishes; key
commands will cause standby time to restart.
DIP6 Opening photocell testing OFF always place in OFF
DIP7 Encoder ON encoder enabled
OFF encoder disabled
DIP8 Interlock mode (with FT1)
ON interlock mode enabled: the barrier closes if SG.C is enabled
during standby time (in automatic mode)
OFF interlocking mode disabled
DIP9 Closing photocell testing OFF always place in OFF
DIP10 No function OFF always place in OFF
Selecting functions and modes using SW2 (DIP1 = OFF)
C.F.: fan running time
Regulate the time the operator's cooling fan is working.
•Minimum value: 3 seconds; maximum value: 90
seconds
T.E.: barrier open standby time
If automatic or optional automatic operation mode has
been programmed, regulate T.E. to adjust standby time
with the barrier open (before automatic closing begins).
•Minimum value: 0 seconds; maximum value: 90
seconds
P.M.: motor torque
Use P.M. to adjust the maximum motor power value.
Torque adjustment, respecting the maximum
closing forces set out in Standard EN12453:2000.
Make the measurements as described in Standard
EN 12445:2000.
P289M
C.F.
C.F.
Adjusting the potentiometers
Table of contents
Other Erreka Automatic Barrier manuals
Popular Automatic Barrier manuals by other brands

MachPower
MachPower AC-ASDSC-017 user manual

Entrematic
Entrematic Ditec QIK4E manual

Roger Technology
Roger Technology Agilik Series Instruction and warnings for the installer

Vimar
Vimar ELVOX EBR1 Installer manual

SEA
SEA Sprint manual

BFT
BFT MAXIMA ULTRA 36 UL Instructions for installation, use and maintenance