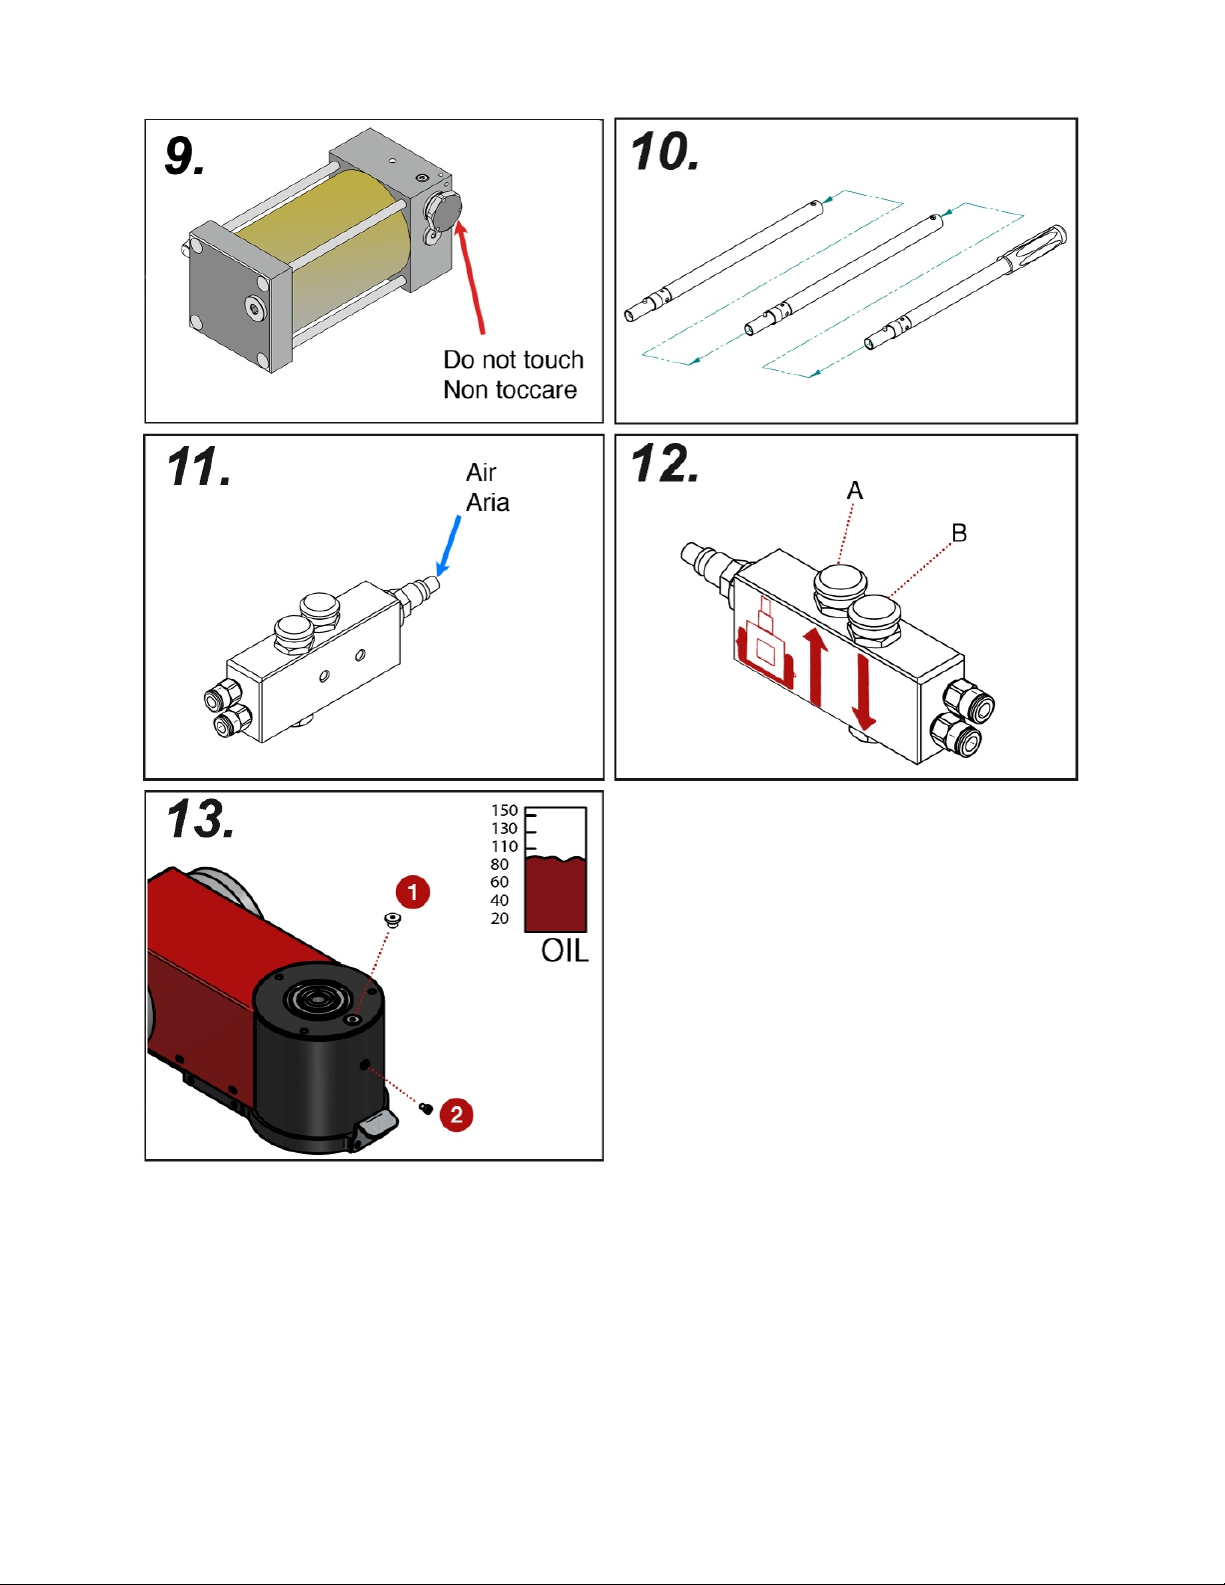
3. If the oil fails to come out POS. 8 - A00388POS. 8 - A00388 once the screw has been loosened, the level is too low. In this case, add
oil. The level must be at the height of screw POS. 8 - A00388POS. 8 - A00388 .
4. If oil does come out, let the excess quantity drain off until the right level is reached (see point 4).
5. Re-tighten the screw POS. 8 - A00388POS. 8 - A00388 . Operate the lifting control and allow the pistons to move up by about 4 cm,
then re-tighten the screw POS. 7 - A00388POS. 7 - A00388
AIR BLEEDING
Each time the jack is serviced, removing and refitting parts connected to the tank and motorpump, it is advisable to bleed
off all air. Bleeding phases:
1. The pistons must be moved out completely.
2. Loosen the dowel POS. 9POS. 9 exploded drawing A00388A00388 inside the piston POS. 2 - A00388POS. 2 - A00388
3. Let all the air flows out of the dowel until the oil starts to come out. If necessary, push the piston downwards and then
close the dowel again.
5. Let all the air out from the dowel and continue until oil starts coming through and then close the dowel.
8. Move the pistons back in completely and check oil level.
9. Try to operate the jack without any load and if the piston lowers in jerks repeat the procedure at least 2 or 3 times.
MAINTENANCE RESERVED TO A PROFESSIONALLY QUALIFIED
ENGINEER
Having to carry out maintenance or overhauling, use exclusively genuine spare parts to ensure the utmost reliability for the
jack.
PROBLEMS
Solutions
THE MOTOR WILL NOT START, OR IT RUNS BADLY.
- Check that the air supply line is not choked.
- If the pistons fail to move up, the pump could be empty. Completely lower the pistons by means of the descent
control and subsequently pressing with your hand, once the pistons have been lowered, press the up and down
commands a few times alternately. This will enable the pump to recharge.
- If the pistons are already completely lowered and the lifting command is not working, the pump will have to be
recharged according to the following procedure:
1. Connect the jack to the compressed-air circuit
2. Loosen the screw POS. 7 - A00388POS. 7 - A00388
3. In place of the screw just removed, screw on a pipe with compatible coupling.
4. Blow a small quantity of air inside the tank through the pipe just fitted and, at the same time, operate the lifting
command.
5. If, when the lifting command is operated, the pistons also move up without blowing air into the tank, the pump has
recharged and you can proceed to the next step. Otherwise, repeat the operations illustrated at the previous point.
6. Allow the pistons to move completely up by operating the lifting command. If the pistons move in jerks, the
bleeding procedure will have to be performed (see "Maintenance reserved to the end user").
7. Let the pistons re-enter being careful to leave the large piston POS. 3 - A00388POS. 3 - A00388 out by 4 cm.
8. Remove the pipe fitted at point (3), and re-tighten the screw POS. 7 - A00388POS. 7 - A00388
9. Fully lower the large piston POS. 3 - A00388POS. 3 - A00388 manually.
6