Esko Kongsberg XL User manual

Service Guide
i-XL
Kongsberg XL / i-XL tables
Note
We remind you that only the Esko staff, or persons having received
appropriate training, are allowed to handle, manipulate or do repairs on the system.
A Publication of: Esko-Graphics Kongsberg AS
Copyright © 1984-2013 Esko.
This copyright does not indicate that this work has been published.
All rights strictly reserved. Reproduction or issue to third parties in
any form whatever is not permitted without written authority from the publisher.
Esko reserves the right to change specifications without notice.
Document number: D3073
Status: 110905
Esko-Graphics Kongsberg AS
www.esko.com
P.O.Box 1016, N-3601 Kongsberg, Norway
Tel: +47 32 28 99 00 Fax: +47 32 28 85 15 / 32 28 67 63
not permitted without written authority from the publisher.

i-XL Service Guide
2
© Copyright Esko-Graphics Kongsberg AS, Norway
All rights reserved. This material, information and instructions for use contained herein are the property of Esko-
Graphics Kongsberg AS. There are no warranties granted or extended by this document. Furthermore Esko-Graphics
Kongsberg AS does not warrant, guarantee or make any representations regarding the use, or the results of the use
of the system or the information contained herein. Esko-Graphics Kongsberg AS shall not be liable for any direct,
indirect, consequential or incidental damages arising out of the use or inability to use the system or the information
contained herein.
The information contained herein is subject to change without notice. Revisions may be issued from time to time to
advise of such changes and/or additions.
No part of this system may be reproduced, stored in a data base or retrieval system, or published, in any form or in
any way, electronically, mechanically, by print, photoprint, microfilm or any other means without prior written
permission from Esko-Graphics Kongsberg AS.
This document supersedes all previous dated versions.
Correspondence regarding this publication should be forwarded to:
Global Support
Esko-Graphics Kongsberg AS
Kirkegårdsveien 45
N-3616 KONGSBERG

i-XL Service Guide
3
Table of content
1. INTRODUCTION .....................................................................................................................................................5
2. WHAT IS I-XL COMPARED TO XL?...............................................................................................................6
2.1 I-CUT USER INTERFACE.........................................................................................................................................6
2.2 THE I-CUT COMPUTER STAND...............................................................................................................................6
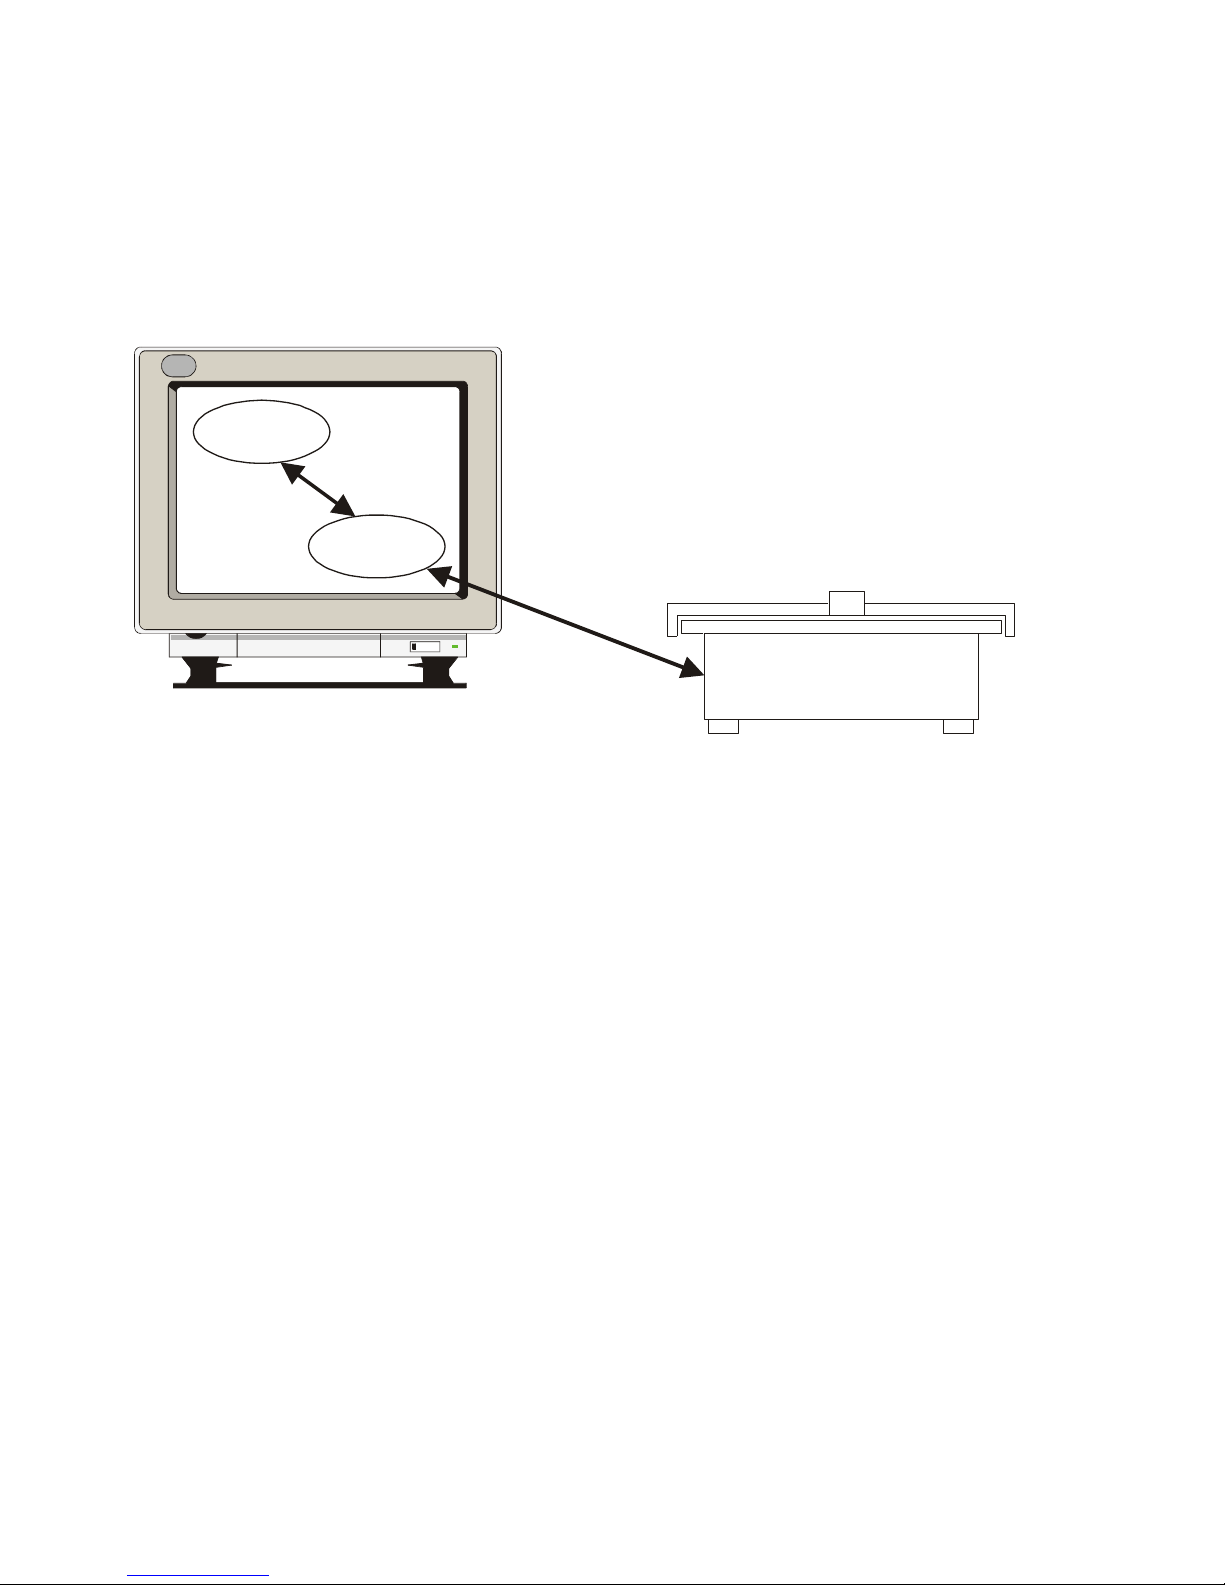
2.3 THE I-CUT CAMERA ...............................................................................................................................................6
2.4 MORE VACUUM SECTIONS .....................................................................................................................................7
2.5 PRESSURIZED AIR SUPERVISION ..........................................................................................................................7
2.6 THE CONVEYOR BELT (OPTIONAL)........................................................................................................................7
2.6.1 The belt clamps ............................................................................................................................................8
2.6.2 The feeder paws...........................................................................................................................................9
2.6.3 Vacuum reverse ...........................................................................................................................................9
2.7 THE VINYL ROLL HOLDER (OPTIONAL)................................................................................................................10
2.8 THE SHEET FEEDER (OPTIONAL).........................................................................................................................10
2.9 THE KISS-CUT TOOL (OPTIONAL).......................................................................................................................10
3. THE MAIN REFERENCE POINT POSITION .............................................................................................11
3.1 GENERAL INFORMATION ABOUT REFERENCE POINTS.........................................................................................11
3.2 SET THE MAIN REFERENCE POINT FOR I-CUT....................................................................................................11
3.3 SET THE MAIN REFERENCE POINT ON A TABLE WITH RULERS ..........................................................................12
3.3.1 If your table is running XL-Guide ........................................................................................................12
3.3.2 If your table is running i-Cut.................................................................................................................12
3.3.3 Execution ......................................................................................................................................................12
4. FLEXIHEAD WITH I-CUT .................................................................................................................................13
5. MULTICUT WITH I-CUT ...................................................................................................................................13
6. I-CUT CAMERA CONNECTION TO PC ........................................................................................................14
7. I-CUT CAMERA ADJUSTMENT.......................................................................................................................14
8. SOFTWARE INSTALLATION...........................................................................................................................15
8.1 INSTALL XL-GUIDE .............................................................................................................................................15
8.2 INSTALL I-CUT HARDWARE AND SOFTWARE......................................................................................................15
8.3 HOW TO UPDATE THE I-CUT LICENSE CODES....................................................................................................15
8.4 CONFIGURE XL-GUIDE FOR I-CUT CONTROL....................................................................................................16
8.5 CONFIGURE I-CUT FOR THE KONGSBERG I-XL.................................................................................................16
9. HOW TO CHECK CAMERA OPERATION ....................................................................................................17
10. THE KISS-CUT KNIFE TOOL ......................................................................................................................18
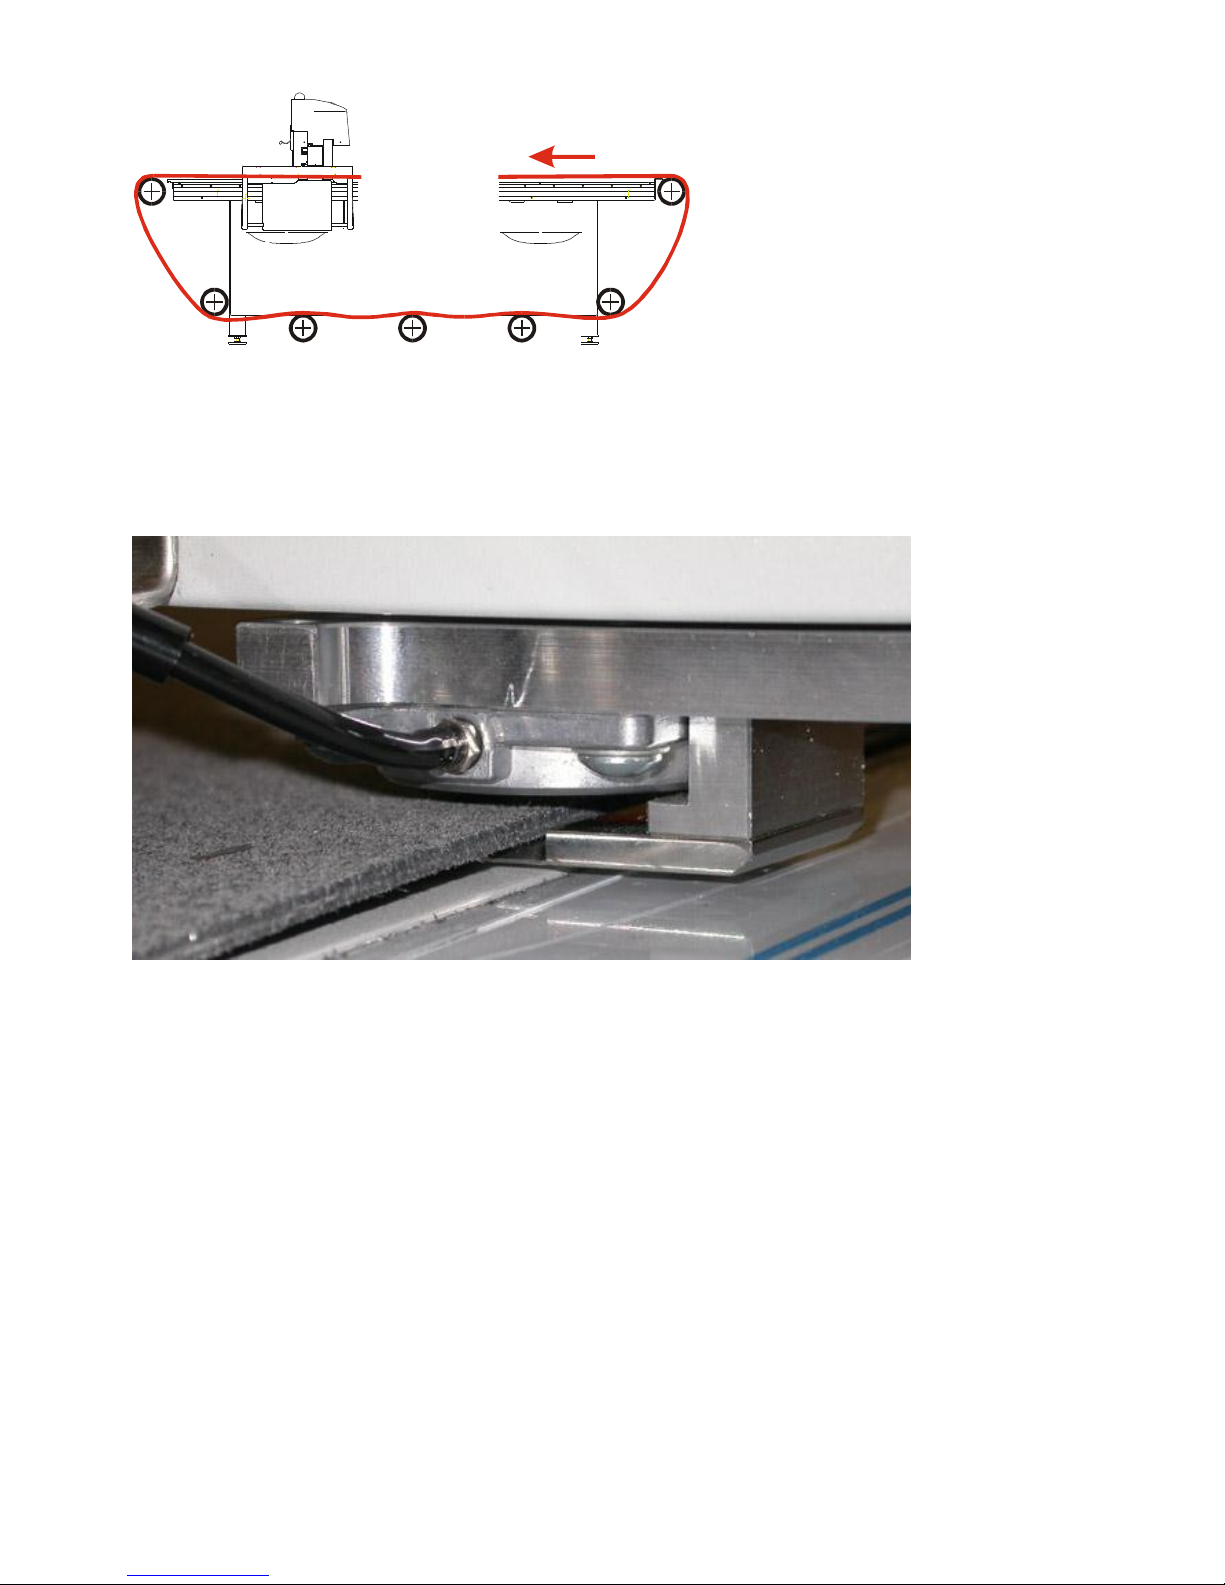
11. BELT TENSION..................................................................................................................................................21
12. HOW TO GLUE THE BELT ............................................................................................................................22
12.1 INTRODUCTION ....................................................................................................................................................22
12.2 BELT GLUE PROCEDURE,NOVEMBER 05, 2007...............................................................................................22
12.3 OLD BELT GLUE PROCEDURE ...............................................................................................................................28
12.3.1 Tools you need .......................................................................................................................................28
12.3.2 Procedure .................................................................................................................................................29
13. SHEET FEEDER..................................................................................................................................................35
13.1 SHEET FEEDER POSITION ....................................................................................................................................35
13.2 SHEET FEEDER USB TO SERIAL LINE SETUP......................................................................................................35
13.3 SHEET FEEDER SETUP ..........................................................................................................................................35
13.4 SHEET FEEDER LOAD TABLE BRACKETS..............................................................................................................36
14. AIR AND VACUUM, BLOCKED SCHEMATIC .......................................................................................38
14.1 PRESSURIZED AIR LAYOUT WHEN SHEET FEEDER IS INSTALLED ......................................................................38

i-XL Service Guide
4
14.2 ONE VACUUM PUMP,TWO VACUUM SECTIONS...................................................................................................39
14.3 TWO VACUUM PUMPS (OPTIONAL)......................................................................................................................40
14.3.1 General ......................................................................................................................................................40
14.3.2 3 sections .................................................................................................................................................40
14.3.3 4 sections .................................................................................................................................................40
15. ELECTRICAL CONNECTIONS FOR CAMERA, BLOCKED SCHEMATIC ...................................41
16. ELECTRICAL SCHEMATICS.........................................................................................................................42
16.1 TABLE CONNECTIONS ..........................................................................................................................................42
16.1.1 i-XL el. schematic ..................................................................................................................................42
16.1.2 Sheet feeder connections, details ...................................................................................................42
16.1.3 Pressurized air sensor, details..........................................................................................................42
16.1.4 i-XL-20 cable overview........................................................................................................................42
16.1.5 i-XL-24 cable overview........................................................................................................................42
16.1.6 i-XL-44 cable overview........................................................................................................................42
16.2 SHEET FEEDER .....................................................................................................................................................42
16.2.1 Power and safety relay ...................................................................................................................... 42
16.2.2 Motor / drive wiring ..............................................................................................................................42
16.2.3 PLC & I/O..................................................................................................................................................42
16.2.4 I/O...............................................................................................................................................................42
16.2.5 I/O...............................................................................................................................................................42
16.2.6 Enclosure ..................................................................................................................................................42
17. MECHANICAL DRAWINGS..........................................................................................................................43
17.1 I-XL20 W/CONVEYOR ........................................................................................................................................43
17.2 I-XL20 W/2VACUUM SECTIONS ......................................................................................................................43
17.3 I-XL20 W/2SECTIONS AND VACUUM REVERSE ..............................................................................................43
17.4 I-XL24 W/CONVEYOR ........................................................................................................................................43
17.5 I-XL24 W/3VACUUM SECTIONS ......................................................................................................................43
17.6 I-XL24 W/3SECTIONS AND VACUUM REVERSE ..............................................................................................43
17.7 I-XL44 W/CONVEYOR ........................................................................................................................................43
17.8 I-XL44 W/3VACUUM SECTIONS ......................................................................................................................43
17.9 I-XL44 W/3SECTIONS AND VACUUM REVERSE ..............................................................................................43
18. APPENDIX 1 –I-CUT PRODUCTION SETTINGS FOR KONGSBERG .....................................44
19. APPENDIX 2 –HOW TO VERIFY AND ADJUST CORRECT ANGLE ON A TABLE WITH
CONVEYOR BELT...........................................................................................................................................................45
20. APPENDIX 3 - FIELD INSTALLATION OF CONVEYOR BELT PAWS AND CLAMPS .......47
20.1 PRESSURIZED AIR CONNECTIONS,BLOCKED SCHEMATIC.................................................................................47
20.2 HOW TO PUT ADDITIONAL CABLES INTO THE TRAVERSE BEAM ........................................................................48
20.3 REAR SIDE OF TRAVERSE,ASSEMBLY.................................................................................................................51
20.4 FEEDER CLAMP,X1, ASSEMBLY..........................................................................................................................53
20.5 FEEDER CLAMP,X2, ASSEMBLY..........................................................................................................................53
21. APPENDIX 4 - REVOLVING WORK STATION, ASSEMBLY PROCEDURE............................54

i-XL Service Guide
5
1. Introduction
What is i-XL compared to XL?
What are the mechanical differences?
What are the electrical differences?
What about software?
How do I operate i-XL?
The intention of this manual is to answer such questions.
It is aimed especially for Esko-Graphics service personnel.

i-XL Service Guide
6
2. What is i-XL compared to XL?
The main differences introduced by i-XL compared to XL are:
2.1 i-Cut user interface
The system use i-Cut as user interface. i-Cut is a software package delivered by Mikkelsen Graphic
Engineering, inc (MGE), a company sited in Lake Geneva, Wisconsin.
Cutting Table
Front End PC
I-Cut
XL-Guide
The i-Cut software and the XL-Guide software are both installed and running on the front-end PC.
A command protocol is established between i-Cut and XL-Guide, allowing commands from i-Cut to
be executed in XL-Guide. But it is XL-Guide that actually runs the table. You can run XL-Guide as
normal if i-Cut is terminated.
2.2 The i-Cut computer stand
To allow for the conveyor belt, the standard front panel on XL has been replaced by an i-Cut
computer stand. The stand is fixed to the i-XL table frame, close to the –X,-Y –corner of the table.
The i-Cut computer stand includes the following components:
An XP pc delivered from Shuttle with keyboard and mouse. The keyboard is a dedicated
model built into the top of the stand.
A flat-screen monitor for the pc.
A complete MCU –unit including a standard XL operator panel. The only difference is that the
operator panel and the MCU–unit are separated; the panel is glued on top of the i-Cut table
while the MCU–unit is mounted beneath the table.
Power on and Emergency stop buttons
It is possible to rotate the top of the i-Cut stand +/-90o. From XL-Guide, it is possible to modify the
orientation of the jog buttons on the operator panel to correspont to the actual orientation of the
panel.
2.3 The i-Cut camera
One key function in i-Cut is the possibility to read register marks.
A video camera inside the tool head is connected to a video grabber card inside the front end PC.
In addition to the camera itself, a light unit is mounted in front of the camera.

i-XL Service Guide
7
Currently, the FlexiHead and MultiCut tool heads are prepared for the i-Cut camera.
You will find more details in chapter 5, 6 and 7.
2.4 More vacuum sections
Depending upon the model type, an i-XL table will have more vacuum sections compared to
standard XL.
2.5 Pressurized air supervision
To avoid damage due to missing or too low air pressure, a sensor is located beneath the cutting
table.
If the pressure level for the pressurized air is below a certain limit, machine execution is stopped
and an error message is displayed. The sensor is connected to the air tube for traverse and tool
control.
The input from the sensor is read by an analogue input on SCU.
2.6 The conveyor belt (optional)
The i-XL table can be equipped with a conveyor belt. With the conveyor belt, you can feed material
into and out from the working area on the cutting table.
The pulling force is approximately 400N.
AdjustableAdjustable
Adjustable guides
The belt itself is a specially prepared conveyor belt.
The picture above shows how the belt is moving around rollers mounted on both sides of the table
and the table frame.
One or more rollers inside the table frame prevent the belt from touching the floor.
When shipped from Kongsberg, the belt is rolled up in a separate roll. During installation, you have
to mount the belt onto the table and glue it together. You will find a detailed description on how to
glue the belt in chapter

i-XL Service Guide
8
The picture at left shows how to mount
the belt on large tables, as i-XL24 and
i-XL44.
Two different air cylinder systems are used to grab the belt and move it forward. Both systems are
mounted onto the traverse, as it is the traverse that actually moves the belt forward:
2.6.1 The belt clamps
One clamp on
each side
grabs the belt
and moves it
forward.

i-XL Service Guide
9
2.6.2 The feeder paws
Four feeder paws pushes the material
down towards the conveyor belt. In
this way the material is fixed and kept
in place during the belt movement.
The position of the feeder paws along
the Y-axis is adjustable. To release or
lock, a locking knob is available.
It is also possible to disable the
operation of a paw by closing the air
switch to the paw (the blue handle).
It is a general rule that at least two
paws should be inside one sheet of
material.
The air pressure to the two air cylinder systems is adjustable. Maximum pressure should be applied
to the belt clamp.
The pressure to the feeder paws should be kept as low as possible, as increased pressure increases
the friction between the belt and the table.
2.6.3 Vacuum reverse
In order to minimize the friction between the conveyor belt and the cutting table, an air blow is
creating an air pillow below the belt during the belt movement.
Two vacuum valves and a fan provides the air pillow as illustrated:
Vacuum ON
PUMP
PUMP
Vacuum reverse ON
FAN
FAN
During normal operation, the valve to the fan is closed while the valve to the vacuum pump is open.
In this case, you have vacuum on the cutting table.
When the valve to the fan is open and the fan to the vacuum pump is closed, you have an air blow
out from the tabletop.

i-XL Service Guide
10
2.7 The vinyl roll holder (optional)
A roll holder for vinyl rolls is available.
The distance between the rolls can be changed
to suit different roll sizes.
Roll diameters up to ø200 mm is possible.
Note: The weight of the roll has to be
considered. If heavy weight, the acceleration of
the belt movement should be reduced.
Reduced acceleration is also recommended to
avoid material spin-off.
2.8 The sheet feeder (optional)
MGE offers a sheet feeder that can be mounted on the rear side of the cutting table.
You can load a stack of material into the sheet feeder. The feeder will lift one and one sheet onto
the cutting table where the conveyor belt system moves the material into the working area of the
machine.
The interface between the sheet feeder and the i-XL table is just one control signal.
In addition, there is an USB –connection between the sheet feeder and the front end PC.
2.9 The kiss-cut tool (optional)
The kiss-cut tool was developed as part of the i-XL, but the tool is also available for XL. The kiss-cut
tool is a special tool for vinyl cutting. You will find a detailed description of the tool and how to use it
in chapter 8.

i-XL Service Guide
11
3. The Main Reference point position
3.1 General information about reference points
X
Y
Working
area
Main reference point
All X- and Y co-ordinates in the Input program file use the selected reference point as its origin.
Two modes are available:
1. Fixed reference point –the position of the reference point is fixed on the table.
2. Panel reference point –the position of the reference point is set by pressing the Init push button
on the Operator panel.
The fixed reference point number 1 is defined to be the Main reference point.
The Main reference point has to be correctly positioned in order to obtain:
A full working area.
Correct sheet feed operation.
Correct handling of long jobs
Using the Main reference point during program execution ensures correct operation.
3.2 Set the Main reference point for i-Cut
If you are about to run i-Cut on your table, use this procedure to set the Main reference point:
1. Go to Option, Table setup, Set Reference point.
2. Press the i-Cut Main Reference - button. The Main reference point is correctly positioned.

i-XL Service Guide
12
3.3 Set the Main reference point on a table with rulers
3.3.1 If your table is running XL-Guide
10 mm/0.4 inch
Ruler
Main reference point
The Main reference point is set 10 mm / 0.4 inches inside the ruler in both axes:
1. Go to Option, Table setup, Set Reference point.
2. Select reference point 1 and follow the instruction on the screen.
3.3.2 If your table is running i-Cut
Reference point 2
I-Cut reference point =
Main reference point
Unfortunately, the Main reference point for i-Cut and XL-Guide are in different positions on the table.
In order to run both i-Cut and XL-Guide on the same table, we have to follow these rules:
1. The Main reference point on the table (Ref. point 1) is set using the i-Cut Main Reference -
button as described above. Do not modify the position of Reference point 1 after this initial
setting.
2. As reference point when running XL-Guide select any of the other reference points available, for
instance Reference point 2. Go to Option, Table setup, Set Reference point.
Select reference point 2 and follow the instructions on the screen to set reference point 2 10 mm
/ 0.4 inches inside the ruler.
3.3.3 Execution
After the initial setup, follow these rules:
1. When running i-Cut, select reference point 1 on the table.
2. When running from XL-Guide, select reference point 2 on the table (or the reference point you
selected during setup).
Note: The working area for i-Cut is somewhat smaller compared to the working area for XL-Guide.

i-XL Service Guide
13
4. FlexiHead with i-Cut
I-Cut
camera
5. MultiCut with i-Cut
I-Cut
camera

i-XL Service Guide
14
6. i-Cut Camera connection to PC
A Pixci Sv5 Imaging
Board is installed in the
front-end pc.
The video cable is
connected as shown at
left.
A separate +12V power
supply provides power
to the camera and the
light unit.
7. i-Cut camera adjustment
Two adjustments are available:
A - adjust the aperture.
F - adjust camera focus.
Note:
When adjusting the i-Cut camera on MultiCut, the adjustment knobs are available in between the
knife foot, as illustrated in the picture above.
Before any adjustments are carried out, remove the knife from this tool position.

i-XL Service Guide
15
8. Software installation
8.1 Install XL-Guide
Insert the XL-Guide CD in the Front end PC. From the XL-Guide CD, start Setup.exe. Follow
instructions on screen and install in default directories.
You will find more information about software installation in the XL-Guide online help manual.
8.2 Install i-Cut hardware and software
Before installation of i-Cut software can begin, you must complete the following:
1. Install the Epix PIXCI Video Capture Board into an unused PCI slot in your computer.
2. Connect your i-Cut dongle to an available USB port. Two dongles are included in the delivery,
one for production preparation and one for cutting table control. On the Front end PC, the
cutting table control dongle should be used.
3. Connect the plotter and vision system to your computer.
4. Log onto your Windows® operating system administrator account.
5. Insert the i-Cut installation disc into your CD-ROM compatible drive.
Installing i-Cut requires adding the following three software components to your system:
1. Epix PIXCI Video Capture Board Driver
2. HASP copy protection support
3. i-Cut main program
You will find more details regarding software installation in the i-Cut User‟s manual.
8.3 How to update the i-Cut license codes
From PC Desktop or Start menu, start i-Cut.
From the Options menu, select –Configuration:
The options available from the license defined by current dongle are listed in this dialog.

i-XL Service Guide
16
If a license update is needed, copy and paste the new control word into the edit box below and press
the Add button.
Restart i-Cut to enable the updated license.
8.4 Configure XL-Guide for i-Cut control
Ensure the following XL-Guide settings are valid:
Parameter
Set from
Setting
Optimize
Options/System options
Disabled
Sequencing
Options/System options
Disabled
i-Cut controlled vacuum
Options/System options
Enabled
Main ref point no 1
Options/Table options/Set reference point
Ref.pt. no 1
i-Cut Main Reference
Options/Table options/Set reference point
Execute
Single/multiple design
Main toolbar
Single design
8.5 Configure i-Cut for the Kongsberg i-XL
From PC Desktop or Start menu, start i-Cut.
Note: After start-up, i-Cut is waiting until the table zero sequence on the table is completed.
Therefore, press Start to execute the sequence.
From the Options menu, select –System:
From the “Plotter Type” drop down menu, select the proper Kongsberg table.
Ensure the following i-Cut settings are valid:
Parameter
Set from
Setting
Kongsberg tool bar
Wiev
Enabled
More information about system setup is available in the i-Cut User‟s manual.

i-XL Service Guide
17
9. How to check camera operation
Proceed as follows:
1. From PC Desktop or Start menu, start i-Cut.
2. Observe XL-Guide is started.
3. Switch servo on and complete the Table zero sequence
4. From the i-Cut Calibration menu, select –Check Regmark.
5. A window showing the camera picture appears. Sometimes you have to open the window
from the task bar:
Adjust the camera aperture and focus until you have a light picture with focus as sharp as possible.

i-XL Service Guide
18
10. The kiss-cut knife tool
A complete kisscut tool consist of:
A - The tool body
B - Knife adapter
C - Locking knob with Pressure unit #1
D - Knife foot
E - Knife
F - Pressure unit #2
G - Spanner
The picture at left shows how to insert the
knife into the knife adapter.

i-XL Service Guide
19
Use the spanner to push the knife into the
adapter.
Use the spanner also when pulling out the
knife from the adapter.
The picture shows the knife properly
mounted.
Now the knife tool is ready to use.
The knife depth is controlled by knife
pressure.
If you need exact control of knife depth,
use the knife foot as illustrated at left.
The depth is controlled by the foot position
relative to the knife. Turn the foot to
adjust.

i-XL Service Guide
20
Knife pressure is adjusted by turning the
Pressure unit knob available on top of the
KissCut tool.
Adjust and make a test cut to obtain
correct setting.
If higher knife pressure is needed,
interchange Pressure units.
Pressure range:
Pressure unit #1: 0,3 - 3,5 N
Pressure unit #1: 0,8 - 7,5 N
Other manuals for Kongsberg XL
1
This manual suits for next models
1
Table of contents